Contents

Interfacing Soil Moisture Sensor Module with Arduino

Overview

In this tutorial, you will learn how to use a soil moisture sensor. Practical examples are also provided to help you master the code.

What You Will Learn

Soil Moisture Sensor - How Does It Work?

The soil moisture sensor consists of two probes that measure the volume of water in the soil. The two probes allow the electric current to pass through the soil and, according to its resistance, measures the moisture level of the soil.

When there is more water, the soil conducts more electricity, which means that the resistance will be less. So the moisture level will be higher. Dry soil reduces conductivity. So, when there is less water, the soil conducts less electricity, which means it has more resistance. So the moisture level will be lower.

Soil Moisture Sensor Module Features

There are different types of soil moisture sensor on the market, but their working principle are all similar; so if your sensor is different from the one you see in this tutorial, don’t worry! All of these sensors have at least three pins: VCC, GND, and AO. The AO pin changes according to the amount of moisture in the soil and increases as there is more water in the soil. Some models have an additional base called DO. If the moisture amount is less than the permissible amount (which can be changed by the potentiometer on the sensor) the DO pin will be “1”, otherwise will remain”0″.

You can see different types of soil moisture sensor in the image below.

We have used the following soil moisture sensor in this tutorial. But as mentioned, different models of this sensor work the same, and in case you have another model, you can proceed according to this tutorial.

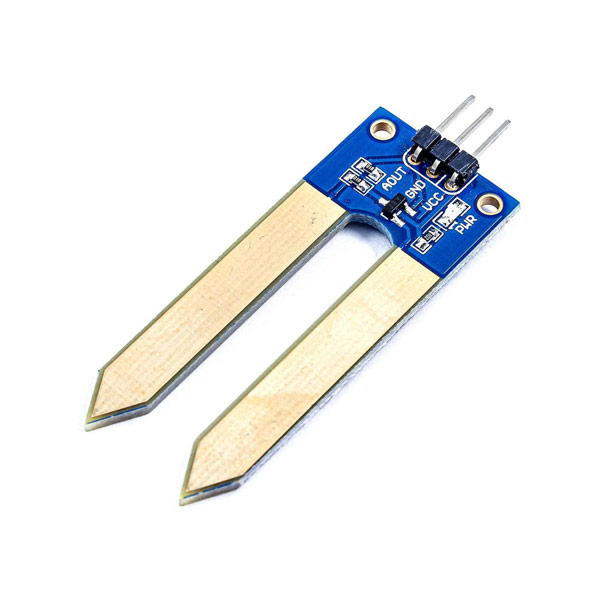
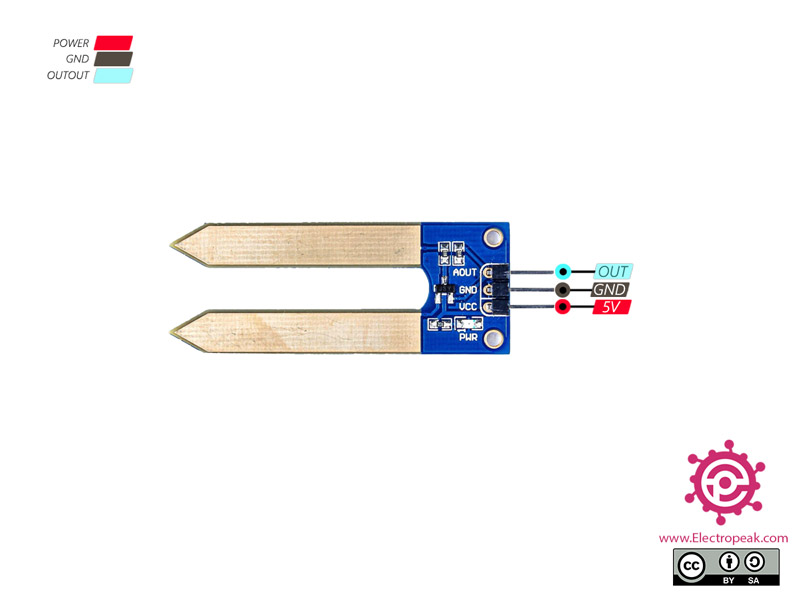
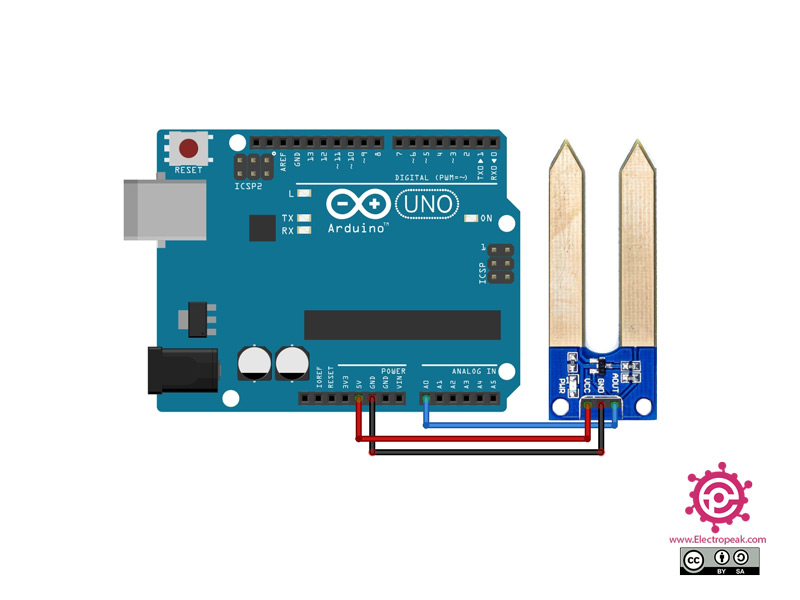
You can download the datasheet of this module here. 

Soil Moisture Sensor Pinout

This module has 3 pins:

  •  VCC: Module power supply – 2-5 V
  •  GND: Ground
  •  AOUT: Analog voltage output

You can see the pinout of this module in the following image.

Required Materials

Hardware component

َArduino Uno R3 × 1
Waveshare Moisture Detection Sensor Module × 1
Capacitive Soil Moisture Sensor Module × 1
YL-69 Soil Moisture Detection Sensor Module × 1
YwRobot Soil Moisture Sensor Module × 1
Male to Female jumper wire × 1

Software Apps

Arduino IDE

Interfacing Soil Moisture Sensor Module with Arduino

Step 1: Circuit

Using this sensor is quite easy. You connect the AO pin to any analog pin. If your sensor has a DO pin, you can connect it to any digital pin.

The following circuit show how you should connect Arduino to this sensor. Connect wires accordingly.

Step 2: Code

Upload the following code to Arduino. After that, open the Serial Monitor.

  /*
Made on Dec 30, 2020
By MehranMaleki @ Electropeak
Home
*/ #define SensorPin A0 float sensorValue = 0; void setup() { Serial.begin(9600); } void loop() { for (int i = 0; i <= 100; i++) { sensorValue = sensorValue + analogRead(SensorPin); delay(1); } sensorValue = sensorValue/100.0; float soil_Pin_voltage = sensorValue * 5.00 / 1023.0; //calculate sensor output voltage Serial.print(" Soil Moisture Sensor Voltage: "); Serial.print(soil_Pin_voltage); //display sensor output voltage Serial.println(" V"); delay(1000); }

In this code, the sensor analog output voltage will be read every second and displayed in the Serial Monitor. Also, for each soil moisture measurement, we took an average of 100 sensor data to make the data more stable and accurate.

The output is as follows:

Please note that after 10-20 months, the sensor may get oxidized in the soil and lose its accuracy. Therefore you should replace it every year. Since it has a low price and easy setup, it worths the annual replacement.

Related Projects

Liked What You See?​
Get Updates And Learn From The Best​

Leave a Reply

Your email address will not be published. Required fields are marked *