Interfacing SW-18010P Vibration Sensor Module with Arduino
Written by
Amir Mohammad Shojaei
SW-18010P Vibration Sensor Module Features
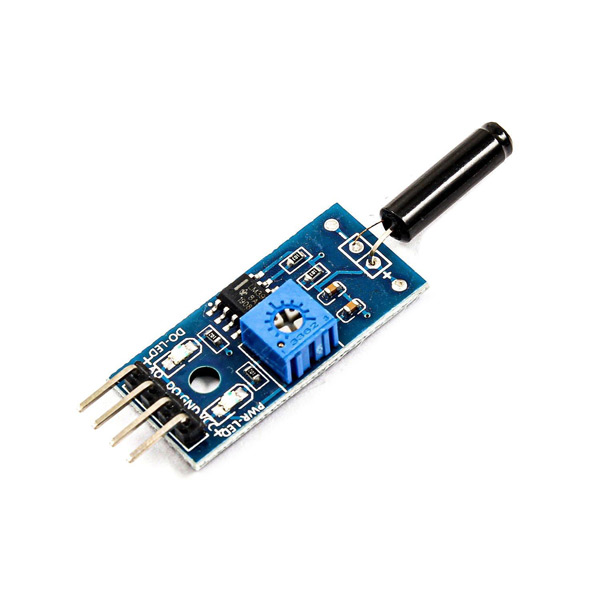
The SW-18010P sensor is used to detect vibration. The sensor has a small spring inside a metal tube. When the sensor vibrates, the spring hits the metal tube and the sensor will be activated.
This sensor has two digital and analog outputs. When the sensor vibrates, the digital output changes from HIGH to LOWand the analog output changes from 1023 to 0.
Other features:
Operating voltage: 3.3V to 5V
Including a fixed hole on board for easy installation
Potentiometer included to adjust sensitivity
Switch indicating LED
Note
If the sensor does not move, the analog output is 1023 and the digital output is HIGH.
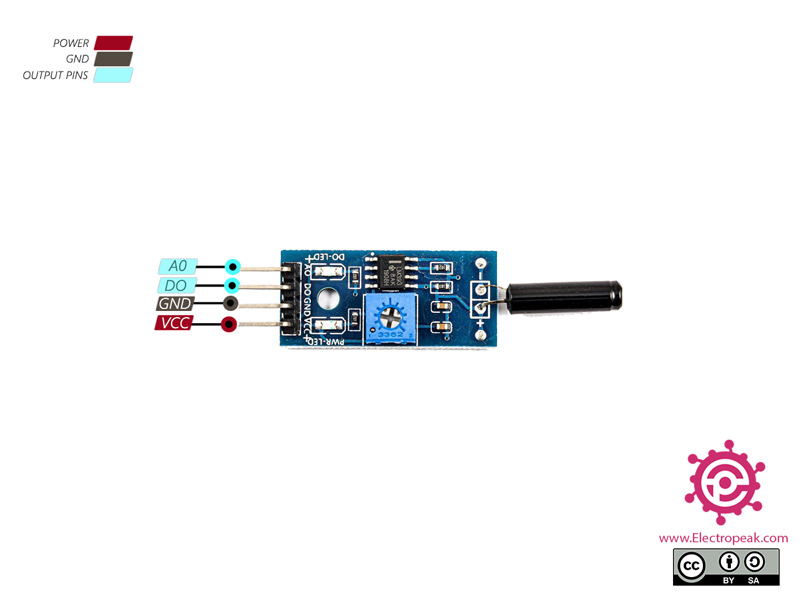
SW-18010P Vibration Sensor Module Pinout
This Module has 4 pins:
VCC: Module power supply – 3.3V to 5V
GND: Ground
D0: Digital Output
A0: Analog Output
You can see the pinout of this module in the image below.
Required Material
Hardware component
Arduino UNO R3
×
1
SW-18010P Vibration Sensor Module
×
1
Male to Female jumper wire
×
1
Software Apps
Arduino IDE
Interfacing SW-18010P Vibration Sensor Module with Arduino
Step 1: Circuit
The following circuit show how you should connect Arduino to SW-18010P sensor. Connect wires accordingly.
Step 2: Code
Upload the following code to your Arduino.
/*
SW-18010P-Vibration-Sensor-Module
made on 05 Jan 2021
by Amir Mohammad Shojaee @ Electropeak
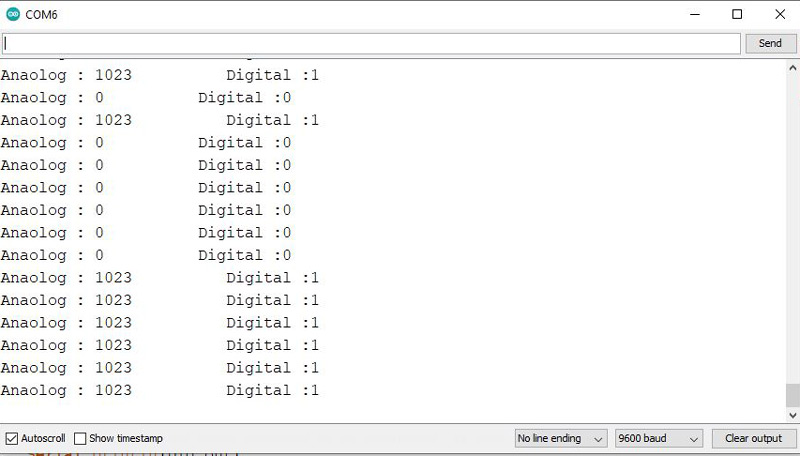
In this code, you can see the sensor analog and digital output values after vibration. First, we set two digital and analog pins as input. Then the values of two inputs appear on Serial Monitor.
The output is as follows. As you can see, when the sensor vibrates the digital and analog output will be zero.