Contents

Absolute Beginner’s Guide to TFT LCD Displays by Arduino

Overview

In this article, you will learn how to use TFT LCDs by Arduino boards. From basic commands to professional designs and technics are all explained here.

What You Will Learn

Presenting Ideas on Displays

In electronic’s projects, creating an interface between user and system is very important. This interface could be created by displaying useful data, a menu, and ease of access. A beautiful design is also very important. There are several components to achieve this. LEDs,  7-segments, Character and Graphic displays, and full-color TFT LCDs. The right component for your projects depends on the amount of data to be displayed, type of user interaction, and processor capacity. TFT LCD is a variant of a liquid-crystal display (LCD) that uses thin-film-transistor (TFT) technology to improve image qualities such as addressability and contrast. A TFT LCD is an active matrix LCD, in contrast to passive matrix LCDs or simple, direct-driven LCDs with a few segments. In Arduino-based projects, the processor frequency is low. So it is not possible to display complex, high definition images and high-speed motions. Therefore, full-color TFT LCDs can only be used to display simple data and commands. In this article, we have used libraries and advanced technics to display data, charts, menu, etc. with a professional design. This can move your project presentation to a higher level.

Which Size? Which Controller?

Size of displays affects your project parameters. Bigger Display is not always better. if you want to display high-resolution images and signs, you should choose a big size display with higher resolution. But it decreases the speed of your processing, needs more space and also needs more current to run.

So, First, you should check the resolution, speed of motion, details of color and size of your project’s images, texts, and numbers.

We suggest popular size of Arduino displays such as 3.5 inch 480×320 , 2.8 inch 400×240 , 2.4 inch 320×240 and 1.8 inch  220×176.

After choosing the right display, It’s time to choose the right controller. If you want to display characters, tests, numbers and static images and the speed of display is not important, the Atmega328 Arduino boards (such as Arduino UNO) are a proper choice. If the size of your code is big, The UNO board may not be enough. You can use Arduino Mega2560 instead. And if you want to show high resolution images and motions with high speed, you should use the ARM core Arduino boards such as Arduino DUE.

Required Materials

Hardware Components

3.5" TFT Color Display Screen Module × 1
2.4" TFT LCD Display Shield × 1
Arduino UNO R3 × 1
Arduino Mega 2560 × 1
Arduino DUE × 1

Software Apps

Arduino IDE

Drivers & Libraries

In electronics/computer hardware a display driver is usually a semiconductor integrated circuit (but may alternatively comprise a state machine made of discrete logic and other components) which provides an interface function between a microprocessor, microcontroller, ASIC or general-purpose peripheral interface and a particular type of display device, e.g. LCD, LED, OLED, ePaper, CRT, Vacuum fluorescent or Nixie.

The display driver will typically accept commands and data using an industry-standard general-purpose serial or parallel interface, such as TTL, CMOS, RS232, SPI, I2C, etc. and generate signals with suitable voltage, current, timing and demultiplexing to make the display show the desired text or image.

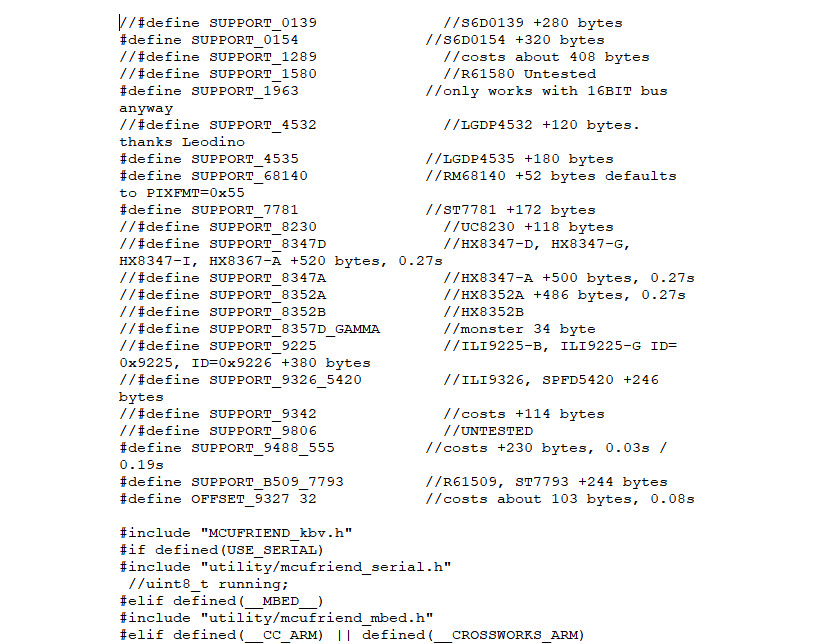
The LCDs manufacturers use different drivers in their products. Some of them are more popular and some of them are very unknown. To run your display easily, you should use Arduino LCDs libraries and add them to your code. Otherwise running the display may be very difficult. There are many free libraries you can find on the internet but the important point about the libraries is their compatibility with the LCD’s driver. The driver of your LCD must be known by your library. In this article, we use the Adafruit GFX library and MCUFRIEND KBV library and example codes. You can download them from the following links.

Necessary Files and Downloads:

Unzip the MCUFRIEND KBV and open the MCUFRIEND_kbv.CPP. You can see the list of drivers that are supported by MCUFRIEND library.

Open Example folder. There are several example codes that you can run by Arduino. Hook up the LCD and test some of the examples.

Code

You must add the library and then upload the code. If it is the first time you run an Arduino board, don’t worry. Just follow these steps:

  • Go to www.arduino.cc/en/Main/Software and download the software of your OS. Install the IDE software as instructed.
  • Run the Arduino IDE and clear the text editor and copy the following code in the text editor.
  • Navigate to sketch and include the libraries .
  • Now click add  ZIP library and add the libraries
  • Choose the board in tools and boards, select your Arduino Board.
  • Connect the Arduino to your PC and set the COM port in tools and port.
  • Press the Upload (Arrow sign) button.
  • You are all set!

Library

#include "Adafruit_GFX.h"
#include "MCUFRIEND_kbv.h"

The first line adds core graphics library for displays (written by Adafruit).

The second adds a library that supports drivers of MCUFRIEND Arduino display shields.

#include "TouchScreen.h" // only when you want to use touch screen

#include "bitmap_mono.h" // when you want to display a bitmap image from library
#include "bitmap_RGB.h" // when you want to display a bitmap image from library

#include "Fonts/FreeSans9pt7b.h"    // when you want other fonts
#include "Fonts/FreeSans12pt7b.h" // when you want other fonts
#include "Fonts/FreeSerif12pt7b.h" // when you want other fonts
#include "FreeDefaultFonts.h" // when you want other fonts

#include "SPI.h"  // using sdcard for display bitmap image
#include "SD.h"   
These libraries are not necessary for now, but you can add them.

Basic Commands

Class & Object

//(int CS=A3, int RS=A2, int WR=A1, int RD=A0, int RST=A4)
MCUFRIEND_kbv tft(A3, A2, A1, A0, A4); 

This line makes an object named TFT from MCUFRIEND_kbv class and provides an SPI communication between LCD and Arduino.

Running the LCD

uint16_t ID = tft.readID(); 
tft.begin(ID); 

The tft.readID function reads ID from the display and put it in ID variable. Then tft.begin function gets ID and the LCD gets ready to work.

Resolution of the Display

 tft.width(); //int16_t width(void);
tft.height(); //int16_t height(void);
By these two functions, You can find out the resolution of the display. Just add them to the code and put the outputs in a uint16_t variable. Then read it from the Serial port by Serial.println(); . First add Serial.begin(9600); in setup().

Color of the Screen

tft.fillScreen(t); //fillScreen(uint16_t t);
fillScreen function change the color of screen to t color. The t should be a 16bit variable containing UTFT color code.
#define BLACK 0x0000
#define NAVY 0x000F
#define DARKGREEN 0x03E0
#define DARKCYAN 0x03EF
#define MAROON 0x7800
#define PURPLE 0x780F
#define OLIVE 0x7BE0
#define LIGHTGREY 0xC618
#define DARKGREY 0x7BEF
#define BLUE 0x001F
#define GREEN 0x07E0
#define CYAN 0x07FF
#define RED 0xF800
#define MAGENTA 0xF81F
#define YELLOW 0xFFE0
#define WHITE 0xFFFF
#define ORANGE 0xFD20
#define GREENYELLOW 0xAFE5
#define PINK 0xF81F
You can add these lines to the top of your code and just use the name of the color in the functions.

Filling Pixels

tft.drawPixel(x,y,t); //drawPixel(int16_t x, int16_t y, uint16_t t)
tft.readPixel(x,y); //uint16_t readPixel(int16_t x, int16_t y)

drawPixel function fills a pixel in x and y location by t color.

readPixel function read the color of a pixel in x and y location.

Drawing Lines

tft.drawFastVLine(x,y,h,t); //drawFastVLine(int16_t x, int16_t y, int16_t h, uint16_t t)
tft.drawFastHLine(x,y,w,t); //drawFastHLine(int16_t x, int16_t y, int16_t w, uint16_t t)
tft.drawLine(xi,yi,xj,yj,t); //drawLine(int16_t x0, int16_t y0, int16_t x1, int16_t y1, uint16_t t)

drawFastVLine function draws a vertical line that starts in x, y location, and its length is h pixel and its color is t.
drawFastHLine function draws a horizontal line that starts in x and y location and the length is w pixel and the color is t.
drawLine function draws a line that starts in xi and yi locationends is in xj and yj and the color is t.

for (uint16_t a=0; a<5; a++){
    tft.drawFastVLine(x+a, y, h, t);}  

for (uint16_t a=0; a<5; a++){
    tft.drawFastHLine(x, y+a, w, t);}  

for (uint16_t a=0; a<5; a++){
    tft.drawLine(xi+a, yi, xj+a, yj, t);} 
for (uint16_t a=0; a<5; a++){
    tft.drawLine(xi, yi+a, xj, yj+a, t);} 
These three blocks of code draw lines like the previous code with 5-pixel thickness.

Drawing Rectangles

tft.fillRect(x,y,w,h,t); //fillRect(int16_t x, int16_t y, int16_t w, int16_t h, uint16_t t)
tft.drawRect(x,y,w,h,t); //drawRect(int16_t x, int16_t y, int16_t w, int16_t h, uint16_t t)
tft.fillRoundRect(x,y,w,h,r,t); //fillRoundRect (int16_t x, int16_t y, int16_t w, int16_t h, uint8_t R , uint16_t t)
tft.drawRoundRect(x,y,w,h,r,t); //drawRoundRect(int16_t x, int16_t y, int16_t w, int16_t h, uint8_t R , uint16_t t)

fillRect function draws a filled rectangle in x and y location. w is width, h is height and t is color of the rectangle

drawRect function draws a rectangle in x and y location with w width and h height and t color.

fillRoundRect function draws a filled Rectangle with r radius round corners in x and y location and w width and h height and t color.

drawRoundRect function draws a Rectangle with r radius round corners in x and y location and w width and h height and t color.

Drawing Circles

tft.drawCircle(x,y,r,t); //drawCircle(int16_t x, int16_t y, int16_t r, uint16_t t)
tft.fillCircle(x,y,r,t); //fillCircle(int16_t x, int16_t y, int16_t r, uint16_t t)

drawCircle function draws a circle in x and y location and r radius and t color.

fillCircle function draws a filled circle in x and y location and r radius and t color.

for (int p = 0; p < 4000; p++) {
  j = 120 * (sin(PI * p / 2000));
  i = 120 * (cos(PI * p / 2000));
  j2 = 60 * (sin(PI * p / 2000));
  i2 = 60 * (cos(PI * p / 2000));
  tft.drawLine(i2 + 160, j2 + 160, i + 160, j + 160, col[n]);
}
By this code, you can draw an Arc. change the “for” between 0 to 4000.

Drawing Triangles

tft.drawTriangle(x1,y1,x2,y2,x3,y3,t); //drawTriangle(int16_t x1, int16_t y1, int16_t x2, int16_t y2, int16_t x3, int16_t y3, uint16_t t)
tft.fillTriangle(x1,y1,x2,y2,x3,y3,t); //fillTriangle(int16_t x1, int16_t y1, int16_t x2, int16_t y2, int16_t x3, int16_t y3, uint16_t t)

drawTriangle function draws a triangle with three corner location x, y and z, and t color.

fillTriangle function draws a filled triangle with three corner location x, y and z, and t color.

Displaying Text

tft.setCursor(x,y); //setCursor(int16_t x, int16_t y)

This code sets the cursor position to of x and y.

tft.setTextColor(t); //setTextColor(uint16_t t)
tft.setTextColor(t,b); //setTextColor(uint16_t t, uint16_t b)

The first line sets the color of the text. Next line sets the color of text and its background.

tft.setTextSize(s); //setTextSize(uint8_t s)
This code sets the size of text by s. s is a number between 1 and 5.
tft.write(c); //write(uint8_t c)

This code displays a character.

tft.println("www.Electropeak.com");
tft.print("www.Electropeak.com");
The first function displays a string and moves the cursor to the next line.

The second function just displays the string.

showmsgXY(x,y,sz,&FreeSans9pt7b,"www.Electropeak.com"); //void showmsgXY(int x, int y, int sz, const GFXfont *f, const char *msg)

void showmsgXY(int x, int y, int sz, const GFXfont *f, const char *msg)
{
  int16_t x1, y1;
  uint16_t wid, ht;
  tft.setFont(f);
  tft.setCursor(x, y);
  tft.setTextColor(0x0000);
  tft.setTextSize(sz);
  tft.print(msg);
}

This function changes the font of the text. You should add this function and font libraries.

for (int j = 0; j < 20; j++) {
    tft.setCursor(145, 290);
    int color = tft.color565(r -= 12, g -= 12, b -= 12);
    tft.setTextColor(color);
    tft.print("www.Electropeak.com");
    delay(30);
}
This function can fade your text. You should add it to your code.

Rotating the Screen

tft.setRotation(r); //setRotation(uint8_t r)

This code rotates the screen. 0=0 , 1=90, 2=180, 3=270 .

Inverting Screen Colors

tft.invertDisplay(i); //invertDisplay(boolean i)

The following code give RGB code and get UTFT color code.

tft.color565(r,g,b); //uint16_t color565(uint8_t r, uint8_t g, uint8_t b)

Scrolling the Screen

for (uint16_t i = 0; i < maxscroll; i++) {
   tft.vertScroll(0, maxscroll, i);
   delay(10);
}

This code Scroll your screen. The Maxroll is the maximum height of your scrolling.

Reset

tft.reset();
This code resets the screen.

Displaying Monochrome Images

static const uint8_t name[] PROGMEM = {
    //Add image code here.
}
tft.drawBitmap(x, y, name, sx, sy, 0x0000); 

First you should convert your image to hex code. Download the software from the following link. if you don’t want to change the settings of the software, you must invert the color of the image and make the image horizontally mirrored and rotate it 90 degrees counterclockwise. Now add it to the software and convert it. Open the exported file and copy the hex code to Arduino IDE. x and y are locations of the image. sx and sy are sizes of image. you can change the color of the image in the last input.

Necessary Files and Downloads:

RGB Color Image Displaying

const uint16_t PROGMEM name[] = {
    //Add image code here.
}
tft.drawRGBBitmap(x, y, name, sx, sy);
First you should convert your image to code.Use this link to convert the image:

http://www.rinkydinkelectronics.com/t_imageconverter565.php

Upload your image and download the converted file that the UTFT libraries can process. Now copy the hex code to Arduino IDE. x and y are locations of the image. sx and sy are size of the image.

Predesigned Templates

In this template, We just used a string and 8 filled circles that change their colors in order. To draw circles around a static point ,You can use sin();  and cos(); functions. you should define the PI number . To change colors, you can use color565(); function and replace your RGB code.

#include "Adafruit_GFX.h"
#include "MCUFRIEND_kbv.h"
MCUFRIEND_kbv tft;

#include "Fonts/FreeSans9pt7b.h"
#include "Fonts/FreeSans12pt7b.h"
#include "Fonts/FreeSerif12pt7b.h"
#include "FreeDefaultFonts.h"

#define PI 3.1415926535897932384626433832795
#define WHITE 0xFFFF

int col[8];

void showmsgXY(int x, int y, int sz, const GFXfont *f, const char *msg)
{
  int16_t x1, y1;
  uint16_t wid, ht;


  tft.setFont(f);
  tft.setCursor(x, y);
  tft.setTextColor(0x0000);
  tft.setTextSize(sz);
  tft.print(msg);
}

void setup() {
  tft.reset();
  Serial.begin(9600);
  uint16_t ID = tft.readID();
  tft.begin(ID);
  tft.setRotation(1);
  tft.invertDisplay(true);
  tft.fillScreen(0xffff);
  showmsgXY(170, 250, 2, &FreeSans9pt7b, "Loading...");
  col[0] = tft.color565(155, 0, 50);
  col[1] = tft.color565(170, 30, 80);
  col[2] = tft.color565(195, 60, 110);
  col[3] = tft.color565(215, 90, 140);
  col[4] = tft.color565(230, 120, 170);
  col[5] = tft.color565(250, 150, 200);
  col[6] = tft.color565(255, 180, 220);
  col[7] = tft.color565(255, 210, 240);

}

void loop() {
  for (int i = 8; i > 0; i--) {
    tft.fillCircle(240 + 40 * (cos(-i * PI / 4)), 120 + 40 * (sin(-i * PI / 4)), 10,  col[0]); delay(15);
    tft.fillCircle(240 + 40 * (cos(-(i + 1)*PI / 4)), 120 + 40 * (sin(-(i + 1)*PI / 4)), 10,  col[1]); delay(15);
    tft.fillCircle(240 + 40 * (cos(-(i + 2)*PI / 4)), 120 + 40 * (sin(-(i + 2)*PI / 4)), 10,  col[2]); delay(15);
    tft.fillCircle(240 + 40 * (cos(-(i + 3)*PI / 4)), 120 + 40 * (sin(-(i + 3)*PI / 4)), 10,  col[3]); delay(15);
    tft.fillCircle(240 + 40 * (cos(-(i + 4)*PI / 4)), 120 + 40 * (sin(-(i + 4)*PI / 4)), 10,  col[4]); delay(15);
    tft.fillCircle(240 + 40 * (cos(-(i + 5)*PI / 4)), 120 + 40 * (sin(-(i + 5)*PI / 4)), 10,  col[5]); delay(15);
    tft.fillCircle(240 + 40 * (cos(-(i + 6)*PI / 4)), 120 + 40 * (sin(-(i + 6)*PI / 4)), 10,  col[6]); delay(15);
    tft.fillCircle(240 + 40 * (cos(-(i + 7)*PI / 4)), 120 + 40 * (sin(-(i + 7)*PI / 4)), 10,  col[7]); delay(15);
  }
}

In this template, We chose a classic font and used a function to fade the text.

#include "Adafruit_GFX.h"   // Core graphics library
#include "MCUFRIEND_kbv.h"   // Hardware-specific library
MCUFRIEND_kbv tft;

#include "Fonts/FreeSans9pt7b.h"
#include "Fonts/FreeSans12pt7b.h"
#include "Fonts/FreeSerif12pt7b.h"
#include "FreeDefaultFonts.h"

#define WHITE 0xFFFF

void showmsgXY(int x, int y, int sz, const GFXfont *f, const char *msg)
{
  int16_t x1, y1;
  uint16_t wid, ht;
  tft.setFont(f);
  tft.setCursor(x, y);
  tft.setTextSize(sz);
  tft.println(msg);
}

uint8_t r = 255, g = 255, b = 255;
uint16_t color;

void setup()
{
  Serial.begin(9600);
  uint16_t ID = tft.readID();
  tft.begin(ID);
  tft.invertDisplay(true);
  tft.setRotation(1);
}

void loop(void)
{
  tft.invertDisplay(true);
  tft.fillScreen(WHITE);

  color = tft.color565(40, 40, 40);
  tft.setTextColor(color);
  showmsgXY(50, 40, 1, &FreeSerif12pt7b, " I love those who can smile in trouble,"); delay(40);
  tft.println("         who can gather strength from distress,"); delay(40);
  tft.println("              and grow brave by reflection."); delay(40);
  tft.println("      'Tis the business of little minds to shrink,"); delay(40);
  tft.println("               but they whose heart is firm,"); delay(40);
  tft.println("    and whose conscience approves their conduct,"); delay(40);
  tft.println("       will pursue their principles unto death."); delay(40);
  tft.println(" ");
  delay(700);
  for (int j = 0; j < 20; j++) {
    tft.setCursor(145, 290);
    color = tft.color565(r -= 12, g -= 12, b -= 12);
    tft.setTextColor(color);
    tft.print(" ---- Da Vinci ----");
    delay(30);
  }

  while (1);
}

In this template, We converted a .jpg image to .c file and added to the code, wrote a string and used the fade code to display. Then we used scroll code to move the screen left. Download the .h file and add it to the folder of the Arduino sketch.

Header File

file Ard_Logo.h

#include "Adafruit_GFX.h"    // Core graphics library
#include "MCUFRIEND_kbv.h"   // Hardware-specific library
MCUFRIEND_kbv tft;

#include "Ard_Logo.h" 

#define BLACK   0x0000
#define RED     0xF800
#define GREEN   0x07E0
#define WHITE   0xFFFF
#define GREY    0x8410

#include "Fonts/FreeSans9pt7b.h"
#include "Fonts/FreeSans12pt7b.h"
#include "Fonts/FreeSerif12pt7b.h"
#include "FreeDefaultFonts.h" 


void showmsgXY(int x, int y, int sz, const GFXfont *f, const char *msg)
{
  int16_t x1, y1;
  uint16_t wid, ht;
  tft.setFont(f);
  tft.setCursor(x, y);
  tft.setTextSize(sz);
  tft.println(msg);
}

uint8_t r = 255, g = 255, b = 255;
uint16_t color;

void setup()
{
  Serial.begin(9600);
  uint16_t ID = tft.readID();
  tft.begin(ID);
  tft.invertDisplay(true);
  tft.setRotation(1);
}

void loop(void)
{
  tft.invertDisplay(true);
  tft.fillScreen(WHITE);

  tft.drawRGBBitmap(100, 50, Logo, 350, 200);
delay(1000);
  tft.setTextSize(2);
  for (int j = 0; j < 20; j++) {
    color = tft.color565(r -= 12, g -= 12, b -= 12);
    tft.setTextColor(color);
    showmsgXY(95, 280, 1, &FreeSans12pt7b, "ELECTROPEAK PRESENTS");
    delay(20);
  }
delay(1000);
  for (int i = 0; i < 480; i++) {
    tft.vertScroll(0, 480, i);
    tft.drawFastVLine(i, 0, 320, 0xffff); // vertical line
    delay(5);}
   
    while (1);
  }

In this template, We used draw lines, filled circles, and string display functions.

#include "Adafruit_GFX.h"
#include "MCUFRIEND_kbv.h"

MCUFRIEND_kbv tft;

uint16_t ox = 0, oy = 0;
int ave = 0, avec = 0, avet = 0;

////////////////////////////////////////////////////////////////
void aveg(void)
{ int z = 0;
  Serial.println(ave);
  Serial.println(avec);
  avet = ave / avec;
  Serial.println(avet);
  avet = avet * 32;

  for (int i = 0; i < 24; i++) {

    for (uint16_t a = 0; a < 3; a++) {
      tft.drawLine(avet + a, z, avet + a, z + 10, 0xFB21);
    } // thick
    for (uint16_t a = 0; a < 2; a++) {
      tft.drawLine(avet - a, z, avet - a, z + 10, 0xFB21);
    }
    delay(100);
    z = z + 20;
  }
}
//////////////////////////////////////////////////////////////////
void dchart_10x10(uint16_t nx, uint16_t ny) {
  ave += nx;
  avec++;
  nx = nx * 32;
  ny = ny * 48;
  tft.drawCircle(nx, ny, 10, 0x0517);
  tft.drawCircle(nx, ny, 9, 0x0517);
  tft.fillCircle(nx, ny, 7, 0x0517);
  delay(100);
  ox = nx;
  oy = ny;
}
///////////////////////////////////////////////////////////////////////
void dotchart_10x10(uint16_t nx, uint16_t ny) {
  ave += nx;
  avec++;
  nx = nx * 32;
  ny = ny * 48;
  int plus = 0;
  float fplus = 0;
  int sign = 0;
  int y = 0, x = 0;
  y = oy; x = ox;
  float xmines, ymines;
  xmines = nx - ox;
  ymines = ny - oy;
  if (ox > nx) {
    xmines = ox - nx;
    sign = 1;
  }
  else
    sign = 0;

  for (int a = 0; a < (ny - oy); a++)
  {
    fplus += xmines / ymines;
    plus = fplus;
    if (sign == 1)
      tft.drawFastHLine(0, y, x - plus, 0xBFDF);
    else
      tft.drawFastHLine(0, y, x + plus, 0xBFDF);
    y++;
    delay(5);
  }

  for (uint16_t a = 0; a < 2; a++) {
    tft.drawLine(ox + a, oy, nx + a, ny, 0x01E8);
  } // thick
  for (uint16_t a = 0; a < 2; a++) {
    tft.drawLine(ox, oy + a, nx, ny + a, 0x01E8);
  }


  ox = nx;
  oy = ny;
}
////////////////////////////////////////////////////////////////////

void setup() {
  tft.reset();
  Serial.begin(9600);
  uint16_t ID = tft.readID();
  tft.begin(ID);
}

void loop() {
  tft.invertDisplay(true);
  tft.fillScreen(0xffff);

  dotchart_10x10(3, 0);
  dotchart_10x10(2, 1);
  dotchart_10x10(4, 2);
  dotchart_10x10(4, 3);
  dotchart_10x10(5, 4);
  dotchart_10x10(3, 5);
  dotchart_10x10(6, 6);
  dotchart_10x10(7, 7);
  dotchart_10x10(9, 8);
  dotchart_10x10(8, 9);
  dotchart_10x10(10, 10);

  dchart_10x10(3, 0);
  dchart_10x10(2, 1);
  dchart_10x10(4, 2);
  dchart_10x10(4, 3);
  dchart_10x10(5, 4);
  dchart_10x10(3, 5);
  dchart_10x10(6, 6);
  dchart_10x10(7, 7);
  dchart_10x10(9, 8);
  dchart_10x10(8, 9);
  dchart_10x10(10, 10);


  tft.setRotation(1);
  tft.setTextSize(2);
  tft.setTextColor(0x01E8);
  tft.setCursor(20, 20);
  tft.print("Average");

  int dl = 20;
  for (int i = 0; i < 6; i++) {
    for (uint16_t a = 0; a < 3; a++) {
      tft.drawLine(dl, 40 + a, dl + 10, 40 + a, 0xFB21);
    }
    dl += 16;
  }

  tft.setRotation(0);
  aveg();

  while (1);
}

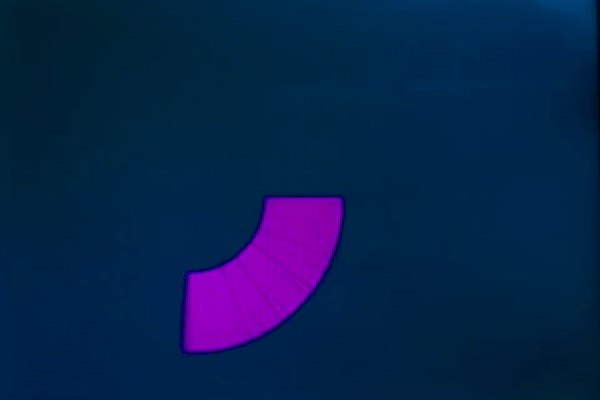
In this template, We used sin(); and cos(); functions to draw Arcs with our desired thickness and displayed number by text printing function. Then we converted an image to hex code and added them to the code and displayed the image by bitmap function. Then we used draw lines function to change the style of the image. Download the .h file and add it to the folder of the Arduino sketch.

Header File

#include "Adafruit_GFX.h"
#include "MCUFRIEND_kbv.h"
#include "Math.h"

MCUFRIEND_kbv tft;

#include "Temperature.h"

#define PI 3.1415926535897932384626433832795

int a = 1000, b = 3500;
int n, f;
int j, j2 , lj;
int i, i2 , li;
int pct = 0;
int d[5] = {20, 20, 20, 20, 20};
uint16_t col[5] = {0x7006, 0xF986, 0x6905, 0x7FF7, 0x024D};

void setup() {
  tft.reset();
  Serial.begin(9600);
  uint16_t ID = tft.readID();
  tft.begin(ID);
  tft.invertDisplay(true);
  tft.setTextSize(2);
}

void loop() {
  // put your main code here, to run repeatedly:
  tft.fillScreen(0xffff);
  tft.setRotation(1);
  tft.drawBitmap(350, 70, Temp, 70, 180, 0x0000);
  tft.fillCircle(385, 213, 25, tft.color565(255, 0, 0));

  for (int p = 0; p < 4000; p++) {
    j = 120 * (sin(PI * p / 2000));
    i = 120 * (cos(PI * p / 2000));
    j2 = 110 * (sin(PI * p / 2000));
    i2 = 110 * (cos(PI * p / 2000));
    tft.drawLine(i2 + 160, j2 + 160, i + 160, j + 160, tft.color565(100, 100, 100));
  }
  if (b > a) {
    while (a < b) {
      j = 120 * (sin(PI * a / 2000));
      i = 120 * (cos(PI * a / 2000));
      j2 = 110 * (sin(PI * a / 2000));
      i2 = 110 * (cos(PI * a / 2000));
      tft.drawLine(i2 + 160, j2 + 160, i + 160, j + 160, tft.color565(255, 0, 0));
      tft.fillCircle(160, 150, 50, 0xffff);
      tft.setTextSize(4);
      tft.setTextColor(0x0000);
      tft.setCursor(135, 145);
      tft.print(a / 40); tft.print("%"); delay(20);

      for (uint16_t c = 0; c < 13; c++) {
        tft.drawLine(378 + c, 213, 378 + c, (200 - a / 40), tft.color565(255, 0, 0));
      }       //200=0 & 100=100
      for (uint16_t c = 0; c < 13; c++) {
        tft.drawLine(378, 213 + c, 378, (200 - a / 40) + c, tft.color565(255, 0, 0));
      }
      a++;
    }
    b = 0;
  }

  //////////////////////////////////////////////////////////////////

  while (b < a) {
    j = 120 * (sin(PI * a / 2000));
    i = 120 * (cos(PI * a / 2000));
    j2 = 110 * (sin(PI * a / 2000));
    i2 = 110 * (cos(PI * a / 2000));
    tft.drawLine(i2 + 160, j2 + 160, i + 160, j + 160, tft.color565(100, 100, 100));
    tft.fillCircle(160, 150, 50, 0xffff);
    tft.setTextSize(4);
    tft.setTextColor(0x0000);
    tft.setCursor(135, 145);
    tft.print(a / 40); tft.print("%"); delay(50);

    for (uint16_t c = 0; c < 13; c++) {
      tft.drawLine(378 + c, (200 - a / 40), 378 + c, 100, tft.color565(0, 0, 0));
    }       //200=0 & 100=100
    for (uint16_t c = 0; c < 13; c++) {
      tft.drawLine(378, (200 - a / 40) + c, 378, 100 + c, tft.color565(0, 0, 0));
    }
    a--;
  }

  ////////////////////////////////////////////////////////////////////
  while (1);
}

In this template, We created a function which accepts numbers as input and displays them as a pie chart. We just use draw arc and filled circle functions.

#include "Adafruit_GFX.h"
#include "MCUFRIEND_kbv.h"
#include "Math.h"

MCUFRIEND_kbv tft;

#define PI 3.1415926535897932384626433832795

int n, f;
int j, j2;
int i, i2;
int pct = 0;
int d[5] = {10, 60, 16, 9, 10};
uint16_t col[5] = {0x7006, 0xF986, 0x6905, 0x7FF7, 0x024D};

void setup() {
  tft.reset();
  Serial.begin(9600);
  uint16_t ID = tft.readID();
  tft.begin(ID);
  tft.invertDisplay(true);
  tft.setTextSize(2);
}

void loop() {
  // put your main code here, to run repeatedly:
  tft.fillScreen(0x0042);
  tft.setRotation(1);

  for (int p = 0; p < 4000; p++) {
    j = 120 * (sin(PI * p / 2000));
    i = 120 * (cos(PI * p / 2000));
    j2 = 60 * (sin(PI * p / 2000));
    i2 = 60 * (cos(PI * p / 2000));
    tft.drawLine(i2 + 160, j2 + 160, i + 160, j + 160, col[n]);
  }
  n = 0;
  for (int a = 0; a < 5; a++) {
    pct += d[n] * 40;
    f = 4000 - pct;

    for (int b = 0; b < f; b++) {
      j = 120 * (sin(PI * b / 2000));
      i = 120 * (cos(PI * b / 2000));
      j2 = 60 * (sin(PI * b / 2000));
      i2 = 60 * (cos(PI * b / 2000));
      tft.drawLine(i2 + 160, j2 + 160, i + 160, j + 160, col[n + 1]);
    }
    tft.fillCircle(380, 100 + (30 * n), 10,  col[n]);
    tft.setTextColor(0xffff);
    tft.setCursor(400, 94 + (30 * n));
    tft.print(d[n]); tft.print("%");
    n++;
  }
  while (1);
}

In this template, We added a converted image to code and then used two black and white arcs to create the pointer of volumes.  Download the .h file and add it to the folder of the Arduino sketch.

Header File

#include "Adafruit_GFX.h"
#include "MCUFRIEND_kbv.h"
MCUFRIEND_kbv tft;

#include "Volume.h"

#define BLACK   0x0000

int a = 0, b = 4000, c = 1000, d = 3000;
int s = 2000;
int j, j2;
int i, i2;
int White;

void setup()
{
  Serial.begin(9600);
  uint16_t ID = tft.readID();
  tft.begin(ID);
  tft.invertDisplay(true);
  tft.setRotation(1);
}

void loop(void)
{
  tft.invertDisplay(true);
  tft.fillScreen(BLACK);

  tft.drawRGBBitmap(0, 0, test, 480, 320);

  White = tft.color565(255, 255, 255);

  while (1) {

    if (a < s) {

      j = 14 * (sin(PI * a / 2000));
      i = 14 * (cos(PI * a / 2000));
      j2 = 1 * (sin(PI * a / 2000));
      i2 = 1 * (cos(PI * a / 2000));
      tft.drawLine(i2 + 62, j2 + 240, i + 62, j + 240, White);
      j = 14 * (sin(PI * (a - 300) / 2000));
      i = 14 * (cos(PI * (a - 300) / 2000));
      j2 = 1 * (sin(PI * (a - 300) / 2000));
      i2 = 1 * (cos(PI * (a - 300) / 2000));
      tft.drawLine(i2 + 62, j2 + 240, i + 62, j + 240, 0x0000);

      tft.fillRect(50, 285, 30, 30, 0x0000);
      tft.setTextSize(2);
      tft.setTextColor(0xffff);
      tft.setCursor(50, 285);
      tft.print(a / 40); tft.print("%");
      a++;
    }

    if (b < s) {

      j = 14 * (sin(PI * b / 2000));
      i = 14 * (cos(PI * b / 2000));
      j2 = 1 * (sin(PI * b / 2000));
      i2 = 1 * (cos(PI * b / 2000));
      tft.drawLine(i2 + 180, j2 + 240, i + 180, j + 240, White);
      j = 14 * (sin(PI * (b - 300) / 2000));
      i = 14 * (cos(PI * (b - 300) / 2000));
      j2 = 1 * (sin(PI * (b - 300) / 2000));
      i2 = 1 * (cos(PI * (b - 300) / 2000));
      tft.drawLine(i2 + 180, j2 + 240, i + 180, j + 240, 0x0000);

      tft.fillRect(168, 285, 30, 30, 0x0000);
      tft.setTextSize(2);
      tft.setTextColor(0xffff);
      tft.setCursor(168, 285);
      tft.print(b / 40); tft.print("%");
      b++;
    }


    if (c < s) {

      j = 14 * (sin(PI * c / 2000));
      i = 14 * (cos(PI * c / 2000));
      j2 = 1 * (sin(PI * c / 2000));
      i2 = 1 * (cos(PI * c / 2000));
      tft.drawLine(i2 + 297, j2 + 240, i + 297, j + 240, White);
      j = 14 * (sin(PI * (c - 300) / 2000));
      i = 14 * (cos(PI * (c - 300) / 2000));
      j2 = 1 * (sin(PI * (c - 300) / 2000));
      i2 = 1 * (cos(PI * (c - 300) / 2000));
      tft.drawLine(i2 + 297, j2 + 240, i + 297, j + 240, 0x0000);

      tft.fillRect(286, 285, 30, 30, 0x0000);
      tft.setTextSize(2);
      tft.setTextColor(0xffff);
      tft.setCursor(286, 285);
      tft.print(c / 40); tft.print("%");
      c++;
    }


    if (d < s) {
      j = 14 * (sin(PI * d / 2000));
      i = 14 * (cos(PI * d / 2000));
      j2 = 1 * (sin(PI * d / 2000));
      i2 = 1 * (cos(PI * d / 2000));
      tft.drawLine(i2 + 414, j2 + 240, i + 414, j + 240, White);
      j = 14 * (sin(PI * (d - 300) / 2000));
      i = 14 * (cos(PI * (d - 300) / 2000));
      j2 = 1 * (sin(PI * (d - 300) / 2000));
      i2 = 1 * (cos(PI * (d - 300) / 2000));
      tft.drawLine(i2 + 414, j2 + 240, i + 414, j + 240, 0x0000);
      tft.fillRect(402, 285, 30, 30, 0x0000);
      tft.setTextSize(2);
      tft.setTextColor(0xffff);
      tft.setCursor(402, 285);
      tft.print(d / 40);
      tft.print("%");
      d++;
    } if (a > s) {
      j = 14 * (sin(PI * a / 2000));
      i = 14 * (cos(PI * a / 2000));
      j2 = 1 * (sin(PI * a / 2000));
      i2 = 1 * (cos(PI * a / 2000));
      tft.drawLine(i2 + 62, j2 + 240, i + 62, j + 240, White);
      j = 14 * (sin(PI * (a + 300) / 2000));
      i = 14 * (cos(PI * (a + 300) / 2000));
      j2 = 1 * (sin(PI * (a + 300) / 2000));
      i2 = 1 * (cos(PI * (a + 300) / 2000));
      tft.drawLine(i2 + 62, j2 + 240, i + 62, j + 240, 0x0000);

      tft.fillRect(50, 285, 30, 30, 0x0000);
      tft.setTextSize(2);
      tft.setTextColor(0xffff);
      tft.setCursor(50, 285);
      tft.print(a / 40); tft.print("%");
      a--;
    }


    if (b > s) {

      j = 14 * (sin(PI * b / 2000));
      i = 14 * (cos(PI * b / 2000));
      j2 = 1 * (sin(PI * b / 2000));
      i2 = 1 * (cos(PI * b / 2000));
      tft.drawLine(i2 + 180, j2 + 240, i + 180, j + 240, White);
      j = 14 * (sin(PI * (b + 300) / 2000));
      i = 14 * (cos(PI * (b + 300) / 2000));
      j2 = 1 * (sin(PI * (b + 300) / 2000));
      i2 = 1 * (cos(PI * (b + 300) / 2000));
      tft.drawLine(i2 + 180, j2 + 240, i + 180, j + 240, 0x0000);

      tft.fillRect(168, 285, 30, 30, 0x0000);
      tft.setTextSize(2);
      tft.setTextColor(0xffff);
      tft.setCursor(168, 285);
      tft.print(b / 40); tft.print("%");
      b--;
    }


    if (c > s) {

      j = 14 * (sin(PI * c / 2000));
      i = 14 * (cos(PI * c / 2000));
      j2 = 1 * (sin(PI * c / 2000));
      i2 = 1 * (cos(PI * c / 2000));
      tft.drawLine(i2 + 297, j2 + 240, i + 297, j + 240, White);
      j = 14 * (sin(PI * (c + 300) / 2000));
      i = 14 * (cos(PI * (c + 300) / 2000));
      j2 = 1 * (sin(PI * (c + 300) / 2000));
      i2 = 1 * (cos(PI * (c + 300) / 2000));
      tft.drawLine(i2 + 297, j2 + 240, i + 297, j + 240, 0x0000);

      tft.fillRect(286, 285, 30, 30, 0x0000);
      tft.setTextSize(2);
      tft.setTextColor(0xffff);
      tft.setCursor(286, 285);
      tft.print(c / 40); tft.print("%");
      c--;
    }


    if (d > s) {

      j = 14 * (sin(PI * d / 2000));
      i = 14 * (cos(PI * d / 2000));
      j2 = 1 * (sin(PI * d / 2000));
      i2 = 1 * (cos(PI * d / 2000));
      tft.drawLine(i2 + 414, j2 + 240, i + 414, j + 240, White);
      j = 14 * (sin(PI * (d + 300) / 2000));
      i = 14 * (cos(PI * (d + 300) / 2000));
      j2 = 1 * (sin(PI * (d + 300) / 2000));
      i2 = 1 * (cos(PI * (d + 300) / 2000));
      tft.drawLine(i2 + 414, j2 + 240, i + 414, j + 240, 0x0000);

      tft.fillRect(402, 285, 30, 30, 0x0000);
      tft.setTextSize(2);
      tft.setTextColor(0xffff);
      tft.setCursor(402, 285);
      tft.print(d / 40); tft.print("%");
      d--;
    }
  }
}

In this template, We added a converted image and use the arc and print function to create this gauge.  Download the .h file and add it to folder of the Arduino sketch.

Header File

#include "Adafruit_GFX.h"    // Core graphics library
#include "MCUFRIEND_kbv.h"
MCUFRIEND_kbv tft;

#define BLACK   0x0000

#include "Gauge.h"

#include "Fonts/FreeSans9pt7b.h"
#include "Fonts/FreeSans12pt7b.h"
#include "Fonts/FreeSerif12pt7b.h"
#include "FreeDefaultFonts.h"

int a = 1000;
int b = 4000;
int j, j2;
int i, i2;

void showmsgXY(int x, int y, int sz, const GFXfont *f, const char *msg)
{
  int16_t x1, y1;
  uint16_t wid, ht;
  tft.setFont(f);
  tft.setCursor(x, y);
  tft.setTextSize(sz);
  tft.println(msg);
}

void setup()
{
  Serial.begin(9600);
  uint16_t ID = tft.readID();
  tft.begin(ID);
  tft.invertDisplay(true);
  tft.setRotation(1);
}


void loop(void)
{
  tft.invertDisplay(true);
  tft.fillScreen(BLACK);

  tft.drawRGBBitmap(0, 0, test, 480, 320);

  if (a < b) {
    while (a < b) { Serial.println(a); j = 80 * (sin(PI * a / 2000)); i = 80 * (cos(PI * a / 2000)); j2 = 50 * (sin(PI * a / 2000)); i2 = 50 * (cos(PI * a / 2000)); tft.drawLine(i2 + 235, j2 + 169, i + 235, j + 169, tft.color565(0, 255, 255)); tft.fillRect(200, 153, 75, 33, 0x0000); tft.setTextSize(3); tft.setTextColor(0xffff); if ((a/20)>99)
    tft.setCursor(208, 160);
    else
    tft.setCursor(217, 160);
    tft.print(a / 20);

      a++;
    } b = 1000;
  }

  //////////////////////////////////////////////////////////////////

  while (b < a) { j = 80 * (sin(PI * a / 2000)); i = 80 * (cos(PI * a / 2000)); j2 = 50 * (sin(PI * a / 2000)); i2 = 50 * (cos(PI * a / 2000)); tft.drawLine(i2 + 235, j2 + 169, i + 235, j + 169, tft.color565(0, 0, 0)); tft.fillRect(200, 153, 75, 33, 0x0000); tft.setTextSize(3); tft.setTextColor(0xffff); if ((a/20)>99)
    tft.setCursor(208, 160);
    else
    tft.setCursor(217, 160);
    tft.print(a / 20);

    a--;
  }

  while (1);
}

In this template, We display simple images one after each other very fast by bitmap function. So you can make your animation by this trick.  Download the .h file and add it to folder of the Arduino sketch.

Header File

#include "Adafruit_GFX.h"
#include "MCUFRIEND_kbv.h"
MCUFRIEND_kbv tft;

#include "image.h"

#include "Fonts/FreeSans9pt7b.h"
#include "Fonts/FreeSans12pt7b.h"
#include "Fonts/FreeSerif12pt7b.h"
#include "FreeDefaultFonts.h"

#define BLACK   0x0000
#define BLUE    0x001F
#define RED     0xF800
#define GREEN   0x07E0
#define CYAN    0x07FF
#define MAGENTA 0xF81F
#define YELLOW  0xFFE0
#define WHITE   0xFFFF
#define GREY    0x8410
#define ORANGE  0xE880

void showmsgXY(int x, int y, int sz, const GFXfont *f, const char *msg)
{
    int16_t x1, y1;
    uint16_t wid, ht;
    tft.setFont(f);
    tft.setCursor(x, y);
    tft.setTextColor(WHITE);
    tft.setTextSize(sz);
    tft.print(msg);
}

void setup()
{
    Serial.begin(9600);
    uint16_t ID = tft.readID();
    tft.begin(ID);
    tft.setRotation(1);
    tft.invertDisplay(true);
    tft.fillScreen(tft.color565(0,20,0));
    showmsgXY(20, 40, 2, &FreeSans9pt7b, "La Linea");
    tft.setRotation(0);
}

void loop(){

while(1){
   tft.drawBitmap(20, 180, Line1, 258, 128, WHITE);delay(60);
   tft.fillRect(20, 180, 258, 128, tft.color565(0,20,0));
      tft.drawBitmap(20, 180, Line2, 258, 128, WHITE);delay(40);
   tft.fillRect(20, 180, 258, 128, tft.color565(0,20,0));
      tft.drawBitmap(20, 180, Line3, 258, 128, WHITE);delay(60);
   tft.fillRect(20, 180, 258, 128, tft.color565(0,20,0));
      tft.drawBitmap(20, 180, Line4, 258, 128, WHITE);delay(40);
   tft.fillRect(20, 180, 258, 128, tft.color565(0,20,0));
      tft.drawBitmap(20, 180, Line5, 258, 128, WHITE);delay(60);
   tft.fillRect(20, 180, 258, 128, tft.color565(0,20,0));
      tft.drawBitmap(20, 180, Line6, 258, 128, WHITE);delay(40);
   tft.fillRect(20, 180, 258, 128, tft.color565(0,20,0));
      tft.drawBitmap(20, 180, Line7, 258, 128, WHITE);delay(60);
   tft.fillRect(20, 180, 258, 128, tft.color565(0,20,0));
      tft.drawBitmap(20, 180, Line8, 258, 128, WHITE);delay(40);
   tft.fillRect(20, 180, 258, 128, tft.color565(0,20,0));
      tft.drawBitmap(20, 180, Line9, 258, 128, WHITE);delay(60);
   tft.fillRect(20, 180, 258, 128, tft.color565(0,20,0));
      tft.drawBitmap(20, 180, Line10, 258, 128, WHITE);delay(40);
   tft.fillRect(20, 180, 258, 128, tft.color565(0,20,0));
      tft.drawBitmap(20, 180, Line11, 258, 128, WHITE);delay(60);
   tft.fillRect(20, 180, 258, 128, tft.color565(0,20,0));
      tft.drawBitmap(20, 180, Line12, 258, 128, WHITE);delay(40);
   tft.fillRect(20, 180, 258, 128, tft.color565(0,20,0));
      tft.drawBitmap(20, 180, Line13, 258, 128, WHITE);delay(60);
   tft.fillRect(20, 180, 258, 128, tft.color565(0,20,0));
      tft.drawBitmap(20, 180, Line14, 258, 128, WHITE);delay(40);
   tft.fillRect(20, 180, 258, 128, tft.color565(0,20,0));
      tft.drawBitmap(20, 180, Line15, 258, 128, WHITE);delay(60);
   tft.fillRect(20, 180, 258, 128, tft.color565(0,20,0));
      tft.drawBitmap(20, 180, Line16, 258, 128, WHITE);delay(40);
   tft.fillRect(20, 180, 258, 128, tft.color565(0,20,0));
      tft.drawBitmap(20, 180, Line17, 258, 128, WHITE);delay(60);
   tft.fillRect(20, 180, 258, 128,tft.color565(0,20,0));
      tft.drawBitmap(20, 180, Line18, 258, 128, WHITE);delay(40);
   tft.fillRect(20, 180, 258, 128, tft.color565(0,20,0));
      tft.drawBitmap(20, 180, Line19, 258, 128, WHITE);delay(60);
   tft.fillRect(20, 180, 258, 128, tft.color565(0,20,0));
      tft.drawBitmap(20, 180, Line20, 258, 128, WHITE);delay(40);
   tft.fillRect(20, 180, 258, 128, tft.color565(0,20,0));
      tft.drawBitmap(20, 180, Line21, 258, 128, WHITE);delay(60);
   tft.fillRect(20, 180, 258, 128, tft.color565(0,20,0));
      tft.drawBitmap(20, 180, Line22, 258, 128, WHITE);delay(40);
   tft.fillRect(20, 180, 258, 128, tft.color565(0,20,0));
      tft.drawBitmap(20, 180, Line23, 258, 128, WHITE);delay(60);
   tft.fillRect(20, 180, 258, 128, tft.color565(0,20,0));
      tft.drawBitmap(20, 180, Line24, 258, 128, WHITE);delay(40);
   tft.fillRect(20, 180, 258, 128, tft.color565(0,20,0));
      tft.drawBitmap(20, 180, Line25, 258, 128, WHITE);delay(60);
   tft.fillRect(20, 180, 258, 128,tft.color565(0,20,0));
      tft.drawBitmap(20, 180, Line26, 258, 128, WHITE);delay(40);
   tft.fillRect(20, 180, 258, 128, tft.color565(0,20,0));
      tft.drawBitmap(20, 180, Line27, 258, 128, WHITE);delay(60);
   tft.fillRect(20, 180, 258, 128, tft.color565(0,20,0));
 }
}

In this template, We just display some images by RGBbitmap and bitmap functions. Just make a code for touchscreen and use this template.  Download the .h file and add it to folder of the Arduino sketch.

Header File

#include "Adafruit_GFX.h"    // Core graphics library
#include "MCUFRIEND_kbv.h"   // Hardware-specific library
MCUFRIEND_kbv tft;

#define BLACK   0x0000
#define RED     0xF800
#define GREEN   0x07E0
#define WHITE   0xFFFF
#define GREY    0x8410

#include "images.h"

#include "Fonts/FreeSans9pt7b.h"
#include "Fonts/FreeSans12pt7b.h"
#include "Fonts/FreeSerif12pt7b.h"
#include "FreeDefaultFonts.h"

int a = 3000;
int b = 4000;
int j, j2;
int i, i2;

void showmsgXY(int x, int y, int sz, const GFXfont *f, const char *msg)
{
    int16_t x1, y1;
    uint16_t wid, ht;
   // tft.drawFastHLine(0, y, tft.width(), 0xffff);
    tft.setFont(f);
    tft.setCursor(x, y);
    tft.setTextColor(WHITE);
    tft.setTextSize(sz);
    tft.print(msg);
    delay(1000);
}

void setup()
{
  Serial.begin(9600);
  uint16_t ID = tft.readID();
  tft.begin(ID);
  tft.invertDisplay(true);
  tft.setRotation(1);
}

void loop(void)
{
  tft.invertDisplay(true);
  tft.fillScreen(BLACK);

  tft.drawRGBBitmap(0, 0, test, 480, 320);

  tft.drawBitmap(20, 20, Line1, 45, 45, 0xffff);//battery
  tft.drawBitmap(65, 20, Line2, 45, 45, 0xffff);//wifi
  tft.drawBitmap(125, 25, Line3, 45, 45, 0xffff);//mail
  tft.drawBitmap(185, 25, Line4, 45, 45, 0xffff);//instagram
  tft.drawBitmap(245, 25, Line6, 45, 45, 0xffff);//power
  tft.drawBitmap(20, 260, Line5, 45, 45, 0xffff);//twitter

  tft.drawBitmap(410, 140, Line7, 45, 45, 0xffff);//rain

  tft.setTextSize(6);
  tft.setTextColor(0xffff);
  tft.setCursor(280, 210);
  tft.print("20:45"); 
    tft.setTextSize(2);
  tft.setTextColor(0xffff);
  showmsgXY(330, 280, 1, &FreeSans12pt7b, "Saturday");
  showmsgXY(300, 305, 1, &FreeSans12pt7b, "6 October 2018");
  
  while (1);
}

Final Remarks

  • The speed of playing all the GIF files are edited and we made them faster or slower for better understanding. The speed of motions depends on the speed of your processor or type of code or size and thickness of elements in the code.
  • You can add the image code in the main page but it fills all the main page. So you can make a .h file and add in the folder of the sketch.
  •  In this article, We just discussed about displaying elements on LCD. Follow our next tutorials to learn using touch screens and SD Cards.
Liked What You See?​
Get Updates And Learn From The Best​

Comments (68)

  • Fabrizio Reply

    Best ever beginner’s guide. Thanks!

    August 17, 2019 at 3:02 pm
    • mohammad Reply

      You Are Welcome. We are happy to hear this 🙂

      August 17, 2019 at 5:23 pm
      • Richard Reply

        Can this work for a 2.8inch tft lcd display by waveshare?

        April 28, 2021 at 9:36 pm
        • Mehran Maleki Reply

          Yes, you can do that, but you better use the following tutorial written specifically for the display you have.
          “https://electropeak.com/learn/interfacing-2-8-inch-tft-touch-display-shield-module-with-arduino/”

          May 1, 2021 at 5:19 am
  • Petter Peper Reply

    Wonderful job!!!
    I have one question to add Volume.h in the project to Mega it says : too many initializers for ‘const uint16_t [0]

    To compile this project i must have an Arduino DUE?

    Thanks.

    August 20, 2019 at 2:11 pm
    • Saeed Hosseini Reply

      Hello.
      We are glad you are interested in this project.
      Yes you should use Arduino DUE.

      August 22, 2019 at 4:30 am
  • Darene Reply

    had a lot of troubles until I discovered this site, finally i got started with these TFT’s lol ==> kudos!!

    I still have a problem,

    tft methods work fine in the void setup part,but whenever I move one into void loop it says the tft was not declared in this scope.

    so for now i have to create a loop in the setup part …

    any suggestions?

    November 17, 2019 at 10:55 pm
    • Saeed Hosseini Reply

      make sure that “tft.begin(ID);” still is in setup.

      November 24, 2019 at 10:59 am
  • Tim Kern Reply

    Thank you for this tutorial. I feel that maybe I have a chance!
    All I ever see is a blank white screen. I have downloaded the libraries and extracted them to the defaults, and when I try to open any of the sketches, all I get is line after line of errors. It doesn’t matter what sketch I try — none will compile.
    I know it must be something simple, but could I please get just one example of any sketch that will work on my 3.5″ TFT / Mega 2560? I have no one to ask, and I have been trying one tutorial after another for more than six weeks.
    I am not asking for anyone’s troubleshooting help — I just want a successful sketch. I want anything that will work.
    This isn’t as fun as it used to be. Can anybody give me one sketch that works, that I can copy and paste?
    Thank you for your help!

    January 9, 2020 at 1:19 am
    • Ernesto F Reply

      I have the same error, did you find a solution?

      February 3, 2020 at 8:38 am
  • Peter Reply

    Thanks so much! It’s the thing I need.

    February 6, 2020 at 9:30 am
    • Saeed Hosseini Reply

      🙂 🙂

      March 1, 2020 at 6:12 am
  • Peter Reply

    Why when I use the arduino Due, it says : too many initializers for ‘const uint16_t [0]’ ? How to compile it ?

    February 7, 2020 at 8:04 am
    • Amir Mogoeir Reply

      Which part of the tutorial are you trying to compile? There are so many uint16 in this page.

      June 7, 2020 at 8:24 am
  • Silas Reply

    Very usefull guide! I just have the problem now that if i try to set the setrotation commando to 1, my calibration dosent follow.
    I have tried to change the calibration values so it should make it landscape instead of portrait:

    Left -> bot
    Rt -> Top
    Top -> left
    Bot -> Rt

    Like this:
    Potrait
    TS_LEFT = 907, TS_RT = 136, TS_TOP = 942, TS_BOT = 139;
    Landscape
    TS_LEFT = 942, TS_RT = 139, TS_TOP = 136, TS_BOT = 907;

    But this does not help… Any who can help explain what i do wrong?

    April 11, 2020 at 10:21 am
    • Mehran Maleki Reply

      Hello.
      The thing is that the screen needs to be square for your change to work. In other word, you cannot just swap the calibration values and expect it to work. That would only work in case the screen was square. But it is rectangle in our case. That’s where you’re doing wrong. So you need to work a bit more with your calibration values.

      December 6, 2020 at 1:46 pm
  • pino Reply

    I can not update a string on the display….any new print at the seme position overimpose the previous one ….
    …writing blanks spaces does not do any better.

    April 30, 2020 at 12:29 am
    • Amir Mogoeir Reply

      Do you change the x,y where you want the text to be printed? use this command:
      showmsgXY(x,y,sz,&FreeSans9pt7b,”www.Electropeak.com”);
      set x,y to where you want to place the text.

      May 30, 2020 at 1:06 pm
  • Schein Reply

    Thanks you so much!!!. I’m find this thing long time

    May 3, 2020 at 5:33 am
    • mohammad Reply

      So glad to hear that. 🙂

      May 26, 2020 at 10:58 am
  • Cole Reply

    Thank you!!! You guys are awesome for this! I’m planning to hopefully hook up a arduino to my cars ODB1 port and read the raw data for translation into a slick gauge cluster. It’s gonna be a long process but this guide will help put me way ahead in the road.

    June 25, 2020 at 6:18 am
    • Mohammadreza Akbari Reply

      Hi. We are glad to hear that.

      October 26, 2020 at 11:54 am
  • hamed Reply

    sorry about my question
    but how can get these Libraries
    #include “TouchScreen.h” // only when you want to use touch screen

    #include “bitmap_mono.h” // when you want to display a bitmap image from library
    #include “bitmap_RGB.h” // when you want to display a bitmap image from library

    #include “Fonts/FreeSans9pt7b.h” // when you want other fonts
    #include “Fonts/FreeSans12pt7b.h” // when you want other fonts
    #include “Fonts/FreeSerif12pt7b.h” // when you want other fonts
    #include “FreeDefaultFonts.h” // when you want other fonts

    #include “SPI.h” // using sdcard for display bitmap image
    #include “SD.h”

    thanks

    September 11, 2020 at 4:37 pm
  • kidd Reply

    HJ all

    I need some help for the Ard_Logo exemple , where must ‘i copy the Ard_Logo.h exactly ?

    i’ve try to put it in libraries inside a folder with the same name (ie: \libraries \Ard_Logo \ Ard_Logo.h) and run the sketch giving here , i’ve got an error , so i try then to put the sketch and Ard_Logo.h in same folder in arduino folder (mydocumentes\arduno\ Logo \ Ard_Logo.h + sketch ) bad or hard luck always an error

    I’m using a UNO with tft. : ID = 0x9340 : 240 x 320

    thanks a lot for any help

    November 17, 2020 at 4:39 am
    • Mehran Maleki Reply

      Hi.
      No you don’t need to make a folder in your Arduino libraries folder to use a .h file. Just copy the Ard_Logo.h file in the folder of your Arduino project. I mean put the .h file right in the folder where the .ino file exists.

      December 6, 2020 at 1:54 pm
  • Pedro D. Reply

    Thank you very much for this wonderful tutorial, you have saved my project helping to understand the operation of the MCUFRIEND library.
    I see, on the web, an error in the space for the Sketch of “temperature”, could you put it?
    I’m also getting “too many initializers for‘ const uint16_t [0] “errors in the Sketch with images, could you please clarify why? I am compiling on an Arduino MEGA.

    Thank you very much for your attention.

    a Greetings

    November 20, 2020 at 2:57 pm
    • Mehran Maleki Reply

      Hello Peter. You’re welcome. We are so glad to hear this.
      I’m sorry what have you seen on the web? Please explain it more clearly.
      And about the error you’ve faced, apart from volume.h does the rest of code work well? Check if the code is compiled well without volume.h and this error only pops up when you add volume.h. If so, then the problem is because of the lack of memory in Arduino MEGA and you must compile the code on Arduino DUE.

      December 1, 2020 at 5:42 am
      • Peter Miller Reply

        Hi Mehran,

        I also found this issue when compiling the code…
        Error message = \Arduino!\Sketches\Gauges\Gauge.h:9602:1: sorry, unimplemented: non-trivial designated initializers not supported
        The error message appears hundreds of time!

        Tried the Gauges and Volume examples and both get the same compile error.
        Target is a UNO, but this is a compile error, so presumably an error with the header. I am downloading the .h file directly into the sketch directory, which contains .ino file as the only other file in the directory.

        July 10, 2022 at 1:19 am
        • Mehran Maleki Reply

          Hi,
          As I told you before, the problem is due to the lack of memory in Arduino Uno and also Mega. That’s why it cannot be compiled. In Arduino IDE Tools -> Board, change the board to Arduino Due and you’ll see it compiles properly.

          July 10, 2022 at 11:47 am
  • Joel P Reply

    I am trying to run the Gauge project but I am getting an error that says:

    “too many initializers for ‘const uint16_t [0] {aka const unsigned int [0]}’ };”

    I downloaded the Gauge.h file and added it to both the file and the library, but nothing has worked. Could I get some guidance please?

    December 15, 2020 at 1:46 am
    • Mehran Maleki Reply

      What Arduino Board do you have? This project at its full needs a lot of memory. So your error seems to be related to the lack of memory of the Arduino Board you’re using. You’d need to compile this code on an Arduino Due.

      December 16, 2020 at 6:23 am
      • Joel P Reply

        I was using an Arduino Mega 2560. Thank you!

        December 17, 2020 at 5:31 am
  • john tikis Reply

    the command:

    tft.reset();

    outputs error message.

    December 16, 2020 at 4:15 pm
    • Mehran Maleki Reply

      What error messages exactly do you get?

      December 27, 2020 at 5:13 am
  • Abdul Munaf Reply

    Sir, Aslam-o-Alikum
    i am new in arduino. your tutorial is very good and it clear my concept to use lcd. i want to compile and test Temperature.h please guide me where i past it (complete path) and how to load the arduino.

    December 21, 2020 at 8:53 am
    • Mehran Maleki Reply

      Hello!
      First you need to install Arduino IDE to be able to write codes and program your Arduino Board. You can use the following link for more details on how you can do that. “https://www.arduino.cc/en/guide/windows”
      Then you can easily use the codes given in this article to make a project.

      December 26, 2020 at 2:28 pm
  • Dominic Reply

    Thank you so much, I really do appreciate the clarification. Everything seem okay now.
    Please I don’t know if I could get to be communicating with you directly via any social media chat.
    Please where is the next tutorial as said at the end of this?

    February 19, 2021 at 11:34 pm
    • Mehran Maleki Reply

      Hello. You’re so welcome!
      It is not ready yet but that’s on our list. We’ll reply here and let you know about it as soon as it goes online. Stay tuned!

      February 20, 2021 at 2:46 pm
  • Dominic Reply

    Okay, thank you sir
    Sir please I’ve been trying to display icons (tiles of pictures) on the screen but don’t know the syntax, please could you add this

    February 25, 2021 at 4:34 pm
    • Mehran Maleki Reply

      Hello.
      Just follow the codes and syntax provided in this tutorial more precisely. They almost have all commands that you might need.

      February 28, 2021 at 6:13 am
  • Sakshianand Mishra Reply

    i m finding tft does not name a type error plz help with the error

    February 25, 2021 at 6:36 pm
    • Mehran Maleki Reply

      What errors do you get exactly?

      February 28, 2021 at 6:15 am
  • Sakshianand Mishra Reply

    and what if the code is compiled successfully but their is no display in the tft display what we can do in such cases and where is the probelm?

    February 25, 2021 at 6:38 pm
    • Mehran Maleki Reply

      Maybe the tft display is not properly interfaced with the Arduino. So, at first you better check the wiring.
      Check the following lines of the code and make sure your tft display is connected to the right pins of the Arduino Board.
      “//(int CS=A3, int RS=A2, int WR=A1, int RD=A0, int RST=A4)
      MCUFRIEND_kbv tft(A3, A2, A1, A0, A4); “

      February 28, 2021 at 6:27 am
  • Karl Kobera Reply

    An excellent introduction!
    My display works well with an arduino mega 2560.
    I can print texts, can draw circles, rectangles and lines.
    For example:
    tft.fillCircle(400 , 200,30, col[4]); delay(15);
    draws a filled circle,
    but I cannot draw triangles.

    The following code is being compiled but the triangle is not drawn:
    tft.fillTriangle(20,20,40,40,80,80,BLUE); delay(15);
    What could be wrong?
    Thank you very much in advance.
    Karl

    March 2, 2021 at 3:16 pm
  • Karl Kobera Reply

    Please ignore my mai respective triangle.The triange code works!
    The coordinates are line coordinates.
    I beg your pardon.
    Karl

    March 2, 2021 at 3:33 pm
    • Mehran Maleki Reply

      That’s no problem!

      March 6, 2021 at 10:00 am
  • Robert Reply

    Any chance the same would work with Arduino Nano RP2040 Connect?
    I have a project in mind and looking at how to achieve it with a rounded screen. Those examples are a good start point but not sure if Arduino Nano will be a good one to go with it?
    Thanks

    July 7, 2021 at 5:10 pm
    • Mehran Maleki Reply

      First, there is no difference between different types of Arduino boards in terms of the code you upload on them. In other words, you can use the same codes provided in this article to program your Arduino Nano and there will be no problems. The only issue is the memory. If you want to use a code which has so many variables, you may face shortage of memory using Arduino Nano. So, in overall, since the codes here contain so many variables, and you can also see in the comments that some have had problems compiling the codes even for an Arduino Mega, you probably won’t be able to compile any of the codes in this tutorial for an Arduino Nano. My suggestion is Arduino Due. It has enough memory for almost any code you ever need to upload.

      July 10, 2021 at 5:09 am
  • Trey Reply

    These are pretty cool. Is the code available for both features on the thermometer gif?

    July 14, 2021 at 3:11 am
    • Mehran Maleki Reply

      Hi, do you mean you want to display both features at the same time? If so, you can do that. Just merge both codes and compile them together. That will do what you want.

      July 17, 2021 at 6:55 am
  • Trey Reply

    I’m sorry if this ends up being a duplicate comment…. I really like your temperature sensors and would like to use them in a home project, but I only see this:

    Would it be okay to use the code you made for it and get it from you?

    July 15, 2021 at 4:21 am
    • Mehran Maleki Reply

      Well, I couldn’t quite understand what you meant exactly. There are a lot of different temperature sensors available in our website and they all come with an appropriate tutorial, too. Choose the one you like and if you have any problem using them, we can help you.

      July 17, 2021 at 7:01 am
  • Ubaid Ullah Reply

    Best ever beginner’s guide.
    Please write about TOUCH SCREEN also like this.

    Thanks

    September 24, 2021 at 4:09 pm
    • Mehran Maleki Reply

      Hi! Thanks for your generous opinion!
      We will consider your suggestion.

      September 25, 2021 at 6:41 am
  • meri Reply

    I find this article very useful and interesting but you have just shown some parts of the code and I’m an absolute beginner and didn’t understand how to write the code correctly.

    October 9, 2021 at 11:56 am
    • Mehran Maleki Reply

      Hi,
      There seems to have been something wrong with the website in the last few days. Now it’s fixed and you can see the codes.

      October 12, 2021 at 5:38 am
  • Thom D Reply

    Hi. Great Tutorial! One thing though is not clear to me, Is there a wiring diagram that I am not seeing? It is unclear to me how I am supposed to wire this display to my arduino.

    And are there different wiring diagrams for different display controllers?

    Thanks!

    June 15, 2022 at 1:48 pm
  • Mehran Maleki Reply

    Hi,
    The TFT LCD display used in this tutorial is actually a display shield. All you need to do is to put it right on the Arduino Board and it will fit perfectly. There is no wiring needed.
    Here are the links to these TFT displays:
    https://electropeak.com/2-4-tft-lcd-display-shield
    https://electropeak.com/3-5-tft-color-display-screen-module

    June 19, 2022 at 6:51 pm
  • Prasad Aritakula Reply

    Hi
    Which library can be used to work with STM32F401ccu (black pill board) for this display.
    and how to select the parallel port of my choice for D0-D7 of the display
    Can be recommend any code for arduino for this board.
    Thanks.
    Prasad Aritakula

    September 27, 2022 at 7:12 am
  • andy Reply

    Excellent Guide… Great Effort 🙂

    November 27, 2022 at 10:00 pm
    • Ali Abdolmaleki Reply

      Your Welcome :))

      November 30, 2022 at 9:35 am
  • Jerry Reply

    Can you point me towards a board drawing for this display?

    February 25, 2024 at 3:55 pm

Leave a Reply

Your email address will not be published. Required fields are marked *