Raspberry Pi Serial Communication (UART) w/ Arduino & PC
Written by
Mohammadreza Akbari
Overview
In this tutorial, you’ll learn about Raspberry Pi serial communication (UART), and how to connect your Raspberry Pi board to the Arduino boards or PC using serial communication.
What You Will Learn
Serial communication between Raspberry Pi and PC
Serial communication between Raspberry Pi and Arduino
What Is Serial Communication?
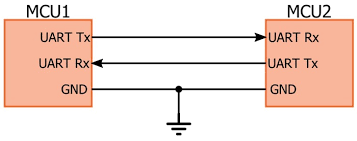
Serial communication (UART) is one of the most popular communication protocols. Most processors support this two-wire connection. Also, many of modules and sensors use serial communication to connect to the other devices.
Serial communication requires only two wires; one for transmitting data and the other one for receiving it.
The rate of the data transfer in this protocol is called the Baud rate. The unit of baud rate is bit per second.
Raspberry Pi boards have two types of UART communications. One is called PL011 and the other is called miniUART. The Raspberry Pi boards that have Bluetooth/Wireless module, use the PL011 for UART communication by default.
Warning
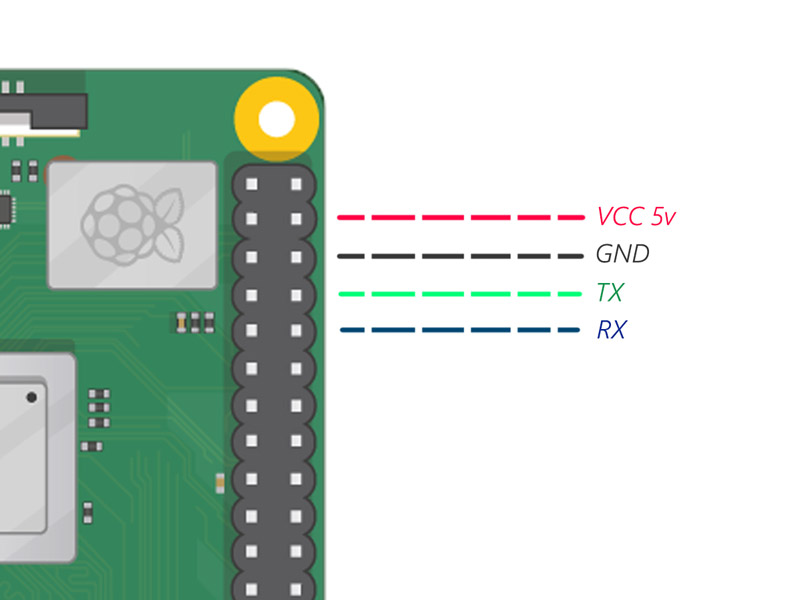
The voltage level of all Raspberry Pi pins, including the RX and TX pins, is 3.3 volts. So to connect a device with 5 volts voltage level to the Raspberry Pi, you should use a voltage level converter or resistance-split circuit.
You can check the Raspberry Pi website for more information about the Raspberry Pi serial communication.
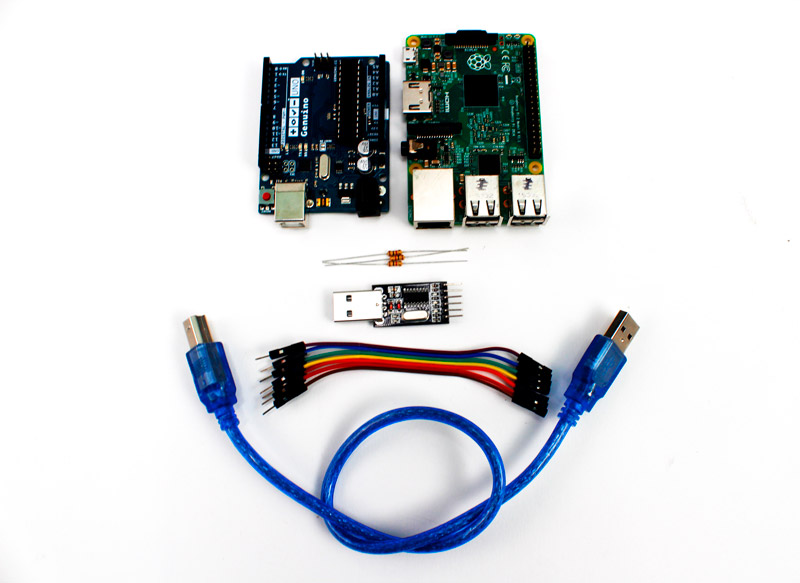
Required Materials
Hardware Components
Raspberry Pi 3 B or B+
×
1
Arduino UNO R3
×
1
TTL to USB converter
×
1
Male to Female jumper wire
×
1
Bread board
×
1
1K Ohm Resistor
×
3
Software Apps
Arduino IDE
Serial terminal
Serial communication between Raspberry Pi and PC
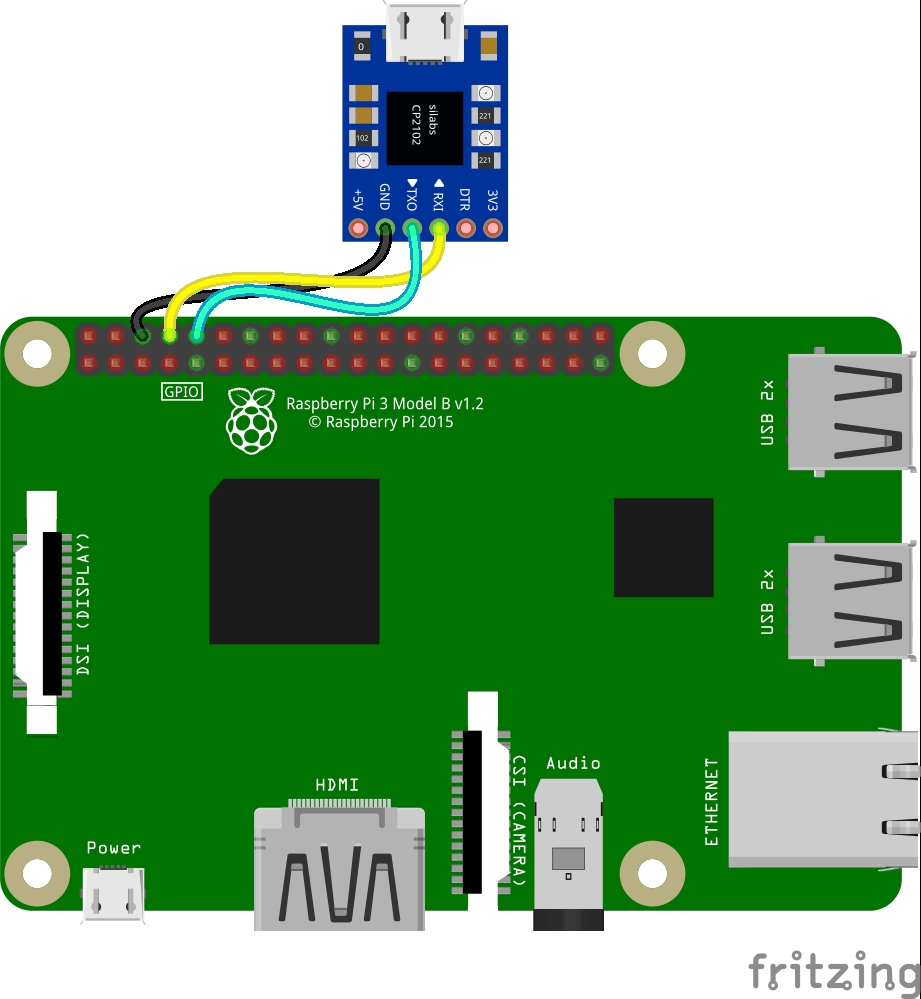
To establish a serial communication between the Raspberry Pi board and your PC you need a serial to USB converter.
Circuit
Follow the steps below to start the Raspberry Pi UART communication:
Step 1. Connect the serial to USB converter to the Raspberry Pi board as is shown in the circuit. Then plug the Raspberry Pi supply and connect the converter to your PC.
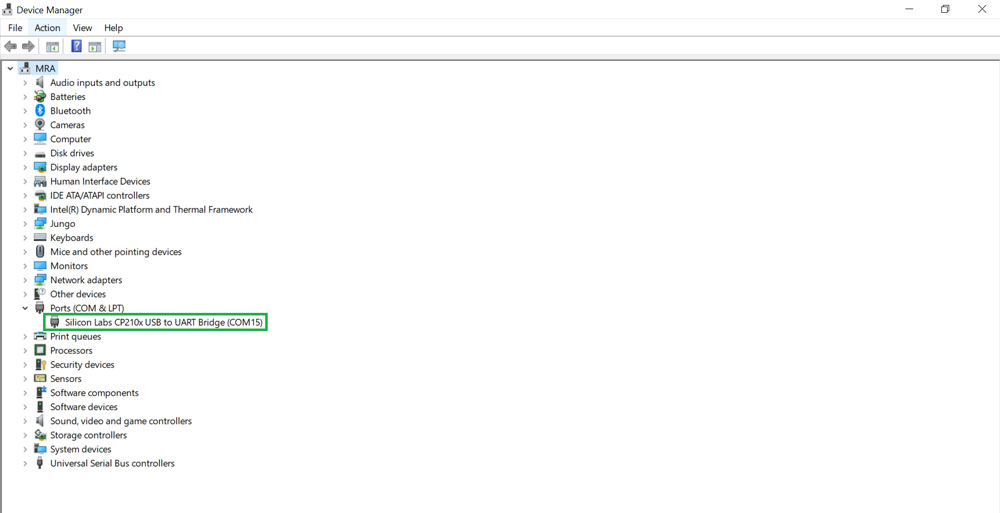
Step 2. Go to the Device Manager and find the port number that is connected to the converter.
Step 3. Open your terminal software and set up the configuration.
Step 4. Enable UART in the Raspberry Pi.
Open the Raspberry Pi terminal and insert the following commands.
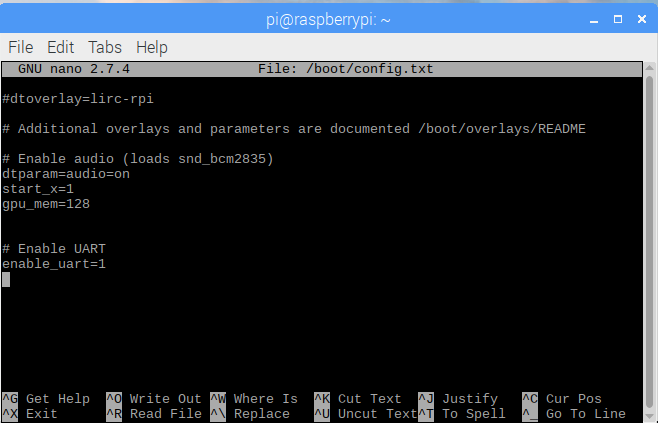
1. Open the config.txt file in the nano editor using the following command.
sudo nano /boot/config.txt
Add the following lines to the end of the file.
Enable UART
enable_uart=1
Then press Ctrl+x and press Y to save the file and close it.
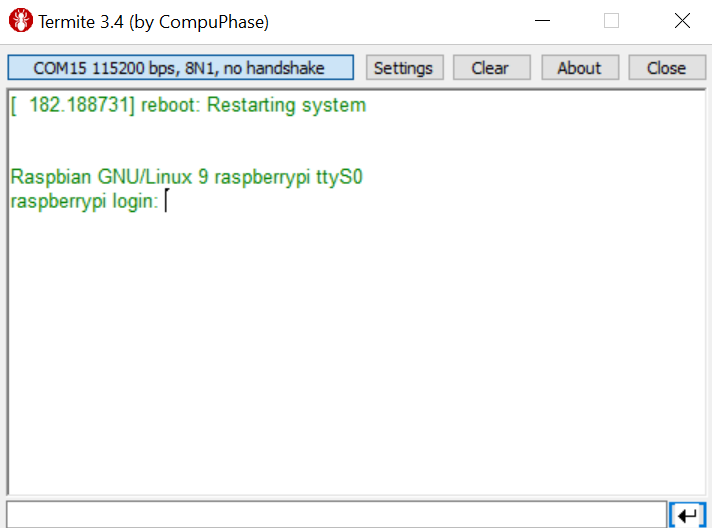
2. Reboot your Raspberry Pi.
sudo reboot
3. Check the terminal software on your computer
4. Disconnect the serial communication between the Raspberry Pi and the Bluetooth module.
5. Open cmdline.txt in nano editor. Delete the “console=serial0,115200” line and save the file. 6. sudo nano /boot/cmdline.txtReboot your Raspberry Pi again.
sudo reboot
7. Install the minicom terminal on your Raspberry Pi.
sudo apt-get install minicom -y
The following command opens the minicom terminal, set the baud rate to 115,200, and starts the serial communication.
minicom -b 115200 -o -D /dev/ttyS0
After executing this command, you should see the following window.
Now you can test the serial communication between the Raspberry Pi and your pc.
Note
If you want to see the commands you write in the minicom terminal, you need to enable the Echo mode by pressing Ctrl+A and then entering E in the minicom terminal.
To exit minicom, first press Ctrl+A and then enter X.
Serial Communication Between Raspberry Pi and Arduino
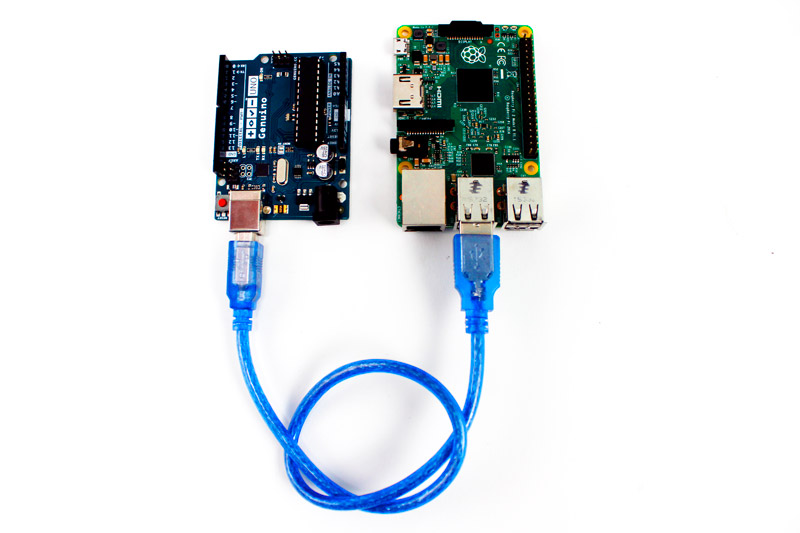
You can connect your Arduino boards to the Raspberry Pi using a USB cable. By doing this, you provide the Arduino supply voltage, and you can also transfer your information between Arduino and the Raspberry Pi through the serial interface.
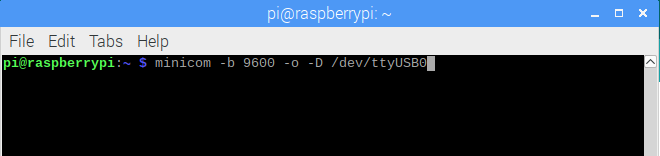
Using the following command you can open the minicom terminal at 9600 bit/sec baud rate.
minicom -b 9600 -o -D /dev/ttyUSB0
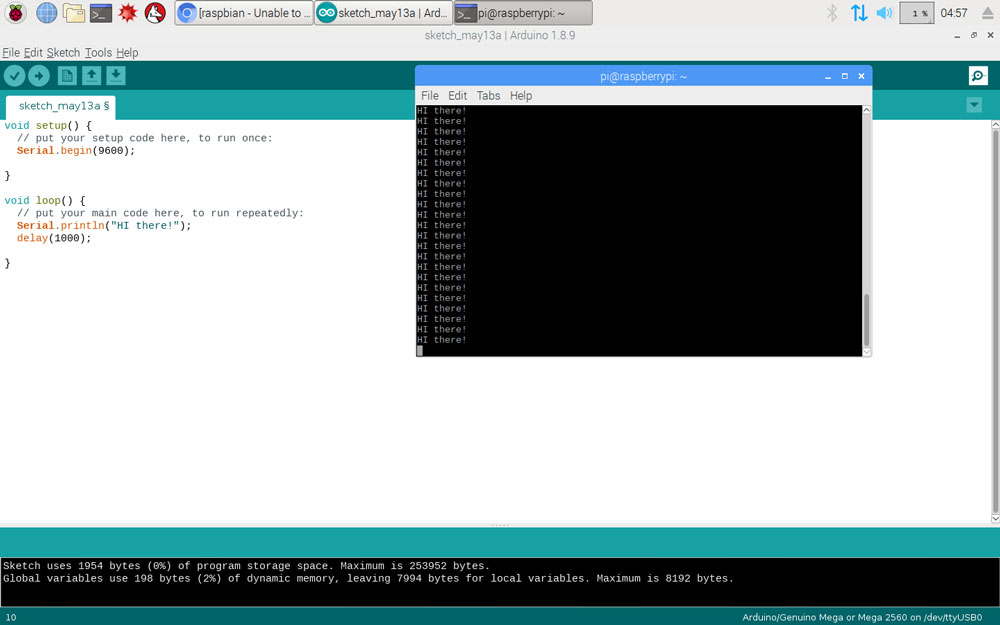
Now upload your code on the Raspberry Pi board and you can transfer the information between the Raspberry Pi and Arduino.
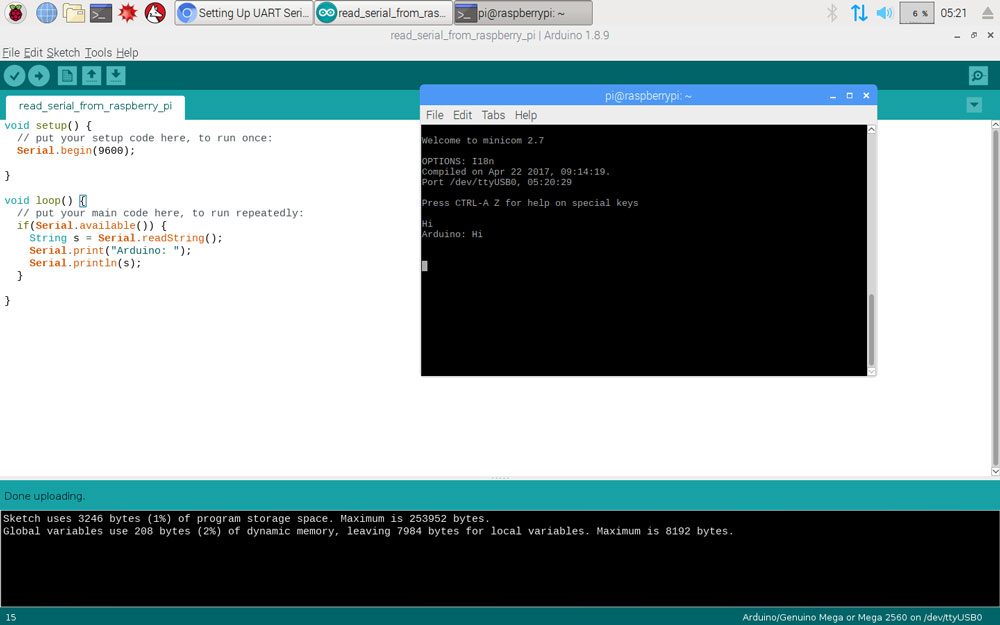
The following code sends any text you write in the minicom terminal from the Raspberry Pi to the Arduino. Then the Arduino returns the same text to the Raspberry Pi.
void setup() {
  // put your setup code here, to run once:
  Serial.begin(9600);
}

void loop() {
  // put your main code here, to run repeatedly:
  if(Serial.available()) {
    String s = Serial.readString();
    Serial.print("Arduino: ");
    Serial.println(s);
  }
}
What’s Next?
Connect a few LEDs to the Arduino and control them using the commands you write in the Raspberry Pi terminal.