Overview
- Will learn how to use a fingerprint sensor.
- Will learn how to pair your devices with your safe zone gadget.
- Will make a cool gadget called Safe Zone.
Lock & Unlock Devices
These days, Our usage of Smart devices is improved and we have many different data in devices like chat content, contacts, images, notes and so on. But some of them need to be private for us and it’s very important and Maybe it is the main reason for set our devices locked. All smart devices have different method to set in lock or unlock mode but sometimes they make limited and have bad feeling for us when you need to pass security section to use devices. For example when you’re working in your private room and there are no body near you don’t need have security section and making a plan for your device to turn it off is a little complicated.
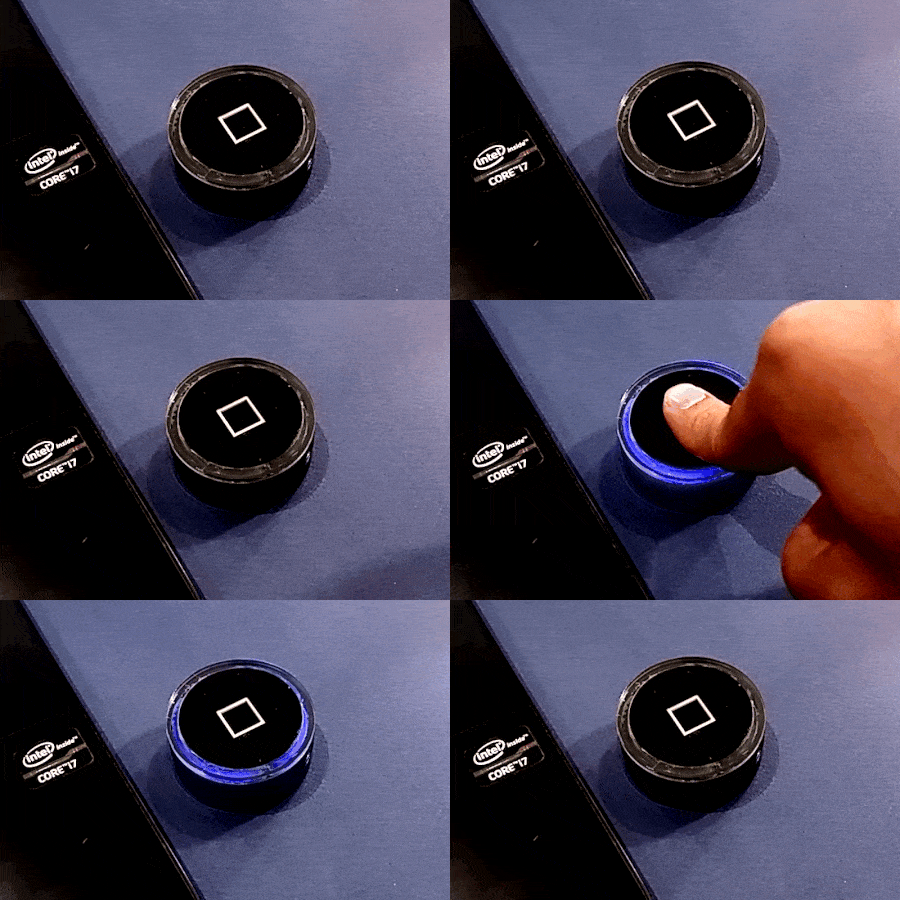
So, We have an idea to make a small gadget that could connected with all our smart devices and when we want to work easy without security, We just active it by our finger ID. When the gadget activated, It pair with our devices by Bluetooth and they will be unlocked till the gadget is in near to them.
R301T Fingerprint Module
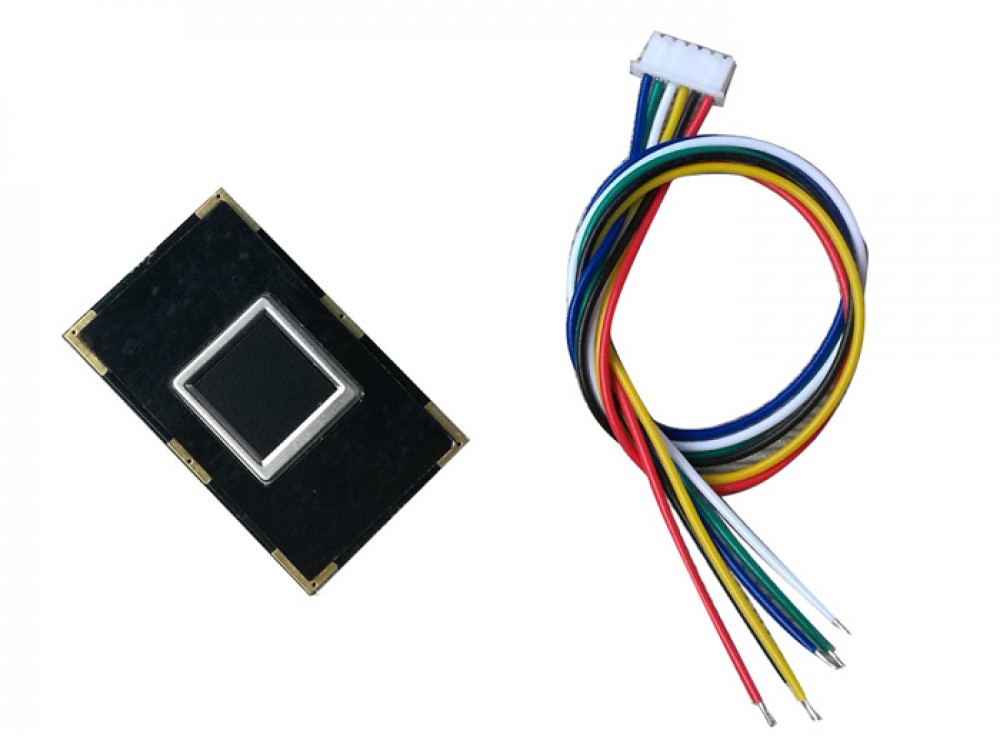
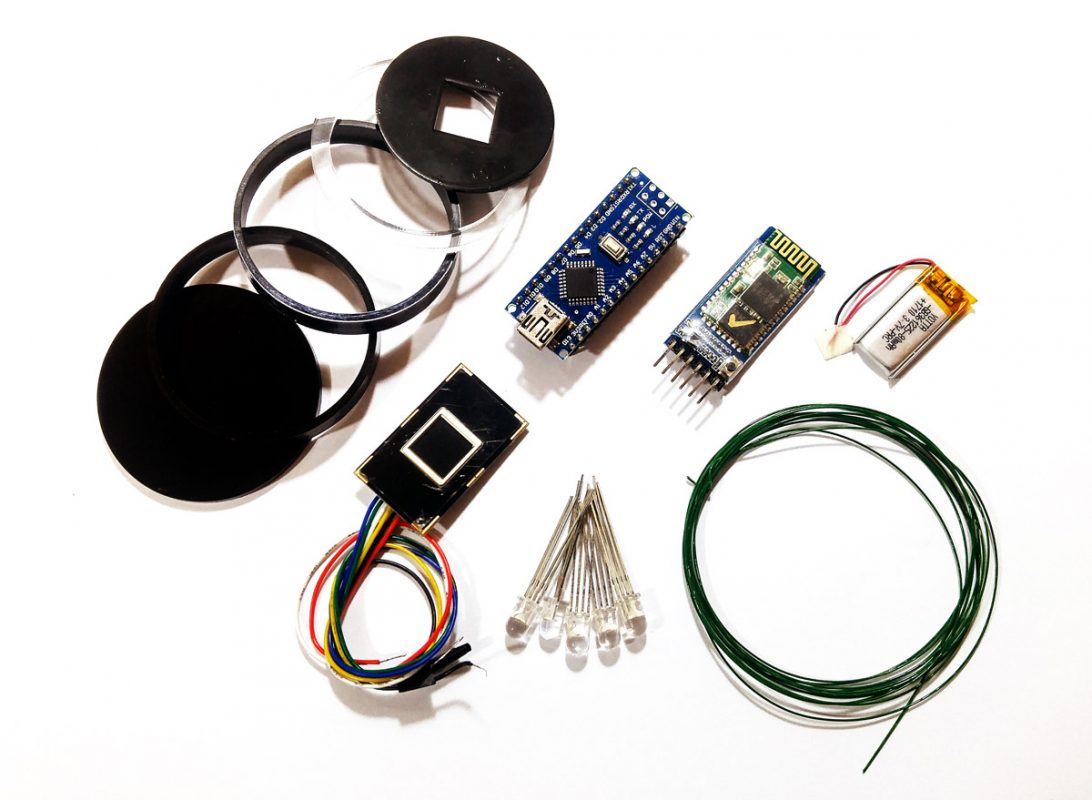
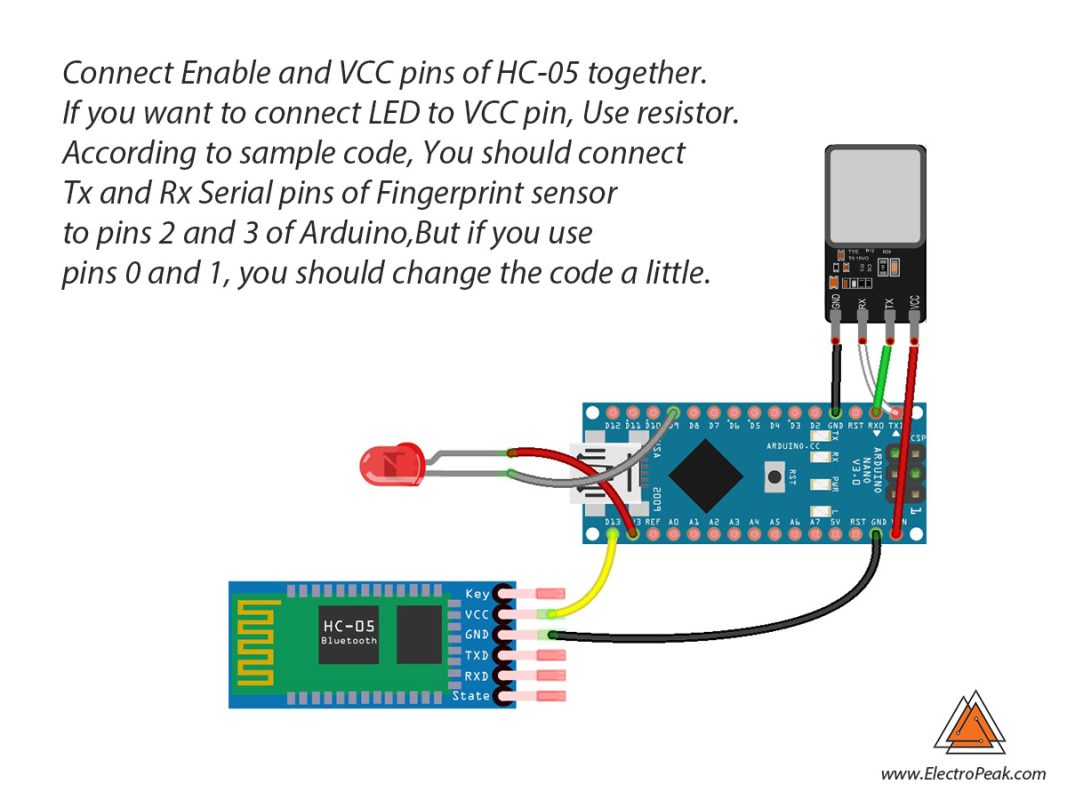
In this project, we use R301T sensor module that makes a serial communication with a controller such as Arduino to exchange data. Firs we set our finger print for R301T as a user and connect it to Arduino Tx and Rx pins. We used a bluetooth module called HC-05 and pair it with our devices one time. Now we will write a code for Arduino and say it when a user activate gadget turn the bluetooth on. Let’s do it!
Required Materials
Hardware Components
Software Apps
Circuit
Code
You must add the fingerprint sensor’s library and then upload the code. If it is the first time you are using an Arduino board, don’t worry, just follow these steps:
- Go to www.arduino.cc/en/Main/Software and download the Arduino software compatible your OS. Install the IDE software as instructed.
- Run the Arduino IDE and clear the text editor and copy the following code in the text editor.
- Choose the board in tools and boards, select your Arduino Board.
- Connect the Arduino to your PC and set the COM port in tools and port.
- Press the Upload (Arrow sign) button.
- You are all set!
Necessary Files and Downloads:
#include "Adafruit_Fingerprint.h"
#include "SoftwareSerial.h"
SoftwareSerial mySerial(2, 3);

Adafruit_Fingerprint finger = Adafruit_Fingerprint(&mySerial);

int cc=0;
void setup()
{
  Serial.begin(9600);
  while (!Serial);  // For Yun/Leo/Micro/Zero/...
  delay(100);
  Serial.println("\n\nAdafruit finger detect test");

  // set the data rate for the sensor serial port
  finger.begin(57600);

  if (finger.verifyPassword()) {
    Serial.println("Found fingerprint sensor!");
  } else {
    Serial.println("Did not find fingerprint sensor :(");
    while (1) { delay(1); }

    pinMode(13,OUTPUT);
    digitalWrite(13,LOW);
    pinMode(9,OUTPUT);
    digitalWrite(9,HIGH);
  }

  finger.getTemplateCount();
  Serial.print("Sensor contains "); Serial.print(finger.templateCount); Serial.println(" templates");
  Serial.println("Waiting for valid finger...");
}

void loop()                     // run over and over again
{
  getFingerprintIDez();
  delay(50);            //don't ned to run this at full speed.
}

uint8_t getFingerprintID() {
  uint8_t p = finger.getImage();
  switch (p) {
    case FINGERPRINT_OK:
      Serial.println("Image taken");
      break;
    case FINGERPRINT_NOFINGER:
      Serial.println("No finger detected");
      return p;
    case FINGERPRINT_PACKETRECIEVEERR:
      Serial.println("Communication error");
      return p;
    case FINGERPRINT_IMAGEFAIL:
      Serial.println("Imaging error");
      return p;
    default:
      Serial.println("Unknown error");
      return p;
  }

  // OK success!

  p = finger.image2Tz();
  switch (p) {
    case FINGERPRINT_OK:
      Serial.println("Image converted");
      break;
    case FINGERPRINT_IMAGEMESS:
      Serial.println("Image too messy");
      return p;
    case FINGERPRINT_PACKETRECIEVEERR:
      Serial.println("Communication error");
      return p;
    case FINGERPRINT_FEATUREFAIL:
      Serial.println("Could not find fingerprint features");
      return p;
    case FINGERPRINT_INVALIDIMAGE:
      Serial.println("Could not find fingerprint features");
      return p;
    default:
      Serial.println("Unknown error");
      return p;
  }

  // OK converted!
  p = finger.fingerFastSearch();
  if (p == FINGERPRINT_OK) {
    Serial.println("Found a print match!");
  } else if (p == FINGERPRINT_PACKETRECIEVEERR) {
    Serial.println("Communication error");
    return p;
  } else if (p == FINGERPRINT_NOTFOUND) {
    Serial.println("Did not find a match");
    return p;
  } else {
    Serial.println("Unknown error");
    return p;
  }


  // found a match!
  Serial.print("Found ID #");
  Serial.print(finger.fingerID);
  Serial.print(" with confidence of ");
  Serial.println(finger.confidence);
  for (int i=255;i>1;i--)
{analogWrite(9,i); delay(10);}
  if (cc%2==0)digitalWrite(13,HIGH);
  else digitalWrite(13,LOW);
  cc++;
  return finger.fingerID;
}

// returns -1 if failed, otherwise returns ID #
int getFingerprintIDez() {
  uint8_t p = finger.getImage();
  if (p != FINGERPRINT_OK)  return -1;

  p = finger.image2Tz();
  if (p != FINGERPRINT_OK)  return -1;

  p = finger.fingerFastSearch();
  if (p != FINGERPRINT_OK)  return -1;

  // found a match!
  Serial.print("Found ID #"); Serial.print(finger.fingerID);
  Serial.print(" with confidence of "); Serial.println(finger.confidence);
  return finger.fingerID;
}
Assembling
First, You should pair the Bluetooth module with your device. To pair with Win10, Go to settings and search sign-in options and enable dynamic lock and pair your BT module from there. For Android smartphones, Go to Settings > Display section > Lock screen then Enable Smart Lock from there and pair with BT. For IOS, Go to Settings, enter Touch ID and Passcode and make it from there.
If your devices do not pair automatically, you can use this trick. When you try to pair for the first time, Send a character to the device.
What’s Next?
You can improve this project as you wish. Here are a few suggestions:
- Try to make you gadget sensitive to a specific location.
- Try to make same limited access for other users.


