Contents

Interfacing YF-S201 Transparent Water Flow Sensor with Arduino

YF-S201 Water Flow Sensor Features

YF-S201 is a sensor used to measure the water flow. This water flow sensor mainly consists of a plastic valve body, rotor assembly, and a hall effect sensor. This module works based on the hall magnetic effect. So when the water flows through the rotor assembly, the rotor will rotate and the hall effect sensor will produce an electric pulse. By counting these generated pulses, the amount of water passing through the sensor can be calculated.

The measuring range of water flow is 1-30 L / Min and its maximum pressure is up to 1.75 MPa. Each pulse is approximately equivalent to 2.25 ml.

Note
You can use this formula to calculate the amount of liters passed per unit time: frequency (Hz) = 7.5 * Q (L / Min).
Note

Pay attention to the arrow mark on the module for water path.

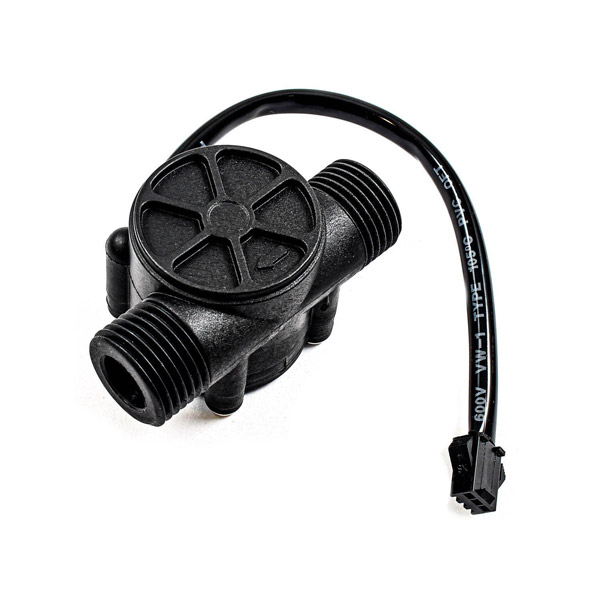
You can download the datasheet of this module here.  

YF-S201 Water Flow Sensor Pinout

This sensor has 3 wires: Red, black and yellow:

  • VCC: Module power supply – 5 to 24 V
  • GND: Ground
  • OUT: Pulse output

You can see pinout of this module in the image below.

Required Materials

Hardware Components

Arduino UNO R3 × 1
YF-S201 Water Flow Sensor × 1
Male to Male jumper wire × 1

Software Apps

Arduino IDE

Interfacing YF-S201 Water Flow Sensor with Arduino

Step 1: Circuit

The following circuit shows how you should connect Arduino to YF-S201 sensor. Connect wires accordingly.

Step 2: Code to measure the volume of water in liters

Upload the following code to Arduino.

    /*
  YF-S201-Water-Flow-Sensor
  made on 14 oct 2020
  by Amir Mohammad Shojaee @ Electropeak
  
Home
*/ double flow; //Liters of passing water volume unsigned long pulse_freq; void setup() { pinMode(2, INPUT); Serial.begin(9600); attachInterrupt(0, pulse, RISING); // Setup Interrupt } void loop () { flow = .00225 * pulse_freq; Serial.print(flow, DEC); Serial.println("L"); delay(500); } void pulse () // Interrupt function { pulse_freq++; }

In this code, we measured the water volume passing through the sensor. As mentioned above, the approximate rate of water passing per pulse is 0.00225. Multiplying this number by the number of pulses gives us the volume of water in liters. Counting pulse number was done using interrupt.

The result can be seen here:

Step 3: Code to measure the flow rate of water in liters per minute

Upload the following code to your Arduino.

    /*
  YF-S201-Water-Flow-Sensor
  modified on 14 oct 2020
  by Amir Mohammad Shojaee @ Electropeak
  
Home
based on www.hobbytronics.co.uk examples */ double flow; //Water flow L/Min int flowsensor = 2; unsigned long currentTime; unsigned long lastTime; unsigned long pulse_freq; void pulse () // Interrupt function { pulse_freq++; } void setup() { pinMode(flowsensor, INPUT); Serial.begin(9600); attachInterrupt(0, pulse, RISING); // Setup Interrupt currentTime = millis(); lastTime = currentTime; } void loop () { currentTime = millis(); // Every second, calculate and print L/Min if(currentTime >= (lastTime + 1000)) { lastTime = currentTime; // Pulse frequency (Hz) = 7.5Q, Q is flow rate in L/min. flow = (pulse_freq / 7.5); pulse_freq = 0; // Reset Counter Serial.print(flow, DEC); Serial.println(" L/Min"); } }

In this code, the flow rate of water passing through the sensor is measured in liters per minute. The flow rate is calculated and displayed every one second.

The result can be seen here:

Liked What You See?​
Get Updates And Learn From The Best​

Comments (8)

  • Msindisi RSA Reply

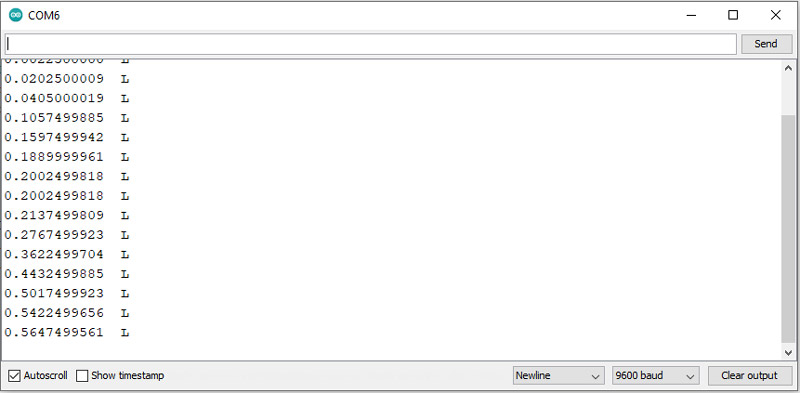
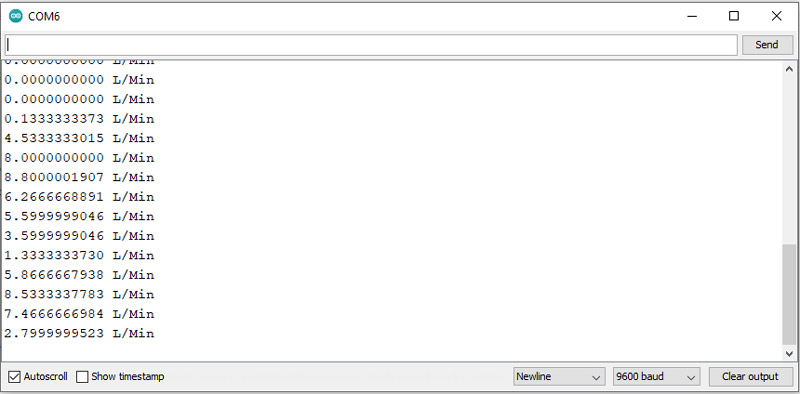
    Thank you sir. This was very helpful. I struggles a lot until I realised through your code that I needed to convert the pulses per litre to litres using the litres per pulse.

    June 7, 2023 at 8:15 am
    • Mohammad Damirchi Reply

      My pleasure dear Msindisi RSA

      June 10, 2023 at 7:06 am
  • Teltherm Instruments Ltd Reply

    This tutorial is a gem for Arduino enthusiasts like me! Interfacing a flow sensor with Arduino opens up a world of possibilities for projects involving liquids. The detailed explanations and the provided code make it easy to follow along and implement. Thanks for sharing this valuable resource that empowers us to create innovative projects that involve liquid flow measurements. Let’s get our creative juices flowing with this fantastic sensor interfacing guide!

    July 30, 2023 at 10:06 am
    • Mohammad Damirchi Reply

      Hi
      You’re so welcome. I’m kinda flattered to hear that.
      Say hi to the gang and everybody! Take care.

      July 31, 2023 at 12:02 pm
  • Flowmeters NZ Reply

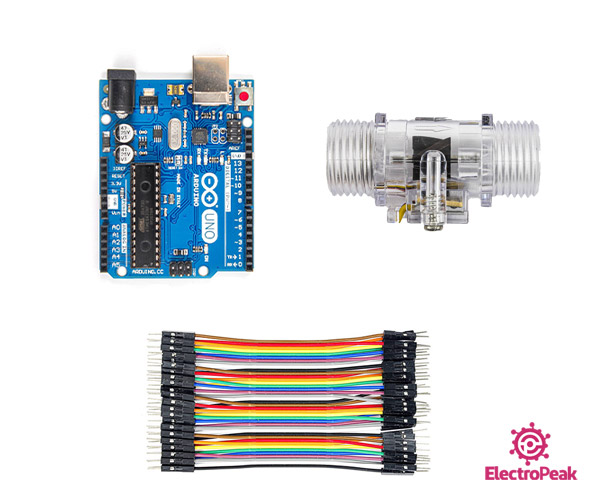
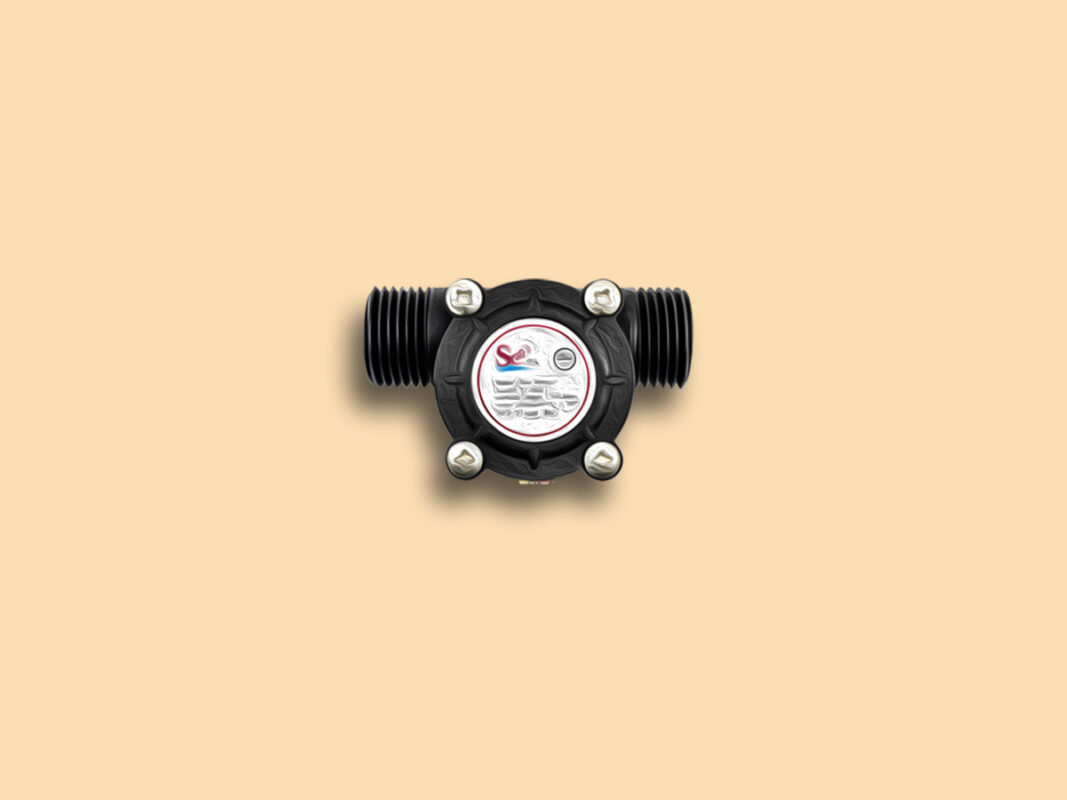
    Aimed at Arduino users, this tutorial demonstrates how to interface the YF-S201 liquid flow sensor. It presents clear wiring diagrams and code explanations, enabling readers to grasp the sensor’s connection and data acquisition process. The tutorial’s simplicity makes it an excellent starting point for those venturing into Arduino-based flow measurement projects.

    August 26, 2023 at 11:04 am
    • Mohammad Damirchi Reply

      Hi my Friend.
      Thank you so much. I’m glad it was helpful for you

      August 27, 2023 at 4:28 am
  • Lou Reply

    Which simulation platform did you use to create the virtual layout? I am struggling loads to find one, thank you for the tutorial!

    March 14, 2024 at 3:27 pm
    • Mohammad Damirchi Reply

      Hello,
      I’m confused about what you mean by “simulation platform.”
      If you’re referring to writing code, we typically use the Arduino IDE.
      For diagrams of circuit connections, we use Fritzing.

      March 24, 2024 at 9:22 am

Leave a Reply

Your email address will not be published. Required fields are marked *