Interfacing Touch Double-sided Switch Module with Arduino
Written by
Amir Mohammad Shojaei
Double-sided Touch Sensor Features
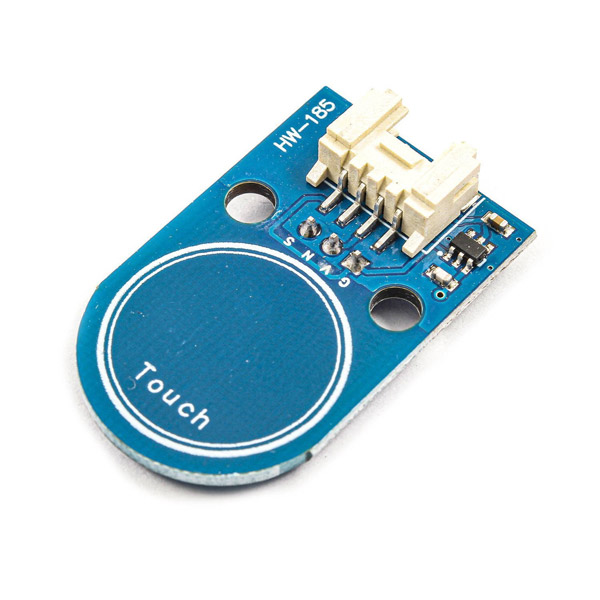
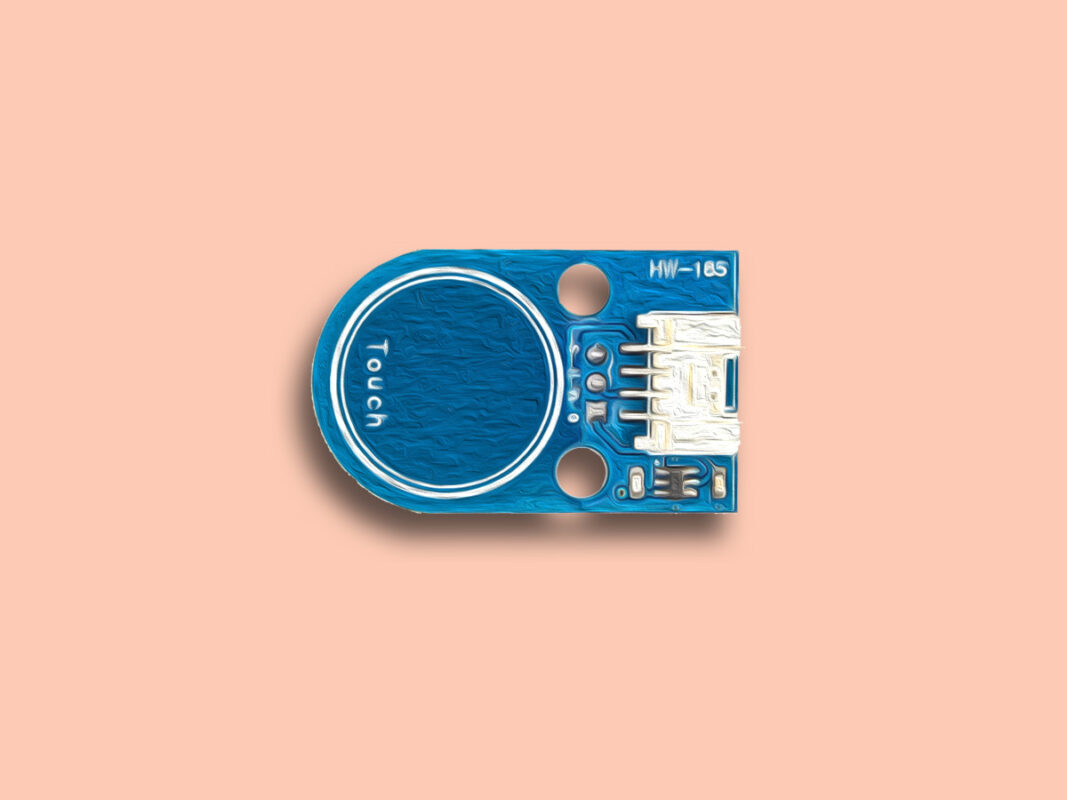
There is a wide variety of touch sensors. One of these sensors is double-sided touch sensor with 3-pin and 4-pin interface on each side. Pin N in 4-pin interface is not used.
Note
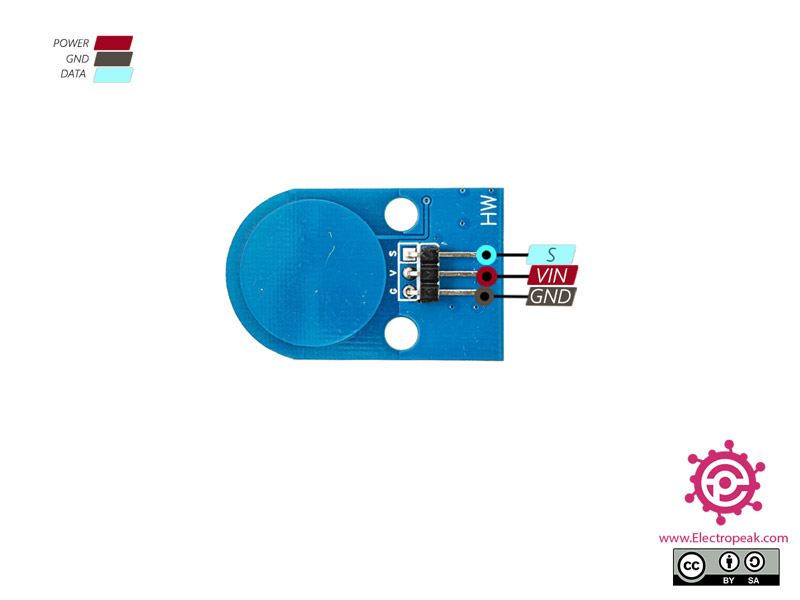
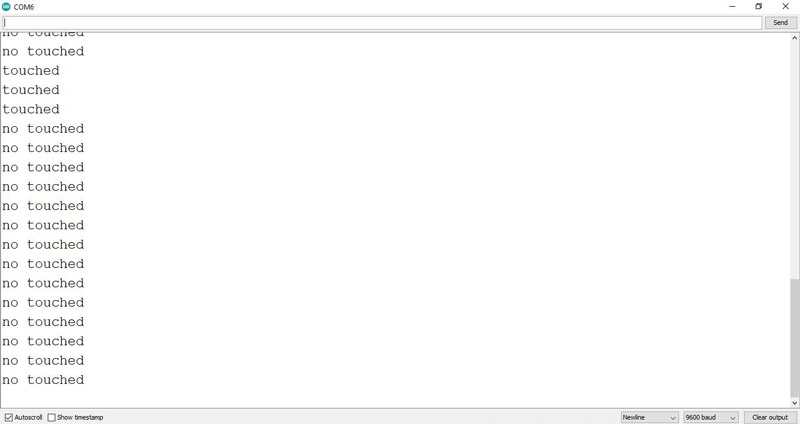
Pin S is always HIGH and changes to LOW if the switch is touched. (If not touched, it will be HIGH again.)
Double-sided Touch Sensor Pinout
This Module has 3 main pins:
VCC: Module power supply – 3.3/ 5 V
GND: Ground
S: Sensor output (5V)
N: Not used
You can see the pinout of this module on the first side in the image below.
You can see the pinout of this module on the other side in the image below.
Required Materials
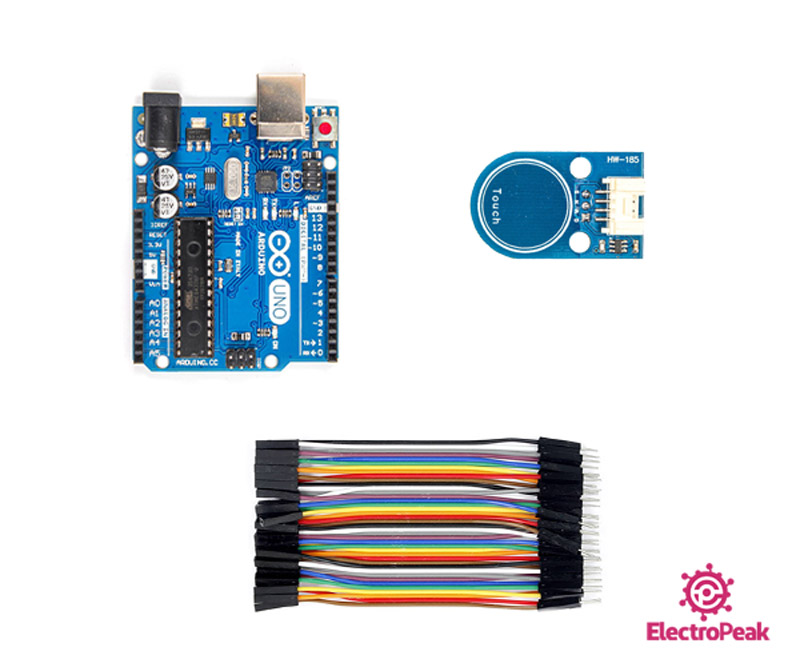
Hardware Components
Arduino UNO R3
×
1
Touch Switch Module Double-sided Sensor
×
1
Male to Female jumper wire
×
1
Software Apps
Arduino IDE
Interfacing Double-sided Touch Sensor with Arduino
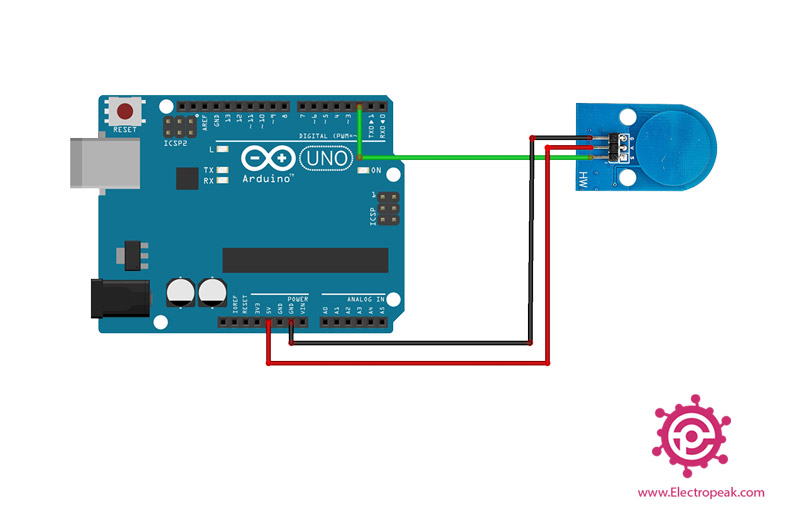
Step 1: Circuit
The following circuit shows how you should connect Arduino to this sensor. Connect wires accordingly.
Step 2: Code
Upload the following code to Arduino.
/*
Double-Sided-Touch-Sensor
made on 18 oct 2020
by Amir Mohammad Shojaee @ Electropeak