Contents

Interfacing E18-D80NK Infrared Obstacle Avoidance Sensor with Arduino

E18-D80NK Infrared Obstacle Avoidance Sensor Features

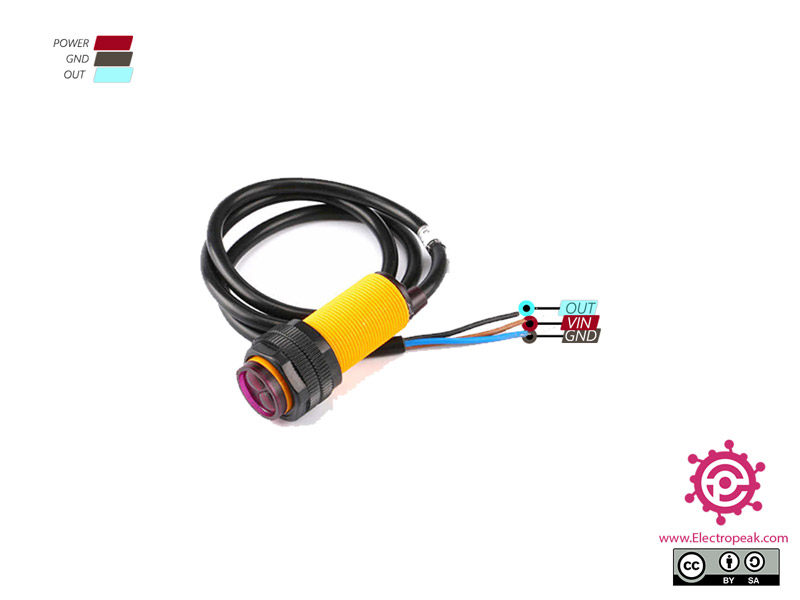
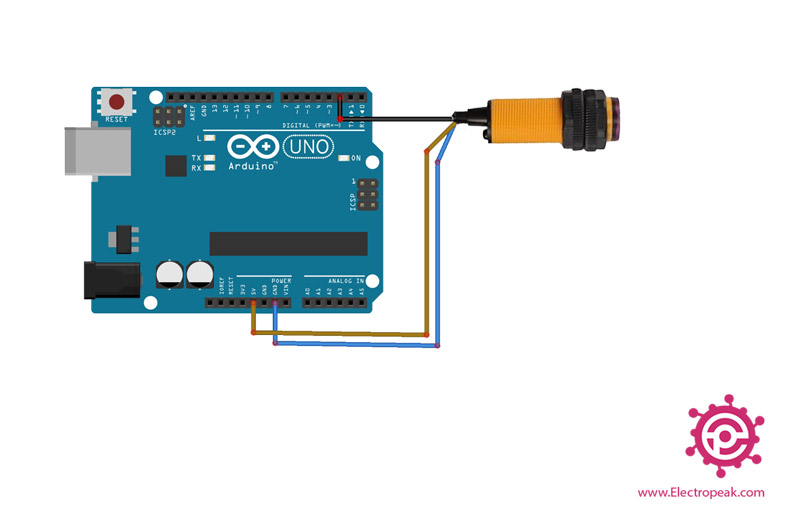
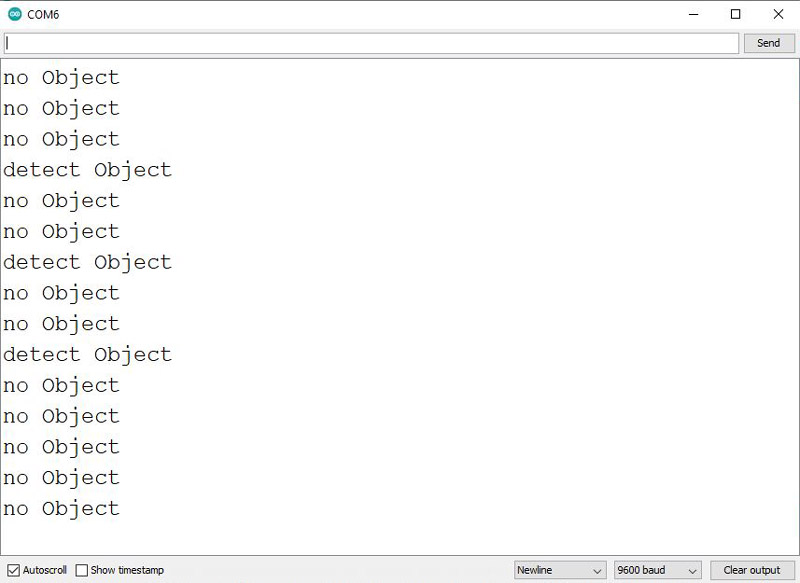
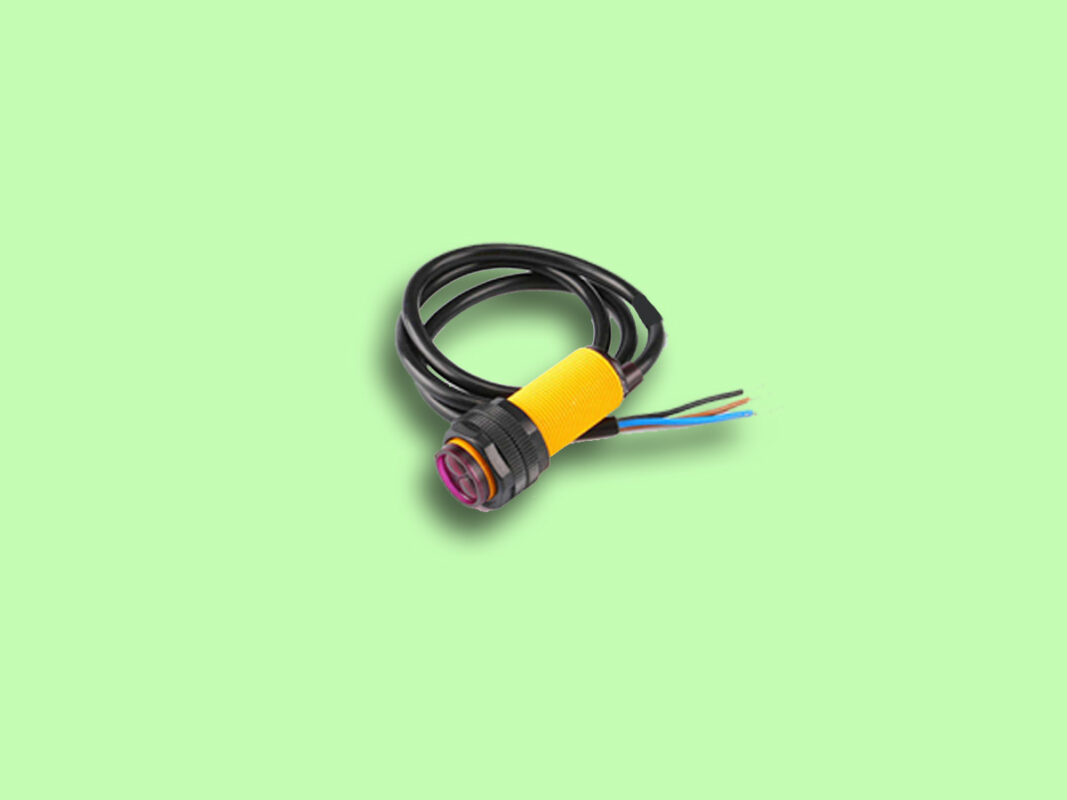
The E18-D80NK sensor is used to detect obstacles and objects. This sensor works based on transmitting infrared rays. First, the transmitter sends the rays in a direct path. This ray hits the obstacle and returns to the receiver. There is a potentiometer on this module that can be adjusted to change this detection distance from 3 to 80cm. In fact, with this sensor, the obstacle can be detected, but the distance cannot be calculated directly. There is also an LED on this sensor that turns off by detecting an obstacle. When there is an obstacle, the sensor output is HIGH, otherwise it is LOW.

This sensor is used in robotics, parking sensor, RPM counting, etc.

Note

If you turn the potentiometer clockwise, the detection distance will increase and vice versa.

E18-D80NK Infrared Obstacle Avoidance Sensor Pinout

This Module has 3 pins:

  • VCC: Module power supply – 5V (Brown)
  • GND: Ground
  • OUT: Digital output (Blue)

You can see the pinout of this module in the image below.

Required Materials

Hardware Components

Arduino UNO R3 × 1
E18-D80NK Infrared Obstacle Avoidance Sensor × 1

Software Apps

Arduino IDE

Interfacing E18-D80NK Infrared Obstacle Avoidance Sensor with Arduino

Step 1: Circuit

The following circuit shows how you should connect Arduino to E18-D80NK module. Connect wires accordingly.

Step 2: Code

Upload the following code to your Arduino.

/*
  E18-D80NK-Infrared-Switch 
  made on 24 oct 2020
  by Amir Mohammad Shojaee @ Electropeak
  
Home
*/ onst int Pin=2; void setup() { pinMode(Pin, INPUT); Serial.begin(9600); } void loop() { int sensorValue = digitalRead(Pin); if(sensorValue==HIGH){ Serial.println("detect Object"); delay(1000); } else{ Serial.println("no Object"); delay(1000); } }

First, we read the sensor output every second. If it is HIGH, the obstacle is detected and if it is LOW, there is no obstacle.

The Serial Monitor output is as follows. We put an obstacle in front of the sensor three times to measure its performance.

Liked What You See?​
Get Updates And Learn From The Best​

Comments (2)

  • Joel Maiato Reply

    Thank you so much , you don’t realise how helpfull this was

    April 28, 2022 at 9:44 pm
    • Mehran Maleki Reply

      You’re so welcome! So glad it was helpful for you.

      April 30, 2022 at 3:23 pm

Leave a Reply

Your email address will not be published. Required fields are marked *