Contents

Interfacing DS18B20 Temperature Module with Arduino

DS18B20 Temperature Module Features

DS18B20 module is a temperature sensor that can measure temperature in the range of -55°C to + 125°C with an accuracy of 0.5 ° C. The output accuracy of this sensor is adjustable from 9 to 12 bits which is set to 12 bits by default.
The communication protocol of this sensor is one-wire, and to measure the ambient temperature you only need to connect one wire to Arduino.

Using this module is quite similar to the DS18B20 Sensor since it based on that component.

Note
One of the biggest advantages of this sensor is its one-wire communication protocol. In this protocol, each sensor has a unique 64-bit code. With this feature, you will be able to connect several DS18B20 sensors to a common Arduino pin (or any other processor).
You can download the DS18B20 module datasheet here.

DS18B20 Temperature Sensor Pinout

This sensor has 3 pins:
•  VCC: Module power supply – 5 V
•  GND: Ground
•  DQ: Sensor Output
You can see pinout of this sensor in the following image.

Required Material

Hardware Components

Arduino UNO R3 × 1
DS18B20 Temperature Module × 1
Male to Female Jumper Wire × 1

Software Apps

Arduino IDE

Interfacing DS18B20 Temperature Sensor with Arduino

Step 1: Circuit

Connect the sensor to Arduino according to the following image. You can connect the sensor output to any of the Arduino ADC pins.

Step 2: Installing Library

Go to Library manager and install the DS18B20 temperature sensor library.
Note

If you need more help with installing a library on Arduino, read this tutorial: How to Install an Arduino Library

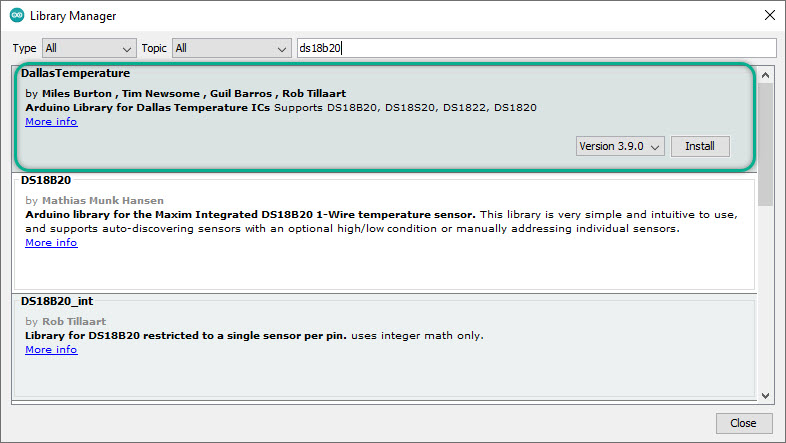
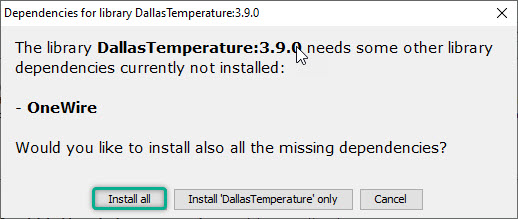
In addition to the sensor library, you also need the OneWire library. If you are using newer versions of the Arduino IDE software, after installing the DS18B20 library, installing the OneWire library will be suggested to you automatically, otherwise install this library yourself.

Step 3: Code

Upload the following code to Arduino. This code displays temperature in the serial monitor.
/*
  DS18B20 Temperature Sensor
  modified on 08 Sep 2020
  by Mohammad Reza Akbari @ Electropeak
  
Home
*/ #include <OneWire.h> #include <DallasTemperature.h> // Connect Sensor output to pin2 #define ONE_WIRE_BUS 2 OneWire oneWire(ONE_WIRE_BUS); DallasTemperature sensors(&oneWire); /* The setup function. We only start the sensors here */ void setup(void) { Serial.begin(9600); sensors.begin(); } void loop(void) { sensors.requestTemperatures(); // Send the command to get temperatures float temp = sensors.getTempCByIndex(0); // Check if reading was successful if (temp != DEVICE_DISCONNECTED_C) { Serial.print("Temperature of Sensor 0 is: "); Serial.println(temp); } else { Serial.println("Error to reading data"); } }
The code output should look like this:
Liked What You See?​
Get Updates And Learn From The Best​

Leave a Reply

Your email address will not be published. Required fields are marked *