Contents

Interfacing Character LCD Modules 0802 / 1602 / 2002 / 2004 with Arduino

Character LCD Display Features

Character display module is an LCD module with a certain number of rows and columns, and has a green or blue backlight and white character. These displays can usually be used to display text, characters and numbers. The contrast can be adjusted by connecting a potentiometer to pin 3. Pin 15 and 16 are for backlight. You can use 6 pins E, RS, DB4, DB5, DB6, DB7 to interface the display with Arduino.

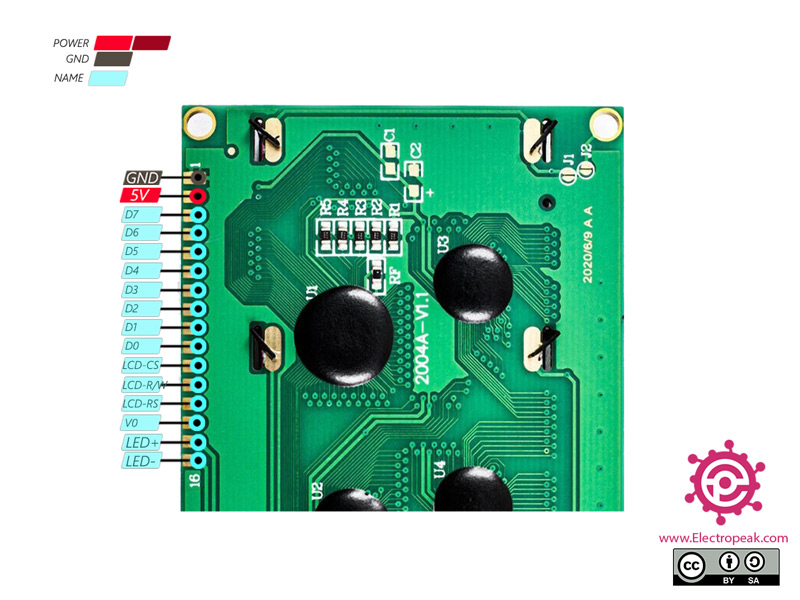
You can download the datasheet of 2004 Character LCD Display here.  

You can download the datasheet of 1602 Character LCD Display here.  

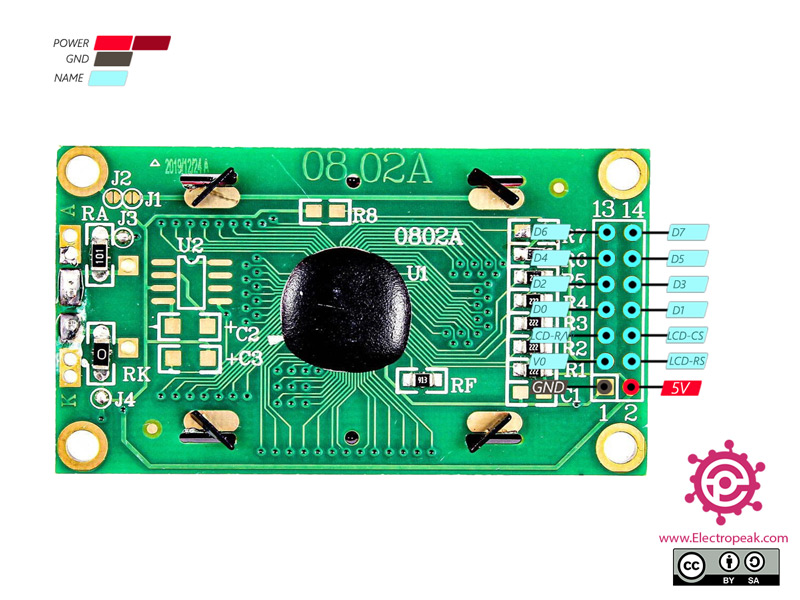
You can download the datasheet of 0802 Character LCD Display here.  

You can download the datasheet of 2002 Character LCD Display here.  

Character LCD Display Pinout

This module has 16 pins:

  • 5V: Module power supply – 5V
  • GND: Ground
  • V0: Adjusting display contrast
  • LED+: Backlight power supply +
  • LED-: Backlight power supply –
  • LCD_CS: LCD select
  • LCD_RS: Data type select
  • CD_R/W: Write Data
  • D_D0: Data Line 0
  • D_D1: Data Line 1
  • D_D2: Data Line 2
  • D_D3: Data Line 3
  • D_D4: Data Line 4
  • D_D5: Data Line 5
  • D_D6: Data Line 6
  • D_D7: Data Line 7

You can see the pinout of this module in the image below.

8×2 character displays have 14 pins as follows.

Required Material

Hardware component

Note

In order to interface character display with Arduino, prepare only one of the following LCDs.

Arduino UNO R3 × 1
Character LCD 20x4 Blue × 1
Character LCD 20x4 Green × 1
Character LCD 16x2 Blue × 1
Character LCD 16x2 Green × 1
Character LCD 8x2 Blue × 1
Character LCD 8x2 Green × 1
Character LCD 20x2 Blue × 1
Female to Female jumper wire × 1
potentiometer 10k × 1

Software Apps

Arduino IDE

Interfacing Character LCD Display with Arduino

Step 1: Circuit

The following circuit shows how you should connect Arduino to this module. Connect wires accordingly.

Note

The potentiometer which is in circuit is used to adjust the contrast of the display brightness.

Step 2: Library

Install the following Library on your Arduino.

https://github.com/arduino-libraries/LiquidCrystal

Tip

If you need more help with installing a library on Arduino, read this tutorial: How to Install an Arduino Library

Note

Change the following line according to your LCD type.

  Lcd.begin(20,4);  //(Column,Row)

Step 3: Code

Download the desire file according to LCD type and upload it to your Arduino.

CodeArduino_0802

CodeArduino_1602

CodeArduino_2002

CodeArduino_2004


This code is for testing the display and shows numbers in rows.

Liked What You See?​
Get Updates And Learn From The Best​

Leave a Reply

Your email address will not be published. Required fields are marked *