Contents

Interfacing AD8232 Heart Rate Monitor – ECG Sensor Module with Arduino

AD8232 ECG Module Features

The AD8232 sensor can provide you to monitor electrocardiographic or ECG signals. Analyzing these signals prepares useful information about heart function, such as heartbeat rate, heart rhythm, and other information regarding the heart’s condition.

This module can be connected to a microcontroller on one side and to specific parts of body on the other side using 3 special electrodes. The signal received through the electrodes can be seen in the analog output of the sensor.

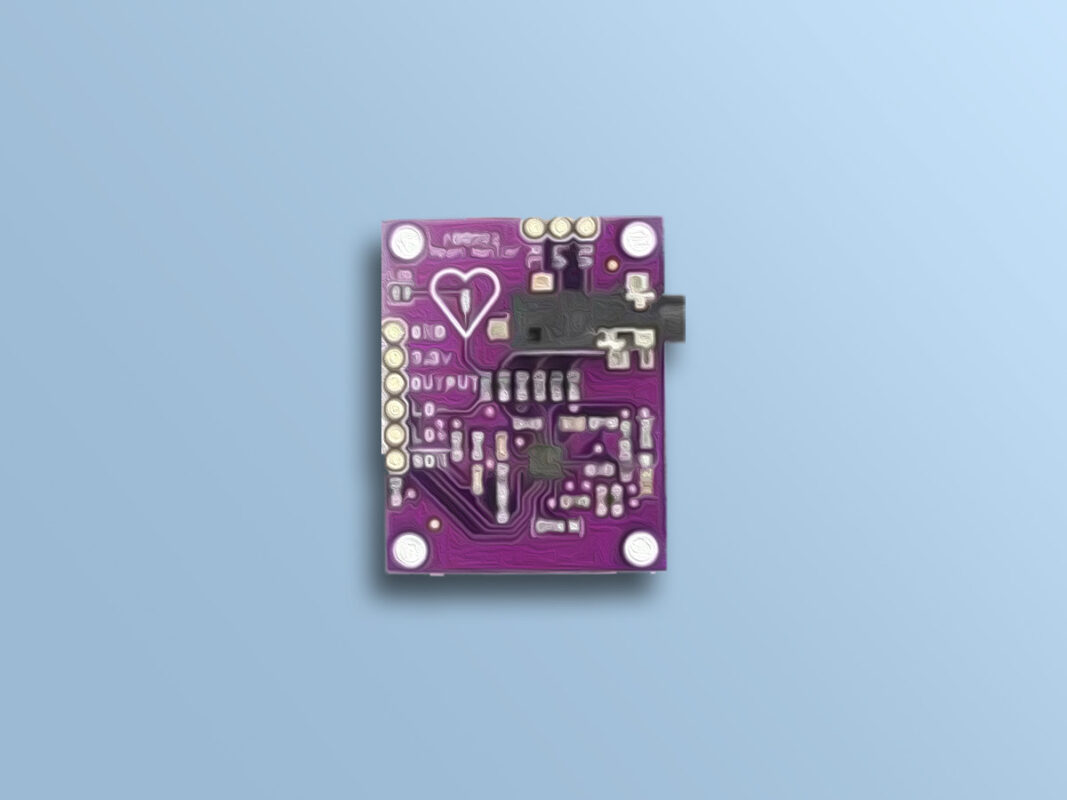
Download the datasheet of AD8232 sensor here.

Heart Rate Monitor

The ECG can be analyzed by studying components of the waveform. These components indicate the electrical activity of the heart. The following figure shows the waveform of a heart signal:

the P wave, which represents the depolarization of the atria; the QRS complex, which represents the depolarization of the ventricles; and the T wave, which represents the repolarization of the ventricles.

AD8232 ECG Module Pinout

This module has 6 pins:

  • 3v:  Power Supply 3.3v
  • GND: Ground
  • OUTPUT: Analog Output Signal
  • LO-: Leads-off Detect –
  • LO+: Leads-off Detect +
  • SDN: Shutdown

You can see the pinout of this module here.

Required Materials

Hardware Components

Arduino UNO R3 × 1
AD8232 ECG Electrocardiogram Heart Pulse Measuring Sensor Module × 1
ECG Heart Rate, EKG Muscle, EMG Sensor Electrode Probe × 1
ECG, EMG Accessories Electrode Sheet × 1

Software Apps

Arduino IDE

Interfacing AD8232 ECG Module with Arduino

Step 1: Circuit

The following circuit shows how you should connect Arduino to AD8232 module. Connect wires accordingly.

How to Connect Electrodes

To get the right waveform, place the electrodes on the body using special pads and following color order, as shown below:

Step 3: Code

Upload the following code to your Arduino.

  /*
  AD8232-ECG-Sensor-Module
  modified on 09 Feb 2021
  by Amir Mohammad Shojaee @ Electropeak
  
Home
*/ void setup() { // initialize the serial communication: Serial.begin(9600); pinMode(10, INPUT); // Setup for leads off detection LO + pinMode(11, INPUT); // Setup for leads off detection LO - } void loop() { if((digitalRead(10) == 1)||(digitalRead(11) == 1)){ Serial.println('!'); } else{ // send the value of analog input 0: Serial.println(analogRead(A0)); } //Wait for a bit to keep serial data from saturating delay(20); }

We display the output signal through an analog input in the Serial plotter. The longer the delay time, the slower the system works, but instead you can see the waveform in more detail.

The image below is the waveform of output signal with 20ms delay:

Liked What You See?​
Get Updates And Learn From The Best​

Leave a Reply

Your email address will not be published. Required fields are marked *