Interfacing KY-008 Laser Transmitter Module with Arduino
Written by
Mehran Maleki
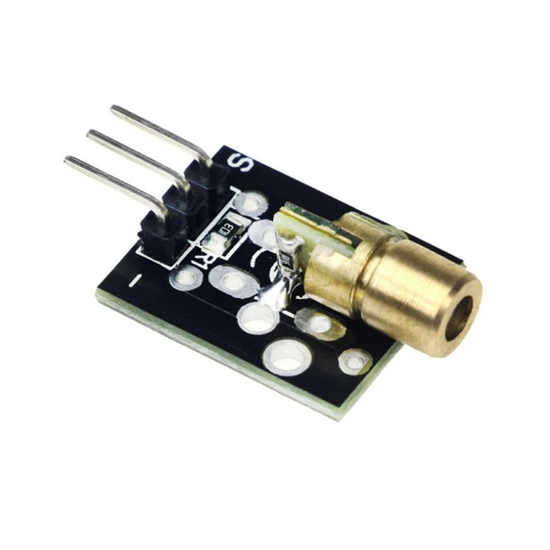
KY-008 Laser Transmitter Module Features
This Laser module emits a small intense focused beam of visible red light. The operating voltage is 3-5 V and the required current is 40mA.
Note
Since the required current is 40 mA and the Arduino pins can supply this current, this module can be connected directly to Arduino. If need be more than 40mA, direct connection to Arduino will damage the Arduino. In that case, you need to use a laser driver to connect the laser module to Arduino.
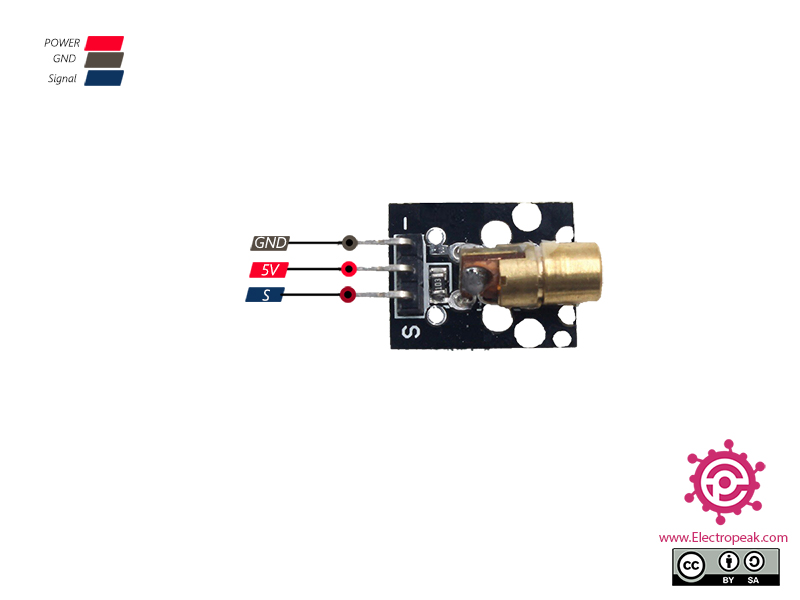
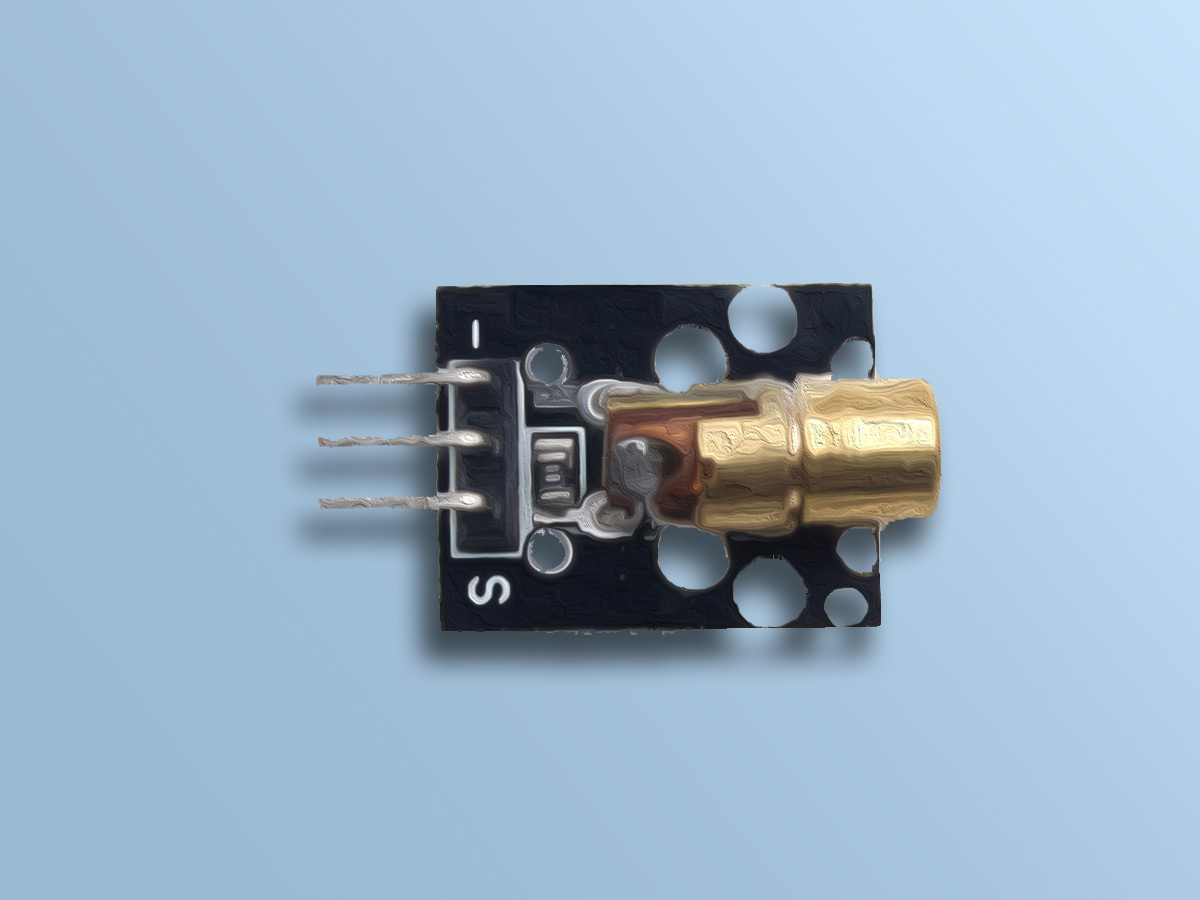
KY-008 Laser Transmitter Module Pinout
This module has 3 pins:
VCC: Module power supply – 5 V
GND: Ground
S: Signal pin (to activate and disactivate laser)
You can see the pinout of this module in the image below.
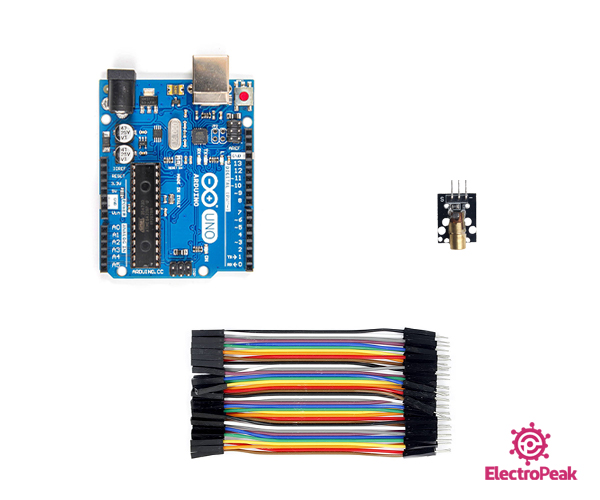
Required Materials
Hardware Components
Arduino UNO R3
×
1
KY-008 Laser Transmitter Module
×
1
Male to Female jumper wire
×
1
Software Apps
Arduino IDE
Interfacing KY-008 Laser Transmitter Module with Arduino
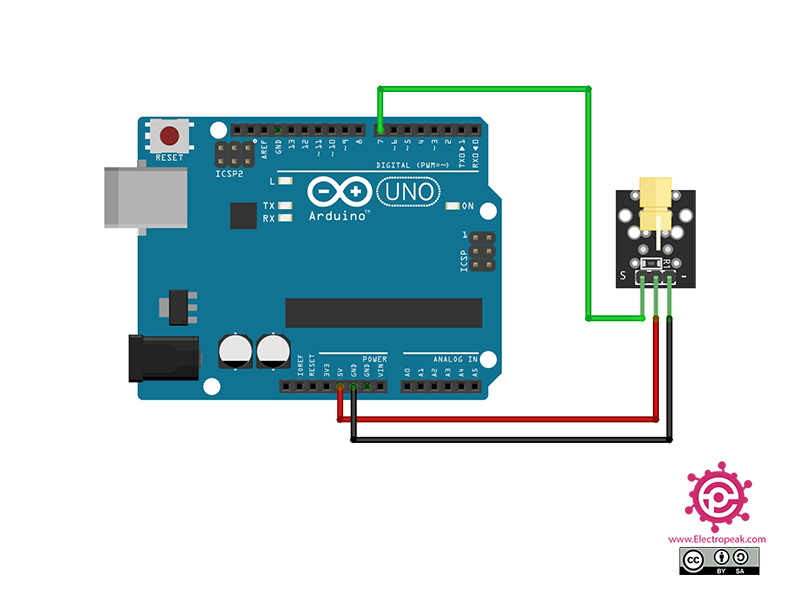
Step 1: Circuit
The following circuit shows how you should connect Arduino to this module. Connect wires accordingly.
Step 2: Code
Upload the following code to Arduino.
/*
Made on 18 Nov 2020
By Mehran Maleki @ Electropeak
In this code, we first set the Arduino pin number 7 as the output, because we are going to control the laser with it. Then we turn the laser on and off every second.
Uploading above code, the laser connected to the Arduino will turn on and off every second.


Comment (1)
[…] (2021). Interfacing KY-008 Laser Transmitter Module with Arduino. [online] Available at: https://electropeak.com/learn/interfacing-5v-650nm-ky-008-laser-transmitter-module-with-arduino/ [Accessed 16 Mar. […]