
Introduction
Thinking about diving into the world of audio playing in electronics? To get you started, we recommend the HSC001 module. It’s a 24-bit audio player with a bunch of great features: size, price, etc. You can use it for all sorts of things: playing music in elevators, generating sounds for various devices, and so on. In this tutorial, we’ll learn how to set up and play audio files using the HSC001 module.
What You Will Learn
- How to play audio files using the HSC001 module
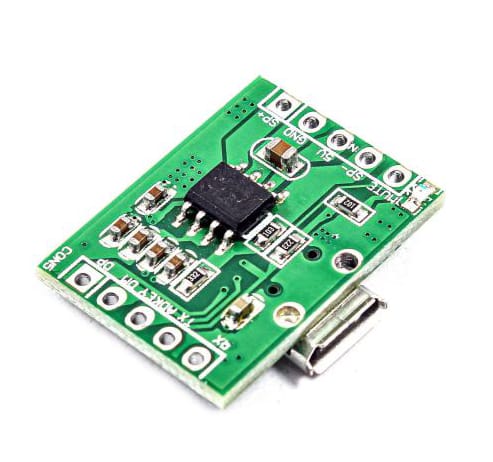
HSC001 Module in a Nutshell
HSC001 is a playback chip that can handle MP3 and WAV files. It also supports USB/SPI FLASH and FAT16/FAT32 file systems. You can control it via the serial port. Some of its features include:
- Playing music with simple commands in the serial port
- User friendly
- Playing songs from the SPI FLASH
- Downloading directly from USB to SPI FLASH
- Reliable
This chip is a fully customized product, providing an affordable solution for playing audio files.
HSC001 Specifications
1. Sample Rate (KHz): 8/11.025/12/16/22.05/24/32/44.1/48.
2. 24-bit DAC output, 90 dB dynamic range, with a minimum signal-to-noise ratio of 85 dB.
3. Full support for FAT16, FAT32, and the SPI Flash within the range of 512KB to 128MB.
4. Multiple control modes, serial port mode, and AD KEY control mode.
5. Audio data is organized by folders, supporting up to 255 folders, each capable of holding 1000 songs.
6. 30-level volume adjustment, and 5 EQ modes.
HSC001 Audio Player Applications
1. Car navigation
2. Audio announcements for road tolls and inspections
3. Safety announcements at railway and bus stations
4. Audio announcements in commercial, communication, and financial halls
5. Audio instructions for vehicle entry and exit confirmation
HSC001 Module Pinout
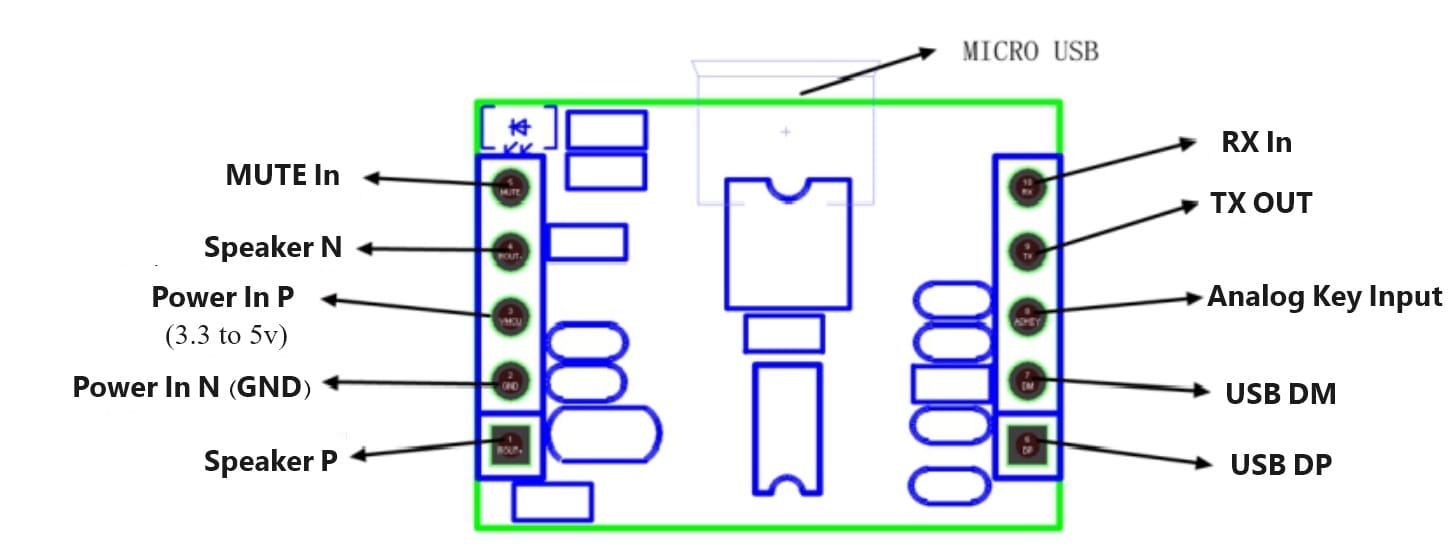
- SP+: Positive pin of amplifier (a speaker up to 3w)
- GND: Ground
- VDD: Module power supply (3.3V to 5.4V)
- SP-: Negative pin of amplifier (a speaker up to 3w)
- MUTE: Muting the output
- DP: USB-DP pin
- DM: USB-DM pin
- ADK: ADK buttons
- TX: Serial UART data output – TTL level (3.3V)
- RX: Serial UART data input – TTL level (3.3V)
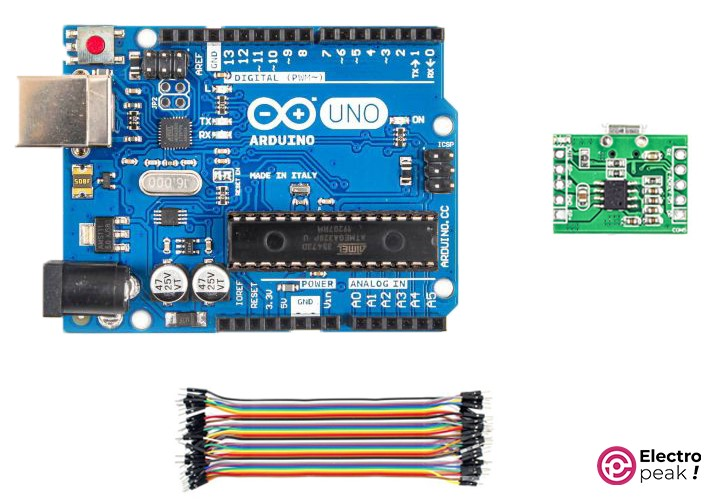
Required Materials
Playing Audio Files with the HSC001 Module And Arduino
Now let’s play the audio files stored in the flash memory, which is connected to the module. To do that, you’ll need to send related commands to the module through the serial port.
The protocol and related commands can be found in the module datasheet on the product page.
Each command sent to the module should have the following format:
- Start Bit (0x7E) + Data Length (Len + CMD + para1 + para2) + CMD + para1 + para2 + End Bit (0xEF)
- Len: The number of Len and subsequent bits, except for the End Bit
- CMD: The command word such as play, pause, volume, etc.
- Para1: The first parameter of CMD
- Para2: The second parameter of CMD
For example, the command below plays the first file stored in the flash memory:
7E04410001EF
In this command, the data length is 4, represented as [04 41 00 01].
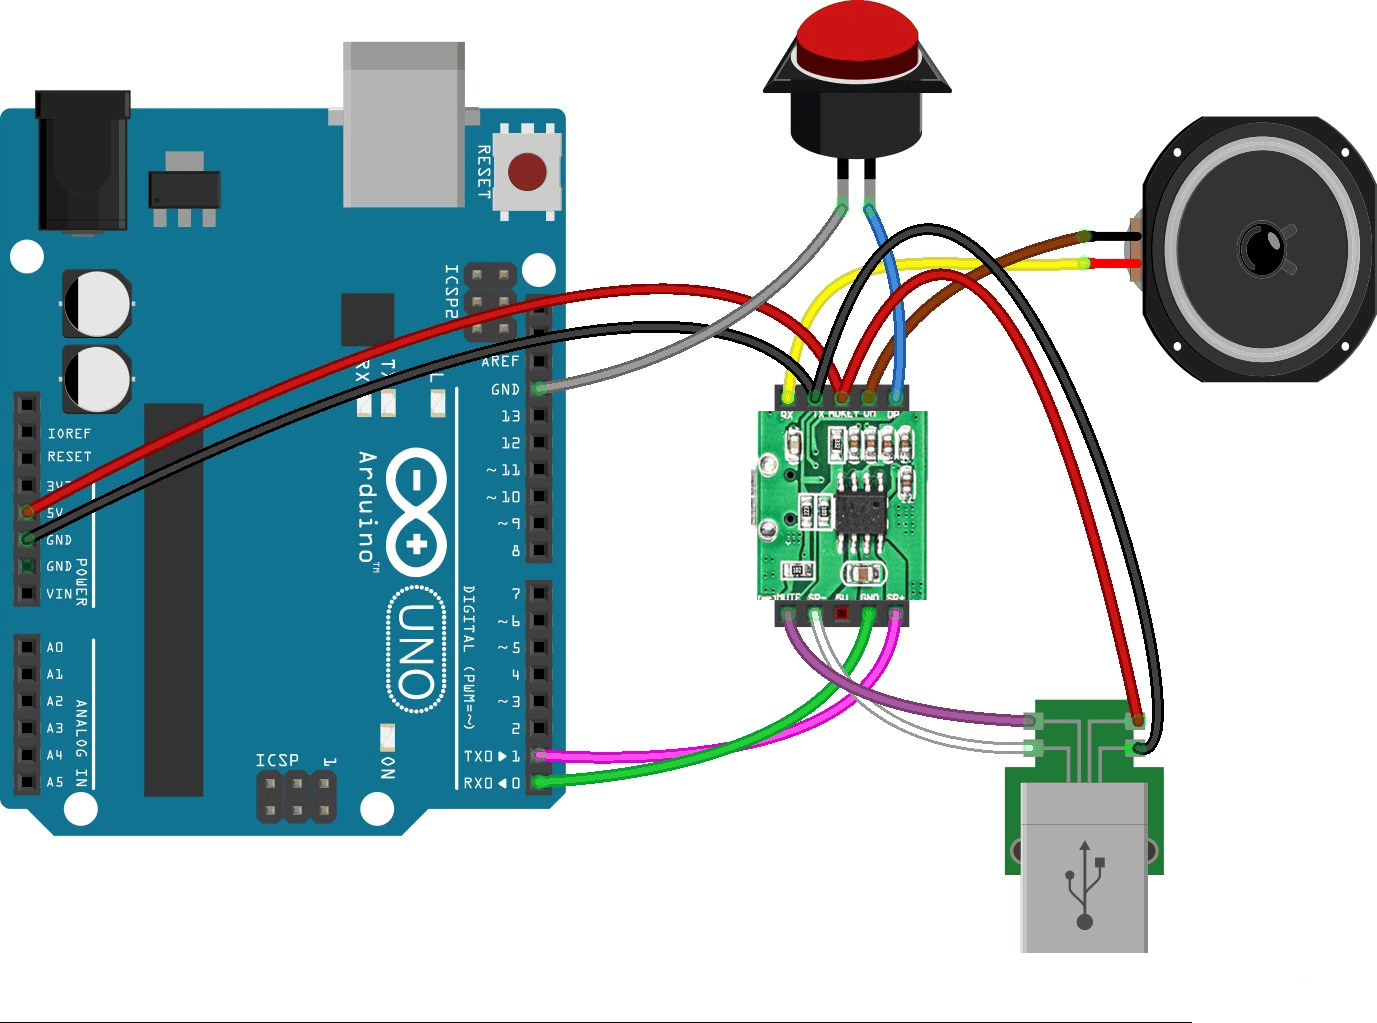
Wiring
Wire up the components as shown below. Then connect the flash memory that contains audio files supported by the module named 0001, 0002… to the module using an OTG cable.
Code
Copy the code below into the Arduino IDE and upload it. This code will play each audio file stored in the memory for 10 seconds and then move on to the next file.
					byte currentSound = 0x01;
void setup() {
  // start serial port at 9600 bps:
  Serial.begin(9600);
  //while (!Serial) {
  //  ; // wait for serial port to connect. Needed for native USB port only
  //}

}

void loop() {
    Serial.write(0x7E);
    Serial.write(0x04);
    Serial.write(0x41);
    Serial.write(0x00);
    Serial.write(currentSound);
    Serial.write(0xEF);
    delay(10000);
    currentSound = currentSound + 0x01;
    if(currentSound > 10)
      currentSound = 1;
}
Code Cracking
• Define a variable to store the currently playing file number
byte currentSound = 0x01;
• Enable serial communication at 9600 bps
Serial.begin(9600);
• Select the file for playback
In these commands, the start bit (0x7E), data length (0x04), file selection request (0x41), thousands and hundreds place of the file number (0x00), tens and units place of the file number (currentSound), and end bit (0xEF) are sent to the module respectively. If the module receives and executes the command successfully, it will respond with “OK” in the serial port.
					    Serial.write(0x7E);
    Serial.write(0x04);
    Serial.write(0x41);
    Serial.write(0x00);
    Serial.write(currentSound);
    Serial.write(0xEF);
• Pause for 10 seconds
delay(10000);
• Add 1 to the file number
					currentSound = currentSound + 0x01;
if(currentSound > 10)
  currentSound = 1;
What’s Next?
Now that you’ve become familiar with the HSC001 audio module and how to control it via the serial port, you can play your desired audio files by sending specific commands.
The module datasheet contains a wide range of commands, giving you full control over a professional audio player.
Another way to control this module is by using the ADK pin. Connect this pin to different buttons according to the schematic diagram below. With just a few push buttons, you won’t even need to send commands through the serial port. You’ll have a standalone audio player at your fingertips.

To level up your experience with this module, you can use other components like character LCDs or TFT screens to create an attractive user interface.
