
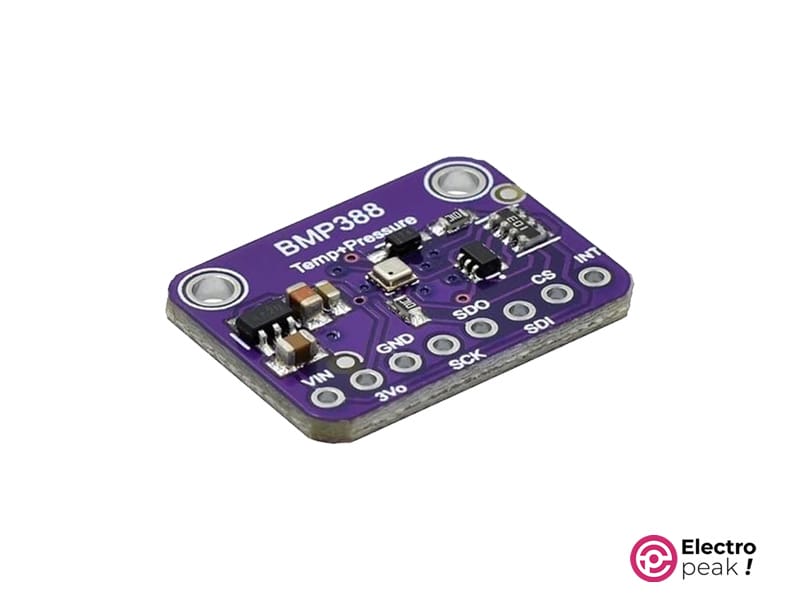
BMP388 Digital Air Pressure Sensor Features
The BMP388 Digital Air Pressure Sensor Module is a versatile device that accurately measures atmospheric pressure, providing valuable data for various applications. Its advanced technology ensures precise readings, making it ideal for weather monitoring systems, altimeters, and drones. This sensor module offers high resolution and low power consumption, making it efficient and reliable for long-term use. With its compact design and user-friendly interface, the BMP388 is easy to integrate into projects, even for beginners. Its compatibility with different microcontrollers further enhances its versatility. Whether you’re tracking weather patterns or navigating through the sky, the BMP388 delivers accurate pressure measurements, making it a valuable tool for a wide range of projects.
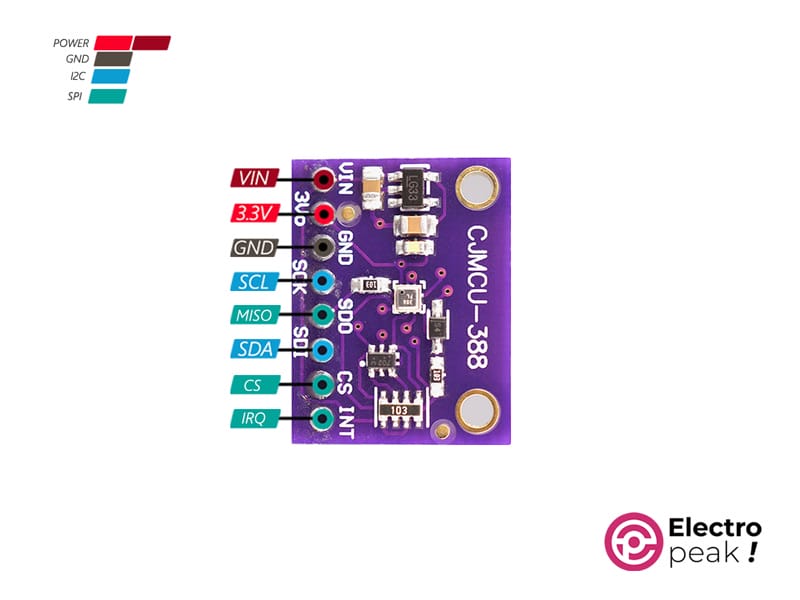
BMP388 Digital Air Pressure Sensor Pinout
The BMP388 Digital Air Pressure Sensor has 8 pins:
- VIN: Power supply input for the BMP388 module (5V).
- 3V: Alternate power supply input compatible with 3.3V systems.
- GND: Ground reference, ensuring a stable electrical connection.
- MOSI (SDA): Shared pin for both I2C (Serial Data Line) and SPI (Master Out Slave In).
- MISO: pin for SPI (Master In Slave Out).
- CS: Chip Select input for enabling communication with the BMP388.
- SCK (SCL): Serial Clock Line for synchronizing data transfer.
- IRQ/INT: Interrupt output for signaling specific events.
You can see the pinout of this module in the image below.
Required Material
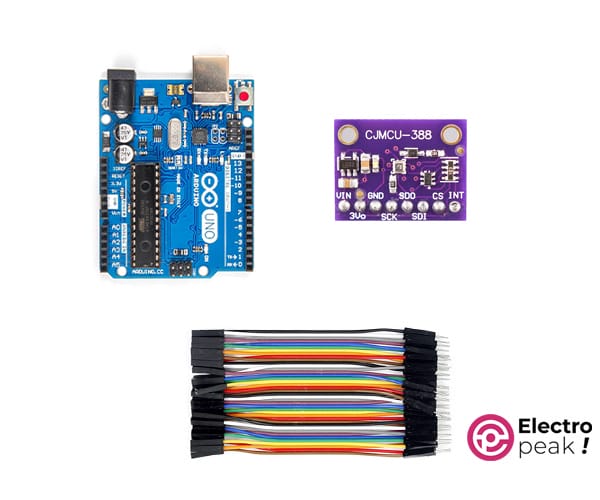
Hardware Components
Interfacing BMP388 Digital Air Pressure Sensor with Arduino
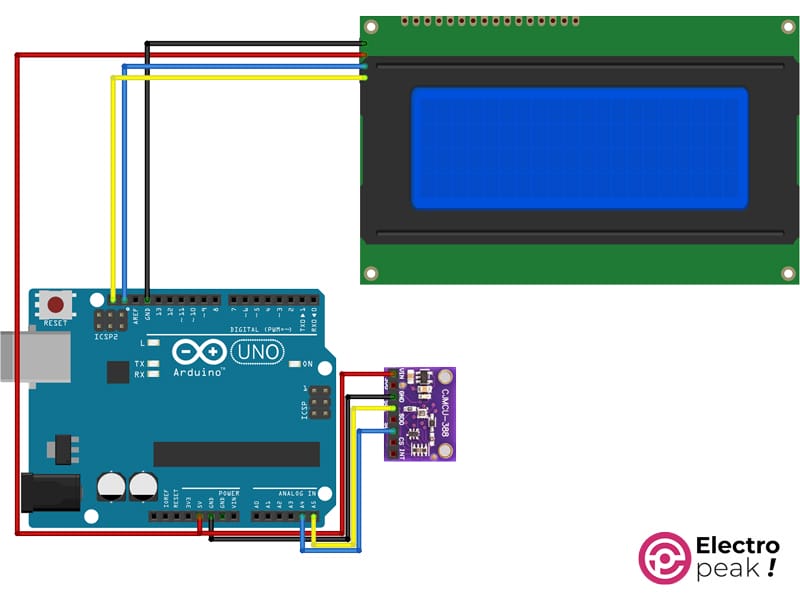
Step 1: Circuit
The following circuit shows how you should connect Arduino to BMP388 Digital Air Pressure Sensor. Connect wires accordingly.
You don’t have to connect the display if you don’t need it.
Step 2: Installing Library
Step 3: Code
To interface the board without a display, upload the following code to your Arduino.
/*
Create on January 24, 2024
Create by MohammedDamirchi base of https://github.com/adafruit/Adafruit_BMP3XX
<blockquote class="wp-embedded-content" data-secret="boE0N0uYG8"><a href="https://electropeak.com/learn/">Home</a></blockquote><iframe class="wp-embedded-content" sandbox="allow-scripts" security="restricted" style="position: absolute; clip: rect(1px, 1px, 1px, 1px);" title="“Home” — Electropeak" src="https://electropeak.com/learn/embed/#?secret=H8i9g5Wohd#?secret=boE0N0uYG8" data-secret="boE0N0uYG8" width="600" height="338" frameborder="0" marginwidth="0" marginheight="0" scrolling="no"></iframe>
*/
#include <Arduino.h>
#include <Wire.h>
#include <SPI.h>
#include <Adafruit_Sensor.h>
#include "Adafruit_BMP3XX.h"
#define SEALEVELPRESSURE_HPA (1013.25)
Adafruit_BMP3XX bmp;
void setup()
{
Serial.begin(115200);
while (!Serial)
;
Serial.println("Adafruit BMP388 / BMP390 test");
if (!bmp.begin_I2C())
{ // hardware I2C mode, can pass in address & alt Wire
// if (! bmp.begin_SPI(BMP_CS)) { // hardware SPI mode
// if (! bmp.begin_SPI(BMP_CS, BMP_SCK, BMP_MISO, BMP_MOSI)) { // software SPI mode
Serial.println("Could not find a valid BMP3 sensor, check wiring!");
while (1)
;
} // Set up oversampling and filter initialization
bmp.setTemperatureOversampling(BMP3_OVERSAMPLING_8X);
bmp.setPressureOversampling(BMP3_OVERSAMPLING_4X);
bmp.setIIRFilterCoeff(BMP3_IIR_FILTER_COEFF_3);
bmp.setOutputDataRate(BMP3_ODR_50_HZ);
}
void loop()
{
if (!bmp.performReading())
{
Serial.println("Failed to perform reading :(");
return;
}
Serial.print("Temperature = ");
Serial.print(bmp.temperature);
Serial.println(" *C");
Serial.print("Pressure = ");
Serial.print(bmp.pressure / 100.0);
Serial.println(" hPa");
Serial.print("Approx. Altitude = ");
Serial.print(bmp.readAltitude(SEALEVELPRESSURE_HPA));
Serial.println(" m");
Serial.println();
delay(200);
}
After uploading the code, open the serial monitor to view the received data.
If you need help running the display, you can refer to the following link.
To interface the board with a display, upload the following code to your Arduino.
Also, download the myLCD file and put it into your project folder.

/*
Create on January 24, 2024
Create by MohammedDamirchi base of https://github.com/adafruit/Adafruit_BMP3XX
<blockquote class="wp-embedded-content" data-secret="boE0N0uYG8"><a href="https://electropeak.com/learn/">Home</a></blockquote><iframe class="wp-embedded-content" sandbox="allow-scripts" security="restricted" style="position: absolute; clip: rect(1px, 1px, 1px, 1px);" title="“Home” — Electropeak" src="https://electropeak.com/learn/embed/#?secret=H8i9g5Wohd#?secret=boE0N0uYG8" data-secret="boE0N0uYG8" width="600" height="338" frameborder="0" marginwidth="0" marginheight="0" scrolling="no"></iframe>
*/
#include <Arduino.h>
#include <Wire.h>
#include <SPI.h>
#include <Adafruit_Sensor.h>
#include "Adafruit_BMP3XX.h"
#include <myLCD.h>
#define SEALEVELPRESSURE_HPA (1013.25)
Adafruit_BMP3XX bmp;
void setup()
{
Serial.begin(115200);
beginLCD("Adafruit BMP388");
while (!Serial)
;
Serial.println("Adafruit BMP388 / BMP390 test");
if (!bmp.begin_I2C())
{ // hardware I2C mode, can pass in address & alt Wire
// if (! bmp.begin_SPI(BMP_CS)) { // hardware SPI mode
// if (! bmp.begin_SPI(BMP_CS, BMP_SCK, BMP_MISO, BMP_MOSI)) { // software SPI mode
Serial.println("Could not find a valid BMP3 sensor, check wiring!");
fail();
while (1)
;
} // Set up oversampling and filter initialization
bmp.setTemperatureOversampling(BMP3_OVERSAMPLING_8X);
bmp.setPressureOversampling(BMP3_OVERSAMPLING_4X);
bmp.setIIRFilterCoeff(BMP3_IIR_FILTER_COEFF_3);
bmp.setOutputDataRate(BMP3_ODR_50_HZ);
success();
printLCD("BMP388 Example", 0, true);
}
void loop()
{
if (!bmp.performReading())
{
Serial.println("Failed to perform reading :(");
return;
}
printLCD("Temp:" + (String)(bmp.temperature) + " *C", 1);
printLCD("Pres:" + (String)(bmp.pressure / 100.0) + " *C", 2);
printLCD("Alt :" + (String)(bmp.readAltitude(SEALEVELPRESSURE_HPA)) + " *C", 3);
Serial.print("Temperature = ");
Serial.print(bmp.temperature);
Serial.println(" *C");
Serial.print("Pressure = ");
Serial.print(bmp.pressure / 100.0);
Serial.println(" hPa");
Serial.print("Approx. Altitude = ");
Serial.print(bmp.readAltitude(SEALEVELPRESSURE_HPA));
Serial.println(" m");
Serial.println();
delay(200);
}
After uploading the code, you can view the sensor output on your display as shown in the video below.
