
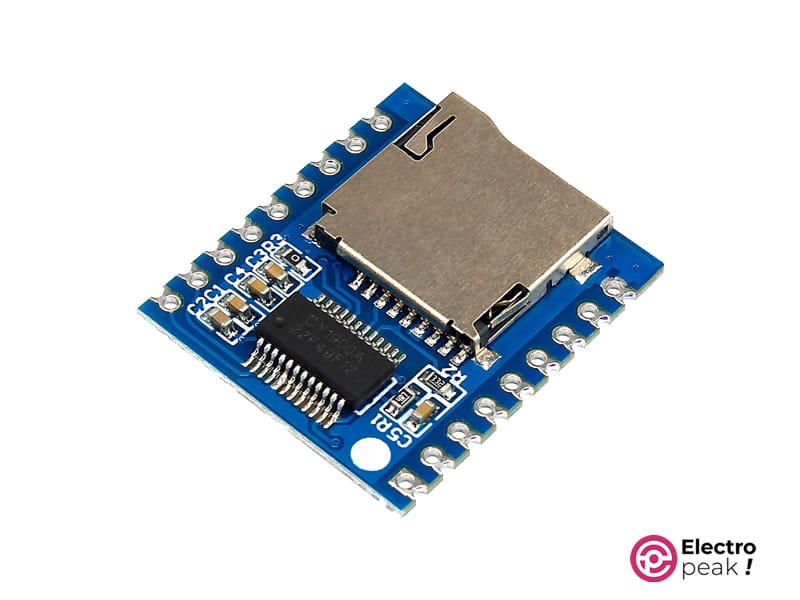
XY-V17B MP3 Playback Module Features
The XY-V17B SD/TF Card MP3 Playback Module stands out as a user-friendly and versatile solution for audio playback. Designed with simplicity in mind, this module is equipped with features that make it accessible for both beginners and enthusiasts alike. Its standout property lies in its compatibility with SD and TF cards, allowing users to effortlessly play MP3 files directly from these storage devices. With a straightforward interface, users can easily navigate through tracks and control playback. The module also supports a wide range of audio formats, providing flexibility for diverse music libraries. Its compact design and ease of integration make it suitable for various applications, from DIY projects to audio systems.
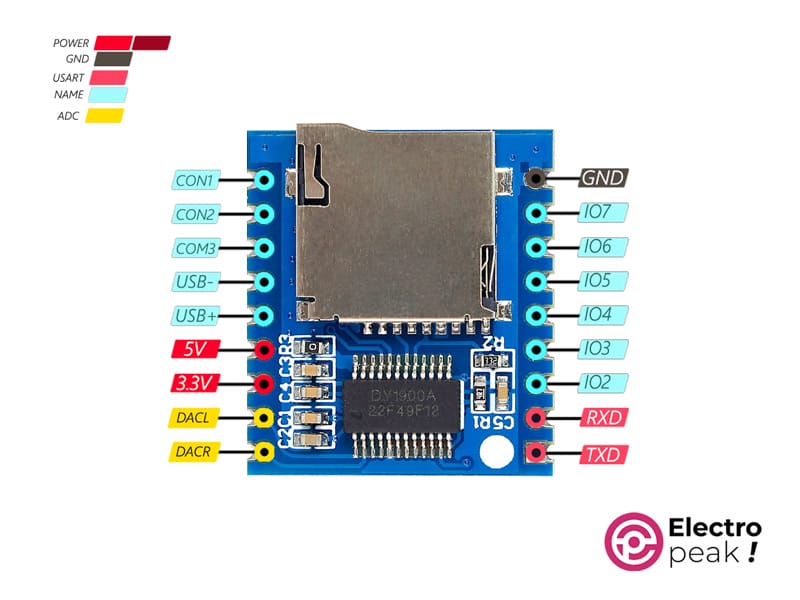
XY-V17B MP3 Playback Module Pinout
This module has 8 IO pins for addressing and 3 CON pins for interfacing the working mode, also have 2 USB pin to connect to PC.
Check the datasheet table to set the working modes. You can see pinout of this module in the following figure.
You can see the pinout of this module in the image below.
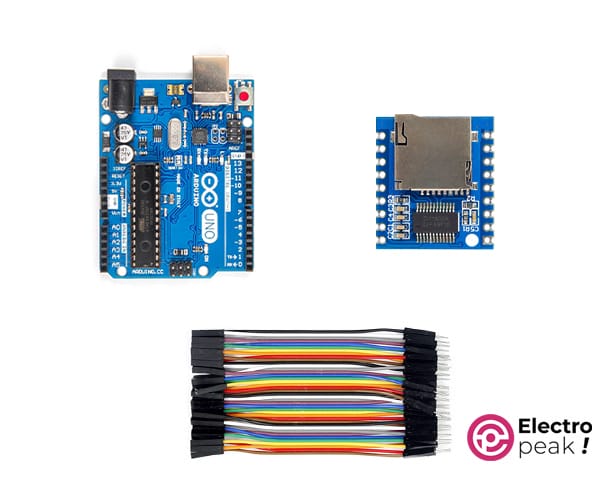
Required Material
Interfacing XY-V17B MP3 Playback Module with Arduino
Step 1: Circuit
Before getting started, it’s essential to upload your songs to the MicroSD Card.
The XY-V17B model is impressively versatile, offering seven distinct modes of operation. In this article, we delve into the detailed exploration of two prominent modes that showcase the module’s adaptability.
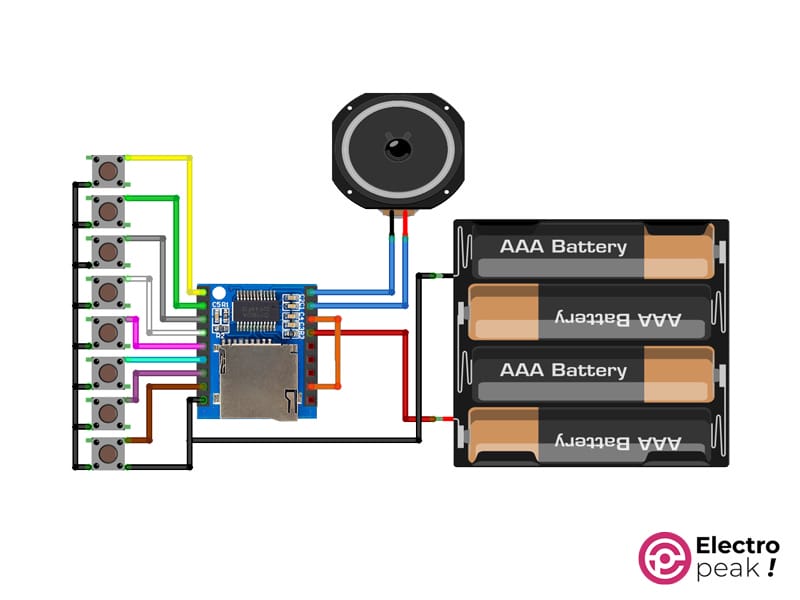
IO Mode
The first mode emphasizes simplicity by allowing users to exclusively utilize the IO (button) for controlling sound playback. This straightforward approach caters to users who prefer a hands-on, button-based interaction with the module.
Press and Hold any button to have the model play the corresponding song according to that particular button’s assigned number. (The sound will stop when you release the button.)
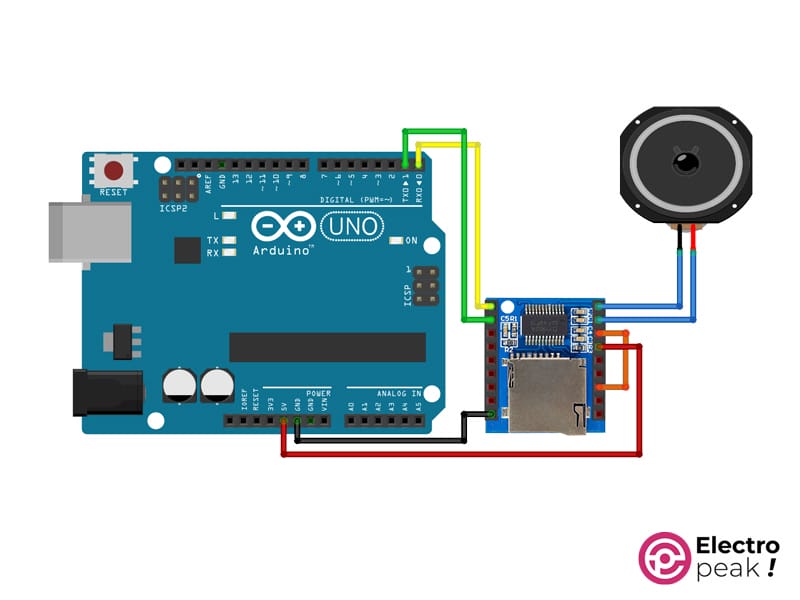
Serial Mode
The second mode showcases the model’s compatibility with serial communication, enabling seamless integration with a wide range of microcontrollers or microprocessors. As a practical example in this article, we demonstrate how to employ the XY-V17B model with an Arduino.
The following circuit shows how you should connect Arduino to this module. Connect wires accordingly.
Step 2: Installing Library
Install the library below on your Arduino IDE.
Step 3: Code
Upload the following code to your Arduino.
/*
Create on January 10, 2024
Create by MohammedDamirchi base of https://github.com/SnijderC/dyplayer/tree/main
<blockquote class="wp-embedded-content" data-secret="avJO05vpyy"><a href="https://electropeak.com/learn/">Home</a></blockquote><iframe class="wp-embedded-content" sandbox="allow-scripts" security="restricted" style="position: absolute; clip: rect(1px, 1px, 1px, 1px);" title="“Home” — Electropeak" src="https://electropeak.com/learn/embed/#?secret=C8gnmT41mx#?secret=avJO05vpyy" data-secret="avJO05vpyy" width="600" height="338" frameborder="0" marginwidth="0" marginheight="0" scrolling="no"></iframe>
*/
#include <Arduino.h>
#include "DYPlayerArduino.h"
// Initialise the player, it defaults to using Serial.
DY::Player player;
// Alternatively initialise on another serial port.
// DY::Player player(&Serial2);
void setup() {
player.begin();
player.setVolume(30); // 50% Volume
player.playSpecified(1);
}
void loop() {
}
After uploading, the Arduino will send a command to the XY-V17B to play the first ‘00001.mp3’ file on the model. Following this, you can simply use the reset button on the Arduino to replay the same track
