Contents

Interfacing IR Flame Sensor with Arduino

Interface IR Flame Sensor with Arduino

IR Flame Sensor Features

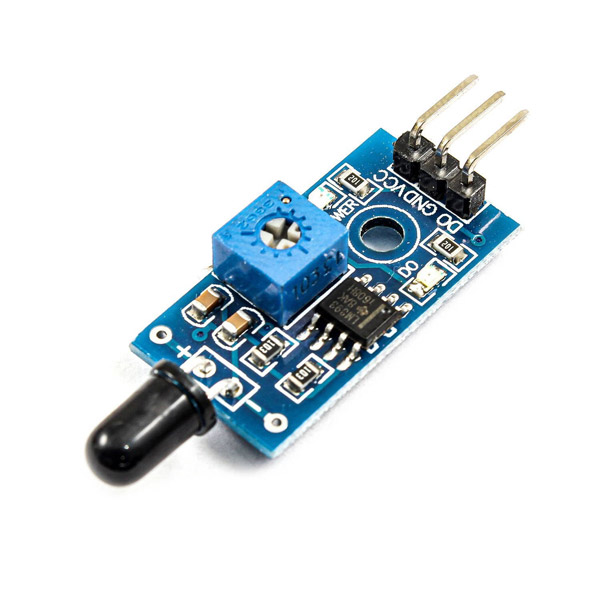
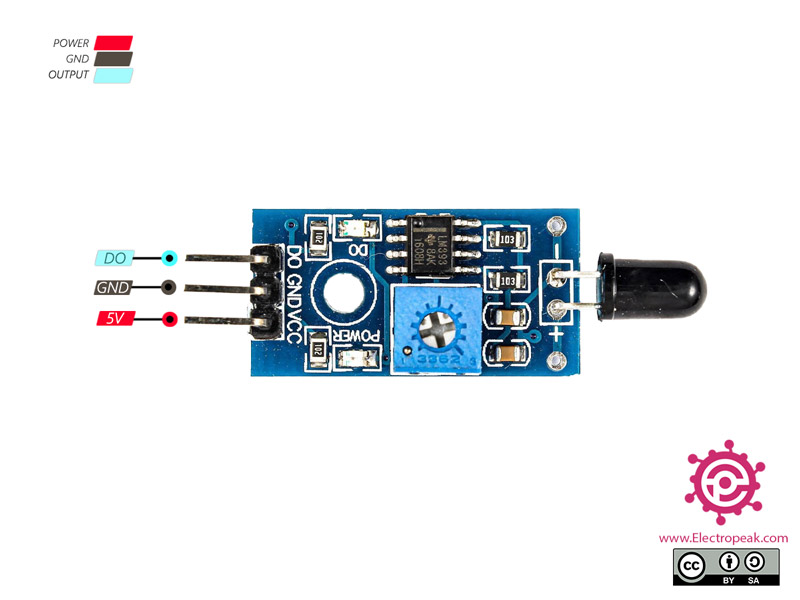
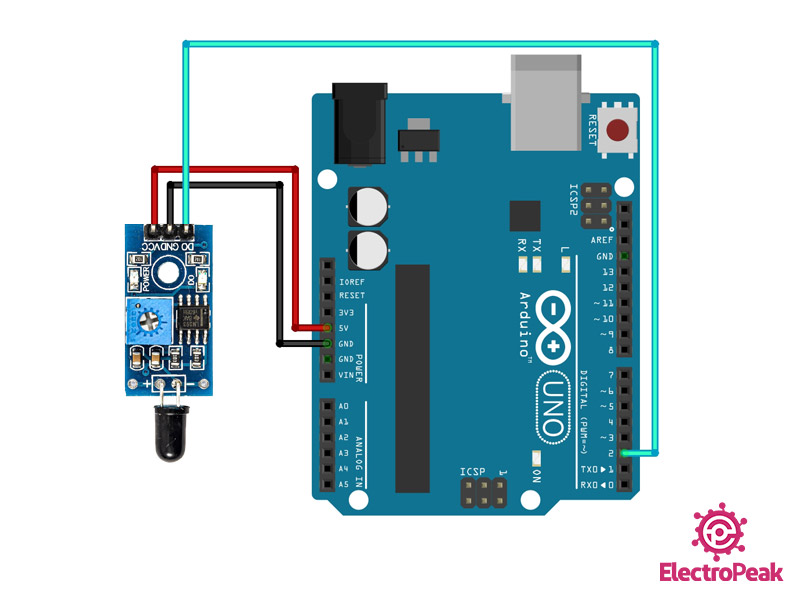
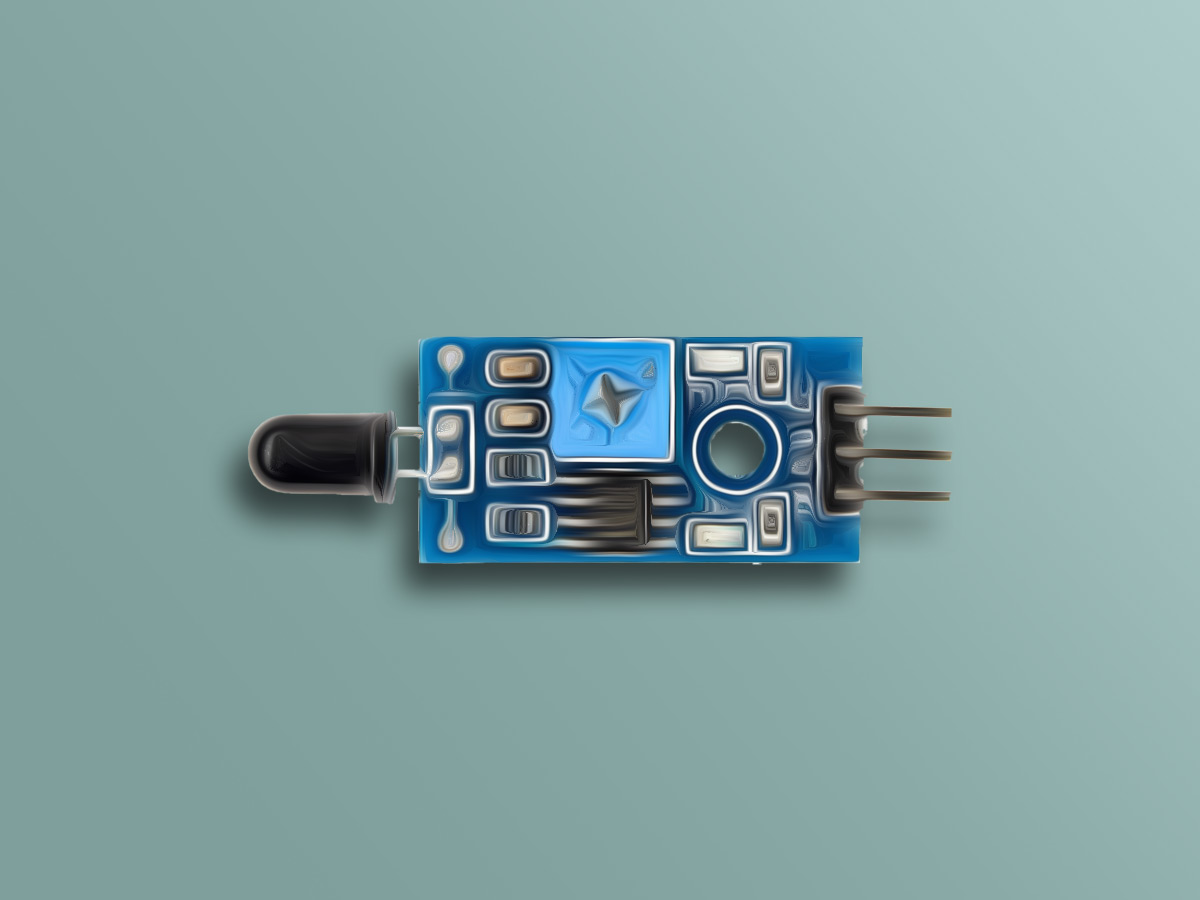
The flame sensor is actually an infrared receiver. In this module, the output of the infrared receiver is measured using a comparator IC. If the fire and flame (or any other infrared source) is close to the sensor, the output of the comparator is LOW, otherwise the output is HIGH.
Note

There is a potentiometer on board to change the sensor’s sensitivity. In practice, this potentiometer changes the reference voltage of the comparator IC (the same voltage that the sensor voltage is compared with). If necessary, you can use it to change the sensitivity of your sensor.

IR Flame Sensor Pinout

This sensor has 3 pins:

  •  VCC: Module power supply – 3.3-5 V
  •  GND: Ground
  •  DO: Digital output

You can see pinout of this module in the image below.

Required Materials

Hardware Components

Arduino UNO R3 × 1
IR flame sensor Module × 1
Male to Female jumper wire × 1

Software Apps

Arduino IDE

Interfacing IR Flame Sensor with Arduino

Step 1: Circuit

The following circuit shows how you should connect Arduino to IR Flame Sensor. Connect wires accordingly.

Step 2: Code

Upload the following code to your Arduino and then open serial monitor. If you approach flame to the sensor, you will see Flame Detected in the serial monitor.
/*
  IR Flame Sensor
  modified on 20 Sep 2020
  by Mohammad Reza Akbari @ Electropeak
  
Home
*/ int Flame = 2; // Flame sensor connected to digital pin 2 void setup() { pinMode(Flame, INPUT); Serial.begin(9600); } void loop() { if (digitalRead(Flame) == LOW) { Serial.println("Flame Detected"); } delay(100); }
Liked What You See?​
Get Updates And Learn From The Best​

Leave a Reply

Your email address will not be published. Required fields are marked *