The Raspberry Pi boards include a CSI port to connect a camera. In this tutorial, you’ll learn how to use and connect a camera to Raspberry Pi boards.
For this tutorial, you need to install the Raspbian operating system on your board.
What You Will Learn
How to connect a camera to Raspberry Pi board
Controlling the camera using a python script
Taking pictures with Raspberry Pi camera
Recording video with Raspberry Pi camera
Required Materials
Hardware Components
Arduino UNO R3
×
1
Arduino Leonardo
×
1
RGB LED
×
1
IR Remote and IR sensor
×
1
Jumpers
×
1
Software Apps
Arduino IDE
Launch the Camera with Raspberry Pi
Controlling a camera using the Raspberry Pi board is very simple. To launch the camera just do the following steps:
Launching the Camera in Raspbian Desktop
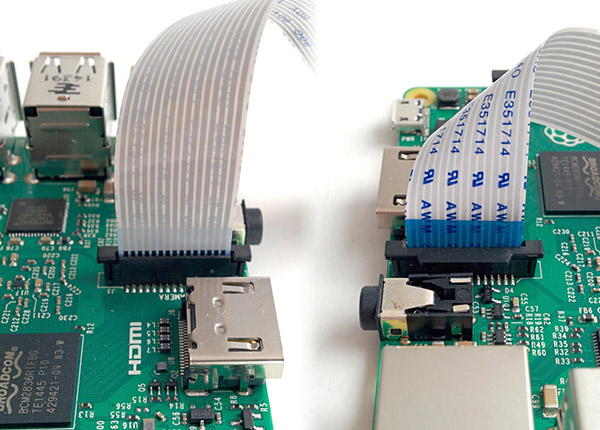
1- Connect the camera to the Raspberry Pi board
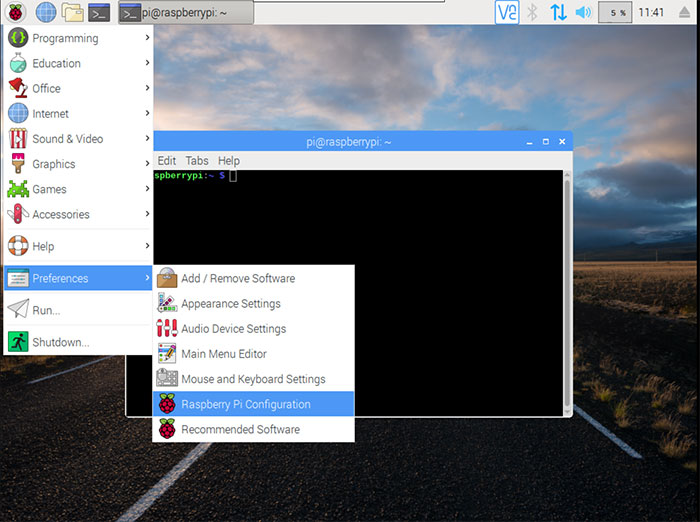
2- Choose Raspberry Pi Configuration from the Preferences menu
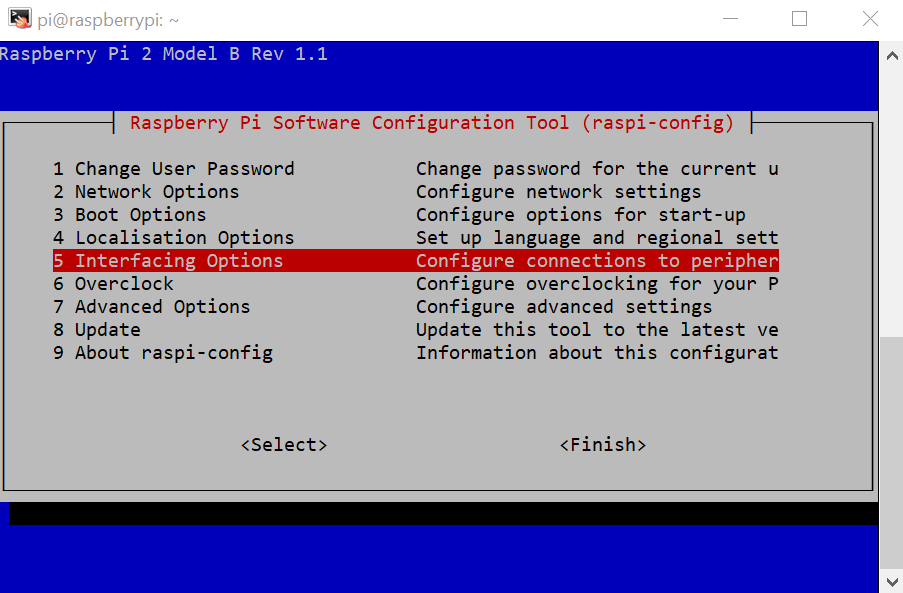
3- Enable the camera from Interfaces option and click OK.
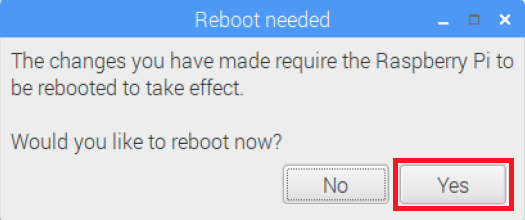
4- Reboot the operating system.
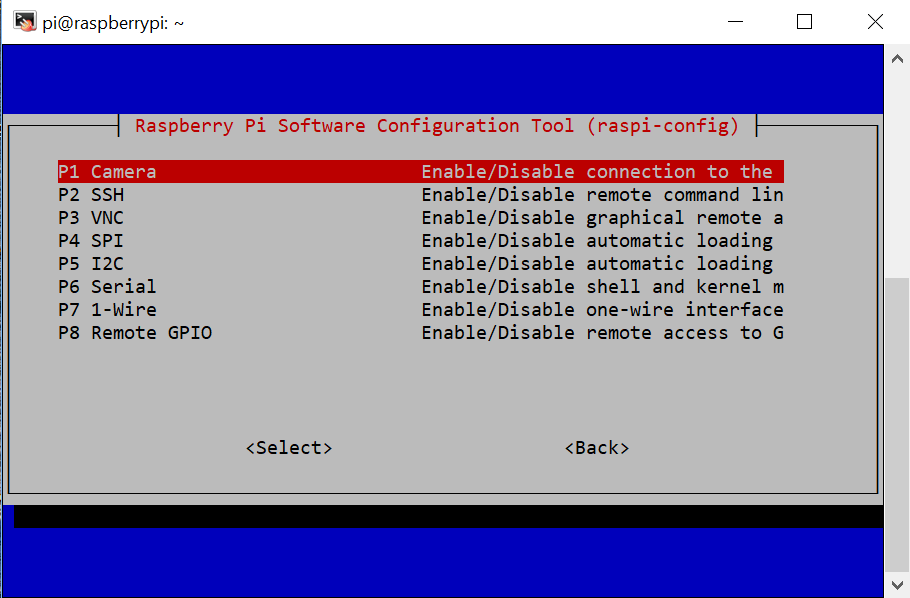
Launching the Camera in Raspbian Light
1- Connect the camera to the Raspberry Pi board.
2- Type the following command in the terminal to enter Raspberry pi settings.
sudo raspi-config
3- Go to the Interfacing Options, enable the camera and reboot your board.
Taking Photo using the Raspberry Pi Camera
Taking Photo using Raspbian Terminal
The libraries required for the camera are installed on Raspbian OS by default.
You can take a photo by the raspistbill command. To learn how to use this command, type it in the raspbian terminal.
raspistill
For example, with the following code, after 2 seconds, a picture is taken and stored as image1.
raspistill -o image1.jpg -t 2000
Taking Pictures Using Python Script
You need Picamera library to control your camera in python language. This library provides you many options to work with the camera.
Note
The camera starts taking pictures with the start_preview command. If your raspberry pi board is connected to the monitor directly, you can see the camera output in preview mode on the monitor. Otherwise, if you use VNC or SSH, you can’t see the preview
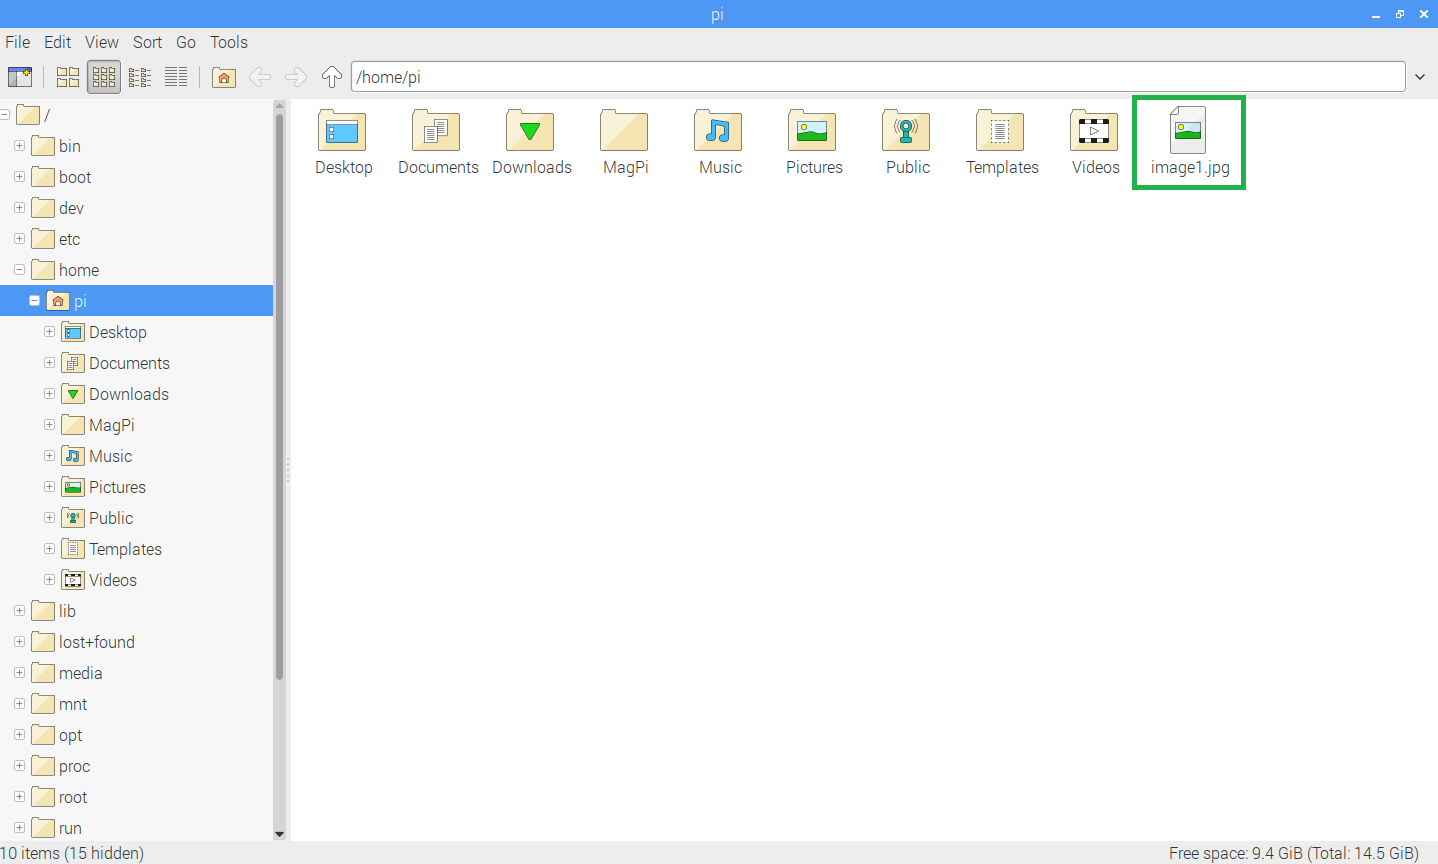
The following code enables the camera in preview mode for 5 seconds, then take a photo and save it as “image” on your desktop.
from camera import PiCamera
from time import sleep

camera = PiCamera()
camera.start_preview()
sleep(5) #at least 2 seconds recommended
camera.capture('/home/pi/Desktop/image.jpg')
camera.stop_preview()
Tip
Do not forget to connect the VCC and the GND of the module to 5V and the GND of Arduino.
Adding text to a photo
You can add any text to the photo using the annotate_text command. See the following example:
You can change the text color using color class and annotate_background and annotate_foreground commands.
You can also change the text size with annotate_text_size command:
Adding Effect to a photo:
The Picamera library has several effects for applying to photos. You can apply them using camera.image_effect = name of effect command.
from picamera import PiCamera, Color
from time import sleep
camera = PiCamera()
camera.start_preview()
camera.image_effect = 'sketch'
sleep(5)
camera.capture('/home/pi/sketch.jpg')
camera.stop_preview()
you can find the complete description of effects here.
Recording Video with Raspberry Pi Camera:
Recording Video Using Raspbian Terminal:
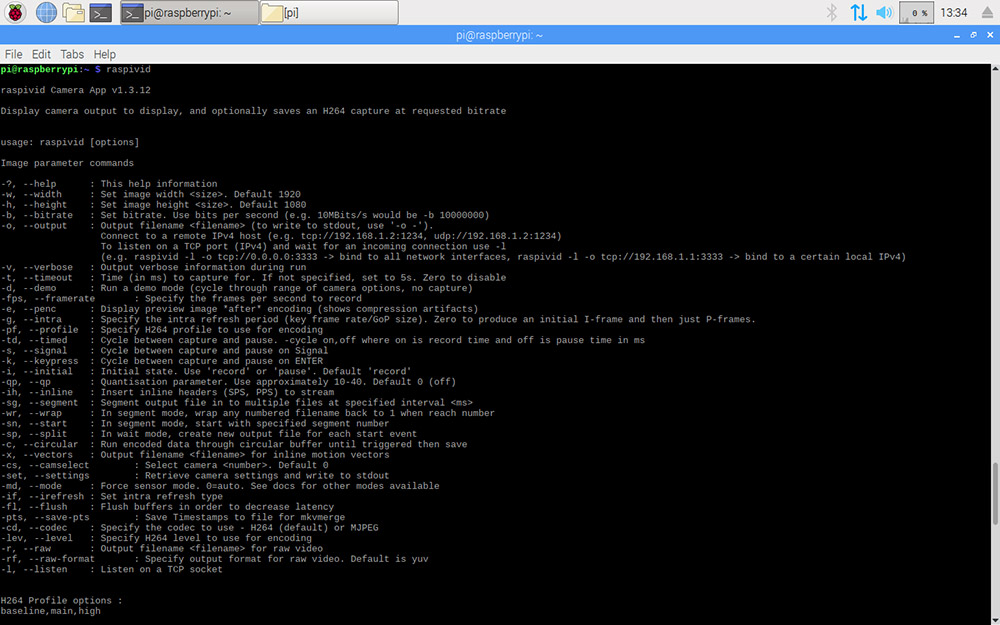
You can use raspivid command to start recording a video.
You will see a brief description of how to use raspvid by typing this command in the terminal.
for example, the following code records video for 10 seconds and save it as video_test and with .h264 format.
raspivid -o video_test.h264 -t 10000
Recording Video Using Python Script:
You can enable the camera in recording mode and start recording using the Picamera library and strat_recording command.
from picamera import PiCamera
from time import sleep
camera = PiCamera()
camera.start_preview()
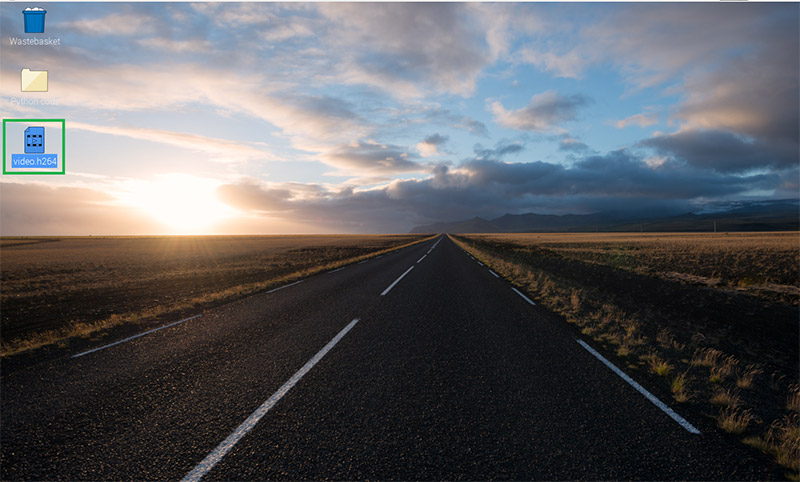
camera.start_recording('/home/pi/Desktop/video.h264')
sleep(10)
camera.stop_preview()
What’s Next?
Try to control the camera with a button. Each time the button is pressed, the camera takes a photo and saves it.
Try to control the camera with the PIR sensor. When a motion is observed in the environment, start recording automatically for a few seconds and store it on the Raspberry Pi.


Comments (2)
Please checkthe “Required Materials” section… Arduino ???? or RPi ???
Thanks for your comment.
It’s correct now