How to Install Android on Raspberry Pi 4 (+Play Store)
Written by
Majid Merati
Introduction
Are you interested in turning your Raspberry Pi into an Android device? In this tutorial, we will guide you step-by-step on how to install the Android operating system on Raspberry Pi. We will also provide a solution to access the Google Play Store.
Whether you want to explore the endless features of this little board or turn your Raspberry Pi board into a media Center, this tutorial has got you covered. We will explain all the necessary steps, from downloading the required files to configuring the Android environment. So, let’s not waste any time and turn your Raspberry Pi into a perfect Android device!
Raspberry Pi Boards
Raspberry Pi boards—one of the most famous single-board computers worldwide—have colorful applications. Like any computer, they need an operating system to function. Several official and unofficial operating systems based on Linux have been developed for Raspberry Pi.
What You Will Learn
How to install the Android operating system on Raspberry Pi
How to install and register Google Play Store on Raspberry Pi
Benefits of Installing Android on Raspberry Pi
An attractive and functional Android environment
A wide range of applications such as media centers, game consoles, or a smart home central computer
Hardware features
A vast software bank
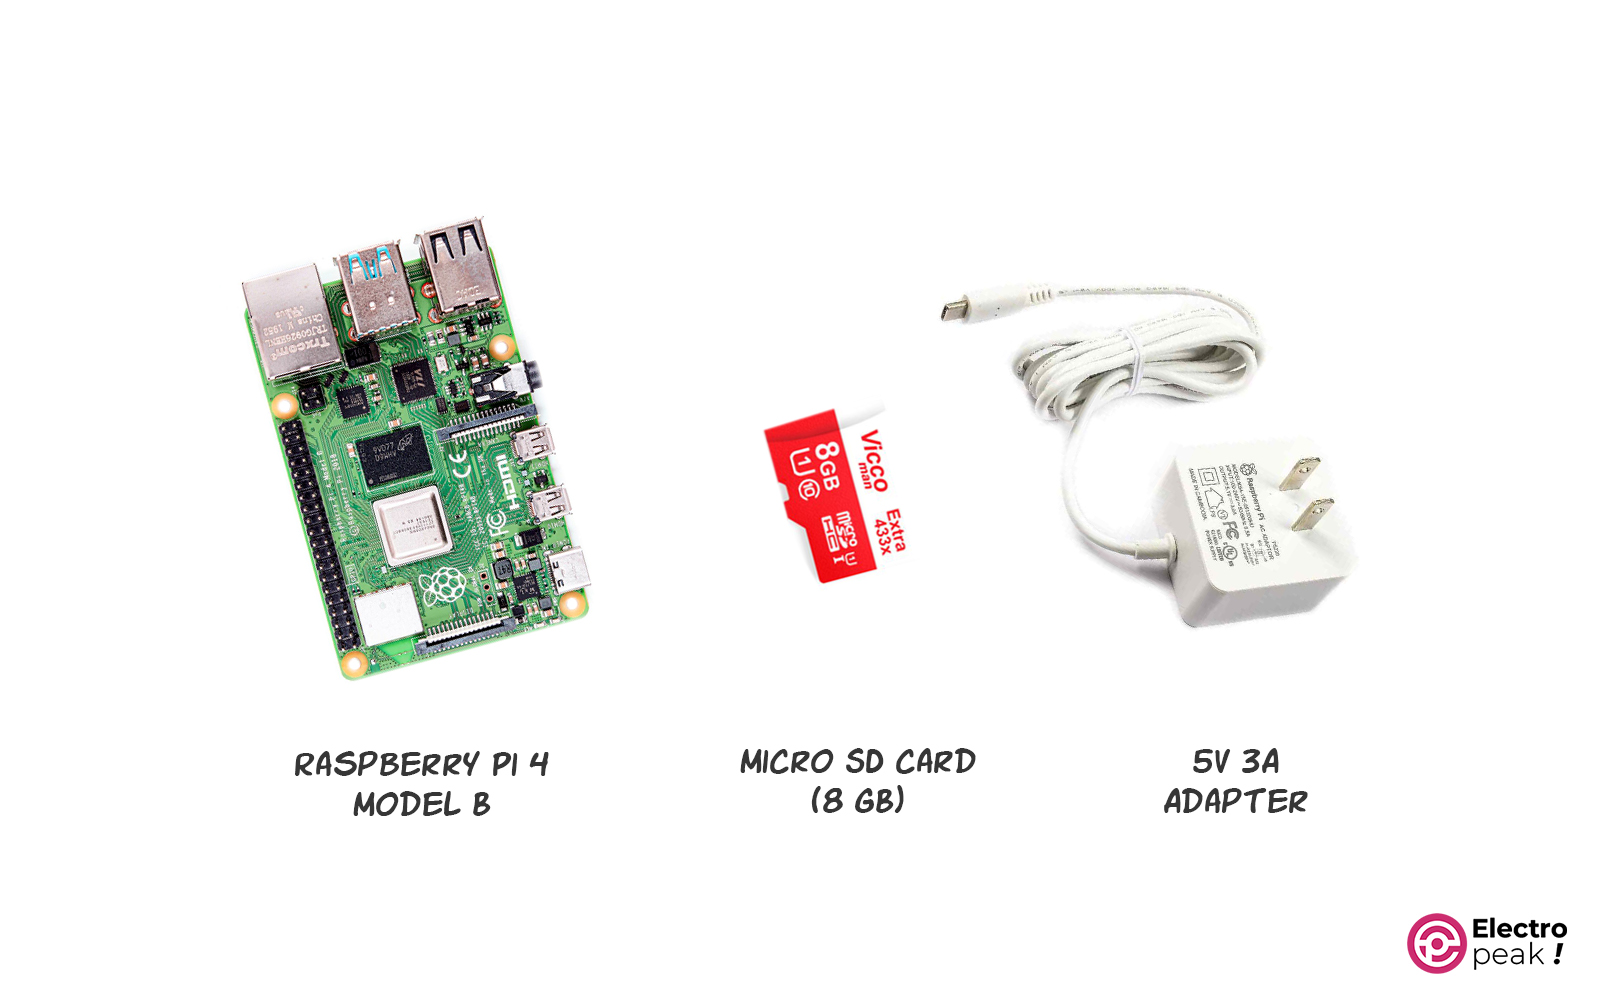
Required Materials
Hardware Components
Raspberry Pi 4 Model B *
×
1
Micro SD card (8 GB) **
×
1
5V 3A Adapter (for Raspberry Pi) ***
×
1
USB Mouse and Keyboard
×
1
Monitor (with HDMI port)
×
1
Mini HDMI to HDMI Cable
×
1
A Computer or Laptop
×
1
*: It is also possible to install Android on Raspberry Pi 3. **: At least 8 GB is recommended to run Android on Raspberry Pi without issues. ***: You can also use other adapters. The recommended output voltage and current are 5V and 3A.
Software Apps
Etcher*
Raspberry Pi Imager*
*: Install only one of these.
How to Install Android on Raspberry Pi 4
To install Android on Raspberry Pi 4, you should follow these steps:
Download and extract the appropriate “Android Build” file for your Raspberry Pi board.
Flash (install) the Android file onto the Micro SD card using an Image-flasher software.
Install the memory card on the Raspberry Pi board and connect the necessary accessories.
Turn on the Raspberry Pi and configure the settings related to Google Play Store.
Now, let’s talk about these steps in detail:
Step 1: Download the Android Operating System
Start by downloading the Android operating system file. Different types of Android Operating Systems are available for Raspberry Pi. For this tutorial, we will use one of the “LineageOs” operating systems, which is based on Android and developed by Konstakang.
You can download the desired operating system from this link.
Step 2: Install Android on Raspberry Pi
Once you have downloaded the Android operating system, extract the file and write it to the Micro SD memory card using Etcher or Raspberry Pi Imager software.
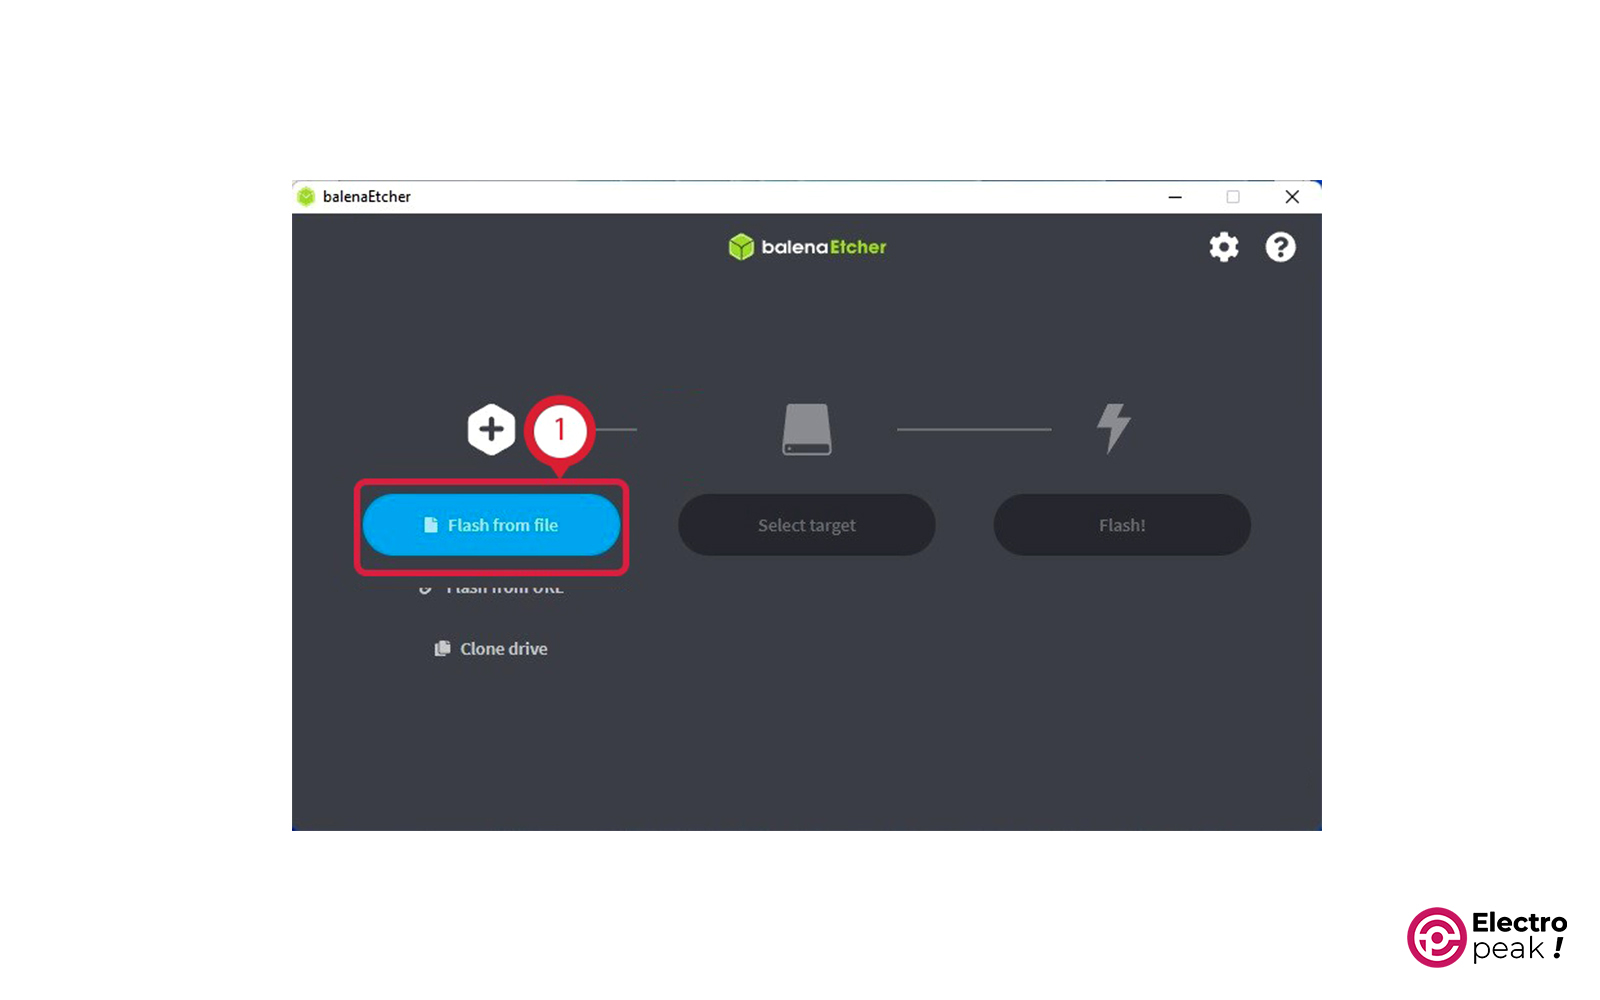
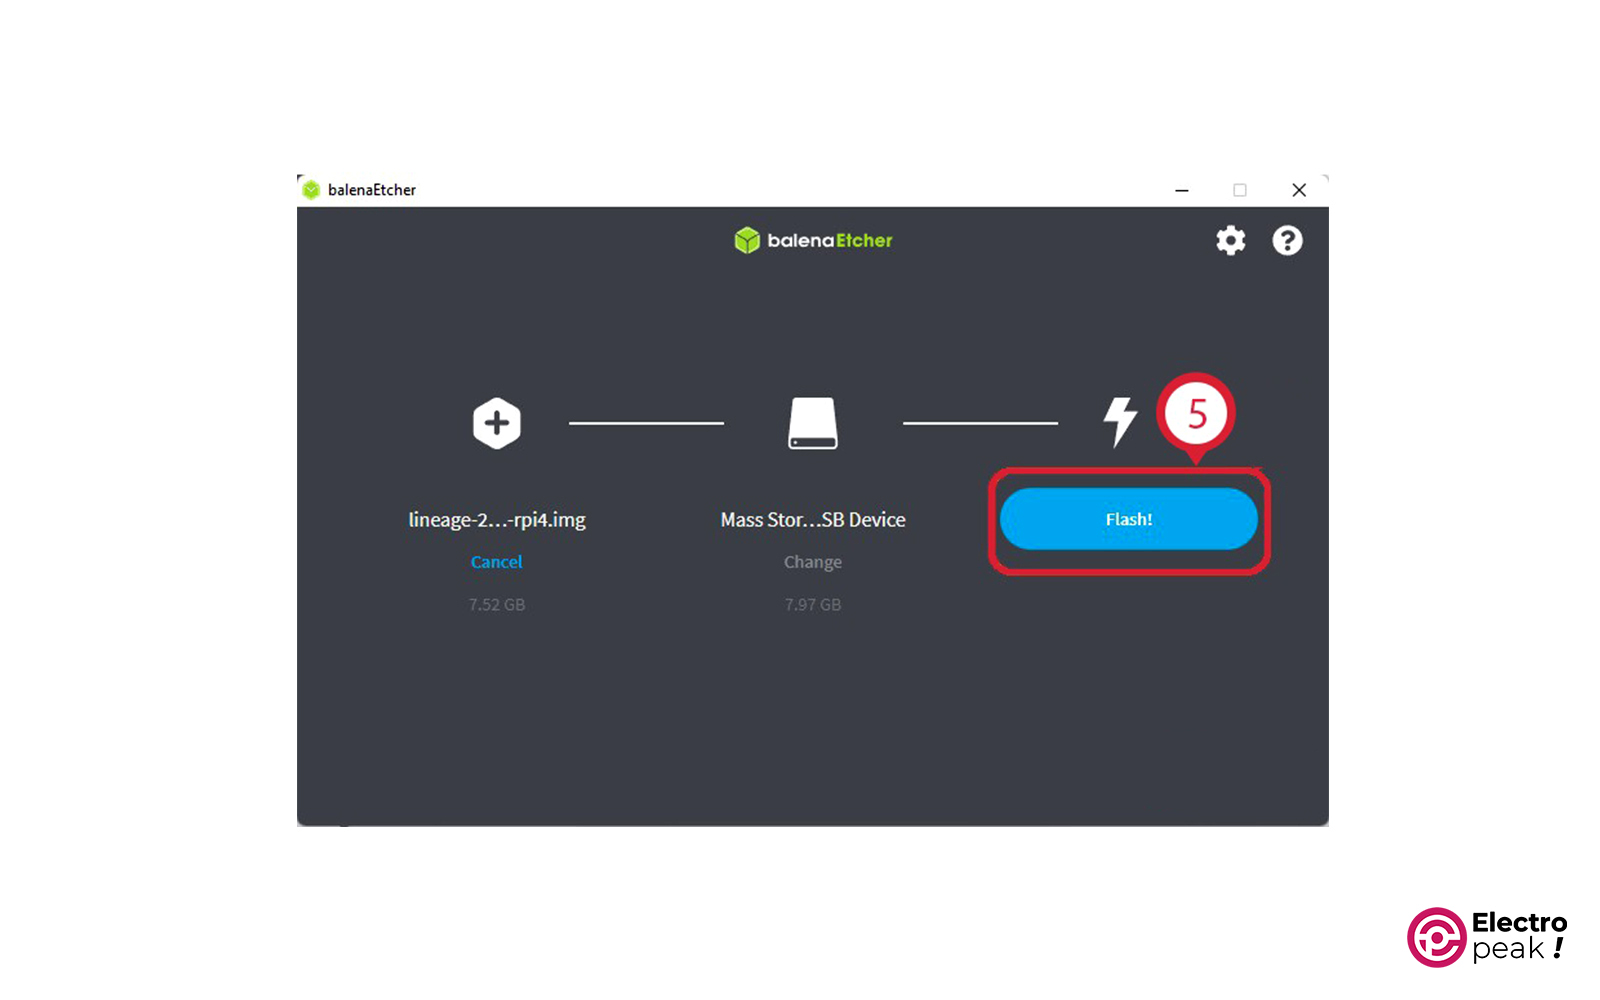
If you are using Etcher software, follow these steps:
1- Click on “Flash From File” and select the downloaded operating system
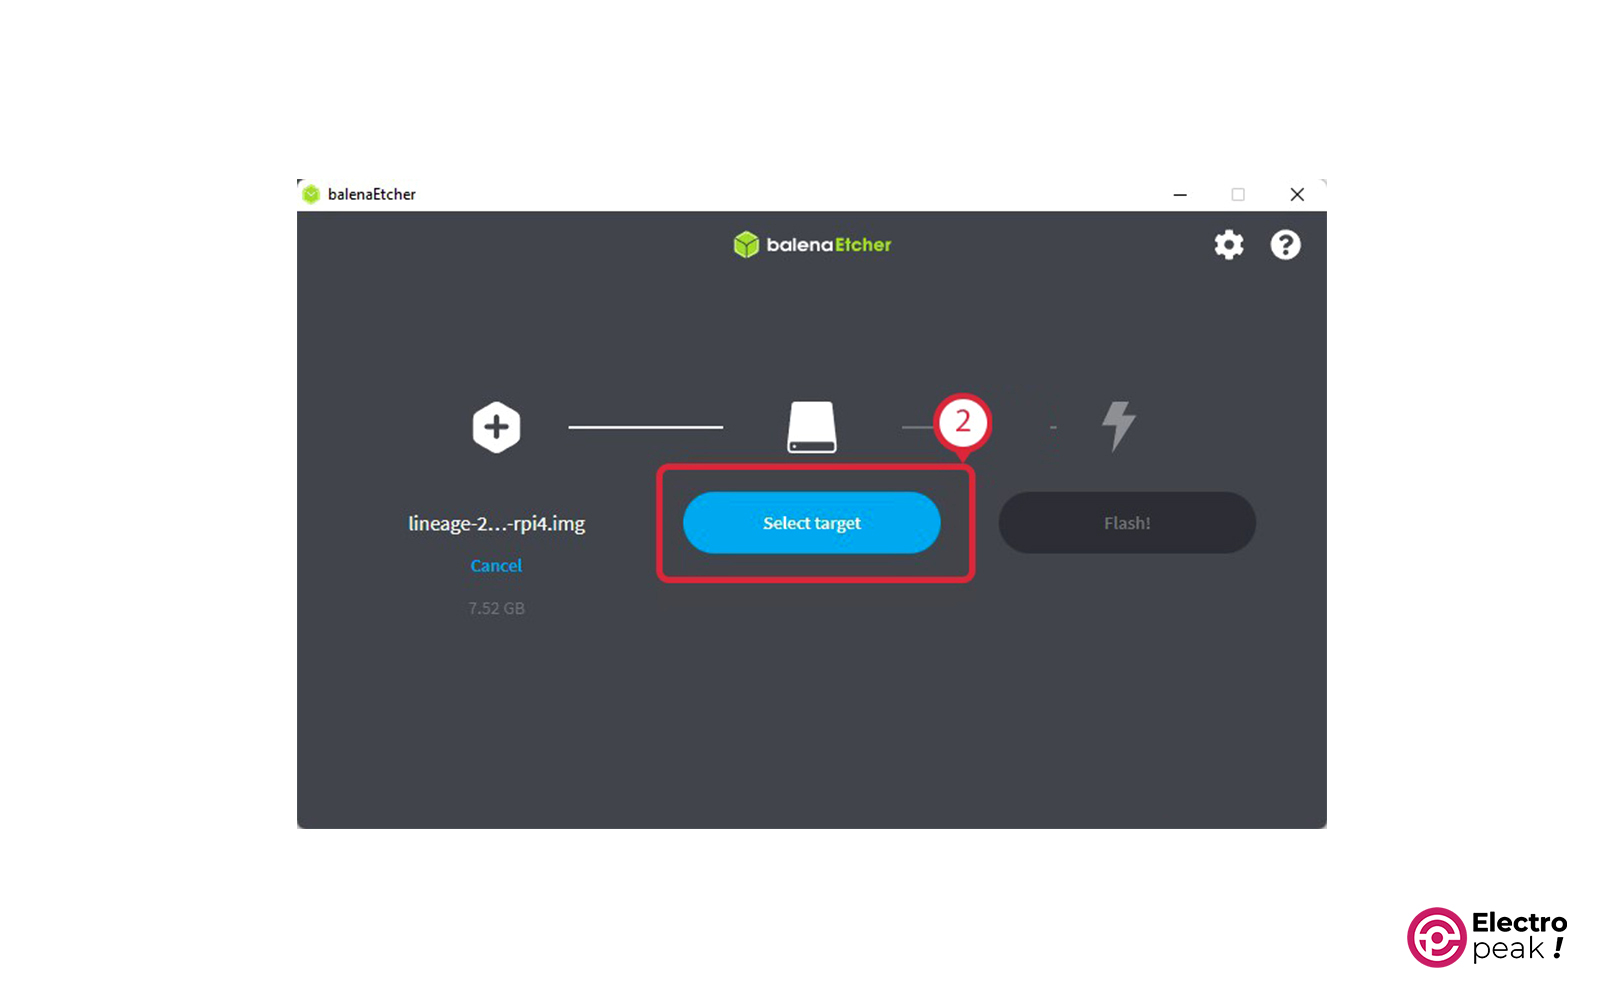
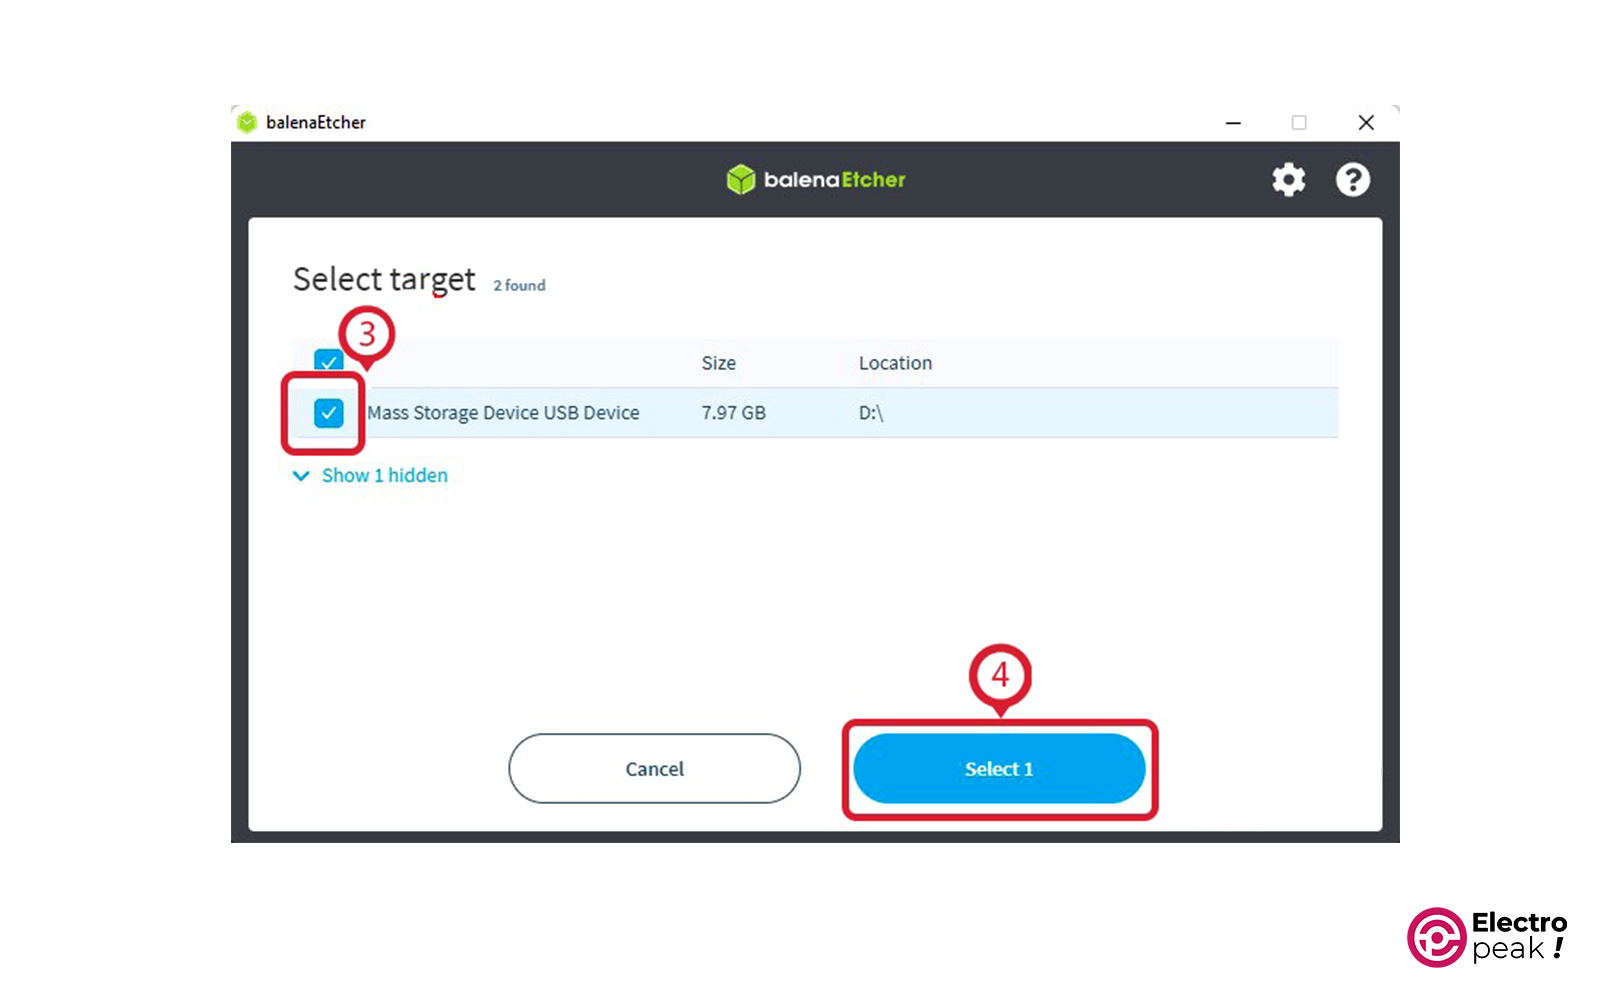
2- Click on “Select Target” and choose the desired memory
3- Finally, click on “Flash!”.
Now wait for a few minutes until the operating system is successfully written to the Micro SD card.
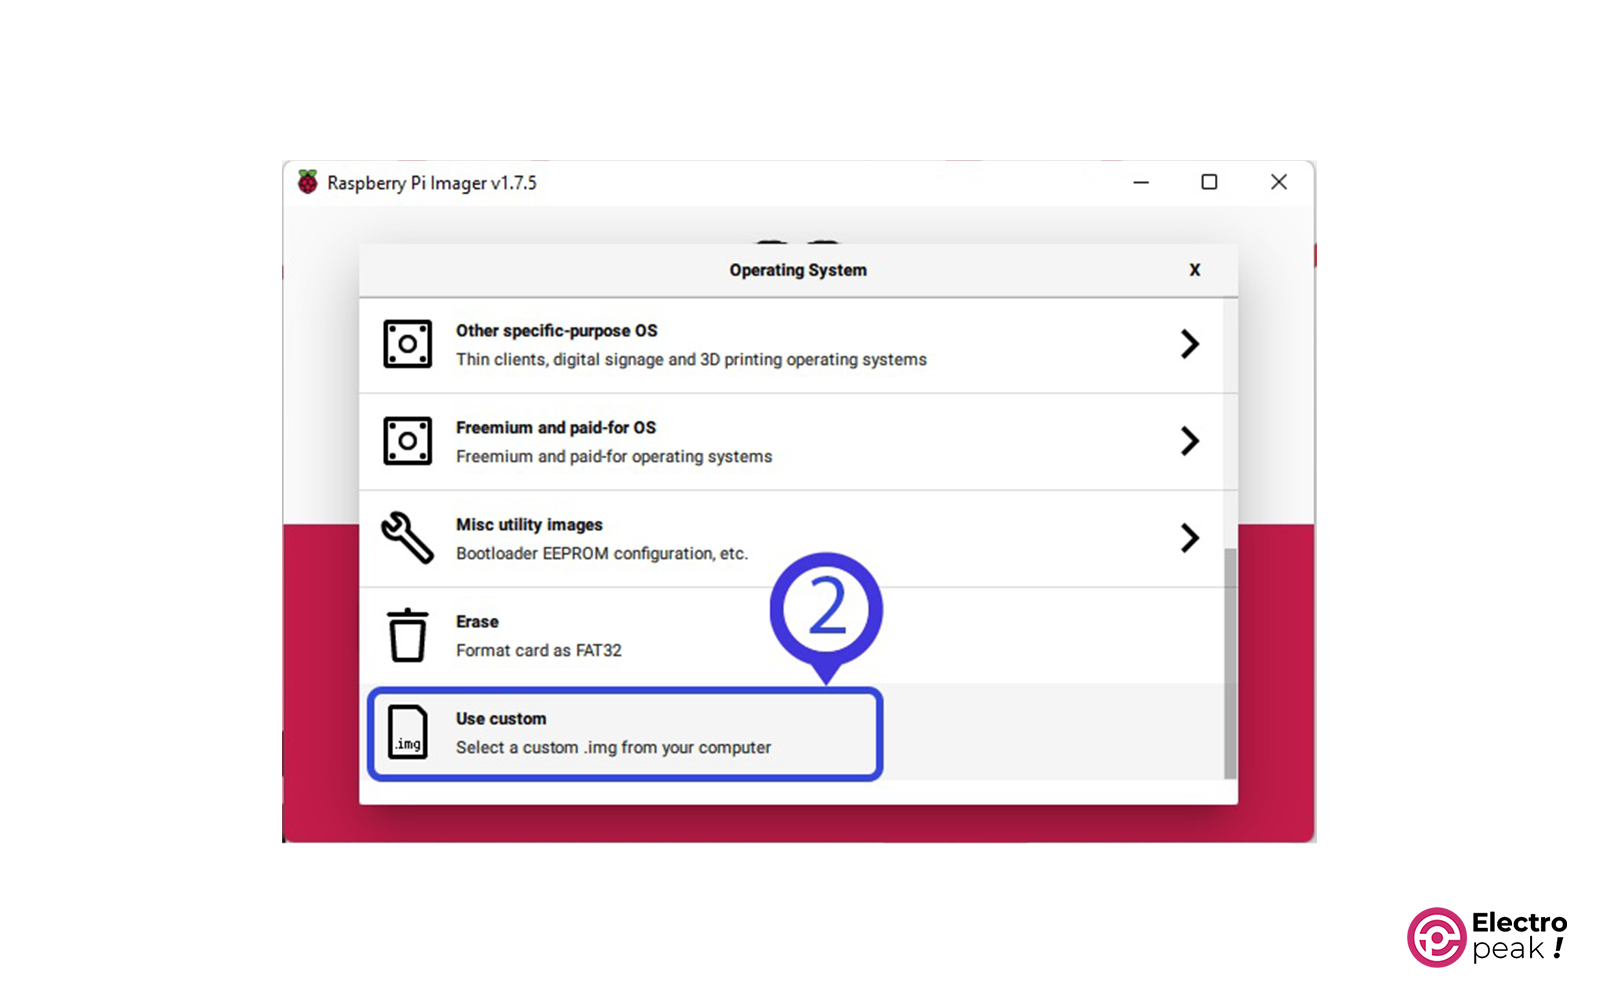
If you are using Raspberry Pi Imager, follow these steps:
1- Click on “CHOOSE OS,” select “Use Custom,” and open the downloaded operating system
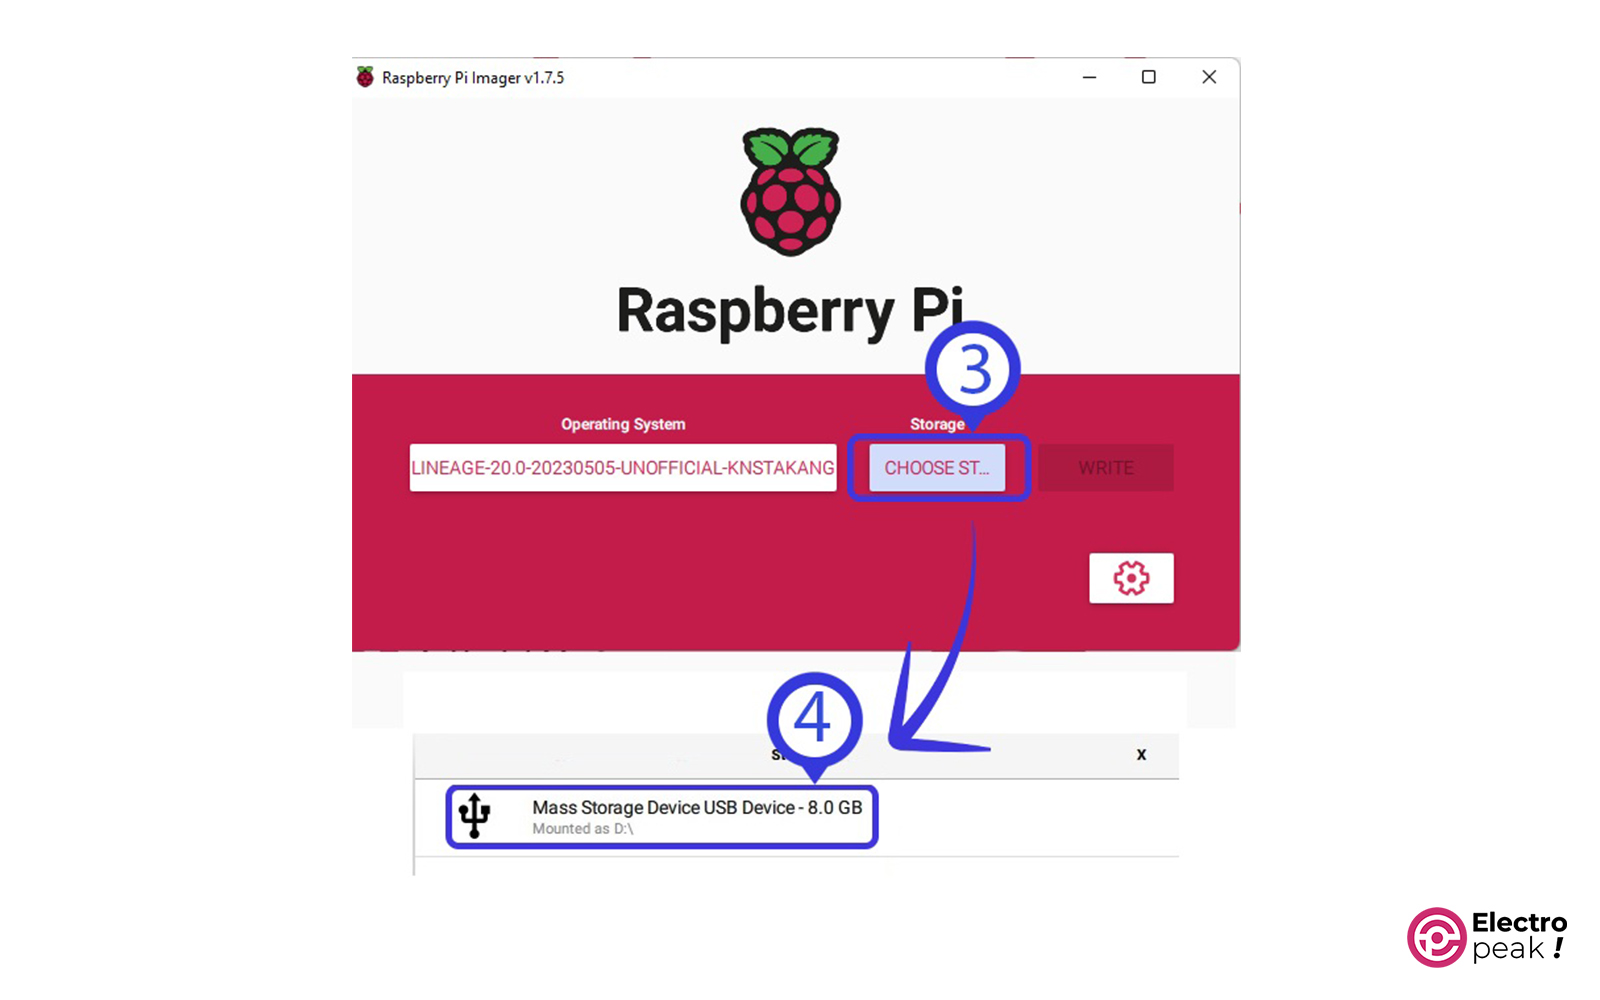
2- Select the Micro SD card
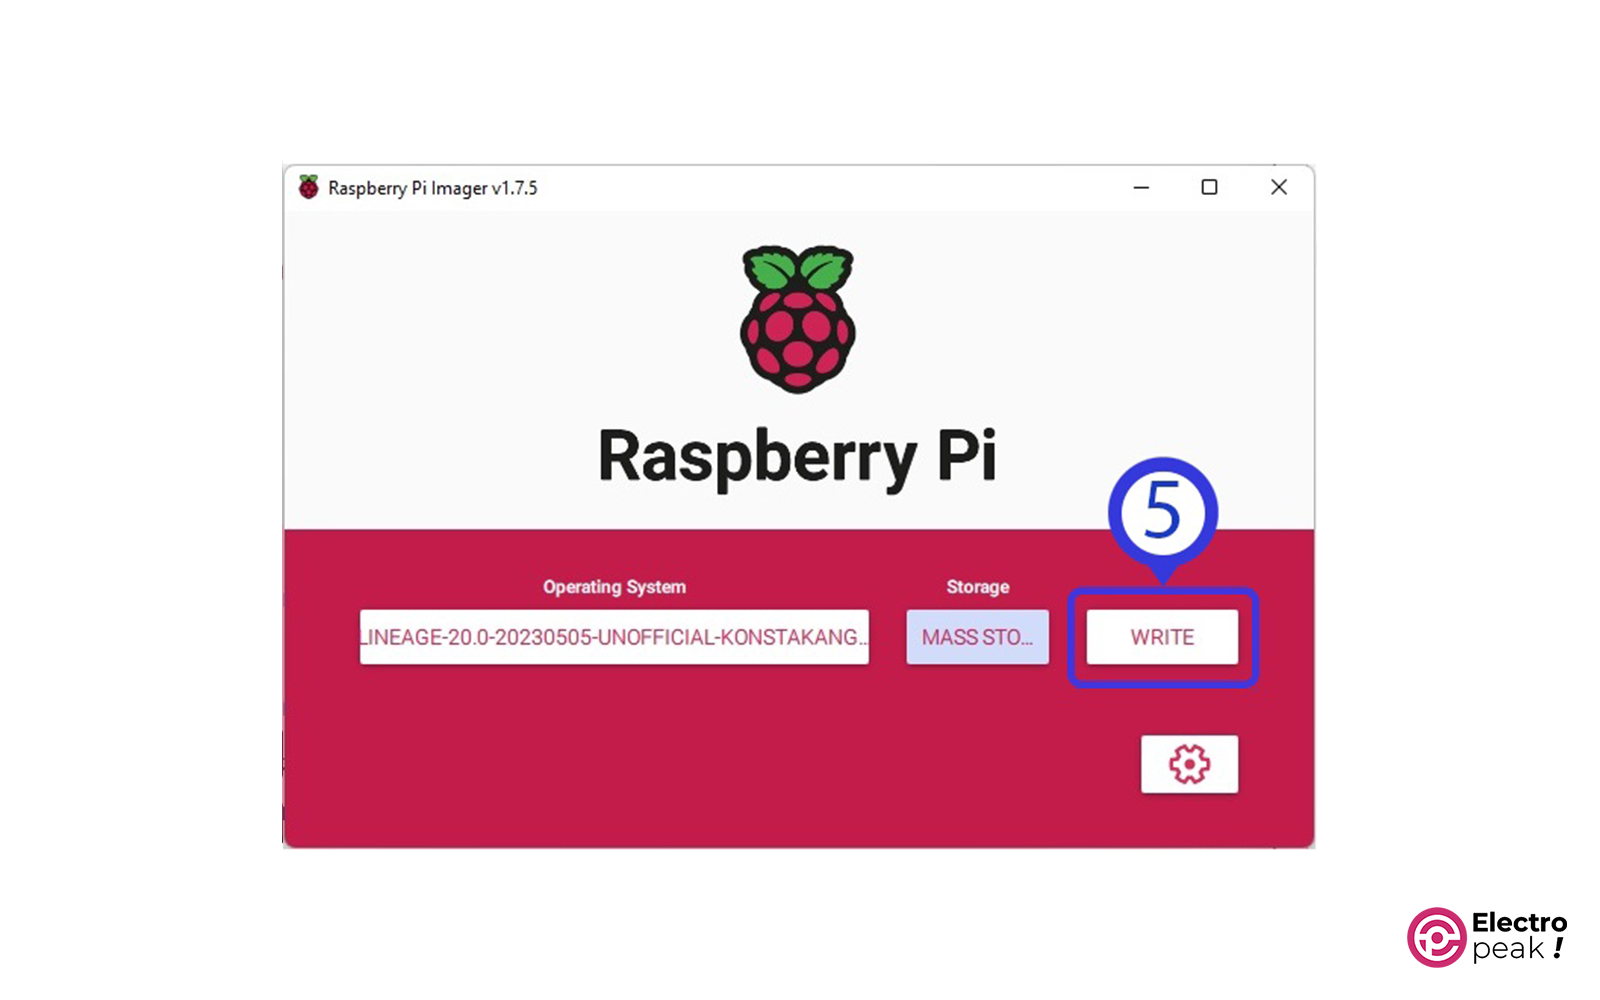
3- Click “Write”
Now wait for a few minutes until the operating system is successfully written to the Micro SD card.
Step 3: Turn on Raspberry Pi to Install Android
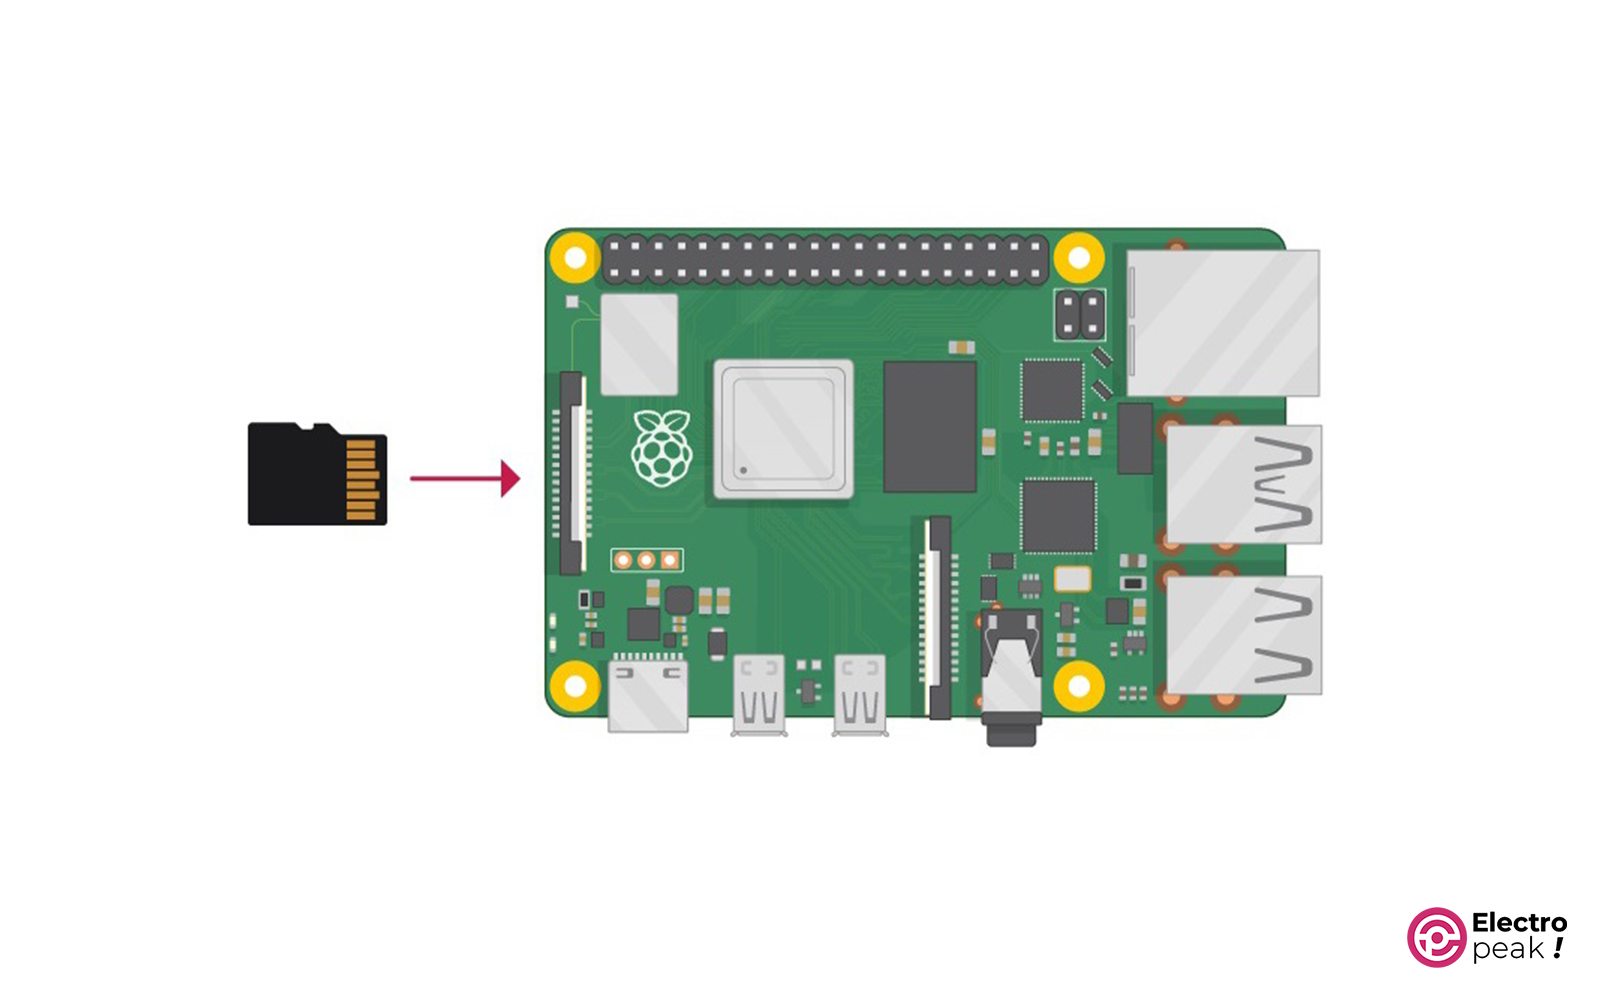
After preparing the Micro SD card, insert it into your Raspberry Pi.
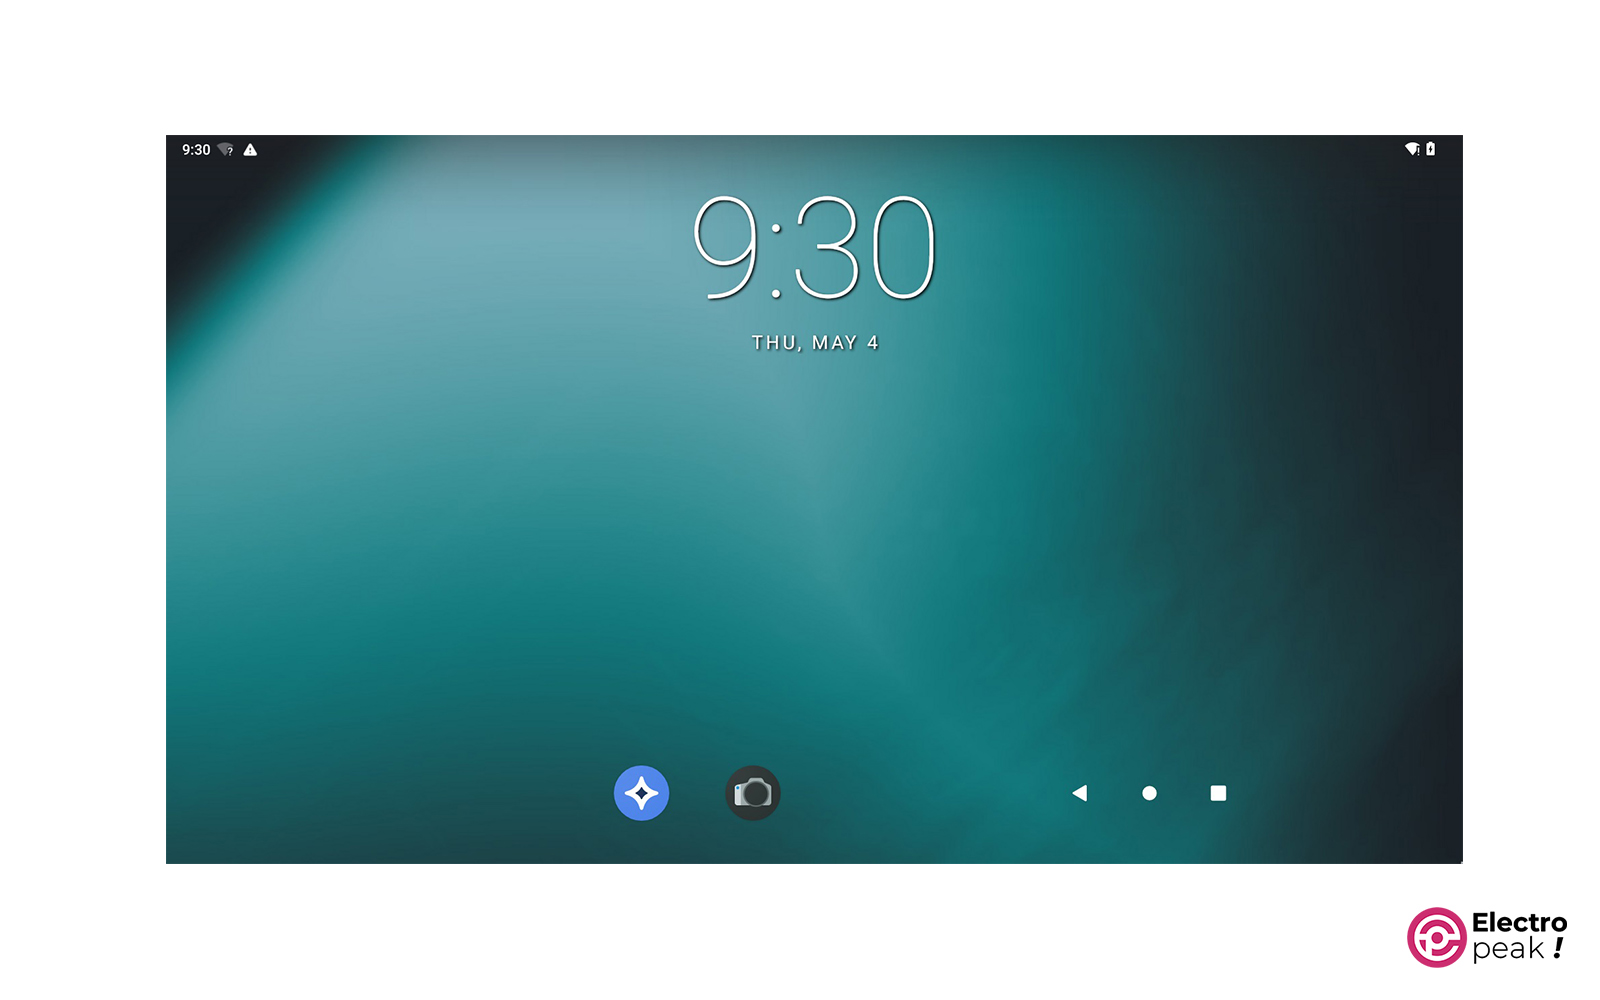
Then connect the required peripherals—keyboard, mouse, and monitor (Mini HDMI). Finally, plug in the adapter. By doing so, the Raspberry Pi board turns on and automatically installs the Android operating system. After a few minutes, your Raspberry Pi will boot up using the Android operating system.
Success You have installed the Android operating system on your Raspberry Pi.
Now, let’s install the Google Apps (such as Google Play Store).
Step 4: Install Google Play Store on Raspberry Pi & Configure it
Since Google does not recognize either the Raspberry Pi board or the installed Android file, you can’t easily access Google apps. However, we have a trick to help you with that. Let’s go through it step by step.
Step 1: Download the Google Apps File
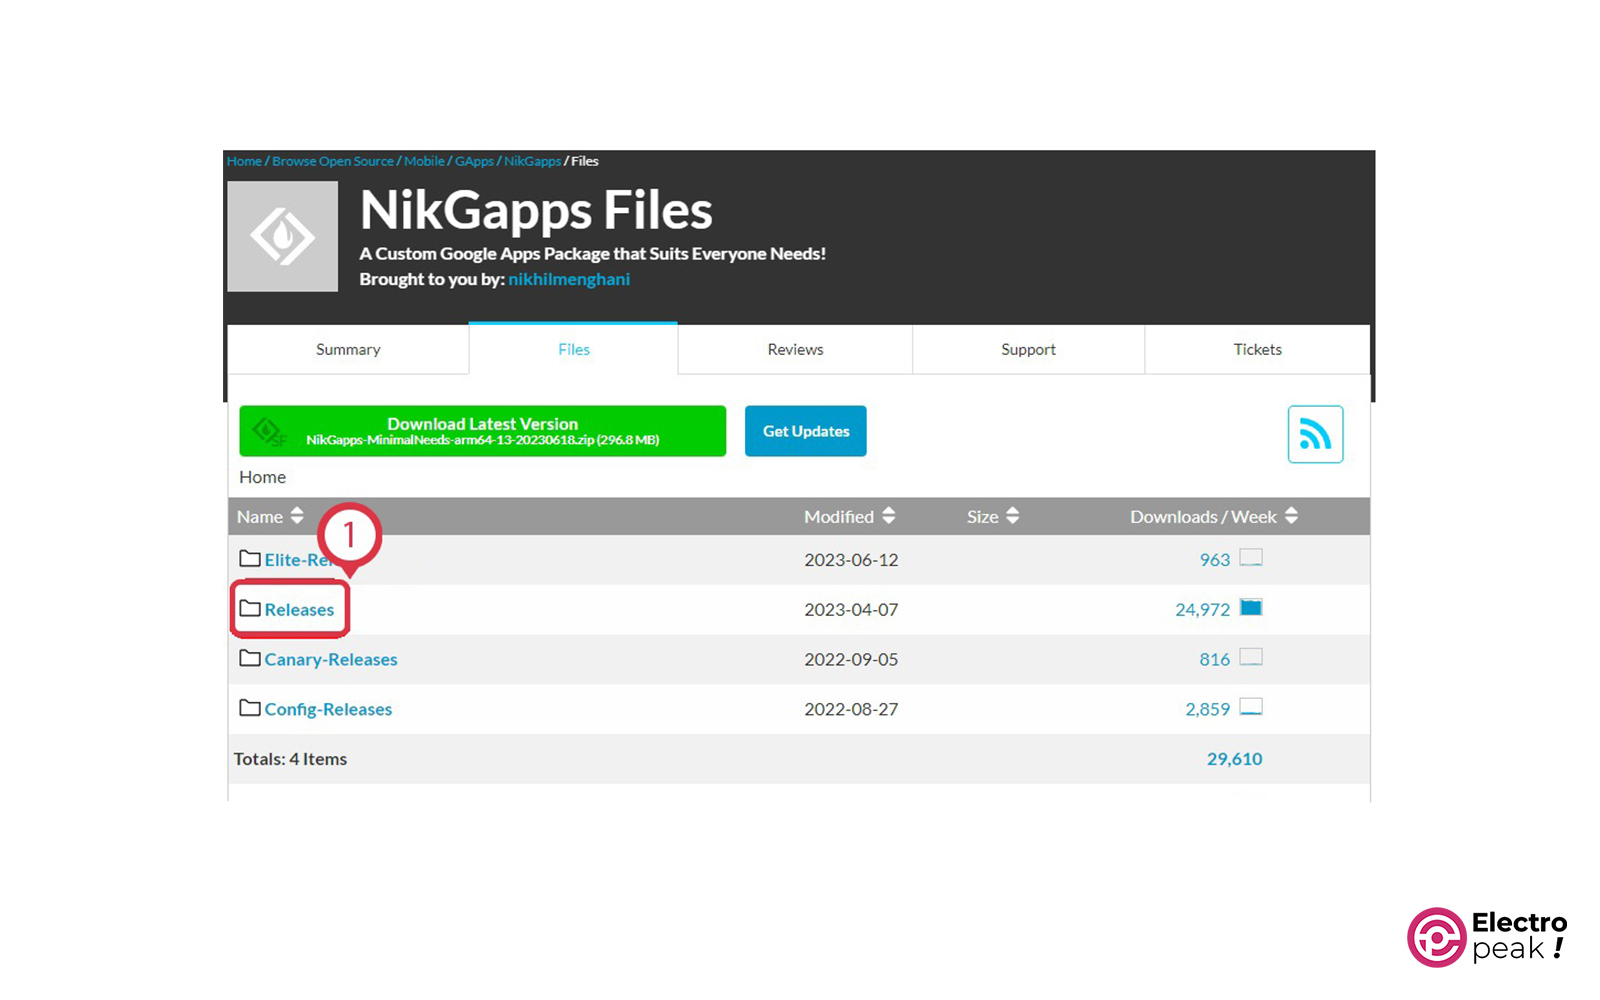
Before anything, download the Google Apps file from this link. 1. click “Download Now” on the opened page and enter the “Sourceforge” website. Now, click on “Releases.”
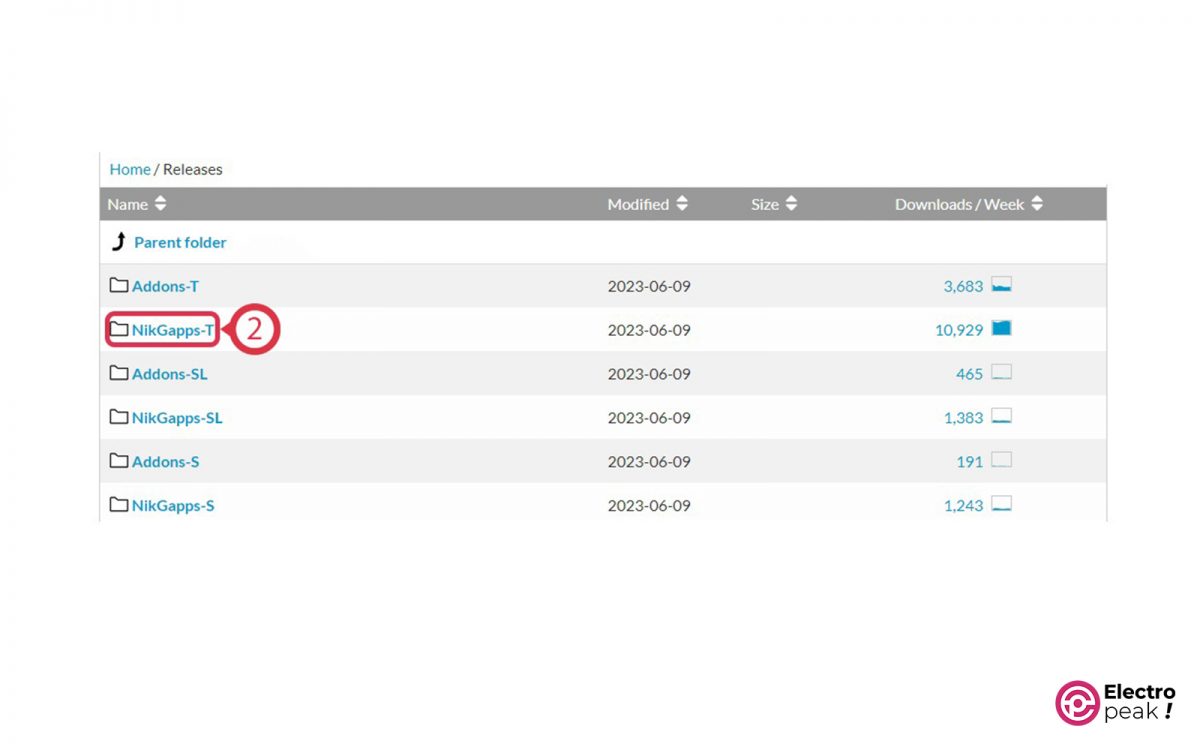
2. If you have installed the Android version 13 (Lineage OS 20) on your Raspberry Pi, select “NikGapps-T” and proceed to the next page.
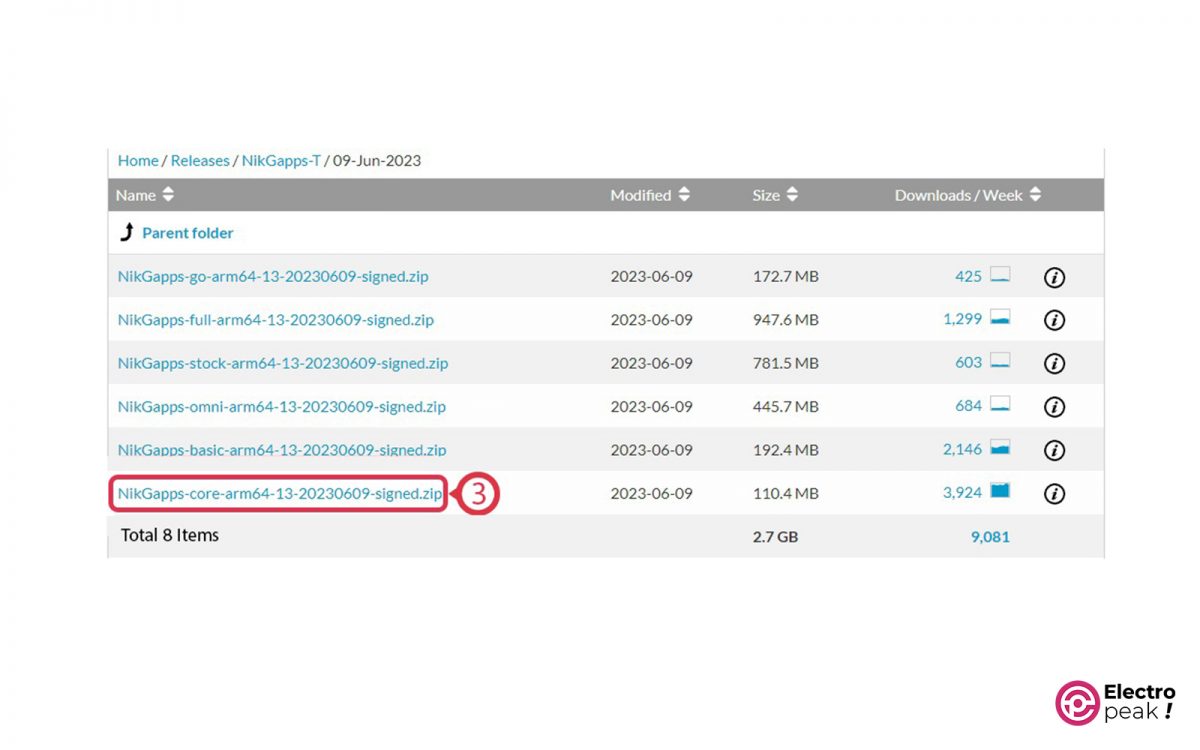
3. Choose your desired version (usually the latest). A page will open, similar to the image below.
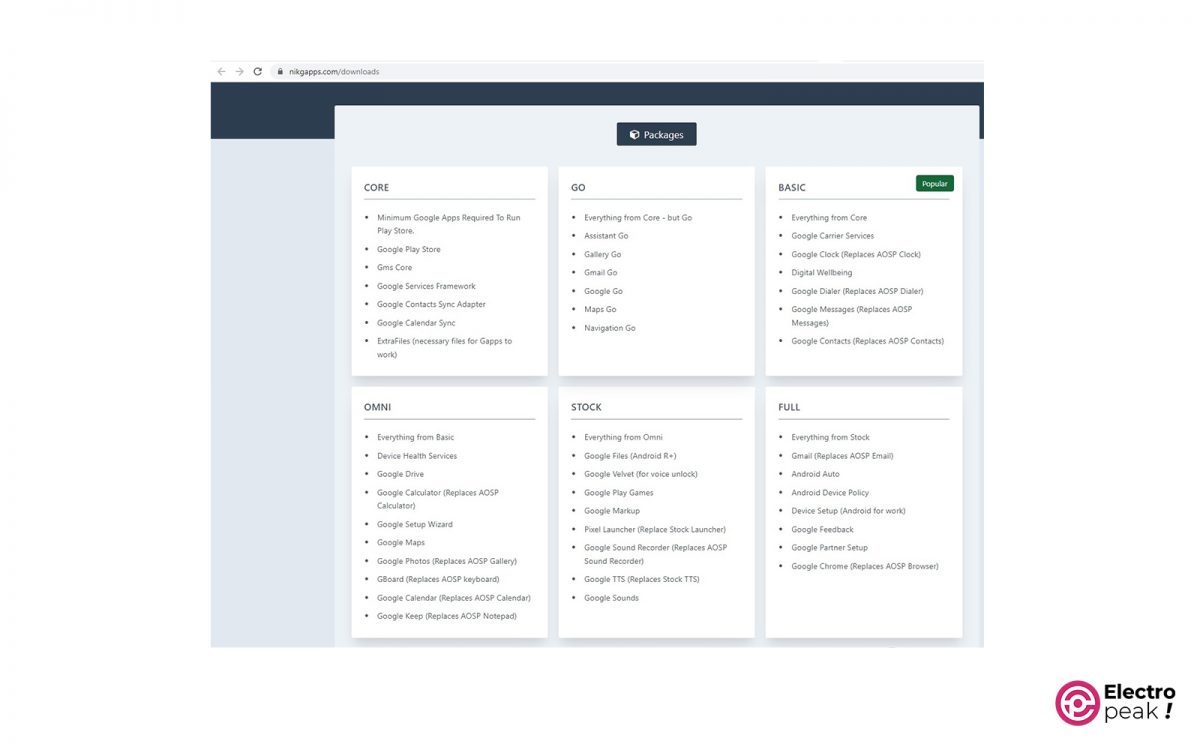
4. On this page, you can download any file you want. The difference between the files lies in the number of applications they contain (image below). For our needs, we recommend selecting the “CORE” option.
5. Transfer the downloaded file to a flash drive formatted with the FAT system. Then plug it into the USB port of your Raspberry Pi.
Step 2: Install Google Apps
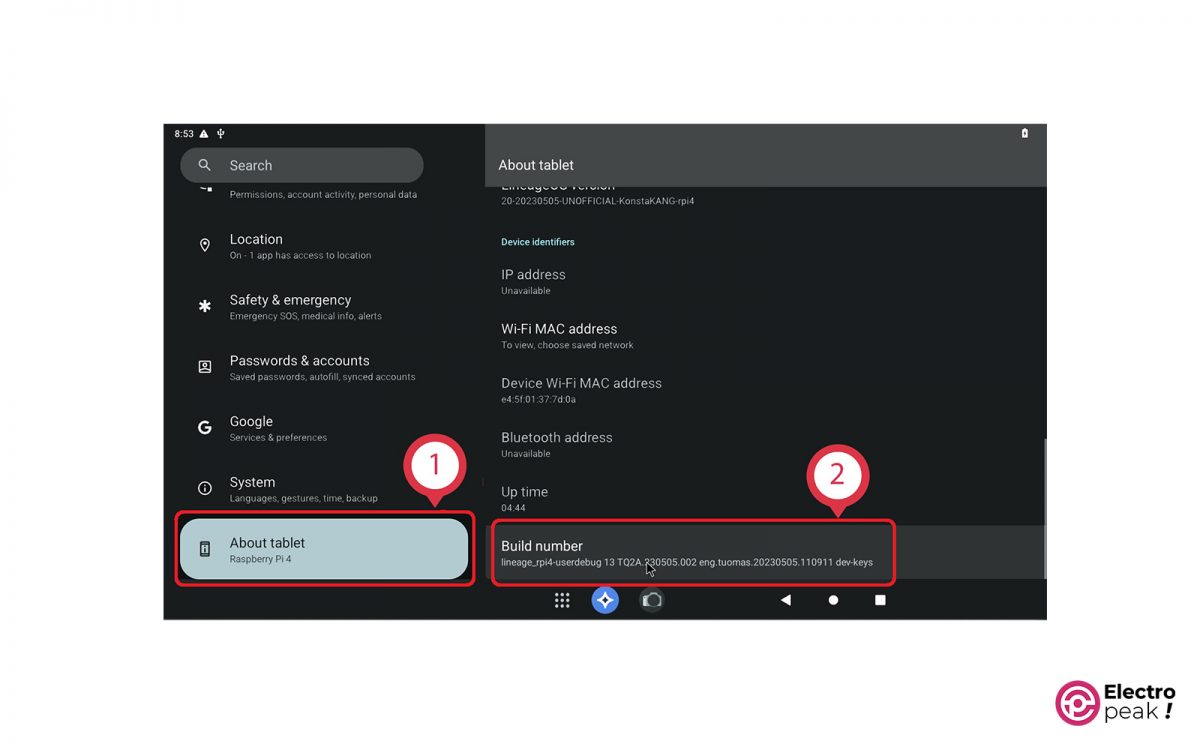
1. Open the Settings application. In the “About tablet” section, tap the “Build number” button seven times. This will activate the “Developer options” for you.
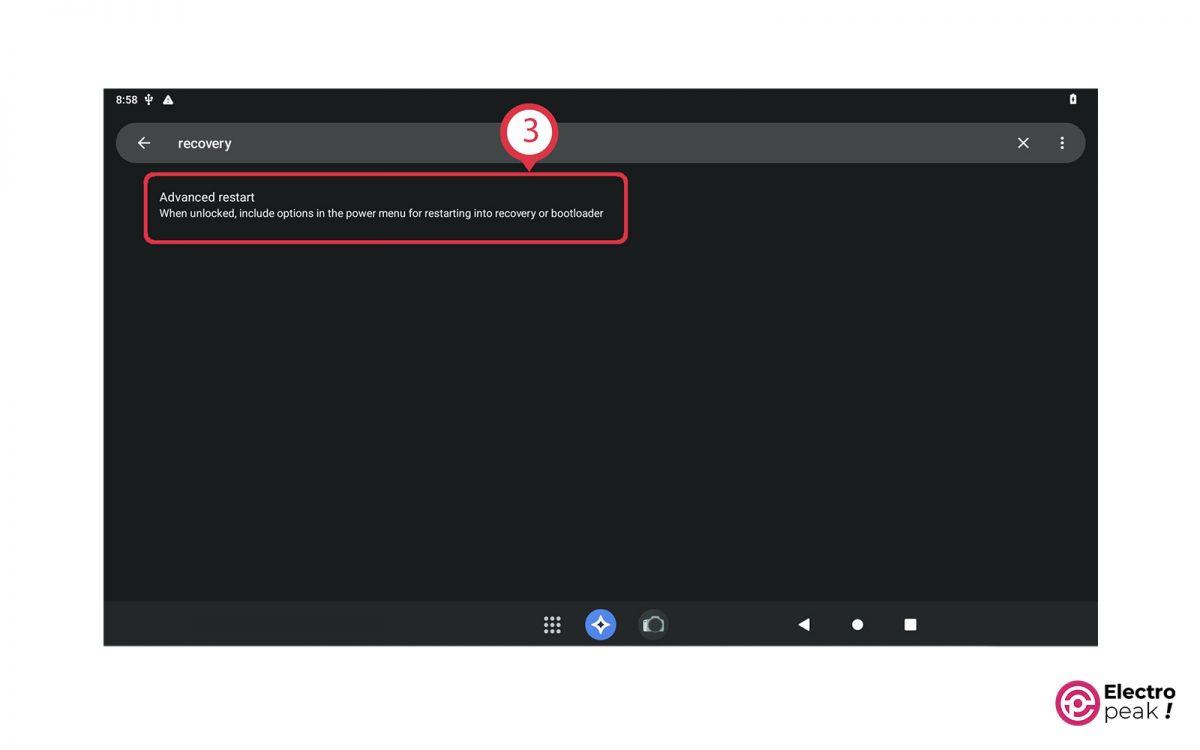
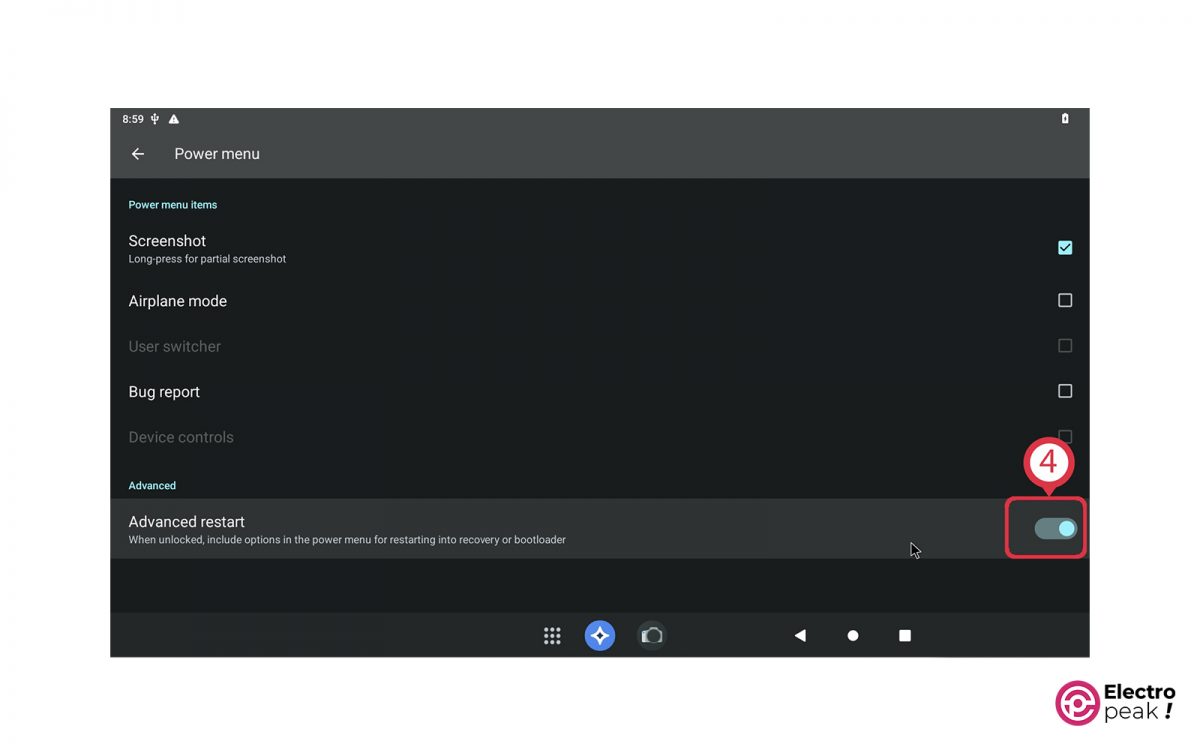
2. Now type “recovery” in the Search bar and click on “Advanced restart.”
3. Tap on “Advanced restart” to change its status.
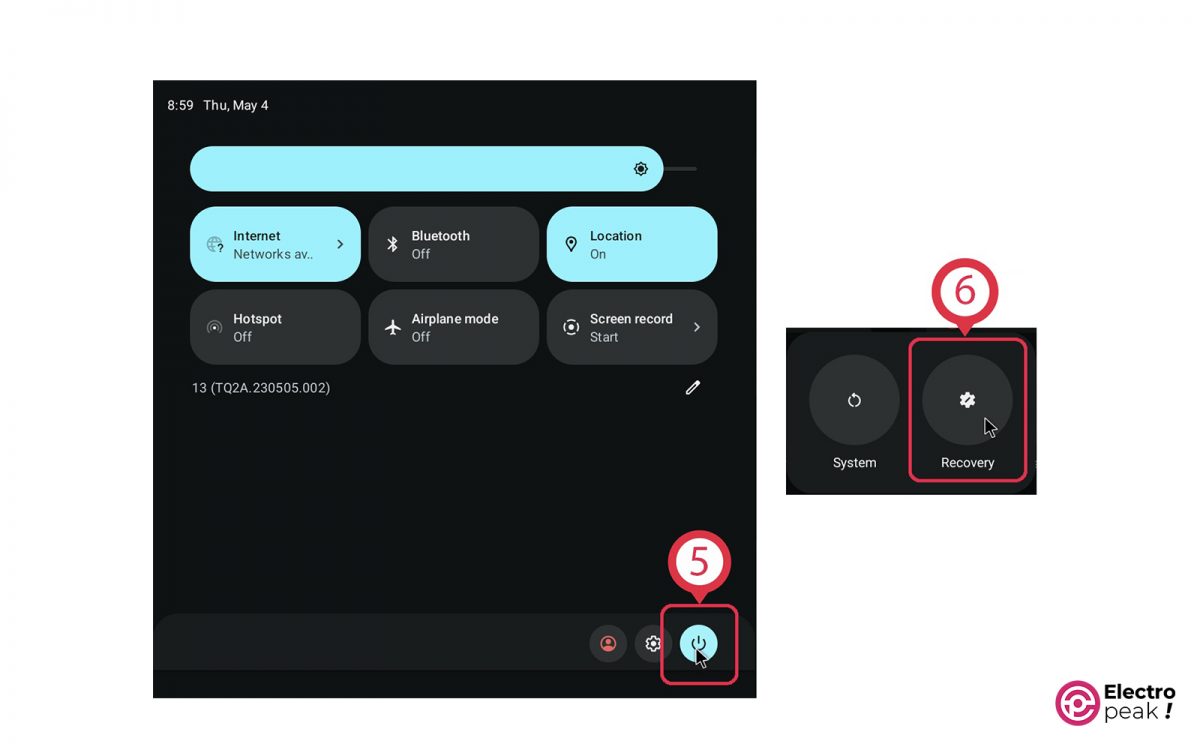
4. Reboot the system. Make sure to select “Recovery” from the options.
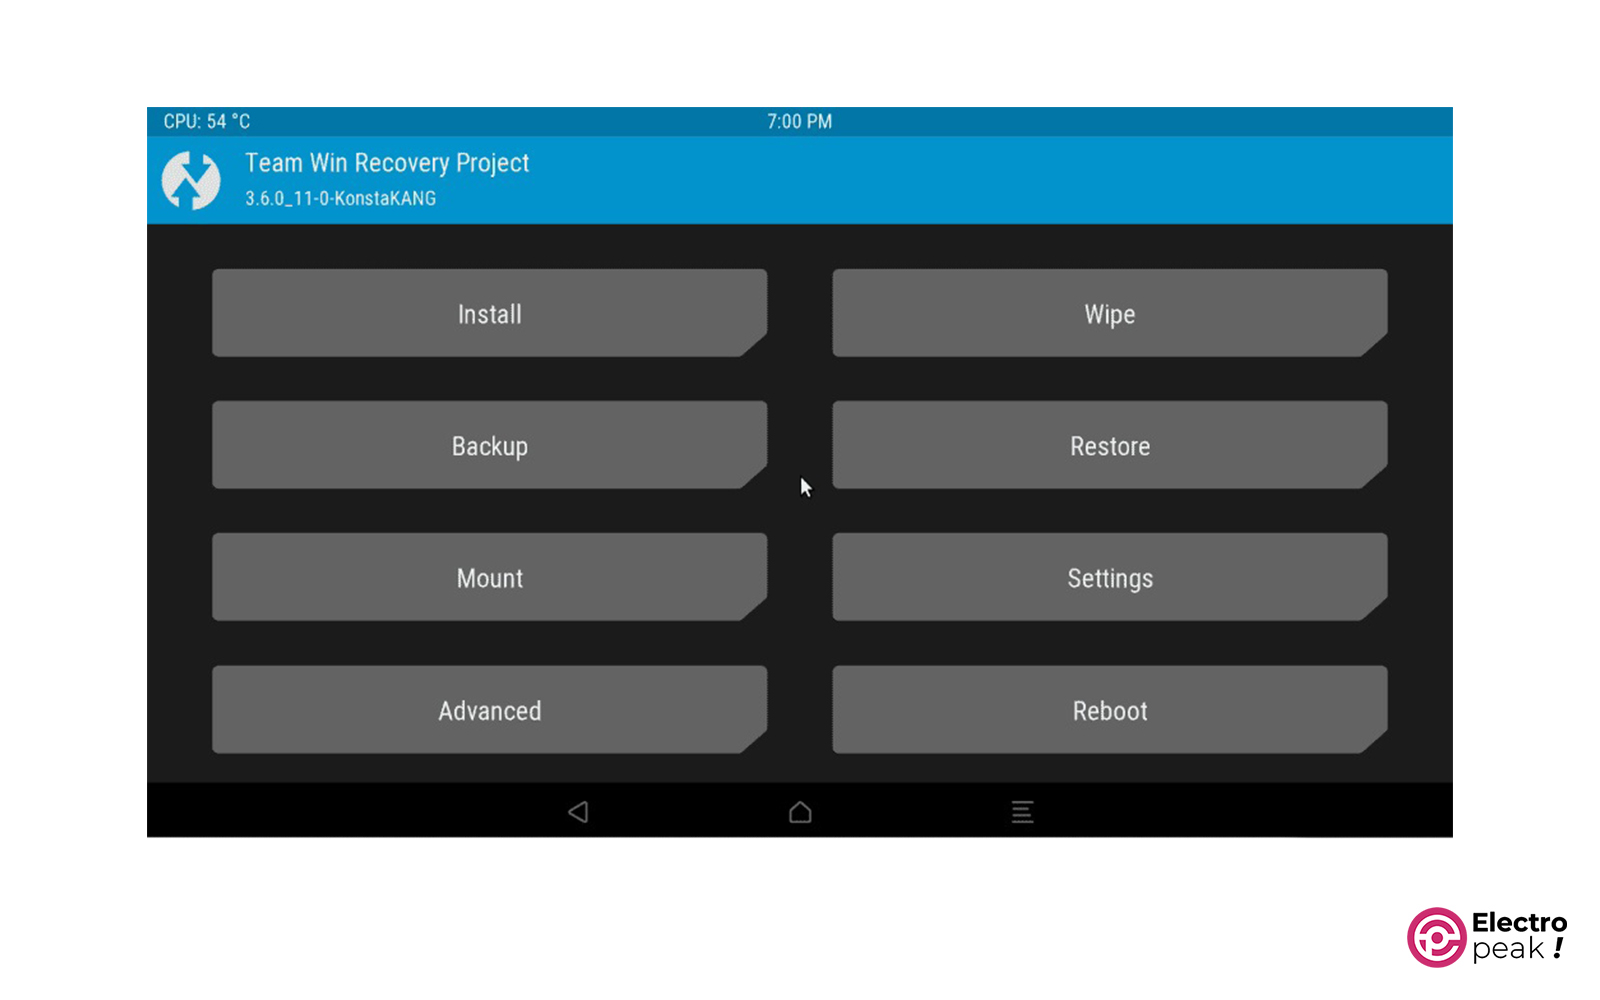
5. Your Raspberry Pi will enter Recovery mode after restarting.
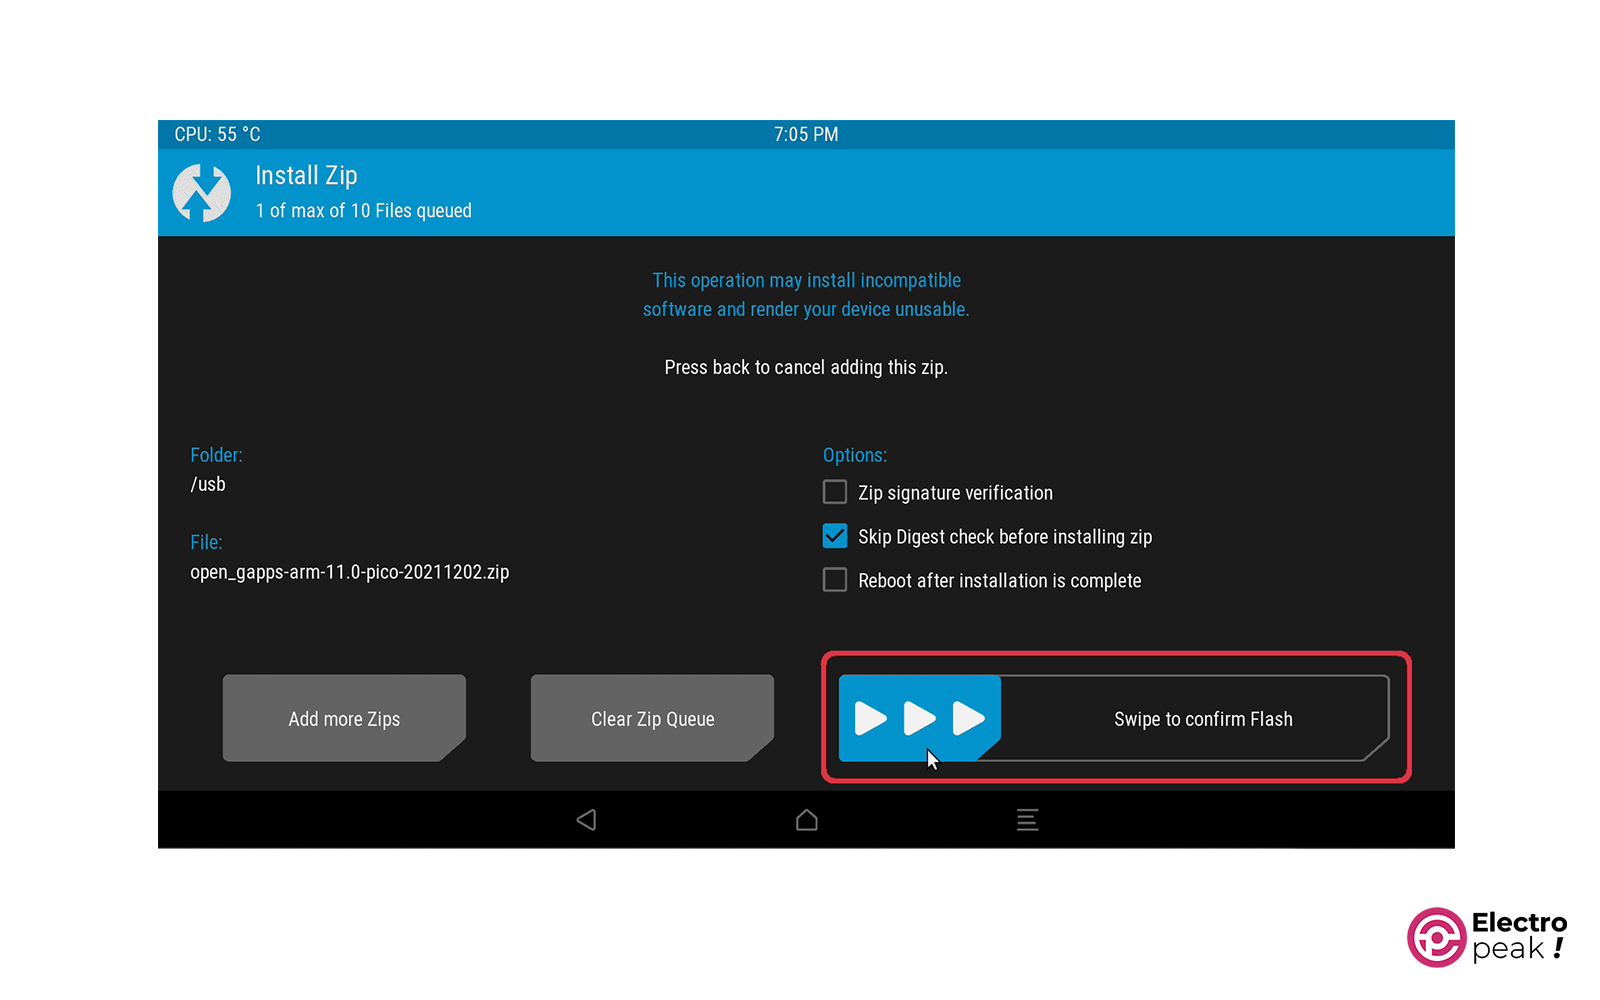
6. Next, follow these steps: 6.1- Click on “Mount” and select the flash that has the Google apps 6.2- Click on “Install” and select the downloaded file 6.3- Swipe the button shown in the image below to the right.
6.4- Click on “Reboot System.”
Success!You have installed Google apps on your Android operating system!
Once the system reboots, the previously downloaded Google apps will be installed on your Raspberry Pi. Finally, open the Google Play Store and complete the “Sign In” process. It’s very simple, but if you need any help, you can visit the links below. https://www.youtube.com/watch?v=lyKq1wkGOng https://www.thedonutwhole.com/how-do-i-sign-into-google-play-store/
What’s Next?
In this tutorial, we’ve learned how to install Android on Raspberry Pi. After installing Google Apps, we will have access to a wide range of applications. To work with this operating system, it’s recommended to use a touch screen monitor since Android is optimized for such usage. One interesting application is “Kodi,” which can turn your TV into a smart device. Here are some other operating systems you might be interested in: Batocera: An operating system designed for running old games (retro-gaming) on Raspberry Pi.
LibreElec: A specific operating system designed for running the Kodi application.
RetroPie: A well-known system for playing old games on Raspberry Pi, which is based on the Raspberry Pi operating system.
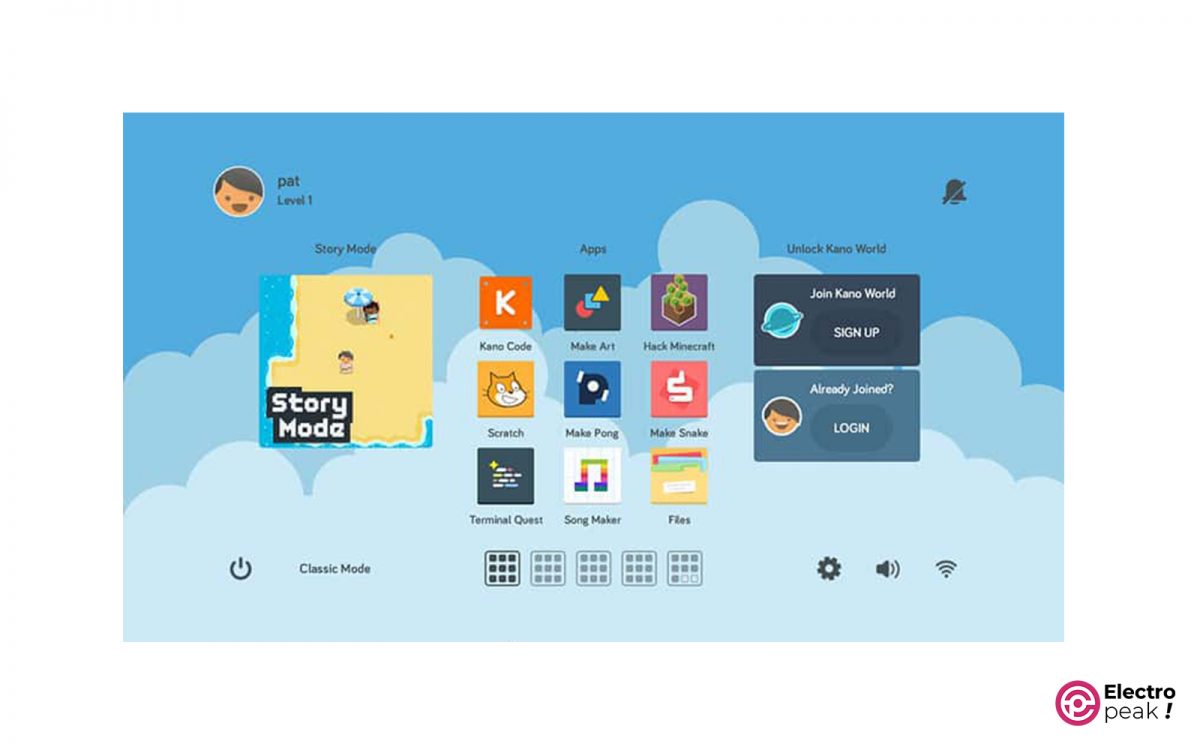
Kano: An operating system designed for children, with a focus on teaching them how to use a computer.
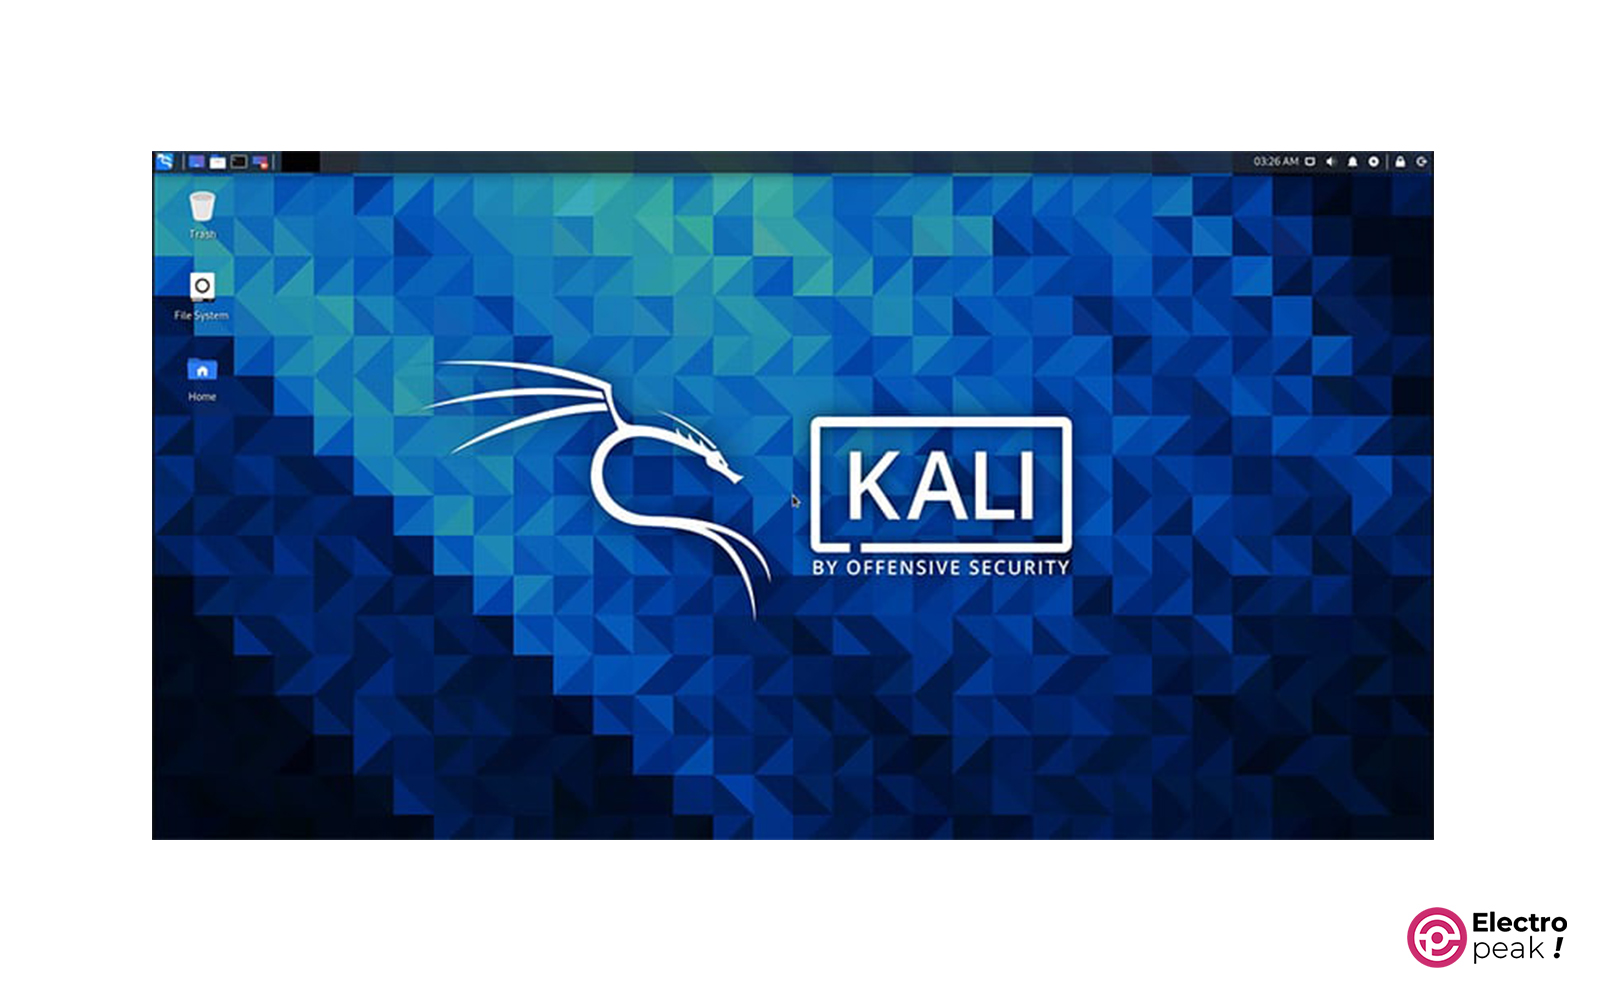
Kali Linux: The best choice for testing various security intrusions.
I followed the procedure as above
But nothing happens when I put the se card and power up the unit.
Anything I am doing wrong
Using pi2
Noobs works perfect on the same unit
have followed the above procedure , but once i insert sd in pi and power it up nothing happens . android installation does not start (waited 30 min).
any thing i am doing wrong . pl suggest
using 32GB sd
i tried lineage 17 . It started but i ended it with Power off and then
i could not use it anymore because it crashes anytime. (PI4).
Where is the Power-Button for Switch Off? F5?
Who can send me a Windows – img for installing on RPI4?
I did buy exagear for RPI1 but now i have RPI4. Who does have a code?
Toni (at) Singles.ms
So you mean that the installation worked for the first time, right? And the first time you turned off the PI, it didn’t work any more?
If so, there could be something wrong with the version of android you’re using. Try lineage 16 from the following link and see if it makes any difference. “https://raspberrytips.com/android-raspberry-pi-4/”
You can follow the same procedure explained in this article to install it.
I just wanted to say that the link for the android image is not working and its displaying an error 404 page. Is it possible for someone to update a fresh workinging link? Thanks.
Hi.
Unfortunately, there seems to be something wrong with the rasbperry-pi website itself and some download links have stopped working. You can use the following download link for a newer version. “https://androidfilehost.com/?fid=8889791610682891697”
The initial installation worked fine, but my TV on the HDMI interface with 1920x1080p does not match the display i.e. the dispaly is too big and I can’t read all. Is there a way to adjust this in config.txt ?


Comments (18)
Can I use Google play and download normal apps or no?
Yes, it should be okay.
سلام وقت بخیر
من زبانم خیلی اوکی نبود که انگلیسی بنویسم.
ممکنه راهنمایی کنید چجوری اندروید رو دانلود کنم از کجا ؟
Hi.
You can see the link for downloading the Android file in the “How to Install Android on RPi” section, Step 1. You can also visit the Persian version of this tutorial here:
https://thecaferobot.com/learn/installing-android-on-raspberry-pi/
I followed the procedure as above
But nothing happens when I put the se card and power up the unit.
Anything I am doing wrong
Using pi2
Noobs works perfect on the same unit
Hi Ravjeet Bomrah.
I don’t have Raspberry Pi2 here to test that. Try this tutorial.
https://www.youtube.com/watch?v=DWH81rw-zzo
have followed the above procedure , but once i insert sd in pi and power it up nothing happens . android installation does not start (waited 30 min).
any thing i am doing wrong . pl suggest
using 32GB sd
I have the same problem. I think it is because I have a composite display (not HDMI).
What kind of screen do you have?
No! That probably cannot be the problem! The screen has nothing to do with the installation of Android.
There doesn’t seem to be any problem in the steps explained in our article! Also follow the procedure of the following link to see if it makes any difference.
https://www.makeuseof.com/tag/install-android-raspberry-pi/
i tried lineage 17 . It started but i ended it with Power off and then
i could not use it anymore because it crashes anytime. (PI4).
Where is the Power-Button for Switch Off? F5?
Who can send me a Windows – img for installing on RPI4?
I did buy exagear for RPI1 but now i have RPI4. Who does have a code?
Toni (at) Singles.ms
So you mean that the installation worked for the first time, right? And the first time you turned off the PI, it didn’t work any more?
If so, there could be something wrong with the version of android you’re using. Try lineage 16 from the following link and see if it makes any difference. “https://raspberrytips.com/android-raspberry-pi-4/”
You can follow the same procedure explained in this article to install it.
I just wanted to say that the link for the android image is not working and its displaying an error 404 page. Is it possible for someone to update a fresh workinging link? Thanks.
Hi.
Unfortunately, there seems to be something wrong with the rasbperry-pi website itself and some download links have stopped working. You can use the following download link for a newer version. “https://androidfilehost.com/?fid=8889791610682891697”
Hi
The initial installation worked fine, but my TV on the HDMI interface with 1920x1080p does not match the display i.e. the dispaly is too big and I can’t read all. Is there a way to adjust this in config.txt ?
Thank you
Markus
The link is not working properly. it showing 404 to me
Hi, would this process work on the Raspberry pi 5? would a 4GB modelenough? Thanks
Hello,
Currently, we haven’t tested this model, but there’s a probability of it working that’s higher than 80%.