Contents

Interfacing VL53LXX Laser-Ranging Module with Arduino

Features of VL53LXX Laser-Ranging Module

The VL53L1X sensor module is a laser-ranging sensor based on Time-of-Flight (ToF). The ToF method measures the distance to the object by measuring a wave’s total travel time (between the sensor and the object). With a maximum frequency of 50Hz, the VL53L1X sensor can measure distances up to a range of 4 meters.

This low-power module is controlled through the I2C interface.

In this module, unlike previous generations of distance measuring modules, IR and optic filters are physically included. It also features the ST’s latest ToF technology, which enables us to measure accurate distances, regardless of the color or material of the target object.

The module has an onboard regulator that can be set up well in both 3.3V and 5V modes.

VL53L1X Module

Specifications of VL53LXX Laser-Ranging Module

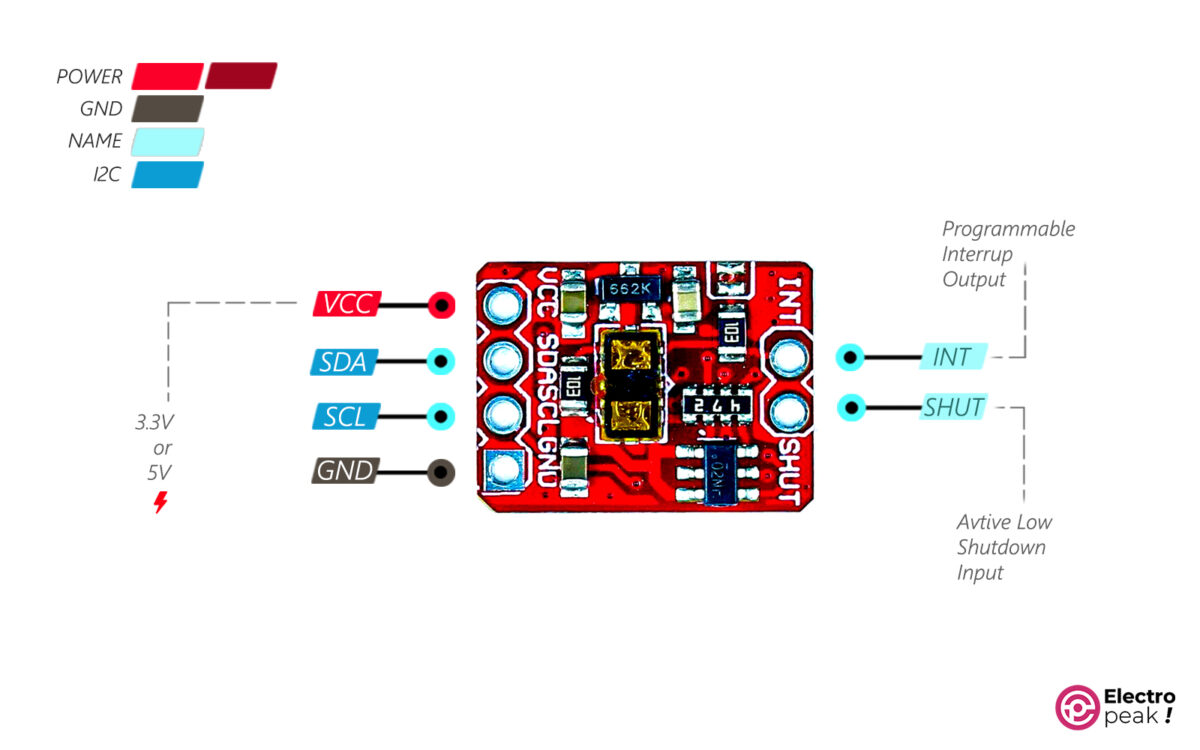
  • Working voltage: 3.3v/5v
  • Distance range: 40 to 4000 mm
  • Accuracy: ±5%
  • Sampling frequency: up to 50 Hz
  • Operating temperature: -20 to 80 °C
  • Field of view: 27°
  • Laser wavelength: 940nm
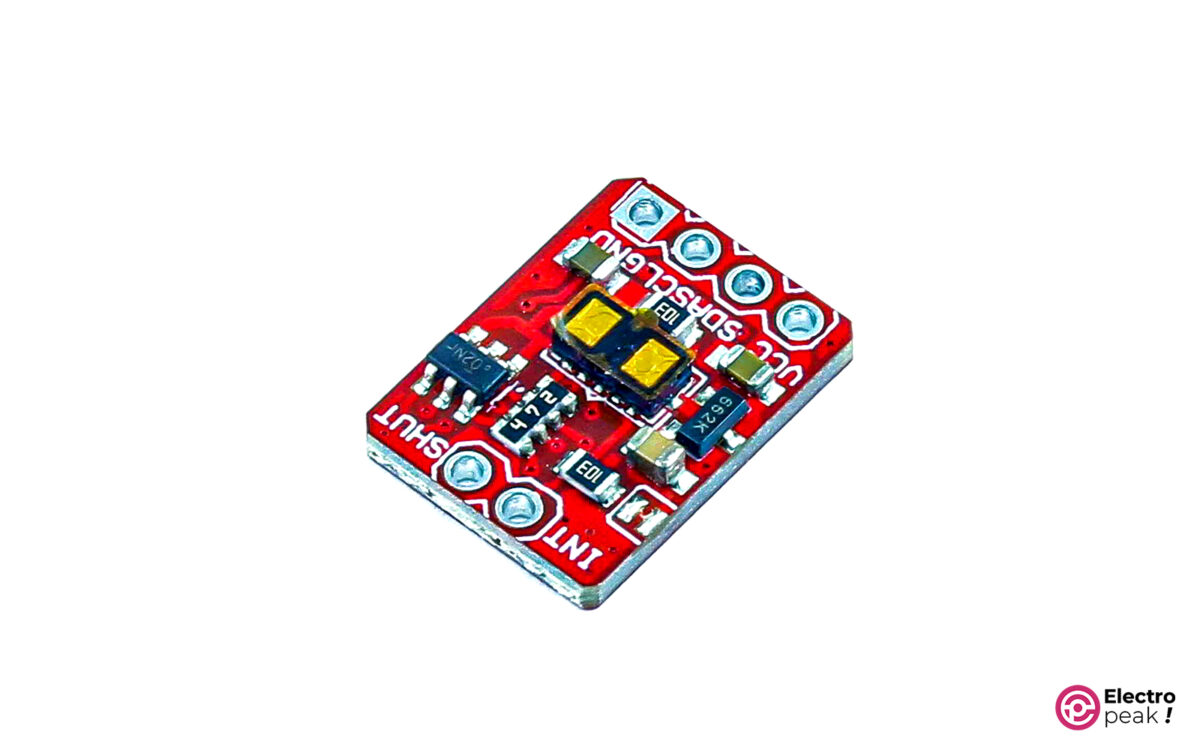
  • Dimensions: 11.80 x 16.35 mm

For more information, check out the datasheet. Here are the user manual and datasheet of VL53L1X.

Pinout of VL53LXX Laser-Ranging Module

VL53L1X module has six pins:

  • VCC: 3.3V/5V power supply
  • GND: Ground
  • SHUT: shutdown (Active Low)
  • INT: adjustable interrupt output for communicating with the microcontroller
  • SCL: I2C communication clock
  • SDA: I2C communication data line
VL53L1X Pinout

Required Materials

Hardware Components

Arduino UNO R3 × 1
VL53L1X Laser-Ranging Module × 1
Jumper Wire Male-Female × 1

Software

Arduino IDE

Interfacing VL53L1X Laser-Ranging Module with Arduino

Step 1: Wiring

Connect the wires as shown below.

VL53L1X Interface circuit

Step 2: Library

Install the library of the VL53L1X laser-ranging module.
VL53L1X library ZIP file

If you need more help installing the library, click on this link.

Step 3: Code

Copy and run the following code in Arduino.


#include <Wire.h>
#include <VL53L1X.h>
VL53L1X sensor;
void setup()
{
 Serial.begin(115200);
 Wire.begin();
 Wire.setClock(400000); // use 400 kHz I2C
 sensor.setTimeout(500);
 if (!sensor.init())
 {
 Serial.println("Failed to detect and initialize sensor!");
 while (1);
 }
 sensor.setDistanceMode(VL53L1X::Short);
 sensor.setMeasurementTimingBudget(15000);
 sensor.startContinuous(15);
 Serial.println("new program");
}

void loop()
{
 Serial.println(String(millis())+","+String(sensor.read()));
 delay(50);
}

Open the serial monitor window. The first number in front of the arrow is “time,” and the next is “distance” in millimeters. The numbers should change when the distance between the object and the sensor changes.

results in serial monitor
Liked What You See?​
Get Updates And Learn From The Best​

Leave a Reply

Your email address will not be published. Required fields are marked *