
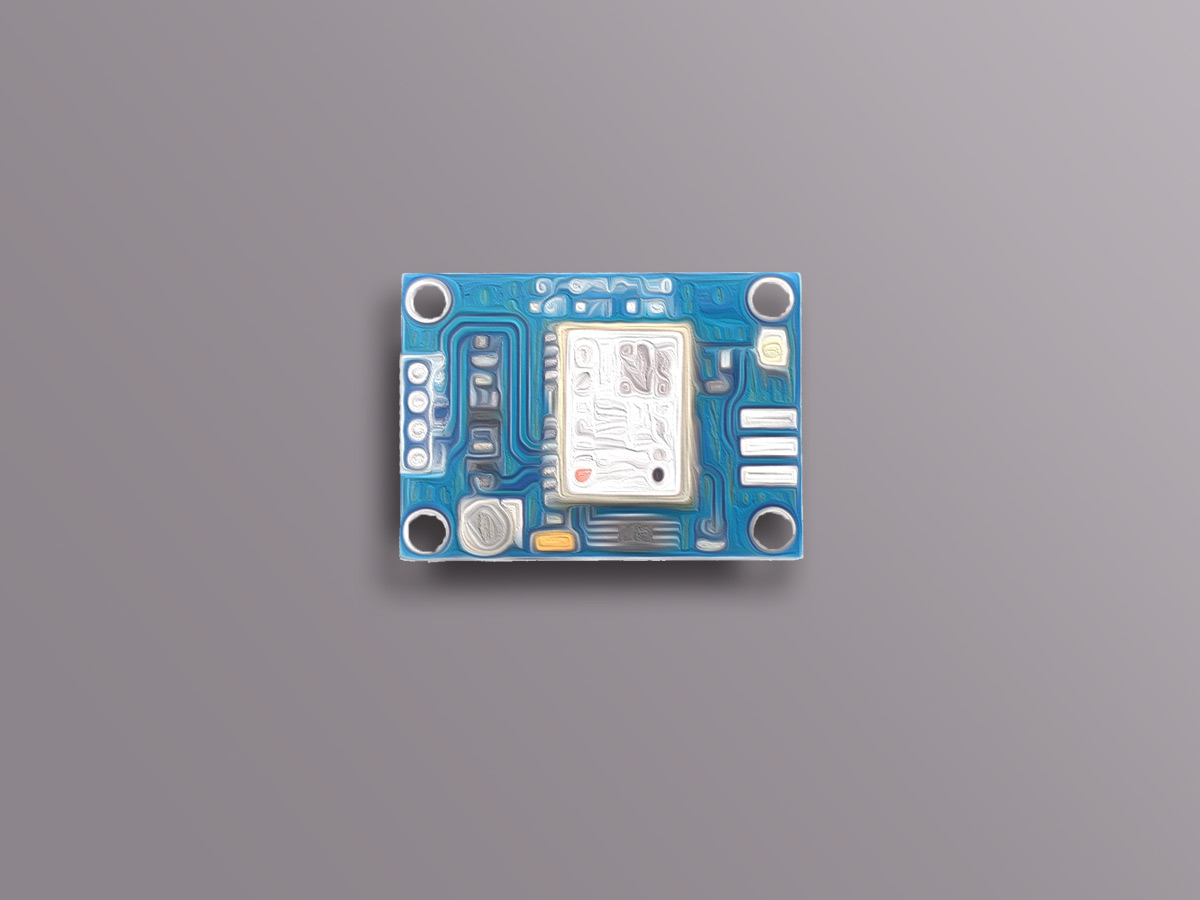
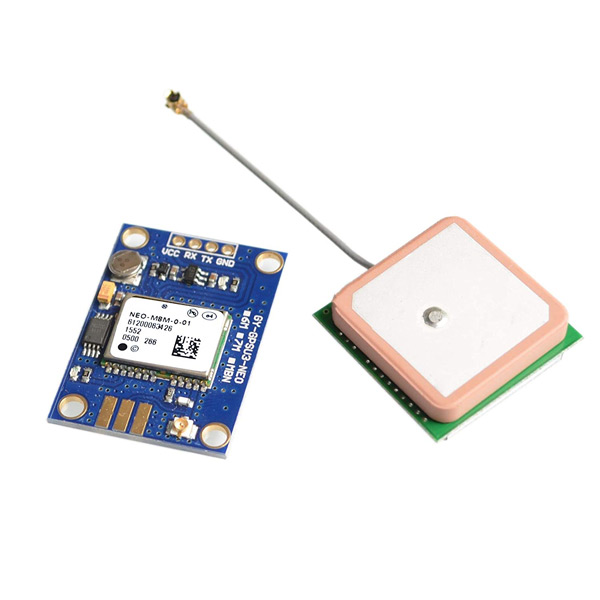
NEO-8M GPS Module Features
The GY-NEO-8M module is an advanced GPS module based on uBlox m8N that supports UART communication protocol with active antenna. You can interface this module easily with a microcontroller. This module has a rechargeable battery and can also be connected directly to a computer using a USB to TTL converter.
NEO-8M can receive information and then calculate the geographical position with very high accuracy and fast speed. In addition to supporting BeiDou, Galileo, GLONASS, GPS / QZSS, the module has an internal memory to save settings. NEO-8M is compatible with Arduino and can be used in any project
Tip
The on-board LED starts blinking when module is connecting to GPS satellites.
You can download the datasheet of this module here.
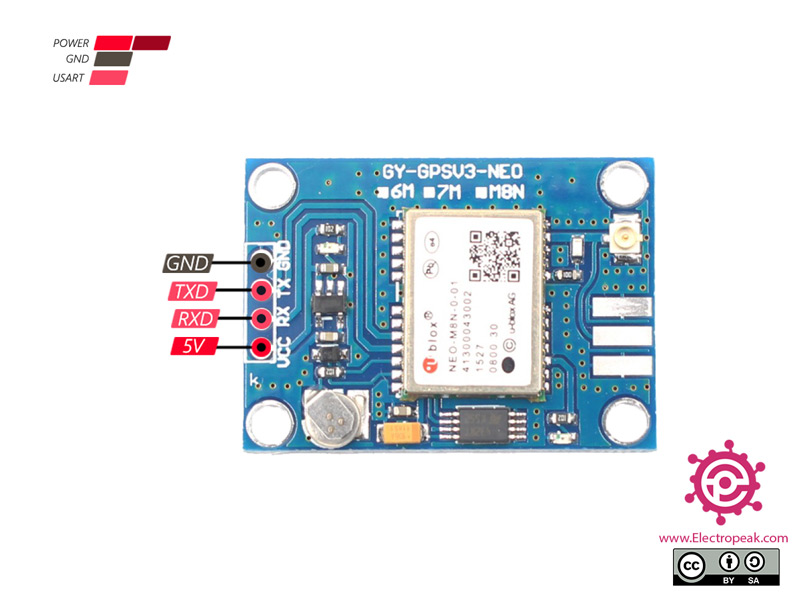
GY-NEO-8M GPS Module Pinout
This sensor has 4 pins:
- VIN: Module power supply – 5 V
- GND: Ground
- RX: Receive data via serial protocol
- TX: Sending data via serial protocol
You can see pinout of this module in the image below.
Required Materials
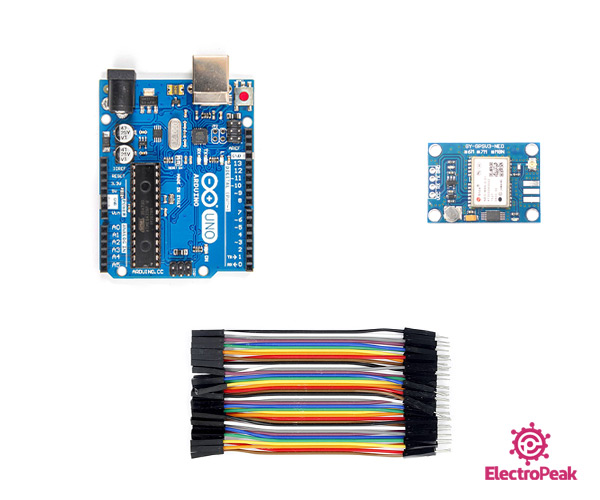
Hardware Components
Software Apps
Interfacing GY-NEO-8M GPS Module with Arduino
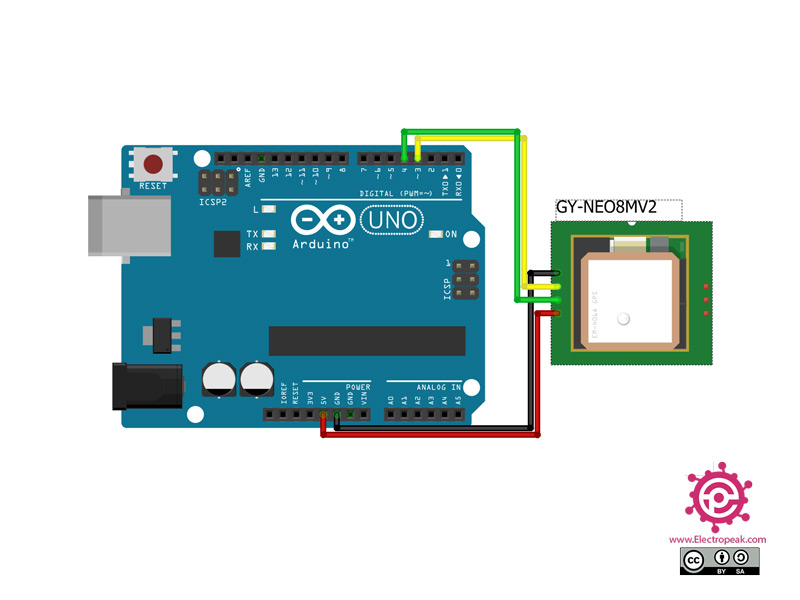
Step 1: Circuit
The following circuit shows how you should connect Arduino to R305 module. Connect wires accordingly.
Step 2: Code
Install the following library on your Arduino.
Tip
If you need more help with installing a library on Arduino, read this tutorial: How to Install an Arduino Library
Upload the following code to your Arduino.
 /*
modified on Sep 27, 2020
Modified by MohammedDamirchi from https://github.com/mikalhart/TinyGPSPlus
Home
*/

#include <TinyGPS++.h>
#include <SoftwareSerial.h>

/*
   This sample demonstrates TinyGPS++'s capacity for extracting custom
   fields from any NMEA sentence.  TinyGPS++ has built-in facilities for
   extracting latitude, longitude, altitude, etc., from the $GPGLL and
   $GPRMC sentences.  But with the TinyGPSCustom type, you can extract
   other NMEA fields, even from non-standard NMEA sentences.

   It requires the use of SoftwareSerial, and assumes that you have a
   9600-baud serial GPS device hooked up on pins 4(RX) and 3(TX).
*/
static const int RXPin = 4, TXPin = 3;
static const uint32_t GPSBaud = 9600;

// The TinyGPS++ object
TinyGPSPlus gps;

// The serial connection to the GPS device
SoftwareSerial ss(RXPin, TXPin);

/*
   By declaring TinyGPSCustom objects like this, we announce that we
   are interested in the 15th, 16th, and 17th fields in the $GPGSA
   sentence, respectively the PDOP (F("positional dilution of precision")),
   HDOP (F("horizontal...")), and VDOP (F("vertical...")).

   (Counting starts with the field immediately following the sentence name,
   i.e. $GPGSA.  For more information on NMEA sentences, consult your
   GPS module's documentation and/or http://aprs.gids.nl/nmea/.)

   If your GPS module doesn't support the $GPGSA sentence, then you
   won't get any output from this program.
*/

TinyGPSCustom pdop(gps, "GNGLL", 1); // $GPGSA sentence, 15th element
TinyGPSCustom hdop(gps, "GNGLL", 3); // $GPGSA sentence, 16th element

void setup()
{
  Serial.begin(115200);
  ss.begin(GPSBaud);

  Serial.println(F("UsingCustomFields.ino"));
  Serial.println(F("Demonstrating how to extract any NMEA field using TinyGPSCustom"));
  Serial.print(F("Testing TinyGPS++ library v. ")); Serial.println(TinyGPSPlus::libraryVersion());
  Serial.println(F("by Mikal Hart"));
  Serial.println();
}

void loop()
{
  Serial.print(F(" LAT=")); Serial.print(atof(pdop.value())/100,7);
  Serial.print(F("\tLON=")); Serial.println(atof(hdop.value())/100,7);
  delay(100);

  while (ss.available() > 0)
    gps.encode(ss.read());


  Serial.print(F("  Date/Time: "));
  if (gps.date.isValid())
  {
    Serial.print(gps.date.month());
    Serial.print(F("/"));
    Serial.print(gps.date.day());
    Serial.print(F("/"));
    Serial.print(gps.date.year());
  }
  else
  {
    Serial.print(F("INVALID"));
  }

  Serial.print(F(" "));
  if (gps.time.isValid())
  {
    if (gps.time.hour() < 10) Serial.print(F("0"));
    Serial.print(gps.time.hour());
    Serial.print(F(":"));
    if (gps.time.minute() < 10) Serial.print(F("0"));
    Serial.print(gps.time.minute());
    Serial.print(F(":"));
    if (gps.time.second() < 10) Serial.print(F("0"));
    Serial.print(gps.time.second());
    Serial.print(F("."));
    if (gps.time.centisecond() < 10) Serial.print(F("0"));
    Serial.print(gps.time.centisecond());
  }
  else
  {
    Serial.print(F("INVALID"));
  }

  Serial.println();
}
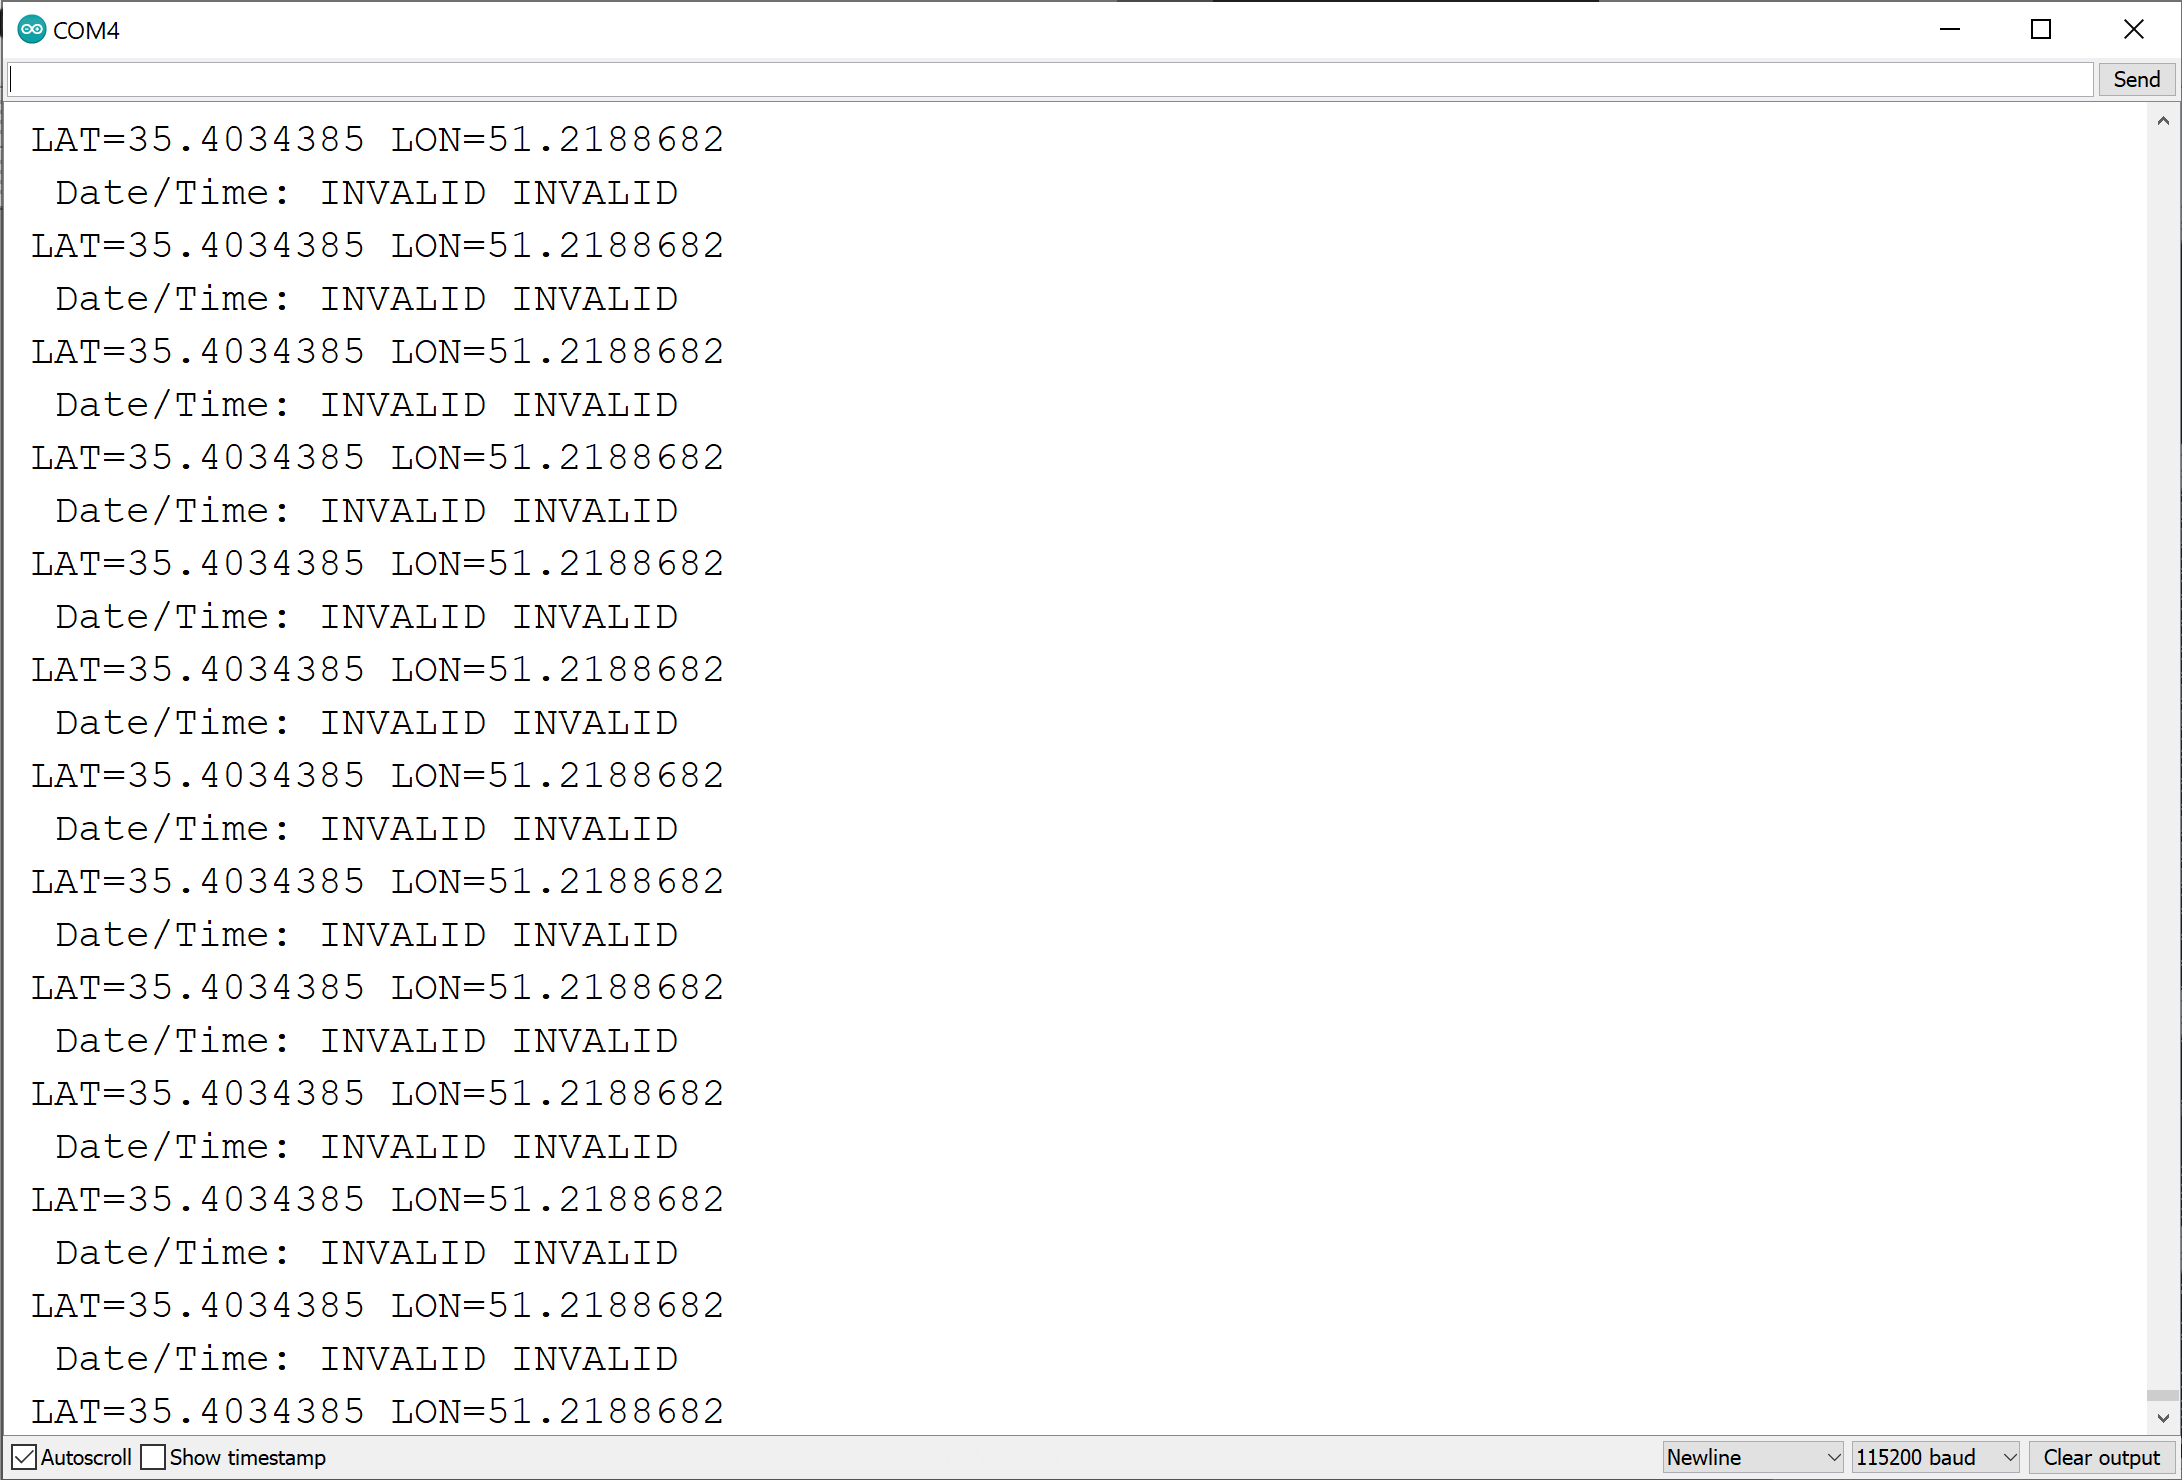
After uploading the code, you can see the output in the serial monitor.

Comments (22)
Hi,
In the NEO-8M GPS Module Datasheet you have included above, there is a information that this module power supply voltage is maximum of 3,6V
So can we safety conenct it to 5V arduino pin?
BR,
Marcin
Hi,
The datasheet is for the IC itself. But the module here comes with a voltage regulator, so you can safely connect it to the Arduino 5V pin.
You cannot connect the UART pins (TX – Arduino) directly to the NEO-8M, the voltage regulator in the module is only for power supply. For the UART you need a simple voltage divider to 3.3V.
How can I use this program on Arduino due? when I am using Arduino UNO everything is ok but when I use this program on Arduino due it doesn’t work. i use pins 8&9 as RX and TX
Hi.
Unfortunately, the library used in this code is written especially for AVR based Arduino Boards and doesn’t work for the Arduino Due which is based on STM32.
Arduino Due is not using STM32, it uses Microchip SAM MCU.
A32bits MCU powered at 3V3.
everything is fine but the data coming out on the serial monitor lon = 0.0000,
lat = 0.0000,
Date / Time: INVALID INVALID
Hi.
First, this module can only work outdoors since it needs to connect to the GPS network system to give valid results. Also, you need to wait for 5 to 10 minutes for the module to connect to the network.
I waited 10 minutes outdoors but got such a result. What does it mean?
UsingCustomFields.ino
Demonstrating how to extract any NMEA field using TinyGPSCustom
Testing TinyGPS++ library v. 1.0.2
by Mikal Hart
It probably means the module has been successfully connected to the network. What do you get for lon, lat, Date and Time?
everything is fine but the data coming out on the serial monitor lon = 0.0000,
lat = 0.0000,
Date / Time: INVALID INVALID
i am using arduino mega board and connected to 50 and 52 pins , 50-TX and 52-RX
i placed to for 10 minutes , but also it is same.
I’ve the same problem. The only change is that it is connected to 3.3V
UsingCustomFields.ino
Demonstrating how to extract any NMEA field using TinyGPSCustom
Testing TinyGPS++ library v. 1.0.2
by Mikal Hart
Date/Time: INVALID INVALID
LAT=0.0000000 LON=0.0000000
And it goes like this…
Hi, I only get:
Demonstrating how to extract any NMEA field using TinyGPSCustom
Testing TinyGPS++ library v. 1.0.2
by Mikal Hart
Date/Time: INVALID INVALID
LAT=0.0000000 LON=0.0000000
And it goes like this…
but if I connect my NEO-6 Ubox work fine. The NEO-8 need some special code or anything ?
regards.
Hi Dear.
according to your data logs from device , it seems connection is not correct.
please first check your hardware and then check C code programming that should define Module pin correctly.
you Don’t need any special change in your code for NEO-8.
How do I communicate to my NEO-M8N GPS via SPI with Arduino.
I am using a M8N GPS from RaceDayQuads part # RDQ BN-880.
Can you help with making this connection via Arduino & TinyGPS Plus?
Hi there
NEO-M8N GPS does not have SPI interface
so it just setup with UART Protocol.
Hi friend,
When I upload the code, I don’t see anything in the serial monitor.
I can only see several characters with no sense in a same straight line.
Something like this:
��������������؉��������������
What can be wrong?
Hi dear
did you set baudrate correctly?
it should be 115200 in serial Monitor.
hello, are the neo 6m,7m and 8m libraries different?
Hi war,
no, all of them use the same TinyGPS++ library.
Are there more examples, for example to get the accelerometer data?
Hi Suyi,
First, use a USB-TTL converter to connect your GPS module to your PC.
Then, download the U-Center program to test and verify each reported value using the app.
You might need to activate certain settings in the app and save them.
After configuring, the module should send you all the necessary values, which you can access using
serial.readto retrieve the required data (the current library may not fully support this).