MTH01 Temperature and Humidity Sensor Features
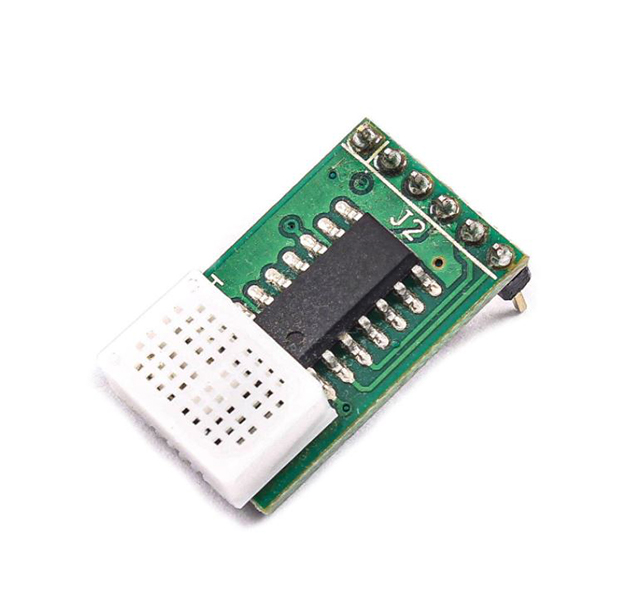
The MTH01 sensor module is a suitable sensor for measuring ambient temperature and humidity. This module actually consists of two sensors: an NTC type high precision temperature sensor and a resistive type relative humidity sensor. It can communicate to different microcontrollers through SPI interface. The key features of this module are:
- Temperature measurement range: -40 to +70 degrees Celsius
- Temperature measurement accuracy: 0.5 degrees Celsius
- Humidity measurement range: 18% to 98% RH
- Humidity measurement accuracy: 3% RH
- Response time: 60 seconds
Download the datasheet of this sensor here.
MTH01 Temperature and Humidity Sensor Pinout
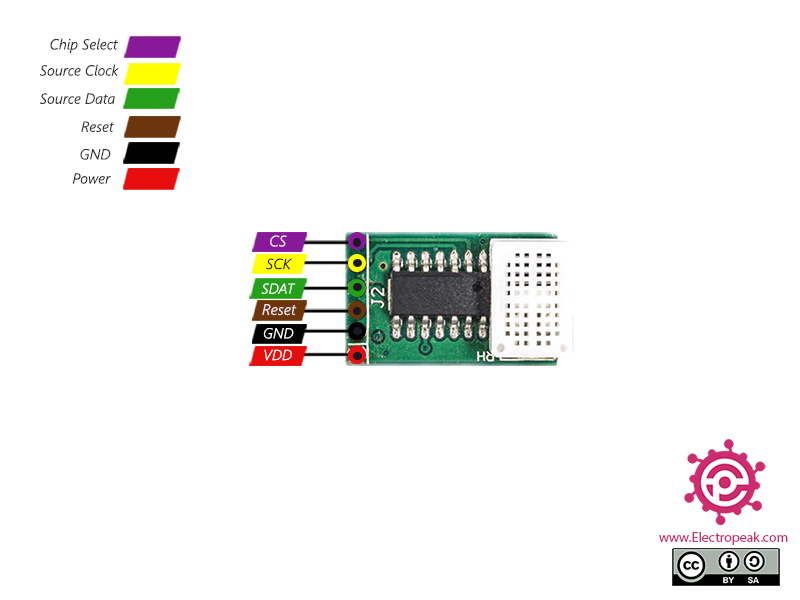
The MTH01 module has 6 pins:
- CS: Enable sensor pin for transmitting data
- SCK: Clock pin
- SDAT: Data Output pin (MISO)
- Reset: Reset (For resetting the module, set it to LOW)
- GND: Ground
- 3V: Power supply module
You can see the pinout of this module here.
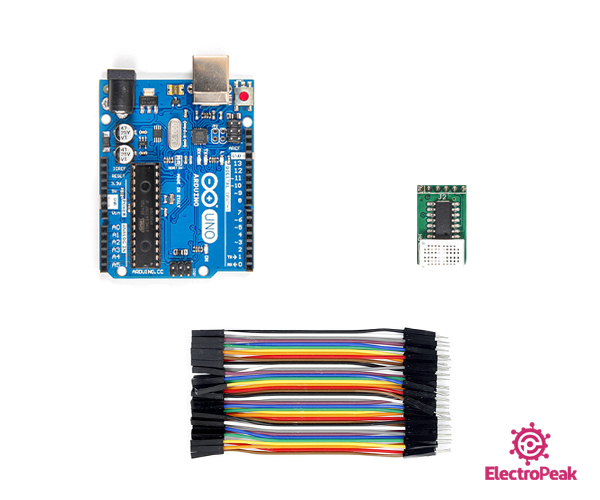
Required Materials
Hardware Components
Software Apps
Interfacing MTH01 Temperature and Humidity Sensor with Arduino
Step 1: Circuit
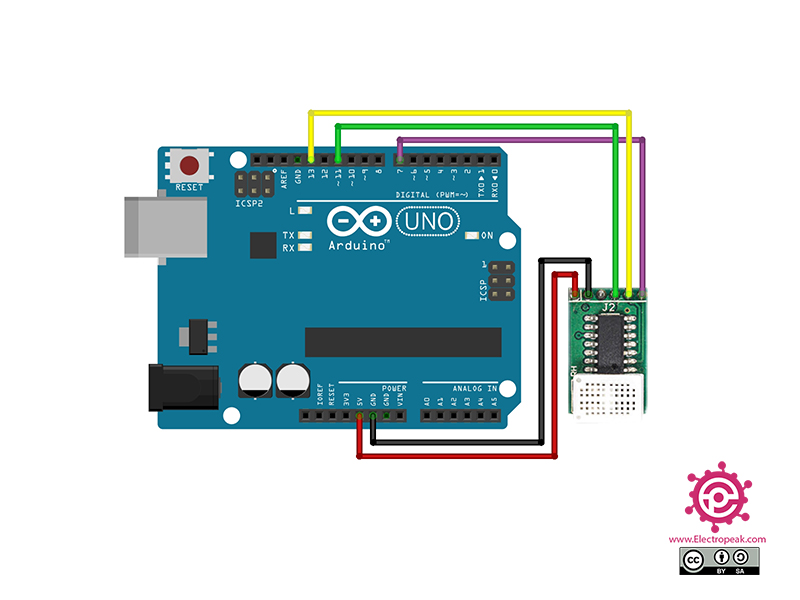
The following circuit shows how you should connect the Arduino Board to the MTH01 module. Connect wires accordingly.
Step 2: Library
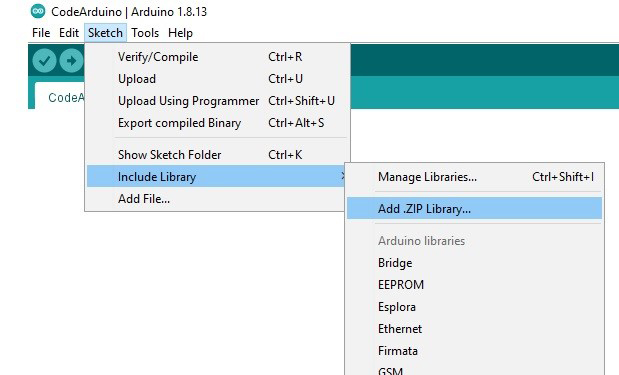
Download the MTH01_Arduino_Lib library from the link below. Then go to Include Library and install it.
https://github.com/mehran-maleki/MTH01_Arduino_Lib
Tip
If you need more help with installing a library on Arduino, read this tutorial: How to Install an Arduino Library
Step 3: Code
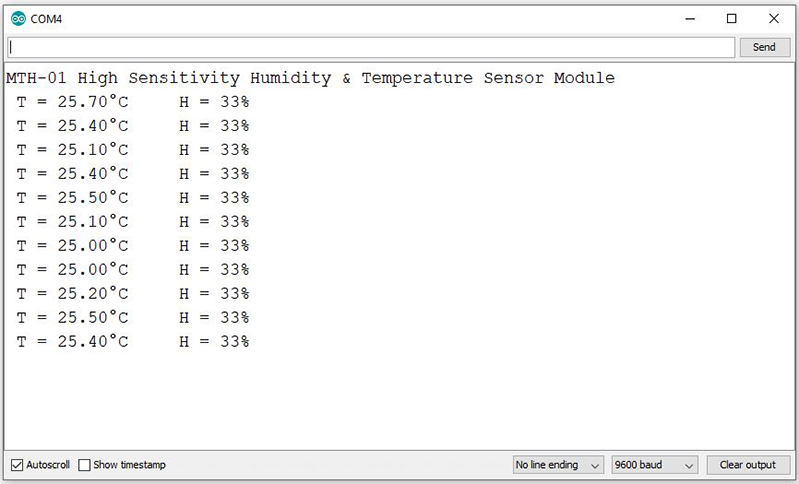
Upload the following code to your Arduino Board. Then open the Serial Monitor.
/*
  Made on Apr 04, 2021
  By MehranMaleki @ Electropeak
  Home
*/

//  Sensor top view
//  CS     -  On/Off   1|°     --------------   [][][][]
//  SCK    -  CLK      2|°    [              ]  [][][][]
//  SDAT   -  MOSI     3|°    [              ]  [][][][]
//  Reset  -  Reset    4|°    [              ]  [][][][]
//  VSS    -  GND      5|°     --------------   [][][][]
//  VDD    -  +5V      6|°                       °    °
//                        -----------------------------

//Arduino connections
// CS    ->  7
// SCK   ->  13
// SDAT  ->  11
// Reset ->  NC
// VSS   ->  GND
// VDD   ->  5V


#include <Arduino.h>
#include "MTH01.h"

#define mth01_pin 7   // define CS pin

MTH01 mth01;
void setup()
{
  Serial.begin(9600);
  Serial.println("MTH-01 High Sensitivity Humidity & Temperature Sensor Module");
  mth01.begin(mth01_pin);   // Start the Sensor
}

void loop()
{
  Serial.print(" T = ");
  Serial.print(mth01.getTemperature());
  Serial.write("\xC2\xB0");   // The Degree symbol
  Serial.print("C");
  Serial.print("\t H = ");
  Serial.print(mth01.getHumidity());
  Serial.println("%");
  delay(5000);
}
In above code, we first enable the sensor. Then, every 5 seconds, the temperature and humidity data is taken from the sensor and display it on the Serial Monitor.
