ADS1232 24-Bit ADC Module Features
Almost all microcontrollers come with ADC pins, but they lack high precision. In a lot of projects, analog values need to be measured with high accuracy, or the voltage level of the measured signal is not within the microcontroller measurement range, or even the microcontroller used doesn’t have an ADC pin. In such cases, analog to digital converter modules are used.
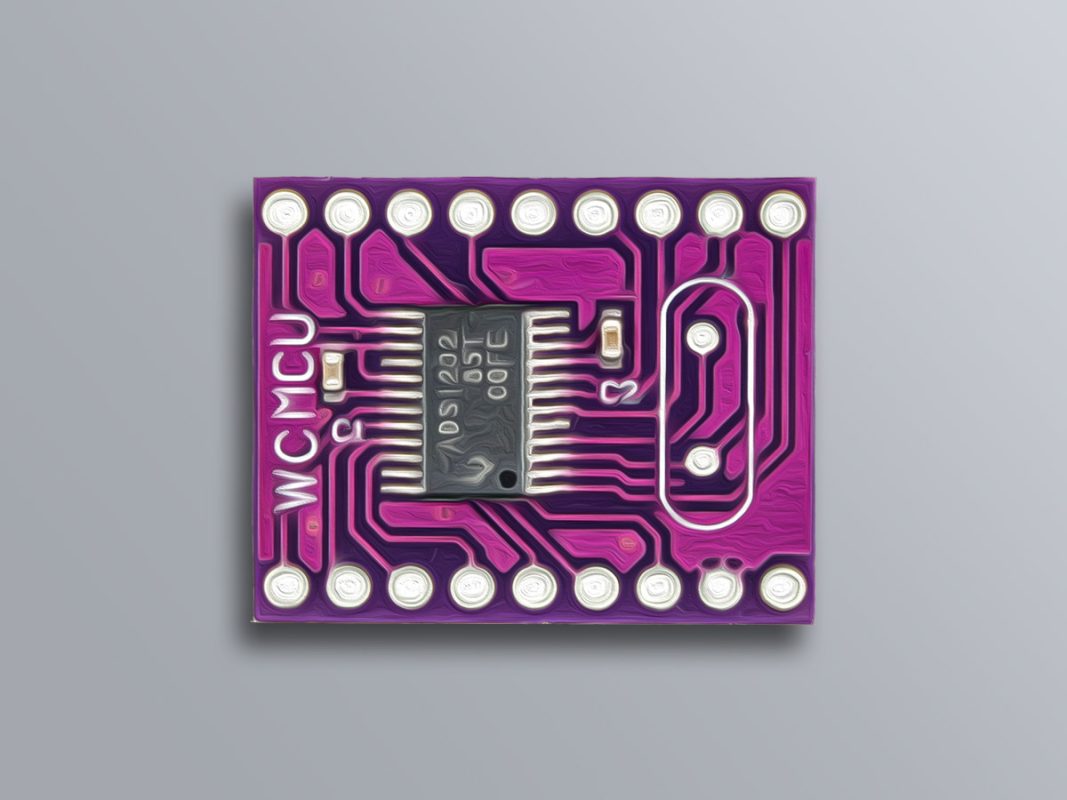
ADS1232 module is an analog to digital converter module that has 24-bit precision. This module can be used to measure the output value of the Wheatstone Bridge.
To download the datasheet of this module, click here.
ADS1232 24-Bit ADC Module Pinout
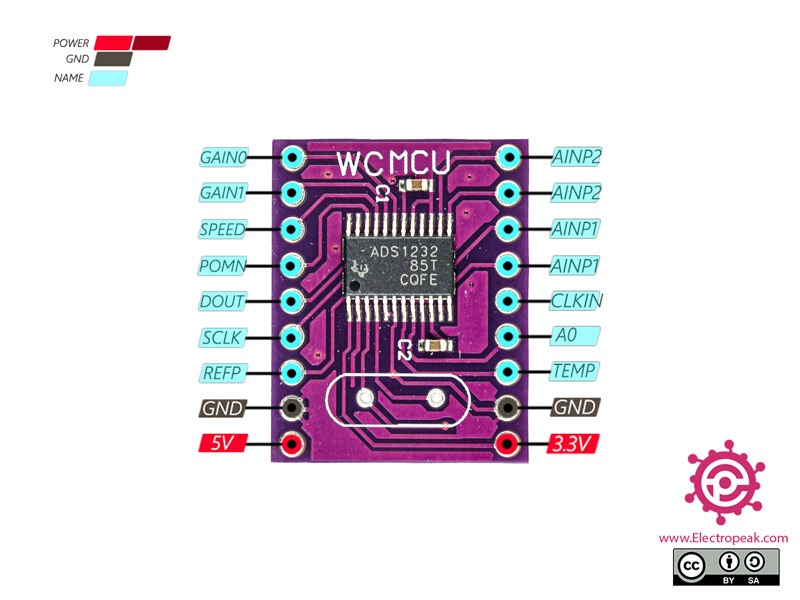
The ADS1232 ADC Module has 10 pins:
- 3.3V: Module power supply – 3.3V
- 5V: Module power supply – 5V
- GND: Ground
- REFP: Reference Voltage
- SCLK: Source Clock for Synchronization
- DOUT: Data Transmit Line
- POMN: Module Power Control
- SPEED: Data Transmit Speed
- GAIN1: Gain Selection
- GAIN0: Gain Selection
- TEMP: Temperature Sensor Selection
- A0: First Analog Input
- CLKIN: External Clock Input
- AINP1: Wheatstone Bridge Input 1
- AINP2: Wheatstone Bridge Input 2
You can see the pinout of this module in the image below.
Required Materials
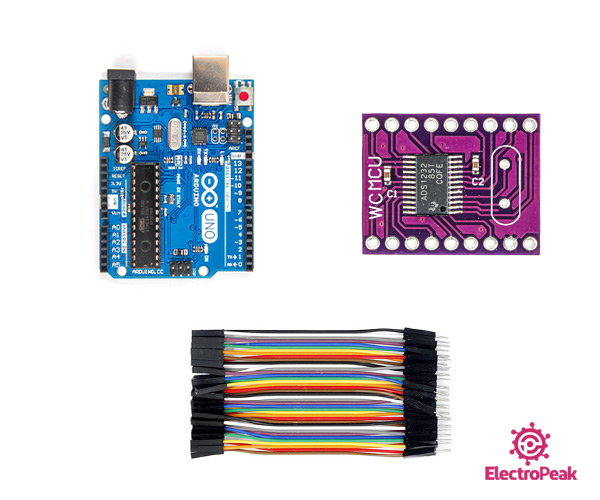
Hardware Components
Software Apps
Interfacing ADS1232 24-Bit ADC Module with Arduino
Step 1: Circuit
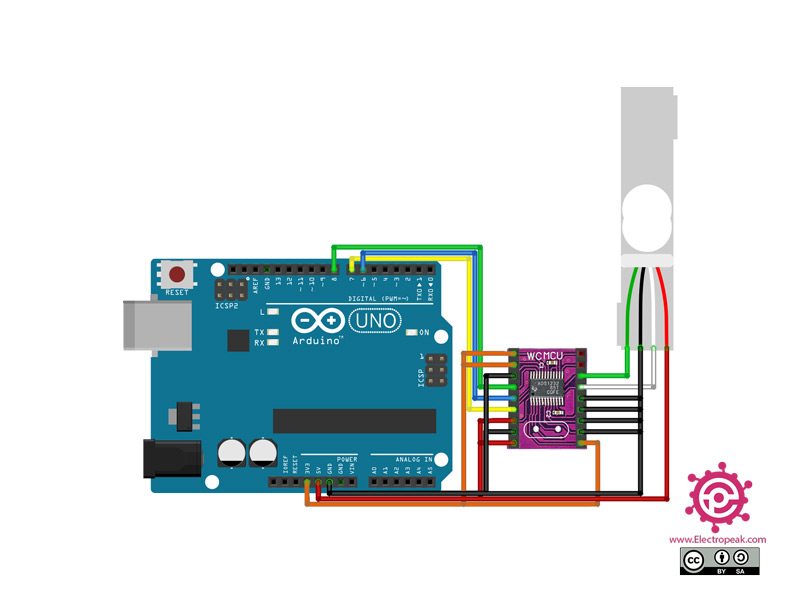
The following circuit shows how you should connect Arduino to ADS1232 module. Connect wires accordingly.
Note
A load cell is used to test the module.
Step 2: Installing Library
Install the library below on your Arduino IDE.
Note
If you need more help with installing a library on Arduino, read this tutorial: How to Install an Arduino Library
Step 3: Code
Upload the following code to Arduino. After that open the Serial Monitor.
/*
  Modify on May 16, 2021
  Modify by MohammedDamirchi base of https://github.com/ciorceri/ADS1232
  Home
*/

#define _dout 6
#define _sclk 7
#define _pdwn 8

#include "ADS1232.h"

ADS1232 weight = ADS1232(_pdwn, _sclk, _dout);

void do_calibration() {
  long t_new_offset = 0;
  long t_raw_read = 0;
  float t_set_scale_value = 0;
  float t_weight = 0;

  // reset to default values
  weight.OFFSET = 0;
  weight.SCALE = 1.0;

  // tare
  t_new_offset = weight.raw_read(3);
  weight.OFFSET = t_new_offset;
  Serial.print("Calibration offset = ");Serial.println(weight.OFFSET);
  Serial.println("You have 10 seconds to put a 2L CocaCola bottle on scale");
  delay(10000);

  // do calibration based on a known weight
  t_raw_read = weight.raw_read(3);
  Serial.print("Units read = ");Serial.println(t_raw_read);
  t_set_scale_value = t_raw_read / 2.0;  // divide it to the weight of a CocaCola bottle
  weight.SCALE = t_set_scale_value;
  Serial.print("Calibration scale value = ");Serial.println(weight.SCALE);

  // read weight
  t_weight = weight.units_read(3);
  Serial.print("Weight = ");Serial.println(t_weight);
}

void setup() {
  Serial.begin(9600);
  weight.power_up();
  do_calibration();
}

void loop() {
  Serial.println(weight.units_read(3));
  delay(1000);
*/
This code is for measuring the Wheatstone Bridge output value on AINP1 pins.


Comments (2)
The link to ads1232 library goes to ads1118, please update or clarify
Regards
Thank you for your reply! The link has been updated.