Contents

Interfacing EasyDriver – Stepper Motor Driver with Arduino

EasyDriver Stepper Motor Features

If you use a stepper motor in your projects, you will definitely need a controller for that. EasyDriver is a type of driver that controls stepper motors. This module is based on A3967 IC. This module can be used to control bipolar motors.

Features;

  • Allowable continuous current: 0.750A
  • Maximum allowable current: 0.850A
  • Maximum allowable voltage: 30V
  • Thermal protection
  • Crossover-Current Protection
  • Potentiometer included to limit the current
Note

It can operate bipolar stepper motors in full, 1/2, 1/4 and 1/8 step modes.

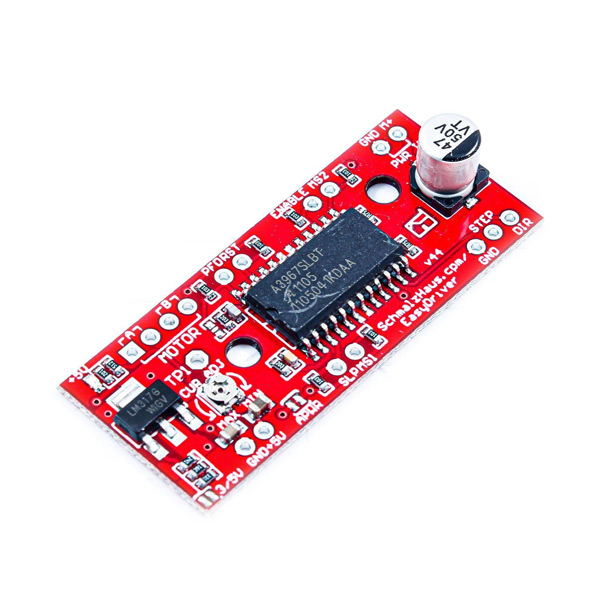
You can download the datasheet of A3967 IC here.

EasyDriver Stepper Motor Pinout

This driver has the following pins:

Power Supply Pins:

  • GND: Ground
  • V+: Motor power supply – Max 30V
  • +5V: Driver power supply

 Motor Coil Pins:

  • A1: Motor first pin – Coil 1
  • A2: Motor second pin – Coil 1
  • B1: Motor first pin – Coil 2
  • B2: Motor second pin – Coil 2

Pins for Controlling Motor Motion

  • DIR: Digital signal to control the direction of motor motion
  • STEP: Digital signal to control rotation steps
  • RDF: Current decay mode
  • SLP: When this signal is LOW, the outputs will be disabled.
  • RST: Reset signal
  • ENABLE: The driver will be disabled if this pin is High.

Microstep Resolution Pins

  • MS1: Microstep pin 1
  • MS2: Microstep pin 2

By changing these two pins, you can change the step from full step to 1/8. The table below shows these changes:

Note

You can limit the current using the onboard potentiometer.

You can see the pinout of this module here.

Required Material

Hardware component

Arduino UNO R3 × 1
EasyDriver Stepper Motor Driver Board × 1
BYGH403 1.65A Stepper Motor × 1
Male to Female Jumper wire × 1

Software

Arduino IDE
Note

Note that you need a proper power supply (adapter, battery, etc.) to interface this motor with EasyDriver driver. The power supply is not listed above. Prepare one yourself.

Warning

When you want to choose a power supply, pay attention to the voltage and current passing through the stepper motor and its driver.

For example, you can use a 12V and 1A power supply.

Interfacing EasyDriver Stepper Motor with Arduino

Step 1: Circuit

The following circuit shows how you should connect Arduino to this driver. Connect wires accordingly.

Step 2: Code

Upload the following code to Arduino.

   /*
  EasyDriver-Stepper-Motor-Driver Module
  made on 20 Dec 2020
  by Amir Mohammad Shojaee @ Electropeak
  
Home
*/ #define stp 2 #define dir 3 #define MS1 4 #define MS2 5 int x; void setup() { pinMode(stp, OUTPUT); pinMode(dir, OUTPUT); pinMode(MS1, OUTPUT); pinMode(MS2, OUTPUT); digitalWrite(MS1,LOW); digitalWrite(MS2,LOW); } void loop() { digitalWrite(dir, HIGH); for(x= 0; x<1000; x++) { digitalWrite(stp,HIGH); delay(1); digitalWrite(stp,LOW); delay(1); } delay(1000); digitalWrite(dir, LOW); for(x= 0; x<1000; x++) { digitalWrite(stp,HIGH); delay(1); digitalWrite(stp,LOW); delay(1); } delay(1000); }

In this program, 4 pins are used: STP, DIR, MS1 and MS2. We set MS1 and MS2 to LOW so that the stepper motor rotates in full step mode.

When the program runs, the stepper motor will rotate 5 times cloockwise and 5 times counter-clockwise.

Liked What You See?​
Get Updates And Learn From The Best​

Comments (2)

  • Charlie Clarke Reply

    Hi
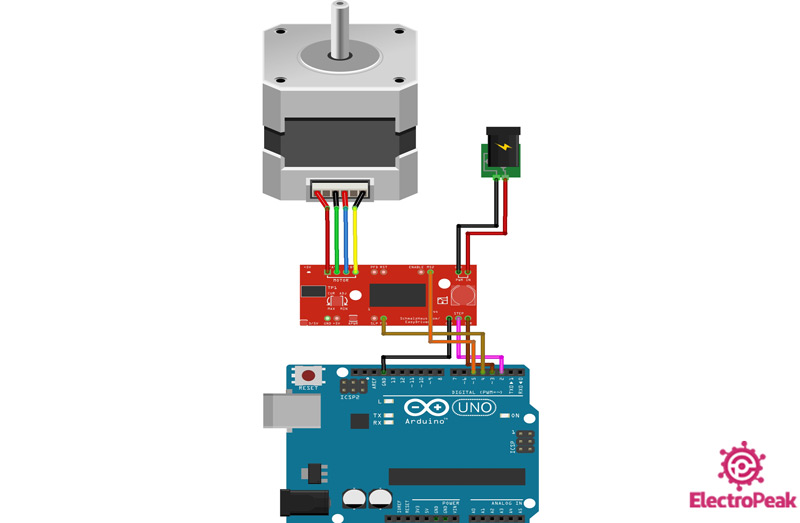
    Thanks for explaining the use of the easy driver along with the stepper motor.
    Could you advise the code i would need to control the motor and turn it a set number of steps with say a push button. I’m very new to this and I’m finding it difficult to find the code that will allow me to control the motor so the shaft of the motor finishes at a given postion at the push of a button. I need to be able to add 3 buttons and at each push send the shat to a differnt position.
    Thanks in advance

    January 27, 2023 at 4:51 pm
    • Ali Abdolmaleki Reply

      Hi dear
      it is so easy, you can use below function in your Loop() :


      if(key1 == 1 && key1_bounce > Millisecond())
      {
      digitalWrite(dir, HIGH);

      for(x= 0; x<1000; x++)
      {
      digitalWrite(stp,HIGH);
      delay(1);
      digitalWrite(stp,LOW);
      delay(1);
      }

      key1 = 0;
      }

      else if(key2 == 1 && key2_bounce > Millisecond())
      {
      digitalWrite(dir, LOW);
      for(x= 0; x<1000; x++)
      {
      digitalWrite(stp,HIGH);
      delay(1);
      digitalWrite(stp,LOW);
      delay(1);
      }
      key2 = 0;

      }

      February 28, 2023 at 2:40 pm

Leave a Reply

Your email address will not be published. Required fields are marked *