Contents

Interfacing 3D Printer 20X04 LCD Smart Controller with Arduino

Interfacing 3D Printer Ramps 20X04 LCD Smart Controller with Arduino

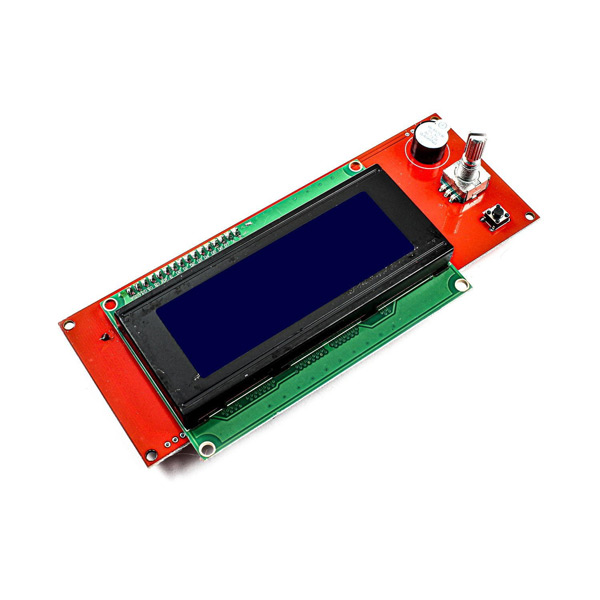
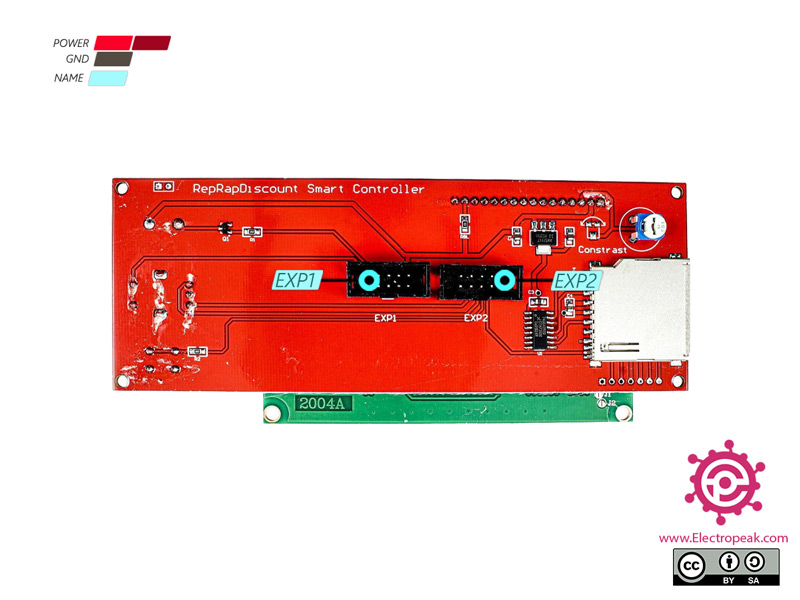
Using this display, you don’t need a computer to control your 3D printer anymore. In this shield, an SD card is used to transfer the 3D designs to the 3D printer and store the G-Codes. This shield consist of a 20x04 Character Line LCD.

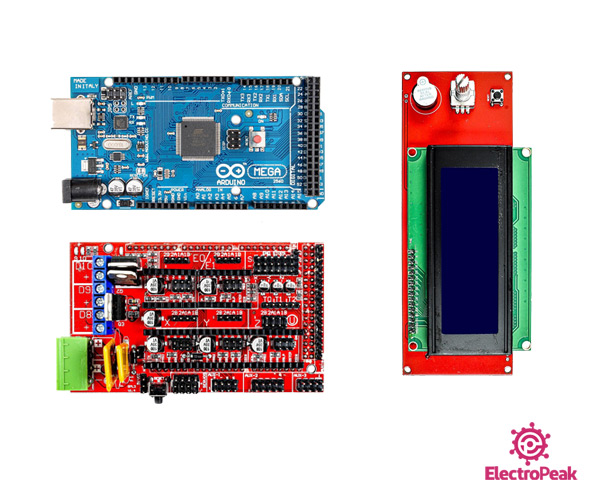
Using the rotary encoder on the board, you can move in the device menu and access data. This display is compatible with ramps 1.4 controllers and can be run with marlin and repiter firmwares.

For more details, please refer to the link below.

https://reprap.org/wiki/RepRapDiscount_Smart_Controller

3D Printer LCD Smart Controller Pinout

This 3D printer LCD has 2 cables and an adaptor for Ramps board. It also has an SD card reader.

Required Materials

Hardware Components

Arduino MEGA R3 × 1
Smart Controller LCD Display × 1
RAMPS 1.4 Printing Control Board for Reprap 3D Printer × 1

Software Apps

Arduino IDE

Interfacing 3D Printer LCD Smart Controller with Arduino

Step 1: Circuit

The 3D printer LCD smart controller is a ready-made Ramps shield that can be placed on the Arduino Mega.

Step 2: Code

First, download the following file:

Marlin.zip

Now, extract the file. Then, open the Configuration.h file. Search for LCD and SD support. In this part, you can adjust the display settings.

Search for the following line and uncomment it.

#define REPRAP_DISCOUNT_FULL_GRAPHIC_SMART_CONTROLLER

Save the file, open the Marlin.ino file and upload it to your Arduino.

This code is for setting up all types of 3D printers.

Liked What You See?​
Get Updates And Learn From The Best​

Leave a Reply

Your email address will not be published. Required fields are marked *