

Overview
Nowadays, ESP32 Board have been so popular due to the very attractive features and capabilities they offer, as well as their very low price. This microcontroller is also so easy to program. The programming can be done in so many different development environments, such as Lua programming language, Arduino IDE, MicroPython, ESP-IDF, etc. Among all these programming environments, Arduino IDE is a pretty good option to start working with the ESP32 boards, since it is open source and better known compared to the other development environments. In this tutorial, you will learn how to install ESP32 boards on Arduino IDE.
What You Will Learn
- Full steps of installing ESP32 Boards on Arduino IDE
- Program ESP32 Board to scan available Wi-Fi networks

What You Need to Install ESP32 Boards
In order to use this tutorial, you need to have the Arduino IDE install on your system. Also, try to keep your Arduino IDE updated. You can download the latest version of Arduino IDE from the link below.
https://www.arduino.cc/en/software/
If you need further help on how to install Arduino IDE, refer to the link below.
How to Install Arduino IDE on Windows & MAC
Install ESP32 Board on Arduino IDE
To install ESP32 Board on Arduino IDE, do as following.
Step 1: Prepare the Arduino IDE
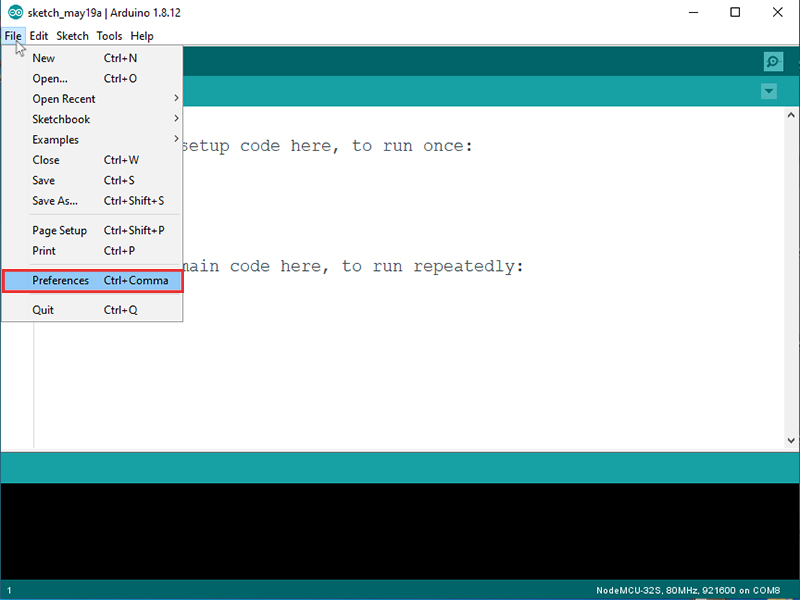
Open the Arduino IDE. Go to File → Preferences.
Step 2: Add the ESP32 Link
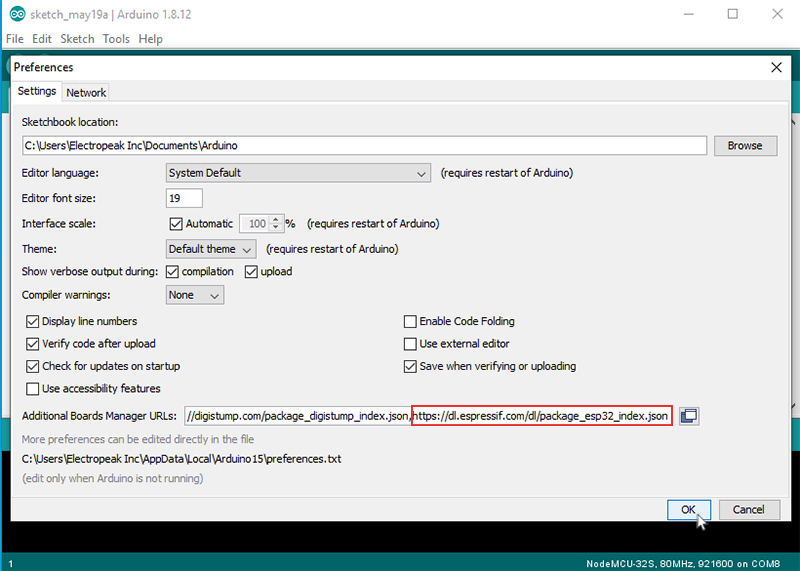
Add the link “https://espressif.github.io/arduino-esp32/package_esp32_index.json” to the “Additional Boards Manager URLs”. Click on OK.
Attention
If there is already a link in this section, separate the links using a comma.
Step 3: Open Boards Manager in Arduino IDE
In Arduino IDE, go to Tools → Board → Boards Manager…

Step 4: Install ESP32 Board
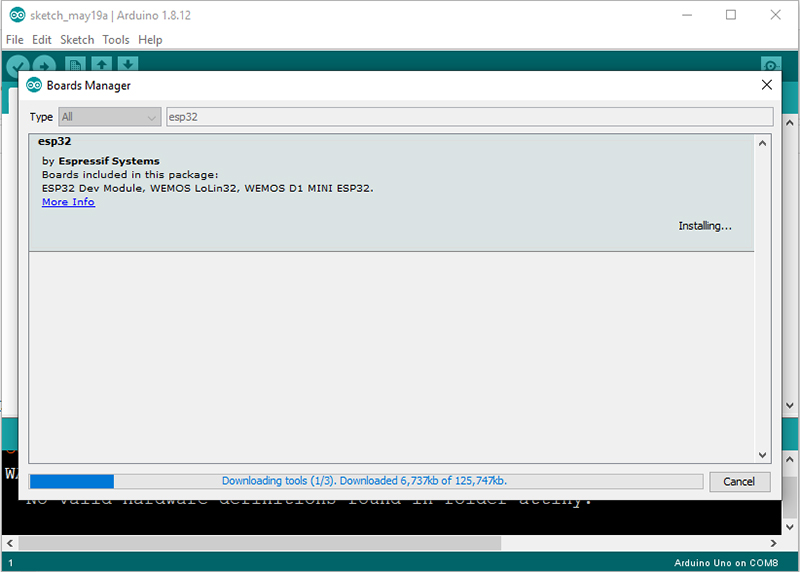
Type the word “ESP32” and wait for the results. Then install the “esp32 by Espressif Systems” by clicking on “Install”.

By clicking on “Install”, the Arduino IDE will start downloading and installing the ESP32 Boards. You will see something like this.
Wait for the installation to complete. Afterwards, you will see an image like this.
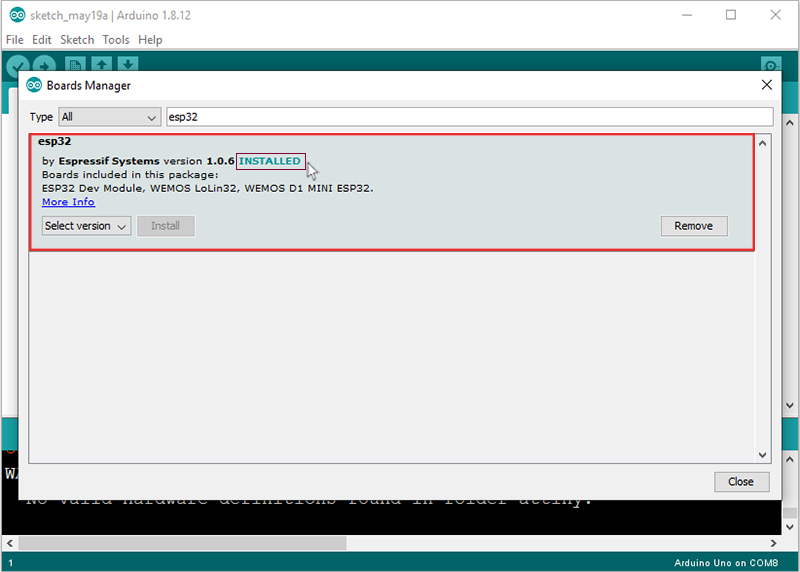
Success
You have successfully installed the ESP32 Boards on Arduino IDE.
Test the Installation: Scan Wi-Fi Network Using the ESP32 Board
The board we use here is NodeMCU – ESP32S Edition. You can see the links of the hardware components and software applications you need.
Hardware Components
Software Apps
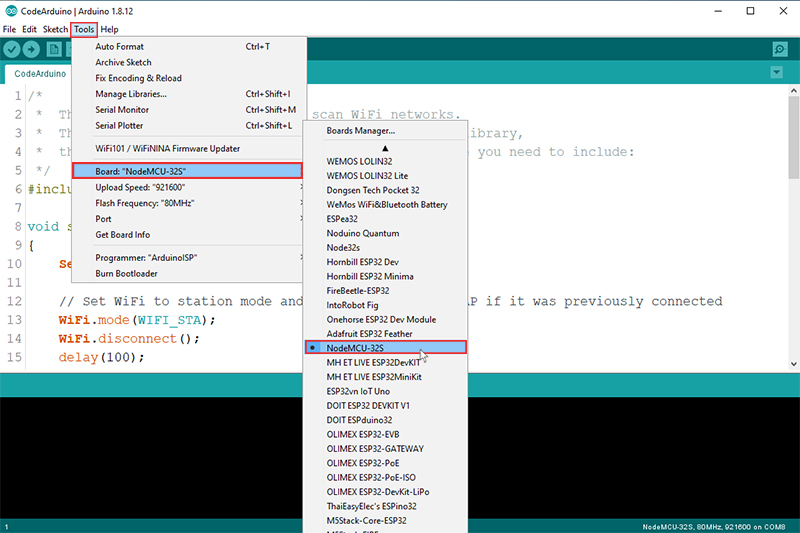
If you’re using a different ESP32 based development board, you can use the same code. You just need to choose the right Board in Arduino IDE.
Code
First, make sure that you have selected the right Board and Port.
Then, upload the code below on your ESP32 Board. This code is one of the Arduino IDE’s examples, and you can find it in File → Examples → Wifi → WifiScan.
/*
 *  This sketch demonstrates how to scan WiFi networks.
 *  The API is almost the same as with the WiFi Shield library,
 *  the most obvious difference being the different file you need to include:
 */
#include "WiFi.h"

void setup()
{
    Serial.begin(115200);

    // Set WiFi to station mode and disconnect from an AP if it was previously connected
    WiFi.mode(WIFI_STA);
    WiFi.disconnect();
    delay(100);

    Serial.println("Setup done");
}

void loop()
{
    Serial.println("scan start");

    // WiFi.scanNetworks will return the number of networks found
    int n = WiFi.scanNetworks();
    Serial.println("scan done");
    if (n == 0) {
        Serial.println("no networks found");
    } else {
        Serial.print(n);
        Serial.println(" networks found");
        for (int i = 0; i < n; ++i) {
            // Print SSID and RSSI for each network found
            Serial.print(i + 1);
            Serial.print(": ");
            Serial.print(WiFi.SSID(i));
            Serial.print(" (");
            Serial.print(WiFi.RSSI(i));
            Serial.print(")");
            Serial.println((WiFi.encryptionType(i) == WIFI_AUTH_OPEN)?" ":"*");
            delay(10);
        }
    }
    Serial.println("");

    // Wait a bit before scanning again
    delay(5000);
}
After successfully uploading the code on your ESP32 Board, you can see an image like this in the Arduino IDE.
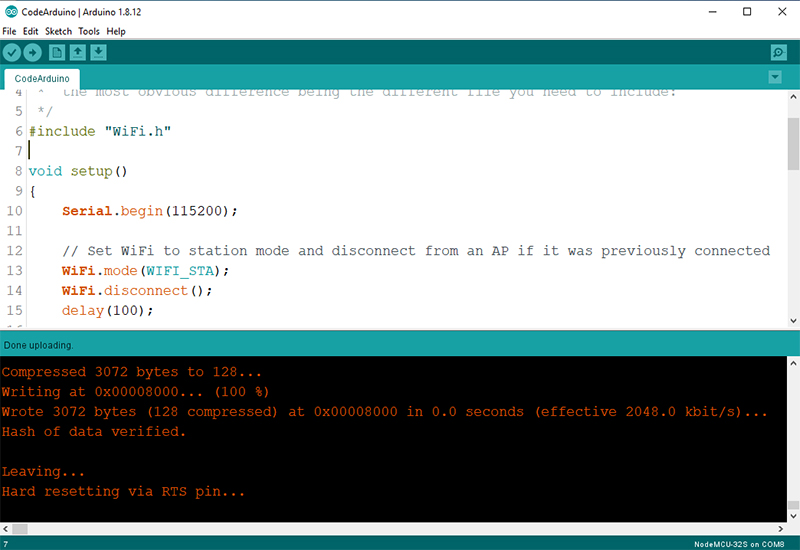
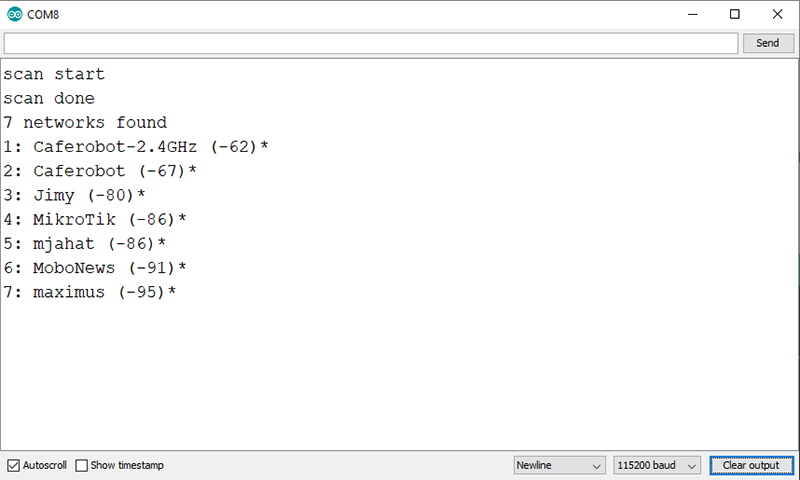
As said in previous sections, the code above scans Wi-Fi networks and displays the list of available Wi-Fi networks on the Serial Monitor.
Open the Serial Monitor. The output is as follows.
What’s Next?
Now that you have installed ESP32 Boards on Arduino IDE and successfully programmed it to scan available Wi-Fi networks, now try to program the ESP32 Board as Wi-Fi network (Access Point mode) and connect to it using your cell phone.
