
What’s Arduino IDE Software?
How to install Arduino IDE on Windows
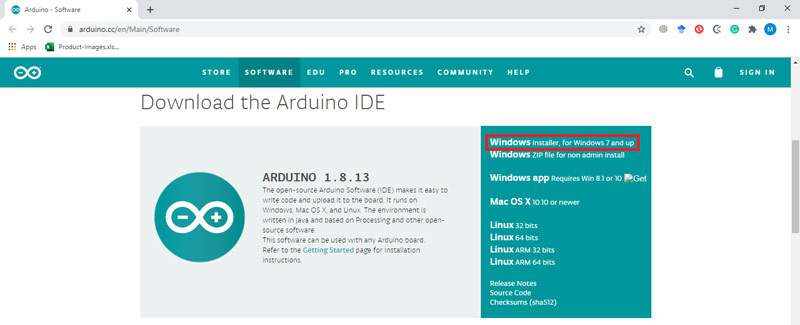
Step 1: First, download the latest version of the software here.
Step 2: Open the downloaded file to start the software installation operation.
Click I Agree to accept the rules.

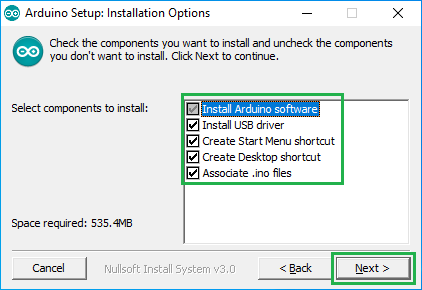
Step 3: Select the components you need to install on your system. It is recommended to leave all options checked.
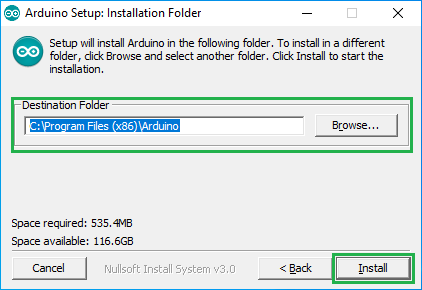
Step 4: Specify the software installation location. It is recommended to leave it unchanged if “C” drive (the default drive suggested by the software) has enough free space,
Wait until the installation is complete.

Success
The software has successfully installed. Fortunately, working with this software is as simple as installing it!
How To Install Arduino IDE Software on MAC
Step 1: First, download the latest version of the software here. This file is in Zip format; If you are using Safari, this file will be automatically decompressed. Otherwise, you must manually decompress the file.
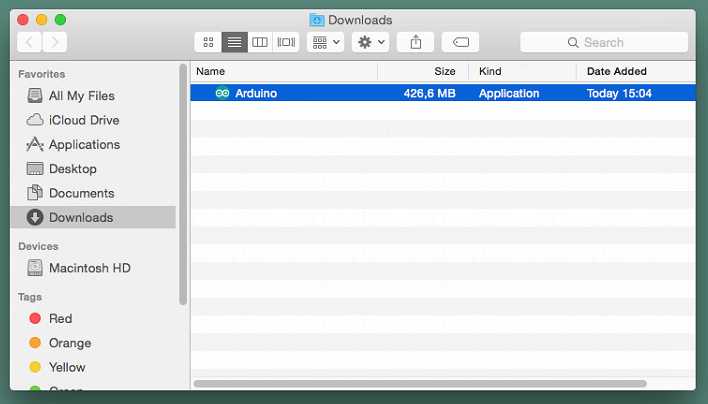
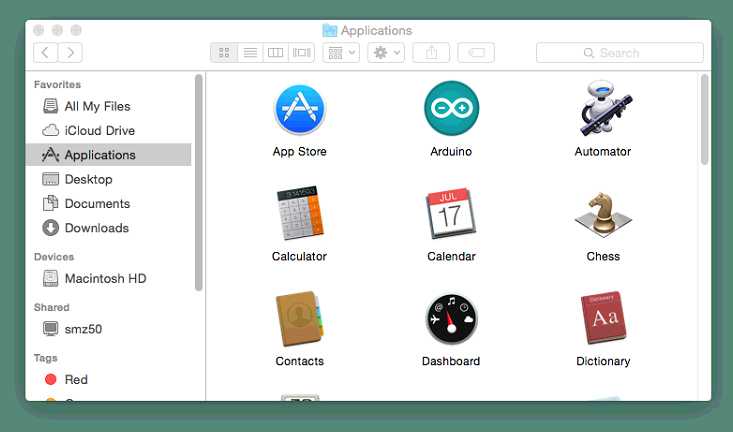
Step 2: Move the software file to the Applications folder. (Or any other location you prefer)
Using Arduino IDE
Arduino code is written in files called Sketch, which are saved in the computer storage with the .ino suffix. The following figure shows the working environment of a sketch.
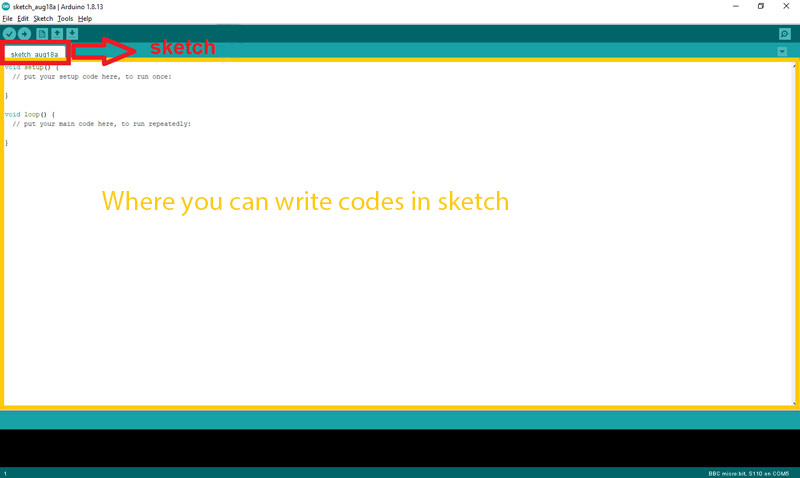
There are 5 keys at the top of each sketch.
Let’s see what the role of each button is.
Verify: Checks if there are any errors in your code and then complies the code.. Note that this button only checks if the code meets C++ programming standards.
Upload: First compiles your code and then uploads it to your board. (So, this code is written to the board processor.)
New: Creates a new Sketch.
Open: To open the sketches you have already written.
Save: To Save sketches.
Additional software settings and capabilities are available in the File, Edit, Sketch, Tools and Help menus.

File
- New: Creates a new page (a new Sketch)
- Open: Opens sketches you have already saved.
- Open Recent: It provides you with a list of sketches you have recently used, and you can open any of them you need.
- Sketchbook: Shows the sketches in the sketchbook to you. Sketchbook is the folder where your sketches are stored by default.
- Examples: Shows you a list of ready examples of software.
- Close: Closes the Sketch window.
- Save: Saves the sketch with its current name. If your sketch is not already named, the Save as window will open for you automatically.
- Save as: Saves the current sketch in a different name and a new location.
- Page Setup: Shows page setting before printing.
- Print: Prints from software window.
- Preferences: In this section, you have access to some of the software settings such as changing the language, font size, etc.
- Quit: Closes all open windows.
Edit
- Undo/Redo: You go to a previous/next step and the operation you performed in the previous/next step is displayed.
- Cut: To cut the selected text and saves it in the Clipboard.
- Copy: To make a copy of selected text and saving in the Clipboard storage.
- Copy for Forum: To copy the code written in the sketch in a way that is suitable for use in the forum and saving it in the the Clipboard.
- Copy as HTML: To copy the code written in the sketch in HTML format and saves it in the Clipboard.
- Paste: To put the current content of Clipboard in the desired location.
- Comment/Uncomment: Turns the selected part of your code into a comment (note). Press it again to revert.
- Increase/Decrease: To increases / decreases the indentation of the text.
- Find: To search for the text you want in the current sketch. It also provide you with other settings, such as replacing one text with another.
- Find Next: If you search for a phrase in the Find section, the cursor will look for it after the current location.
- Find Previous: If you search for a phrase in the Find section, the cursor will look for it before the current location.
Sketch
- Verify/Compile: To check the code written in the sketch with programming standards and compiles it if there is no error.
- Upload: First compiles the code and then uploads the created binary file to the processor.
- Upload Using Programmer: To overwrite the bootloader and you will be able to use all the CPU flash memory. Note that this will only give you access to flash memory and you will not be able to program fusebit.
If you want to use the USB to serial converter and program the Arduino using this IC, you must select the Burn Bootloader from the Tools menu to upload the bootloader to the processor again.
- Export Compiled Binary: To save compiled code as .hex.
- Show Sketch Folder: To open the folder where the sketch is located.
- Include Library: To add a library already installed on the software to your sketch using the #include command automatically. You can also use this tab to install new libraries.
- Add File: To add a source file to the application
Tools
- Auto Format: This option arranges the format of your code. This means that by creating indentations and arranging brackets and parentheses, etc., the structure of your code would be according to the standards and also the code will be easier to read and scan.
- Archive Sketch: To make a copy of current Sketch in ZIP format in the same path as the Sketch is.
- Serial Monitor: To open the serial connection control window. When this window opens, your processor will usually reset once.
- Board: In this tab, you can select the type of board you are currently using. You can also add new boards to the software.
- Port: To select the port to which your board is connected.
- Programmer: If you want to program your processor using an external programmer and you do not want to use a USB to serial converter, you can select your programmer from this tab.
- Burn Bootloader: To upload the bootloader onto the processor and configure its fusebites.
Help
In this menu, you have access to more information and tips about Arduino IDE.
Create A Simple Project with Arduino
Open the Arduino IDE software, make a new sketch and save it with your preferred name. Then copy the following code to the software environmen. This is the Blinking code for the LED on the Arduino board.
Note
if your Arduino board uses a CH340G IC for the USB to TTL converter, first Install the CH340G driver.
void setup() {
  // initialize digital pin LED_BUILTIN as an output.
  pinMode(LED_BUILTIN, OUTPUT);
}

// the loop function runs over and over again forever
void loop() {
  digitalWrite(LED_BUILTIN, HIGH);   // turn the LED on (HIGH is the voltage level)
  delay(1000);                       // wait for a second
  digitalWrite(LED_BUILTIN, LOW);    // turn the LED off by making the voltage LOW
  delay(1000);                       // wait for a second
}
After writing the code, select the board model and its port from the Tools menu, and then upload the written code to your board by pressing the upload button. If the code is compiled without error and successfully uploaded to the board, the Done uploading message should be displayed.
