
Overview
Learn how to install Arduino IDE on Raspberry Pi and easily write and upload code to your Arduino board without the need for a PC or laptop. Follow these simple steps to get started.
What You Will Learn
- How to install Arduino IDE on Raspberry Pi
Required Materials
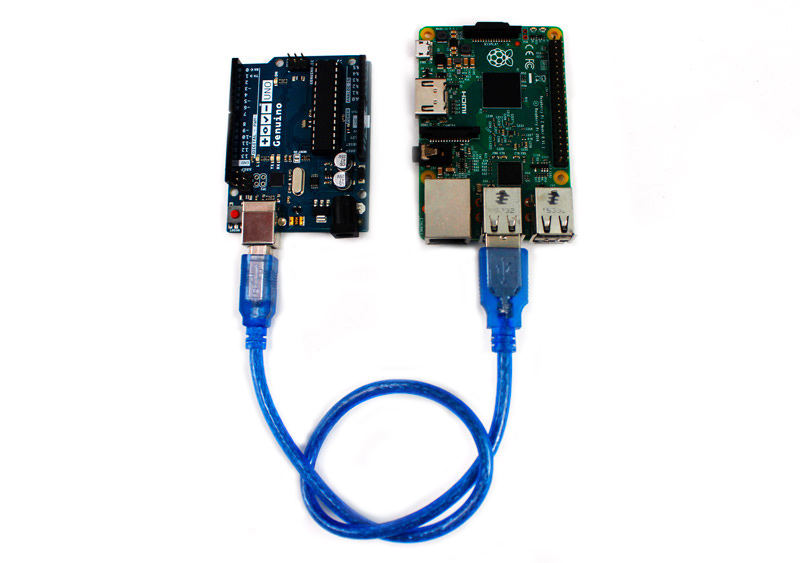
Hardware Components
Software Apps
How to install Arduino IDE on Raspberry Pi ?
Follow these steps to install Arduino IDE:
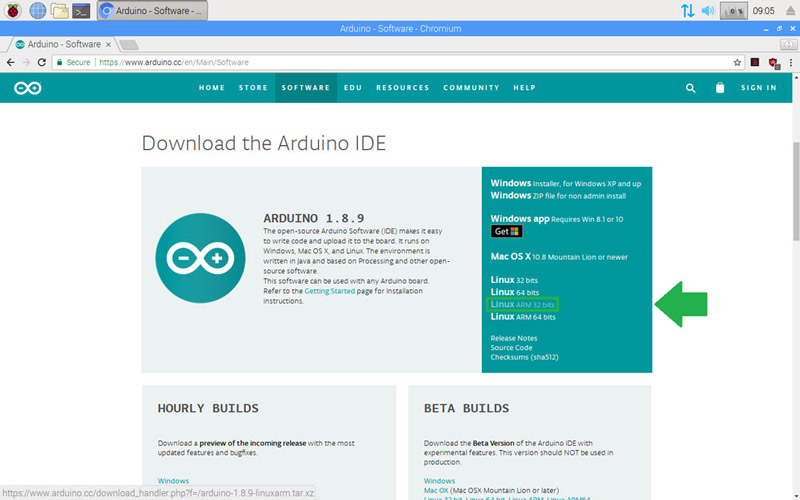
Step 1 : Download the software from the Arduino website
To begin, connect your Raspberry Pi to the internet and open your browser. Visit the Arduino website at :
https://www.arduino.cc/en/Main/Software
From there, download the Arduino software designed for Linux operating systems with ARM processors.
Step 2: Unzip the File
Once the download is complete, locate the downloaded file and right-click on it. Select “Extract Here” to unzip the file.
Step 3: Install
After extracting the file, find the “install.sh” file within the extracted folder. Double-click on it and choose “Execute” or “Execute in Terminal” to initiate the installation process.

And Done!
Now you can easily write codes for your Arduino and upload to the board with no need for a PC or Laptop.
Initial Testing
After the installation is complete, you can access Arduino IDE either from your desktop or the Programming menu on your Raspberry Pi.
After installing software, you can access it on the desktop or in the Programming menu.

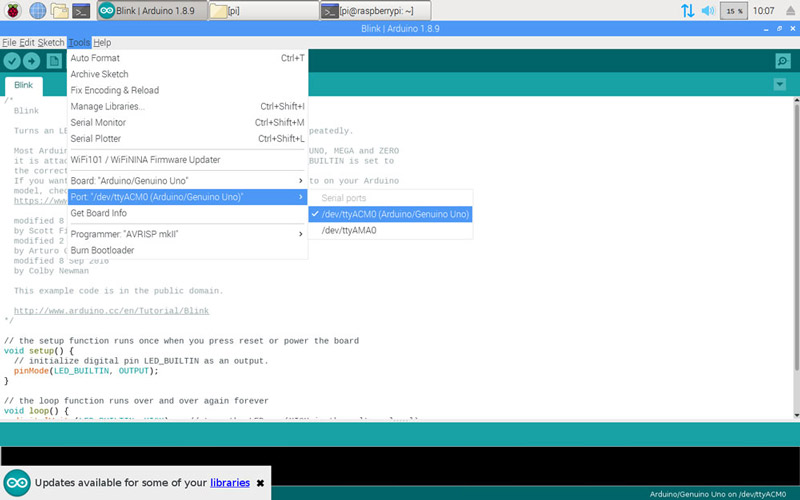
To start you can use the prepared Arduino examples in File>Examples. Here, we are using the Blinking LED example.
/*
  Blink
  Turns on an LED on for one second, then off for one second, repeatedly.

  Most Arduinos have an on-board LED you can control. On the UNO, MEGA and ZERO
  it is attached to digital pin 13, on MKR1000 on pin 6. LED_BUILTIN takes care  of using the correct LED pin whatever is the board used.
  If you want to know what pin the on-board LED is connected to on your Arduino model, check
  the Technical Specs of your board  at https://www.arduino.cc/en/Main/Products

  This example code is in the public domain.

  modified 8 May 2014
  by Scott Fitzgerald

  modified 2 Sep 2016
  by Arturo Guadalupi
*/
// the setup function runs once when you press reset or power the board
void setup() {
  // initialize digital pin LED_BUILTIN as an output.
  pinMode(LED_BUILTIN, OUTPUT);
}

// the loop function runs over and over again forever
void loop() {
  digitalWrite(LED_BUILTIN, HIGH);   // turn the LED on (HIGH is the voltage level)
  delay(1000);                       // wait for a second
  digitalWrite(LED_BUILTIN, LOW);    // turn the LED off by making the voltage LOW
  delay(1000);                       // wait for a second
}
Then, just click upload.

Installing Arduino IDE on Raspberry Pi opens up new possibilities for coding and uploading programs to your Arduino board without the need for a PC or laptop. By following the three simple steps outlined in this tutorial, you can quickly get started with Arduino development on your Raspberry Pi.
With it installed, you can easily write and upload code, taking advantage of the various features and examples available. Whether you’re a beginner or an experienced developer, this program on Raspberry Pi provides a cost-effective and convenient solution for programming your Arduino projects.
Start exploring the vast world of Arduino programming on your Raspberry Pi today and unlock endless possibilities for creating innovative and exciting projects. Happy coding!

Comments (11)
I don’t have a desktop interface.
How can we do these operations only through ssh.
Arduino need GUI to operate. Or use VNC.
this procedure was not working for me as I had to run the install.sh script with root privileges.
Yes. In order to use this method, you need to have root privileges.
I have a PI 400 and want to program an Arduino UNO.
Following these instructions leads me no where.
I followed them and have the Arduino icon on my desktop but in executing it … it goes no where.
Once by shear luck I got into it but then the com port was not connected… despite the UNO being on a USB port.
Hours spent trying to figure this out… but no luck .
Anyone… help me before I die of old age.
Bryan
I guess Rpi 64bit Bullseye is more secure and ran into issues of permission denied and need to stall with root permissions, so I use the terminal to
be able to use the ‘sudo’.
from what I read we should be installing programs in /opt .
Download the latest Arduino IDE to your downloads folder,
open terminal and enter
sudo tar -xvf ~/Downloads/arduino-1.8.19-linuxaarch64.tar.xz -C /opt
this will extract program in /opt/arduino-1.8.19
you can go look to verify, enter
cd /opt
ls
so I see a folder called ‘arduino-1.8.19’ which I do not like and want to rename before I run the install.sh
enter the following to rename folder (the -v is option, it enables feedback at terminal)
sudo mv -v /opt/arduino-1.8.19 /opt/Arduino
when happy with location of program then run the install
sudo /opt/Arduino/install.sh
Thanks for sharing your experience.
How do we remove it, as the installation seems to be corrupted after updating PI?
Hi,
You can just go to the folder where the Arduino IDE is installed and delete the whole folder.
Cindy
Adding to the “Thank You very much list” That was valuable to me as a beginner as I was really getting frustrated when nothing seemed to happen as originally installed. Your description worked just great!
Hi
You’re so welcome.