
Overview
There are two main ways to program the STM32F103C8T6 module, also known as the STM32 Blue Pill:
• Serial and USB to TTL converter
• ST-Link
Therefore, we suggest you use ST-Link to program the STM32 Blue Pill.
Required Materials
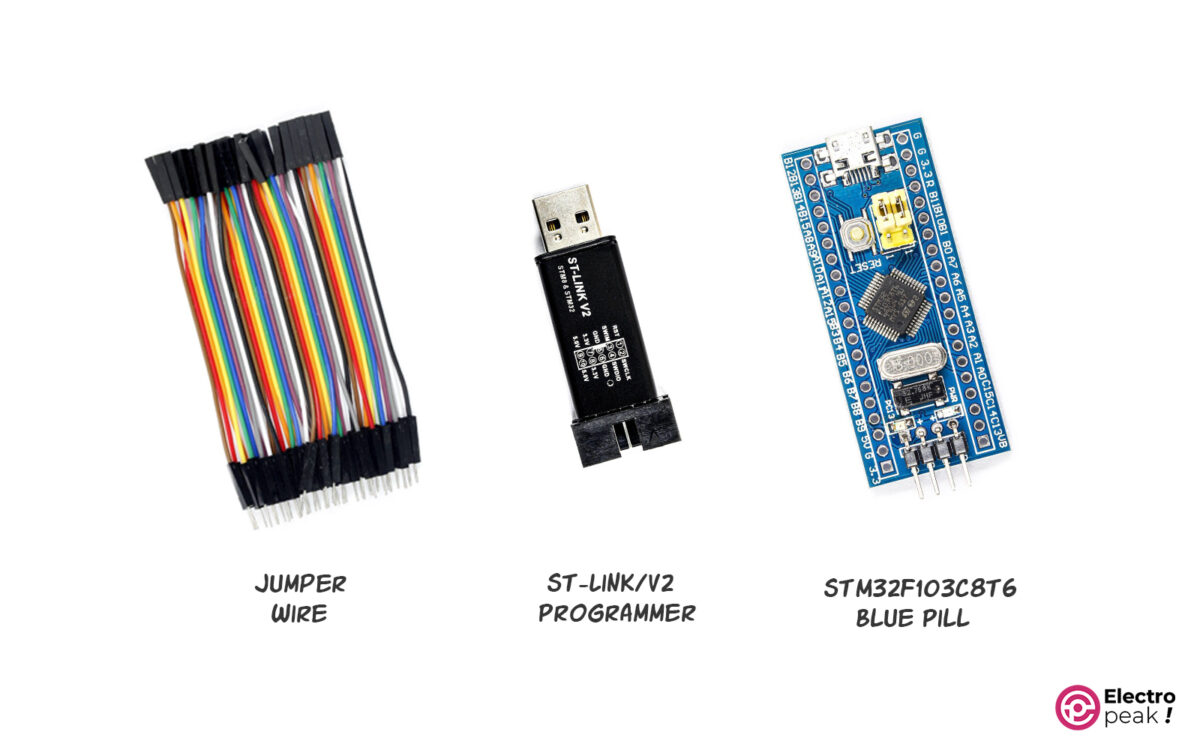
Hardware Components
Software Apps
How to Program STM32 Blue Pill with ST-Link and Arduino IDE
Step 1: Add STM32 Boards to Arduino IDE
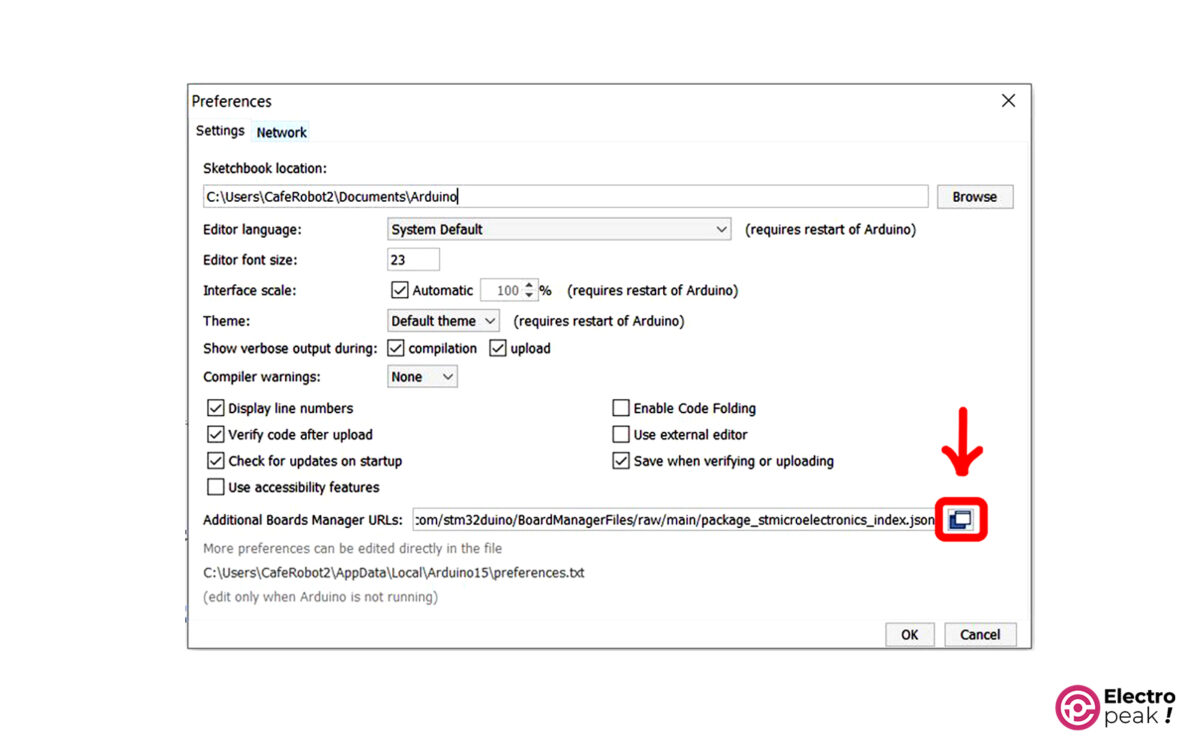
First, open the Arduino IDE and go to File -> Preferences. Then, select the option shown in the picture below.
After selecting, the following window will pop up. In the last line, copy and paste the following link:
https://github.com/stm32duino/BoardManagerFiles/raw/main/package_stmicroelectronics_index.json
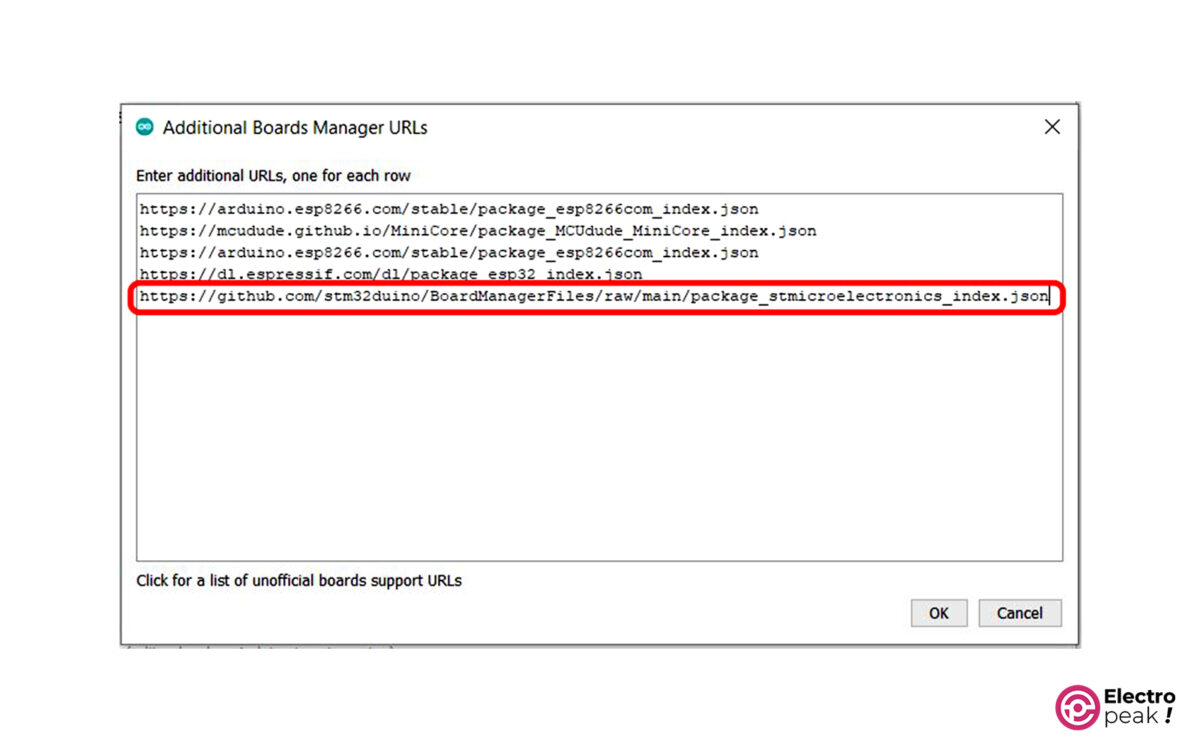
Finally, close both windows by pressing OK.
Step 2: Install STM32 Library
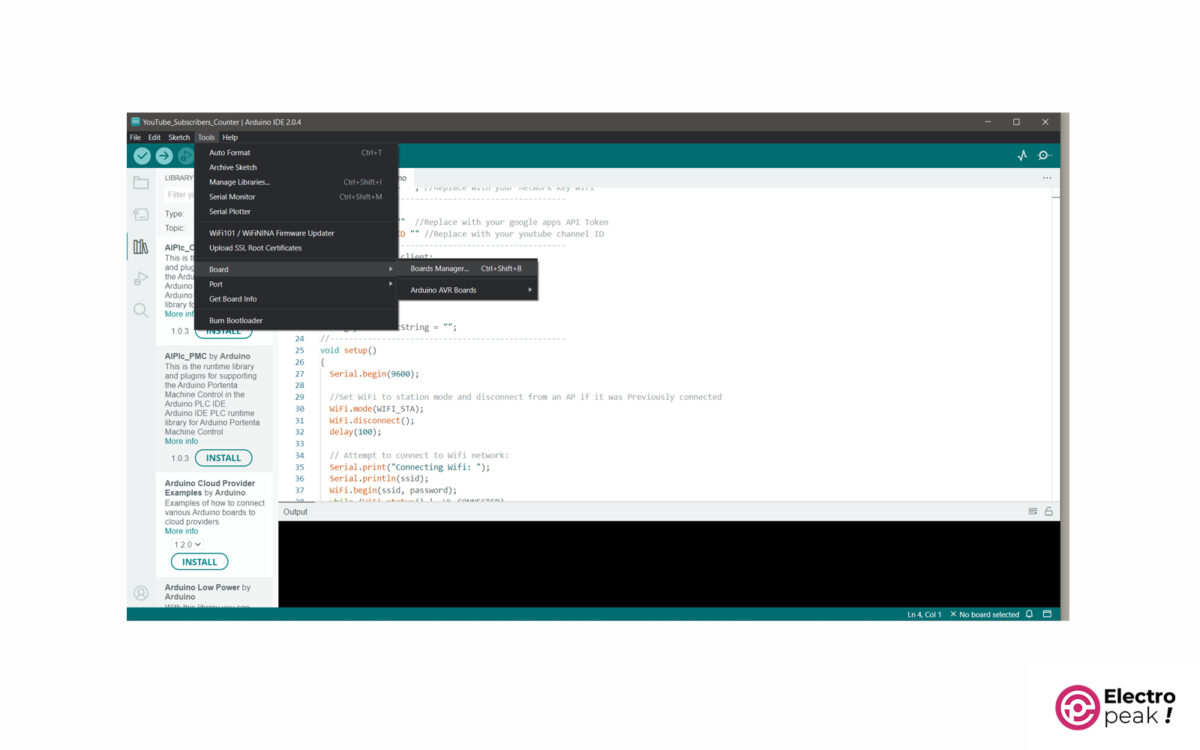
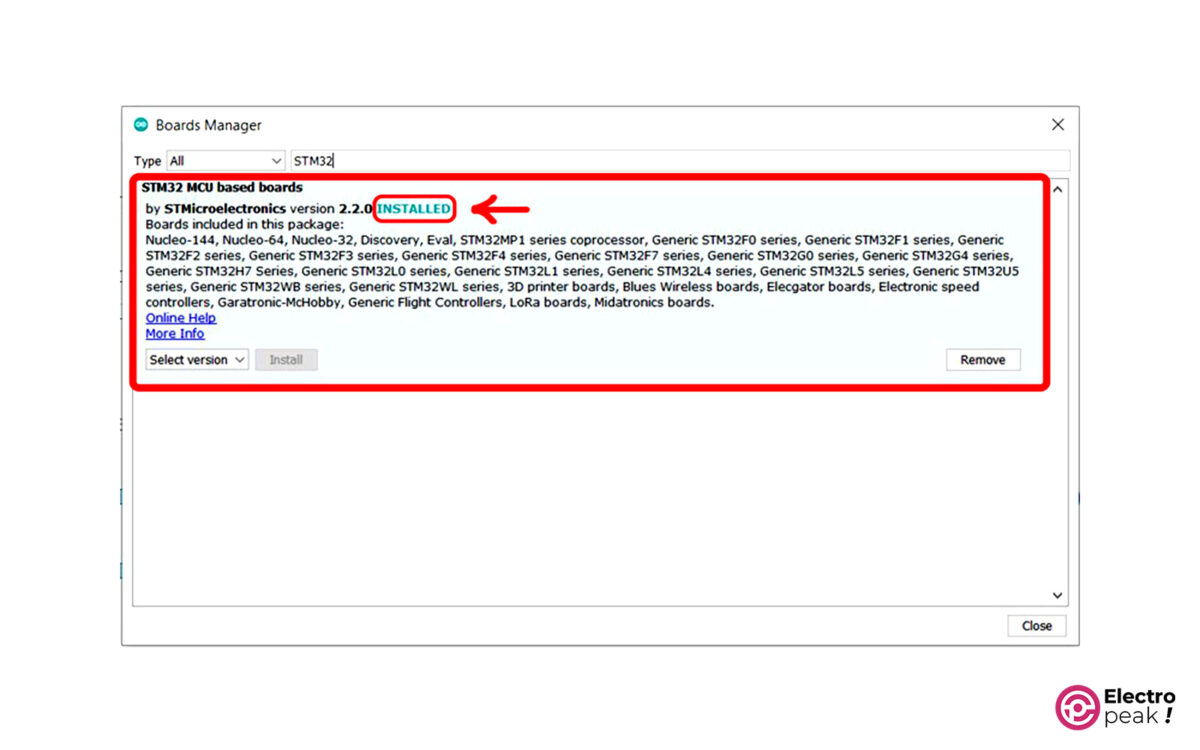
Go to Tools -> Board -> Board Manager.
Then, search for “STM32” and install the relevant library. This process may take a long time, so please wait. After installation, the phrase Installed appears.
Step 3: Select the Appropriate STM32 Board
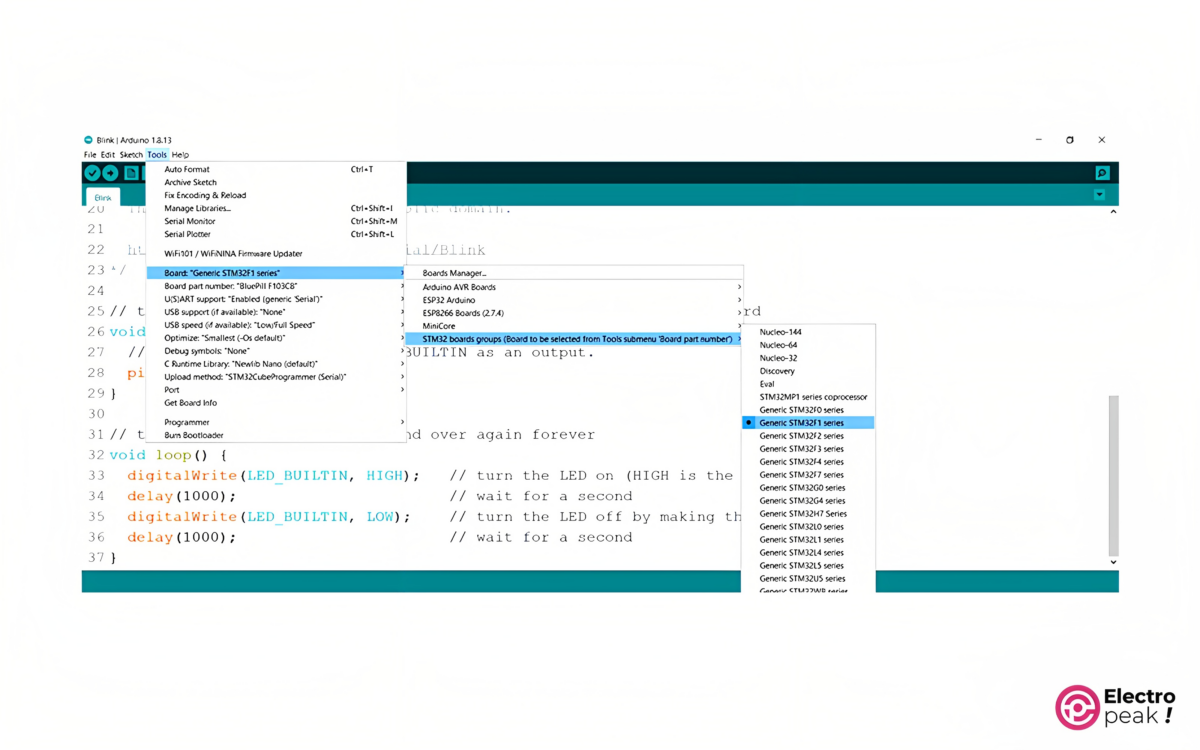
After the STM32 boards library is installed properly, we need to select the desired board type from Tools -> Board -> STM32 Boards.
In this section, we select the STM32F1 series according to the microcontroller type of the Blue Pill module.
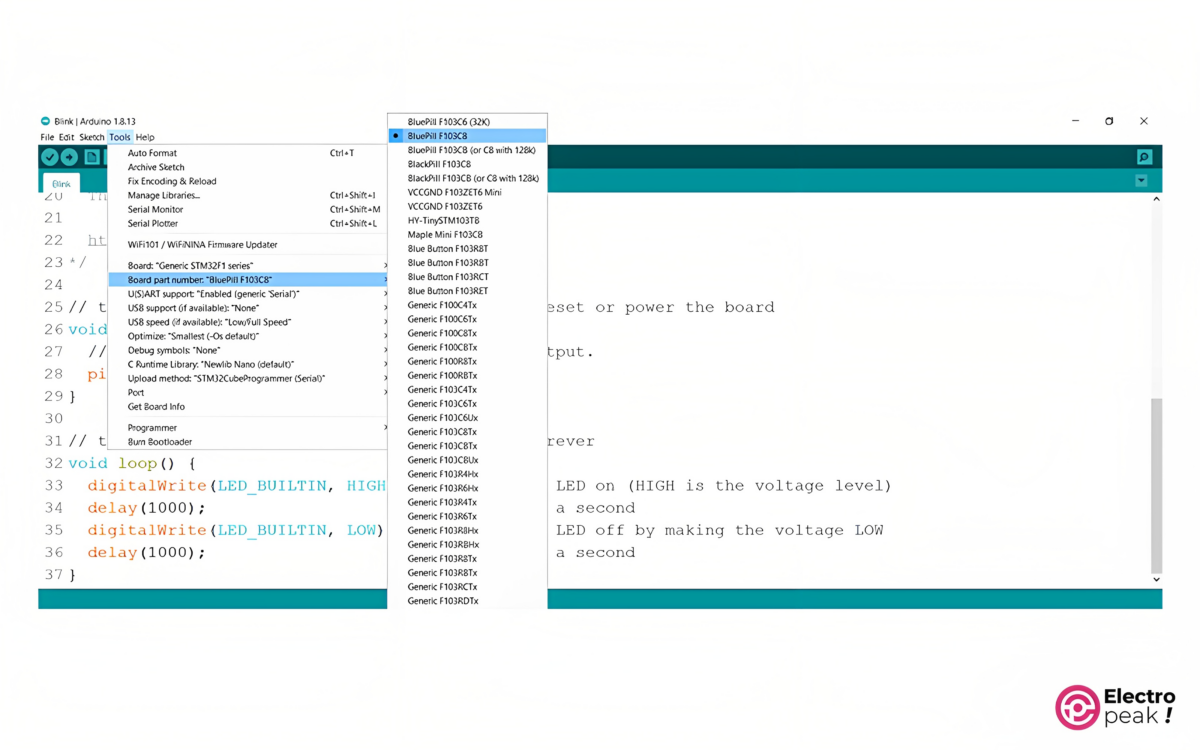
You should also select Blue Pill F103C8 as the part number of the board.
Step 4: Install STMCubeProgrammer Software
Though the programming is done by the Arduino IDE, but this software alone is not able to program STM32 boards. To do the programming properly, you will need to install the STMCubeProgrammer software. You can download it from the ST official website.
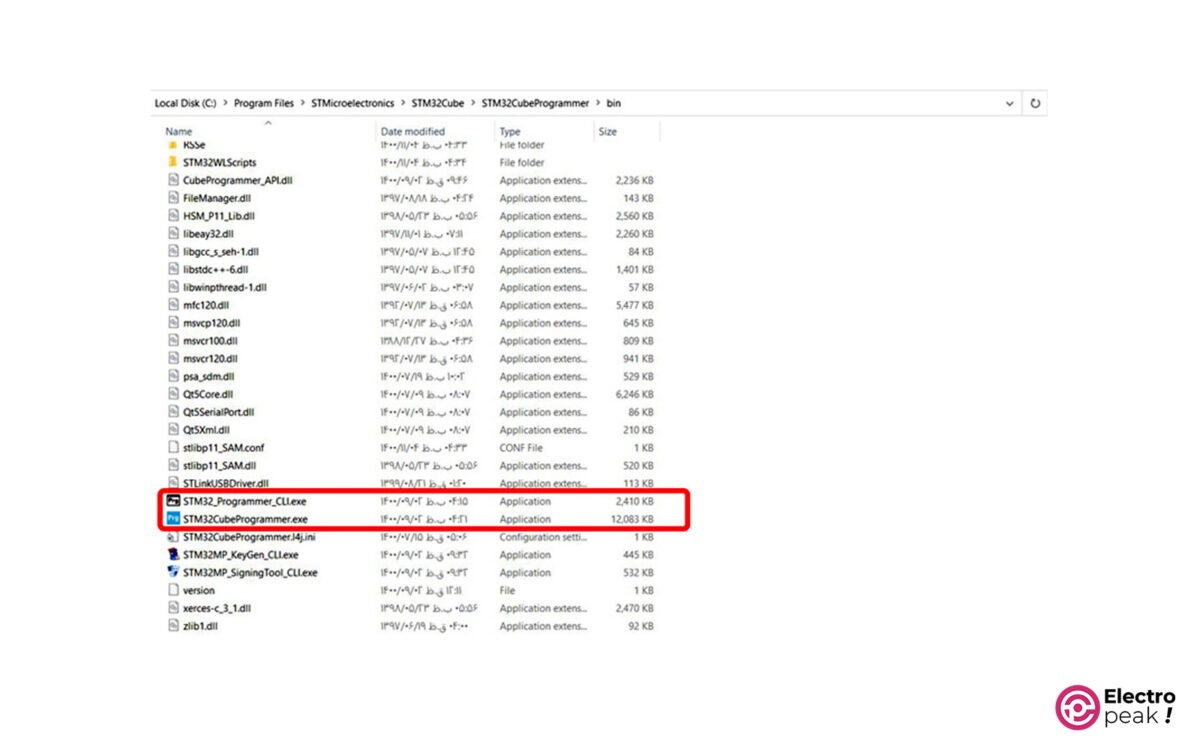
Once downloaded extract the ZIP file and install the software. When completed, the following two programmer files must have been installed in the bin folder in the installation path:
Step 5: Install ST-Link Driver
As you know, microcontrollers can’t communicate with the computer directly. For this reason, you should always use a converter. We use ST-Link to connect STM32 boards to the computer and upload codes on them. So we have to install the driver as well.
Download this file, extract and install.
Step 6: Circuit
Connect the ST-Link converter to the STM32 Blue Pill module as shown below. Connect the ST-Link to the computer’s USB on the other side.
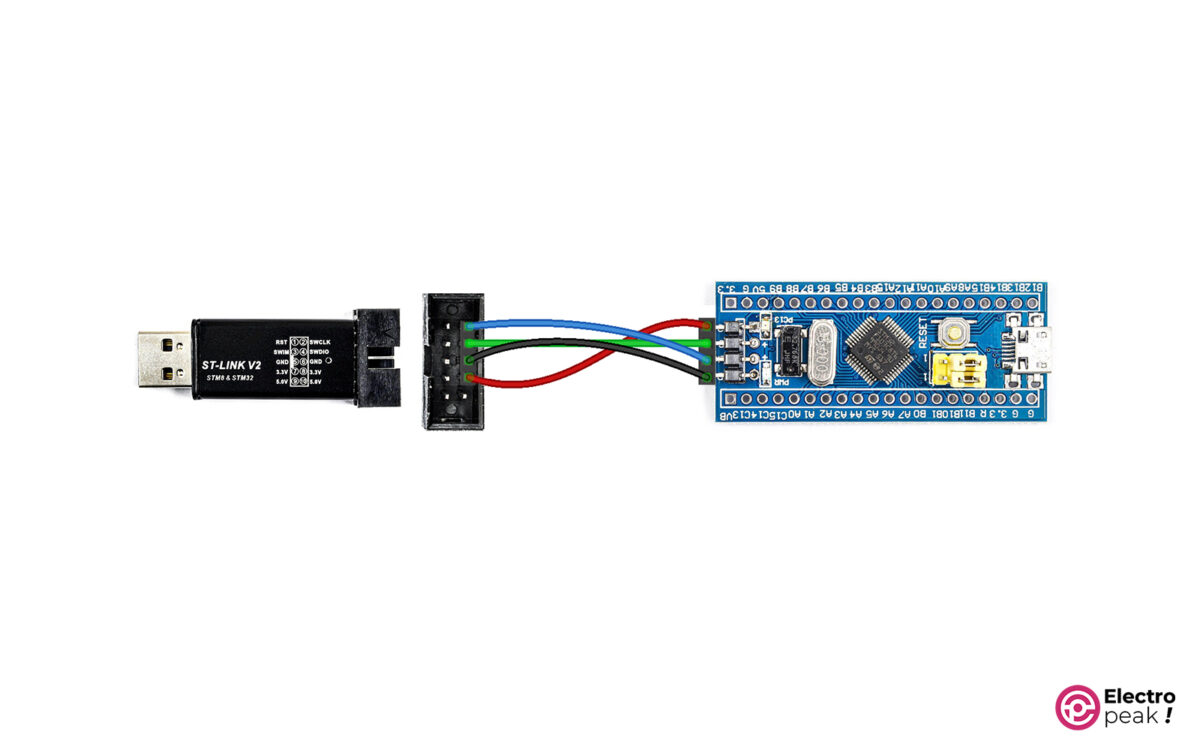
The module is now ready to be programmed.
Step 7: Program STM32 Board with Arduino IDE
Before uploading the code, select the upload method as SWD as shown in the image below.
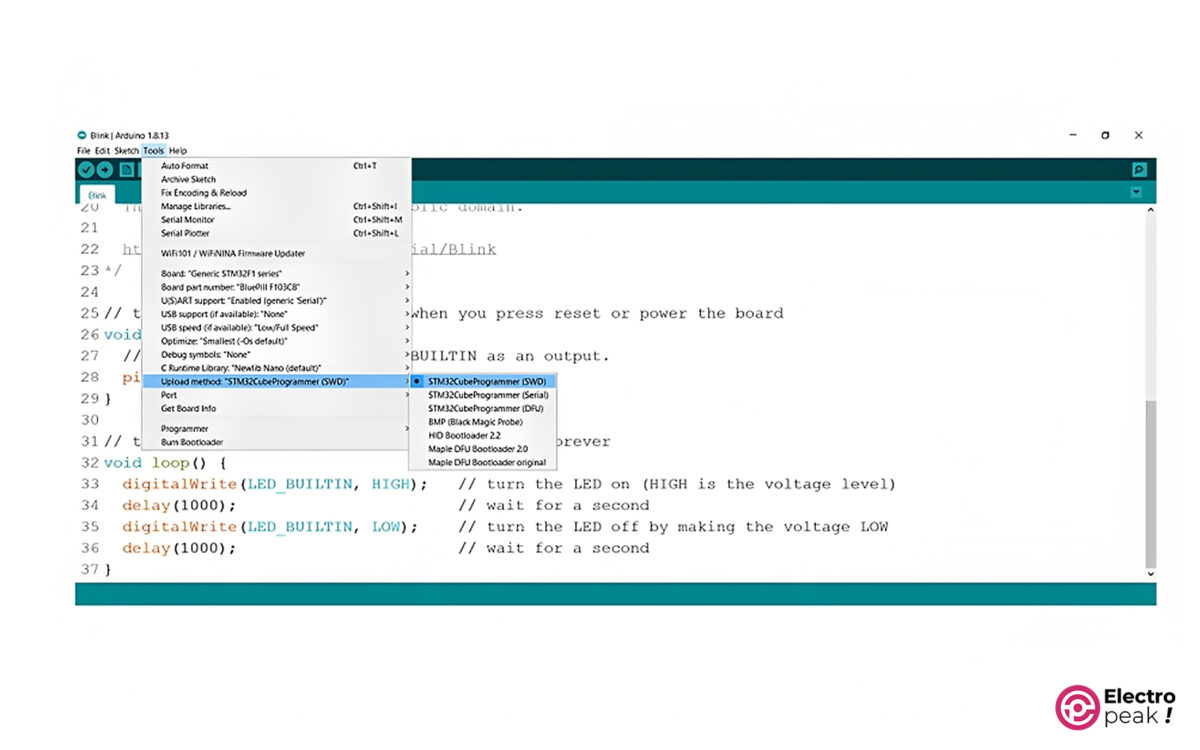
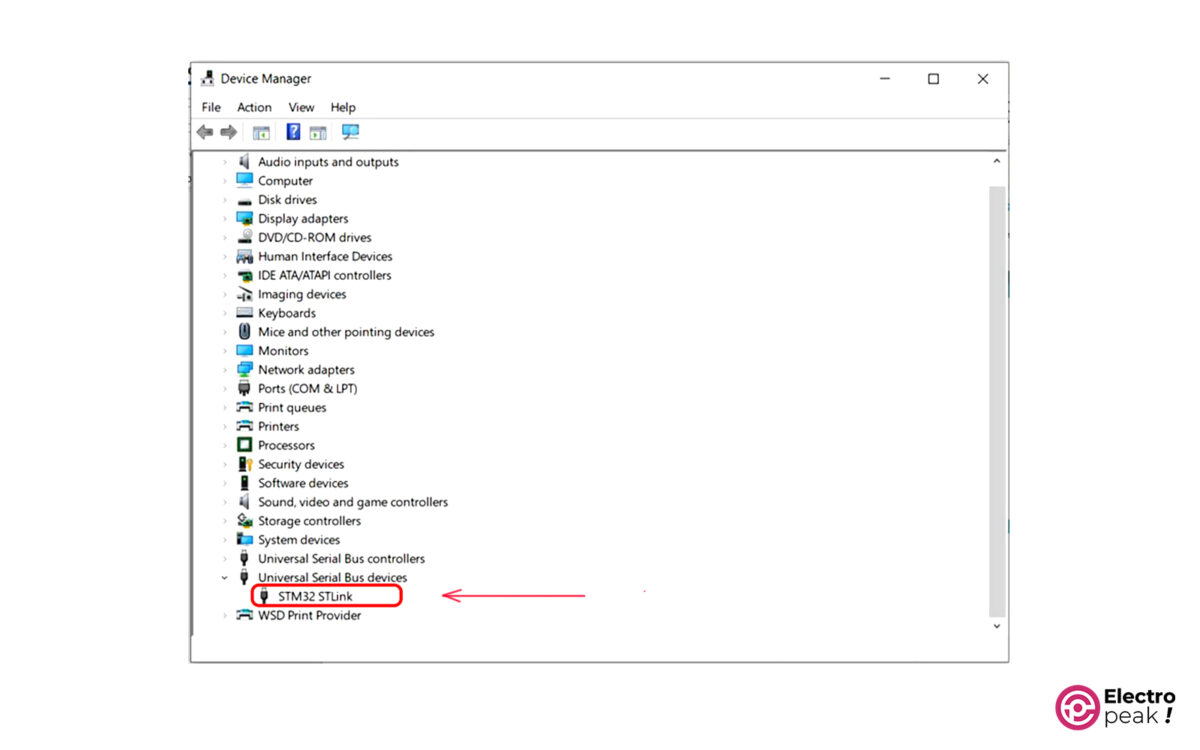
Also, there is no point in choosing a PORT for ST-Link. To ensure the ST-Link programmer is connected properly, you can check the “Universal Serial Bus Devices” section in the “Device Manager”. If the ST-Link is connected properly, you should see it in this section as below.
Step 8: Upload Blink Program
Upload the simple “Blink” program to the board:
/*
 STM32-ST-Link
 made on 29 Jan 2022
 by Amir Mohammad Shojaee @ Electropeak
 Home
*/

#define LED PC13

// the setup function runs once when you press reset or power the board
void setup() {
 // initialize digital pin LED_BUILTIN as an output.
 pinMode(LED, OUTPUT);
}

// the loop function runs over and over again forever
void loop() {
 digitalWrite(LED, HIGH); // turn the LED on (HIGH is the voltage level)
 delay(1000); // wait for a second
 digitalWrite(LED, LOW); // turn the LED off by making the voltage LOW
 delay(1000); // wait for a second
}
We use the Blue Pill’s on-board LED connected to pin PC13 for the Blink program.
As you can see, the on-board LED connected to pin PC13 starts blinking after the program is uploaded. Also, by changing this delay time, the blinking frequency changes.
