
Introduction
Are you interested in technology and want to explore the amazing capabilities of Raspberry Pi Pico? In this step-by-step guide, we will show you how to program Raspberry Pi Pico with Arduino IDE. Whether you’re a beginner or an experienced programmer, this guide will help you make the most of this powerful microcontroller. We’ll start by giving you an overview of Raspberry Pi Pico and its features, and then explain how to set up Arduino IDE in order to program Raspberry Pi Pico. You’ll learn how to connect Raspberry Pi Pico to your computer and configure the board and port.
What You Will Learn
- Introduction to Raspberry Pi Pico board
- How to set Raspberry Pi Pico to Programming mode
- How to program Raspberry Pi Pico with Arduino IDE
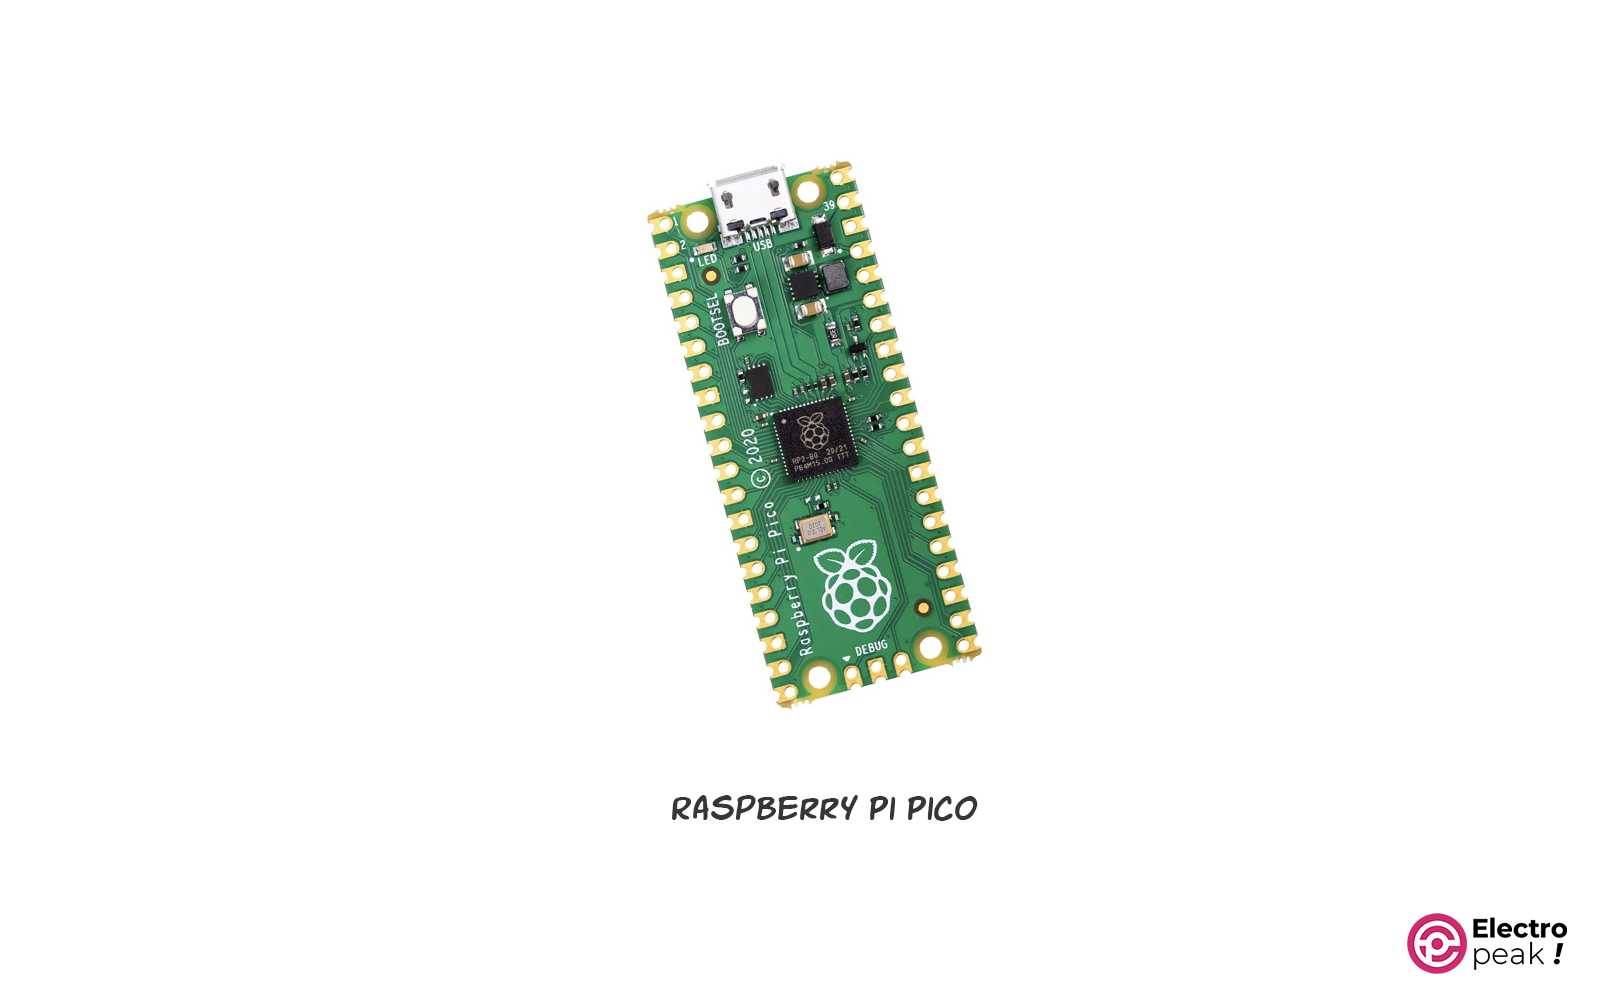
Raspberry Pi Pico in a Nutshell
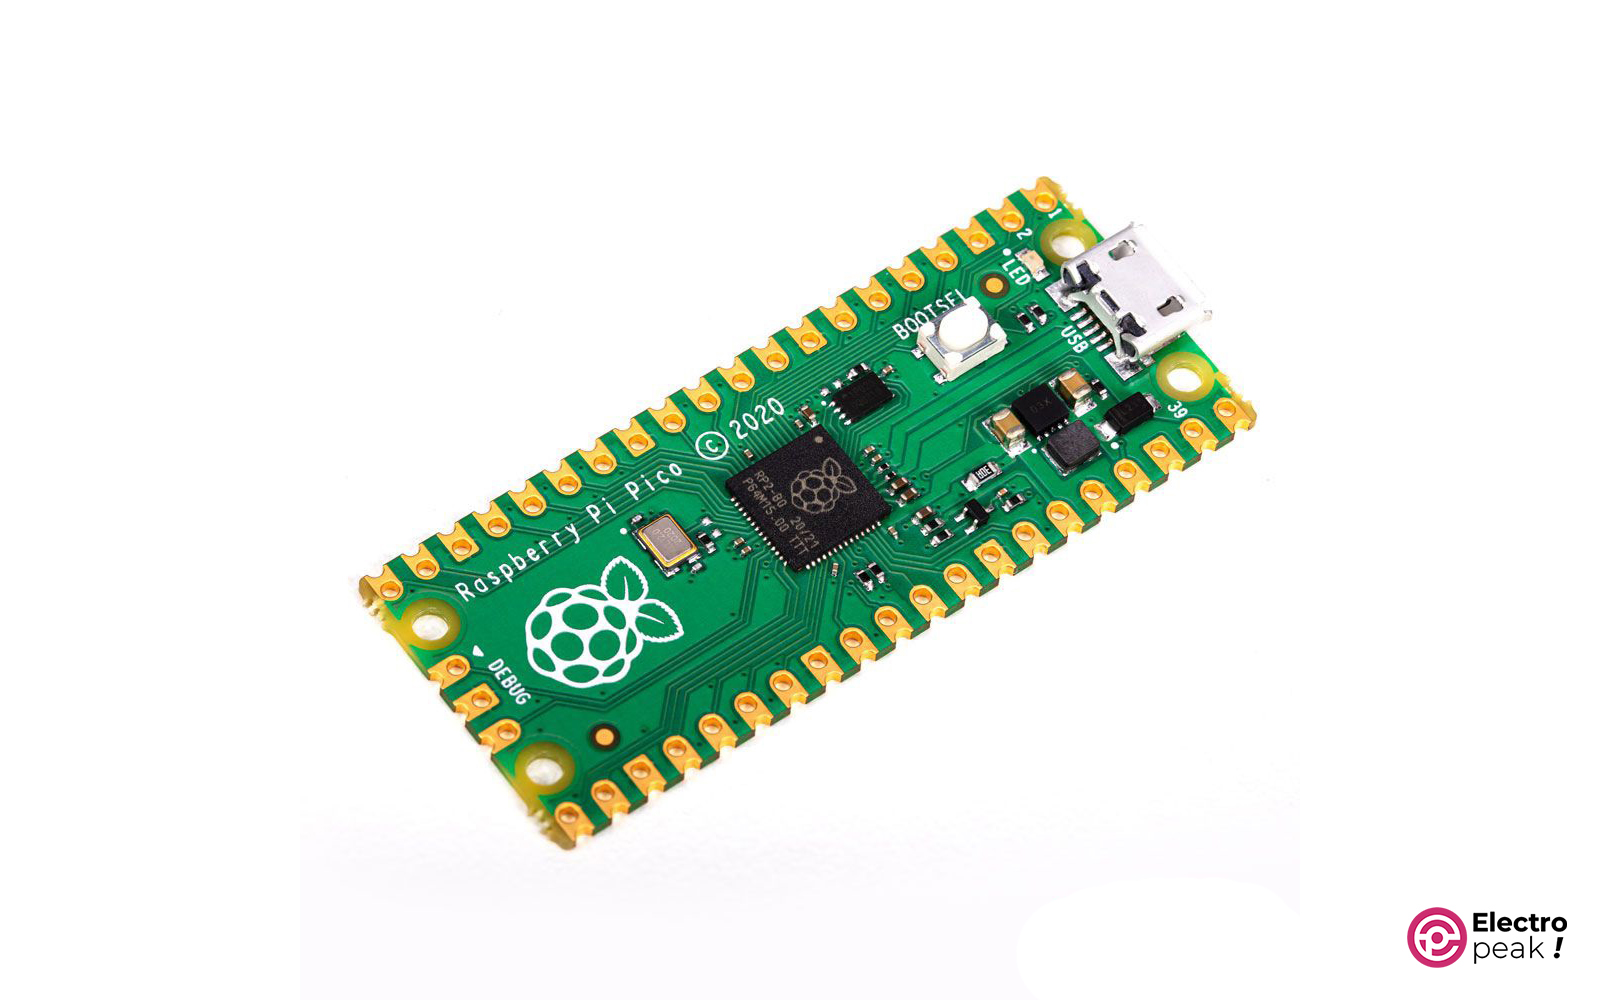
Raspberry Pi Pico is a development microcontroller manufactured by the Raspberry Pi Foundation. It comes with the RP2040 microcontroller chip, which has a dual-core Arm Cortex-M0+ processor. The board also has 26 GPIO pins that can be used for various purposes.
One of the standout features of Raspberry Pi Pico is its affordability compared to other microcontrollers in the market. This makes Raspberry Pi Pico an appealing choice for both beginners and experienced developers. But, despite its low price, the board remains competitive in terms of performance and capabilities, which has made it popular among developers.
In addition, the board has a compact size; with dimensions of 21×51 millimeters, it’s suitable for projects with limited space.
Considering all these features, Raspberry Pi Pico can be used in a wide variety of applications, from robotics to home automation and more.
Specifications:
- Dimensions: 21x51mm
- Dual-core Arm Cortex-M0+ processor with a maximum frequency of 133MHz
- 264KB of SRAM and 2MB of QSPI flash memory
- Wireless LAN (2.4GHz 802.11n) – available only on Raspberry Pi Pico W and WH models
- Bluetooth 5.2 (available only on Raspberry Pi Pico W and WH models)
- 26 multi-purpose GPIO pins, including 3 analog inputs
- Built-in temperature sensor
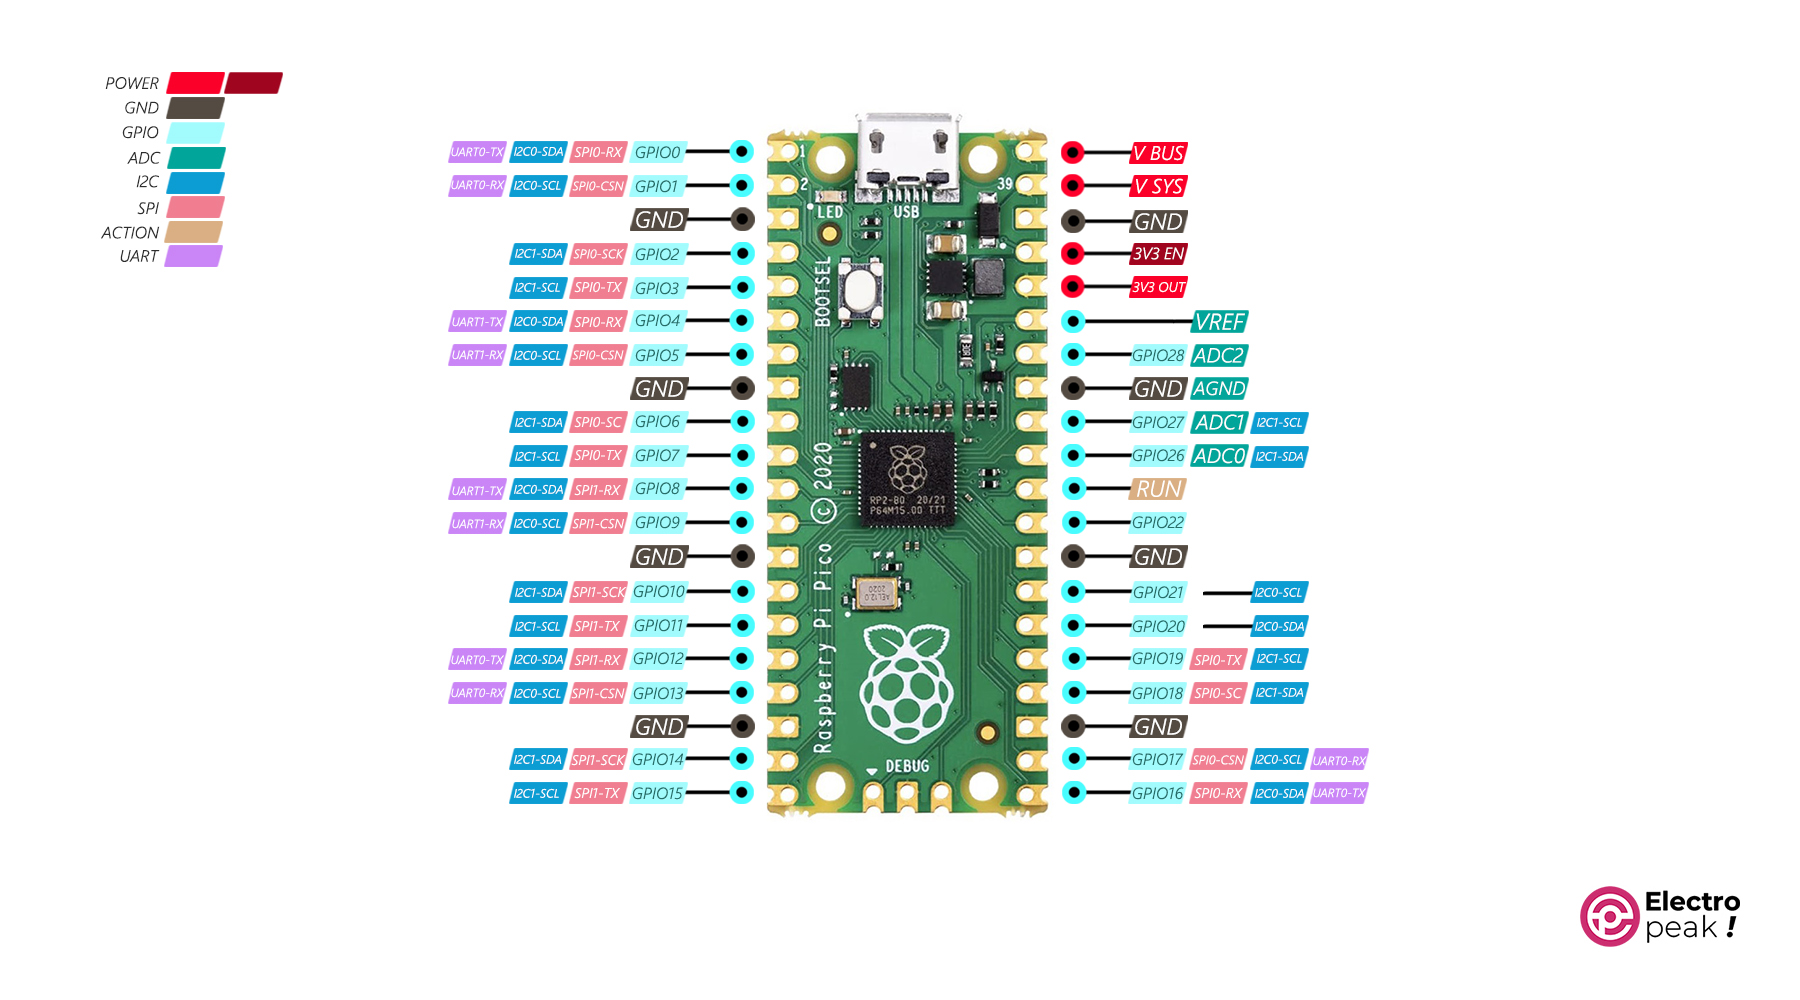
Raspberry Pi Pico Pinout
Raspberry Pi Pico has two rows of 20 pins, each with specific functions. In the picture below, you can see the pinout of this board.
Raspberry Pi Pico Alternatives
Let’s take a quick look at some other popular options in the market before we compare Raspberry Pi Pico with other microcontrollers. These microcontrollers have their unique strengths and weaknesses, and understanding their features provides valuable insights for future comparisons.
Arduino
Arduino is undoubtedly the most well-known and widely used microcontroller platform. They offer a wide range of boards, from basic ones like Arduino Uno to more advanced options like Arduino Mega. Arduino boards are a popular choice for beginners because of their simplicity and ease of use. The Arduino IDE provides a user-friendly interface for programming and uploading code to these boards. Arduino also has a large and active community, which means there are plenty of resources and tutorials available for beginners.
ESP32
ESP32 is a highly capable development microcontroller, manufactured by Espressif Systems, and it has built-in Wi-Fi and Bluetooth. The Wi-Fi and Bluetooth capabilities make it extremely popular in the field of IoT. ESP32 offers a dual-core processor running at 240 MHz, sufficient flash memory, and a rich selection of peripheral interfaces. It also supports the popular Arduino framework, making it user-friendly for individuals familiar with Arduino.
STM32

The STM32 microcontrollers are a family of chips manufactured by ST Microelectronics. These microcontrollers are renowned for their performance and versatility, offering a diverse range of options. The STM32 series contains chips with varying levels of computational power, memory capacity, and peripheral devices. These microcontrollers are particularly favored by professional developers working on intricate projects that demand high performance and advanced features.
Raspberry Pi Pico vs. Other Microcontrollers
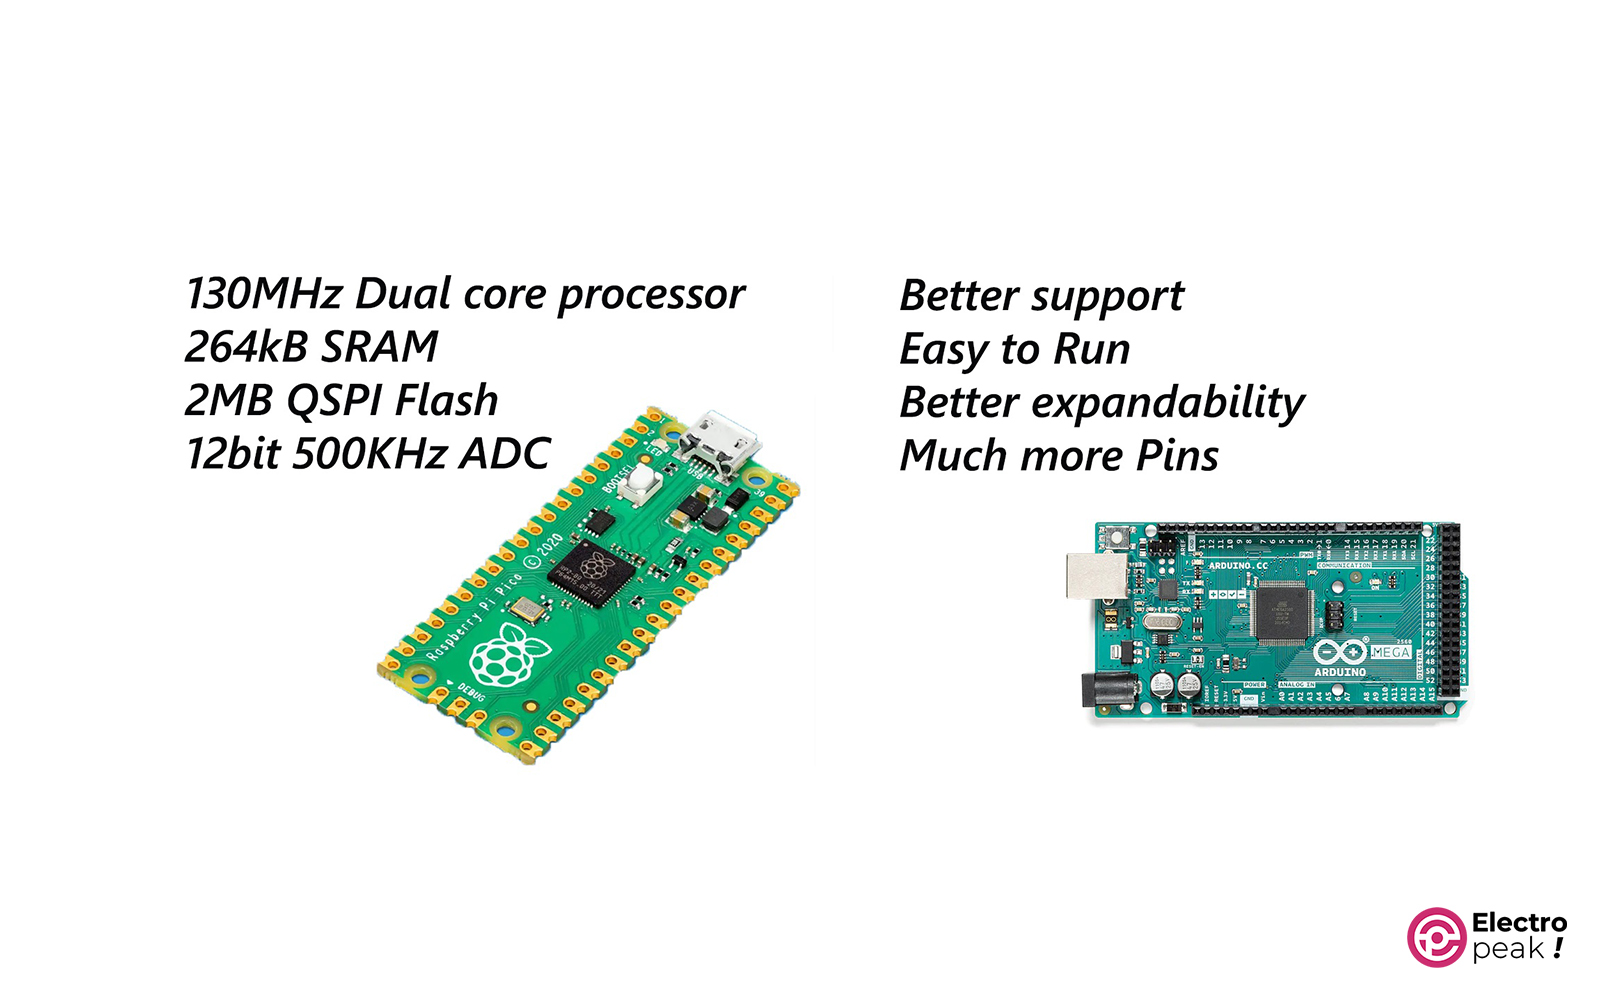
Raspberry Pi Pico vs. Arduino
When comparing Raspberry Pi Pico and Arduino, there are several essential factors: performance, flexibility, programming language, and community support.
In terms of performance, Raspberry Pi Pico holds its own ground against Arduino boards. Raspberry Pi Pico, with its powerful RP2040 chip running at a frequency of 133 MHz, provides ample processing power for most applications. On the other hand, Arduino boards generally have lower clock speeds and less flash memory. However, it’s worth noting that Arduino boards are often optimized for specific tasks and can excel in their related areas.
When it comes to flexibility, Raspberry Pi Pico stands out. Its 26 multi-purpose GPIO pins offer enough room for development and customization. This flexibility allows you to connect a wide range of sensors, actuators, and other peripherals to Raspberry Pi Pico, making it suitable for various projects. Arduino boards also offer a good level of flexibility, but the number of pins and configuration options may vary depending on the specific board you choose.
In terms of programming language, Arduino uses a simplified version of C++ and provides a user-friendly IDE. This makes it an excellent choice for beginners and those who prefer a more straightforward programming process. Raspberry Pi Pico, however, supports programming languages like MicroPython and C/C++. MicroPython is an optimized implementation of Python 3 for microcontrollers, making it a popular choice for those already familiar with Python.
Community support is another essential aspect to consider. Arduino has a large and active community, with numerous libraries, examples, and tutorials. These resources make it easy to find assistance and get started quickly. While Raspberry Pi Pico is relatively new compared to Arduino, it has gained a specific community of developers and enthusiasts. The Raspberry Pi Foundation supports the Raspberry Pi Pico board and provides documentation and resources to help users get started.
In general, Raspberry Pi Pico and Arduino have their strengths and weaknesses. Raspberry Pi Pico offers more processing power and flexibility, while Arduino excels in simplicity and community support. The choice between the two depends on your needs.
Raspberry Pi Pico vs. ESP32
Both options have their own unique features and capabilities. The ESP32 has a notable advantage when it comes to processing power. Its dual-core processor operates at up to 240 MHz, providing superior computing capabilities compared to the RP2040 chip. This makes ESP32 a perfect choice for projects that demand a higher processing power (like IoT).
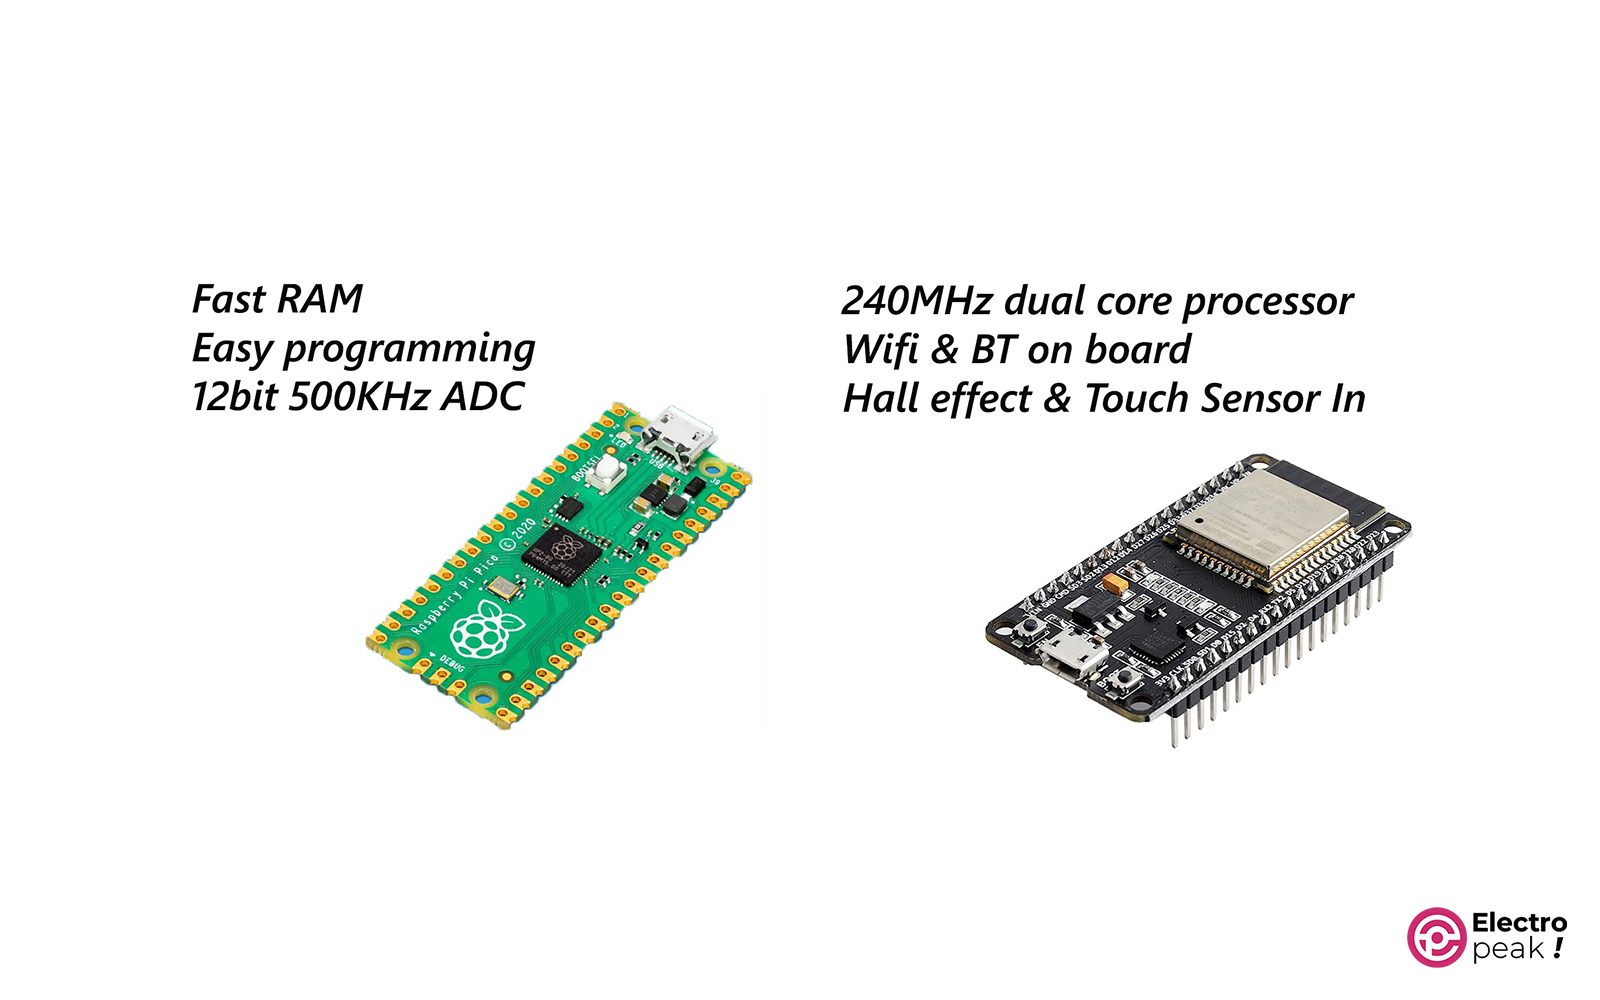
In terms of connectivity, ESP32 takes the lead with its built-in Wi-Fi and Bluetooth. These features make it easy to wirelessly connect to the Internet or other devices, opening up a wide range of possibilities for IoT applications. Although the Raspberry Pi Pico board does not have built-in WiFi and Bluetooth, you can still connect it to external modules or shields to achieve the same functionality.
Raspberry Pi Pico and ESP32 both support MicroPython and C/C++. This means that developers, already familiar with Python, can use their current expertise to program both microcontrollers.
Raspberry Pi Pico and ESP32 both have dedicated and active communities. ESP32 has been on the market longer and has a larger community, which means more resources and tutorials are available. However, the Raspberry Pi Foundation has a strong history of supporting its products, suggesting the Raspberry Pi Pico community will likely grow rapidly in the coming years.
Raspberry Pi Pico vs. STM32
STM32 offers a wide range of options, so we’ll focus on the STM32F4 series.
Processing power: STM32F4 microcontrollers are significantly more powerful than Raspberry Pi Pico boards. With a clock speed of up to 180 MHz and Cortex-M4 cores, STM32F4 chips can handle difficult tasks with ease. Therefore, they are a perfect choice for applications that require highly-efficient computing, such as robotics or real-time signal processing.

STM32F4 microcontrollers offer a rich selection of peripherals such as USB, Ethernet, and CAN bus interfaces. This makes them suitable for applications where we require extensive connectivity options or complex communication protocols. Raspberry Pi Pico, on the other hand, has fewer peripherals. However, they offer good flexibility for most projects.
Raspberry Pi Pico and STM32 support both C and C++ programming languages. However, the STM32 microcontrollers also support other programming languages, such as Ada or FreeRTOS, depending on the specific chip and the development environment used. This flexibility can be helpful for developers who prefer to work with alternative programming languages.
The STM32 microcontrollers have a large and active community with many libraries and resources. Raspberry Pi Pico is relatively new compared to STM32, but it has gained a dedicated community of developers and enthusiasts. The Raspberry Pi Foundation supports the Raspberry Pi Pico and provides documentation and resources to help users get started.
Required Materials
Hardware Components
Software
How to Program Raspberry Pi Pico with Arduino IDE
To do this, follow the steps below:
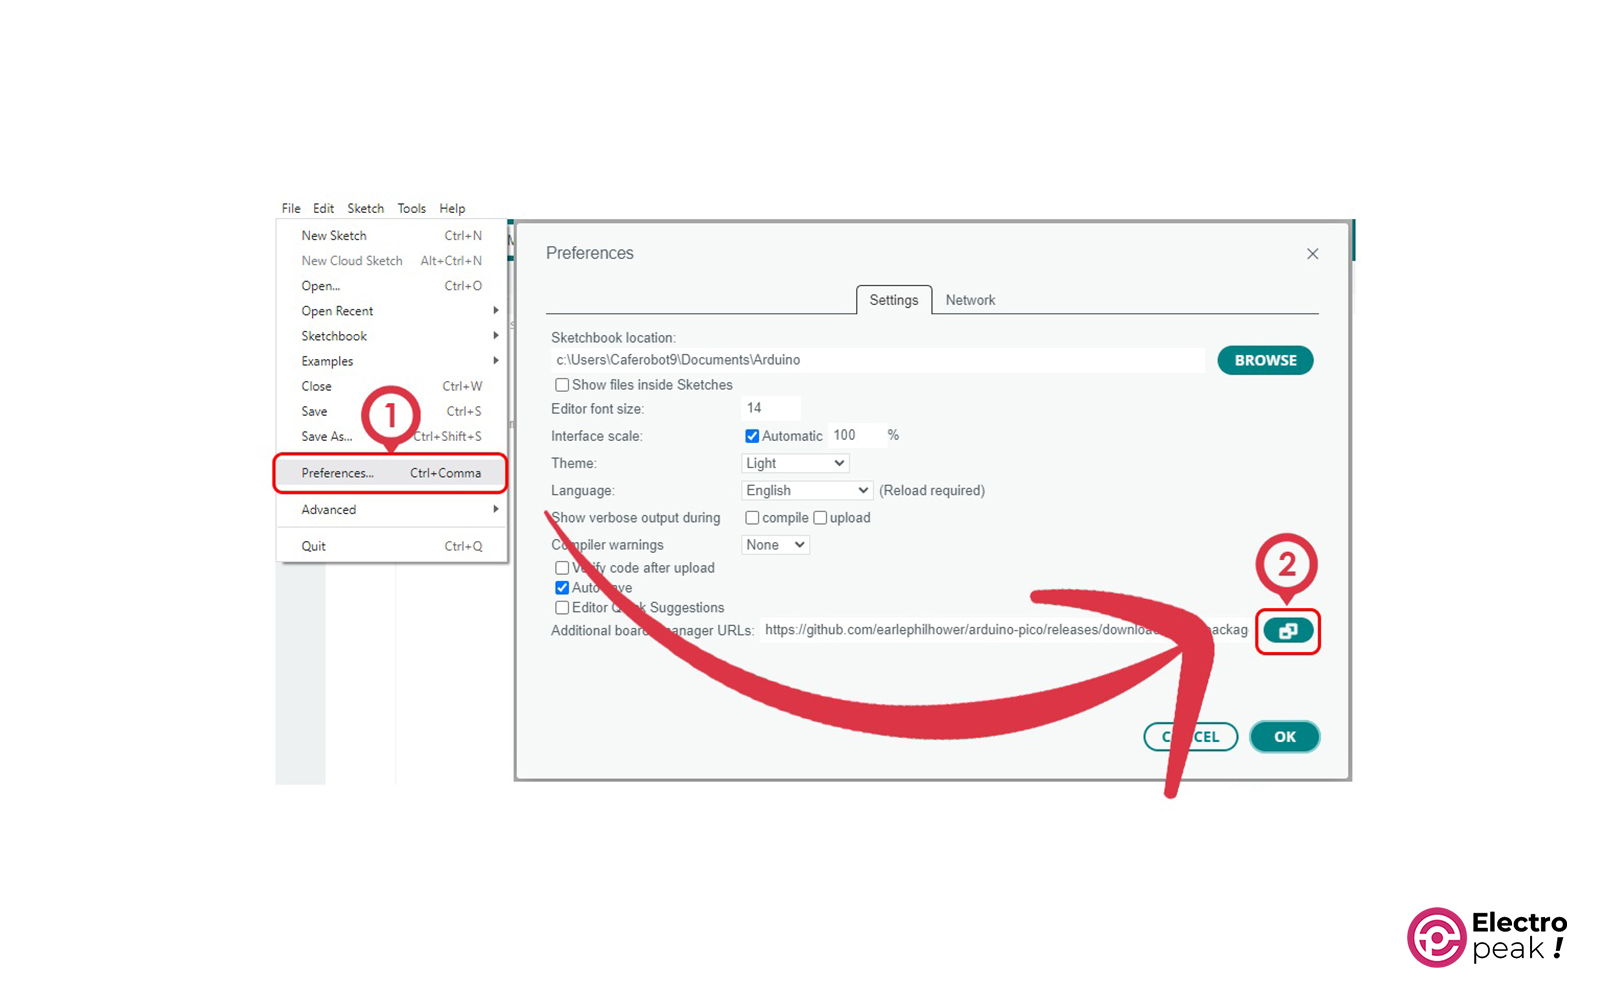
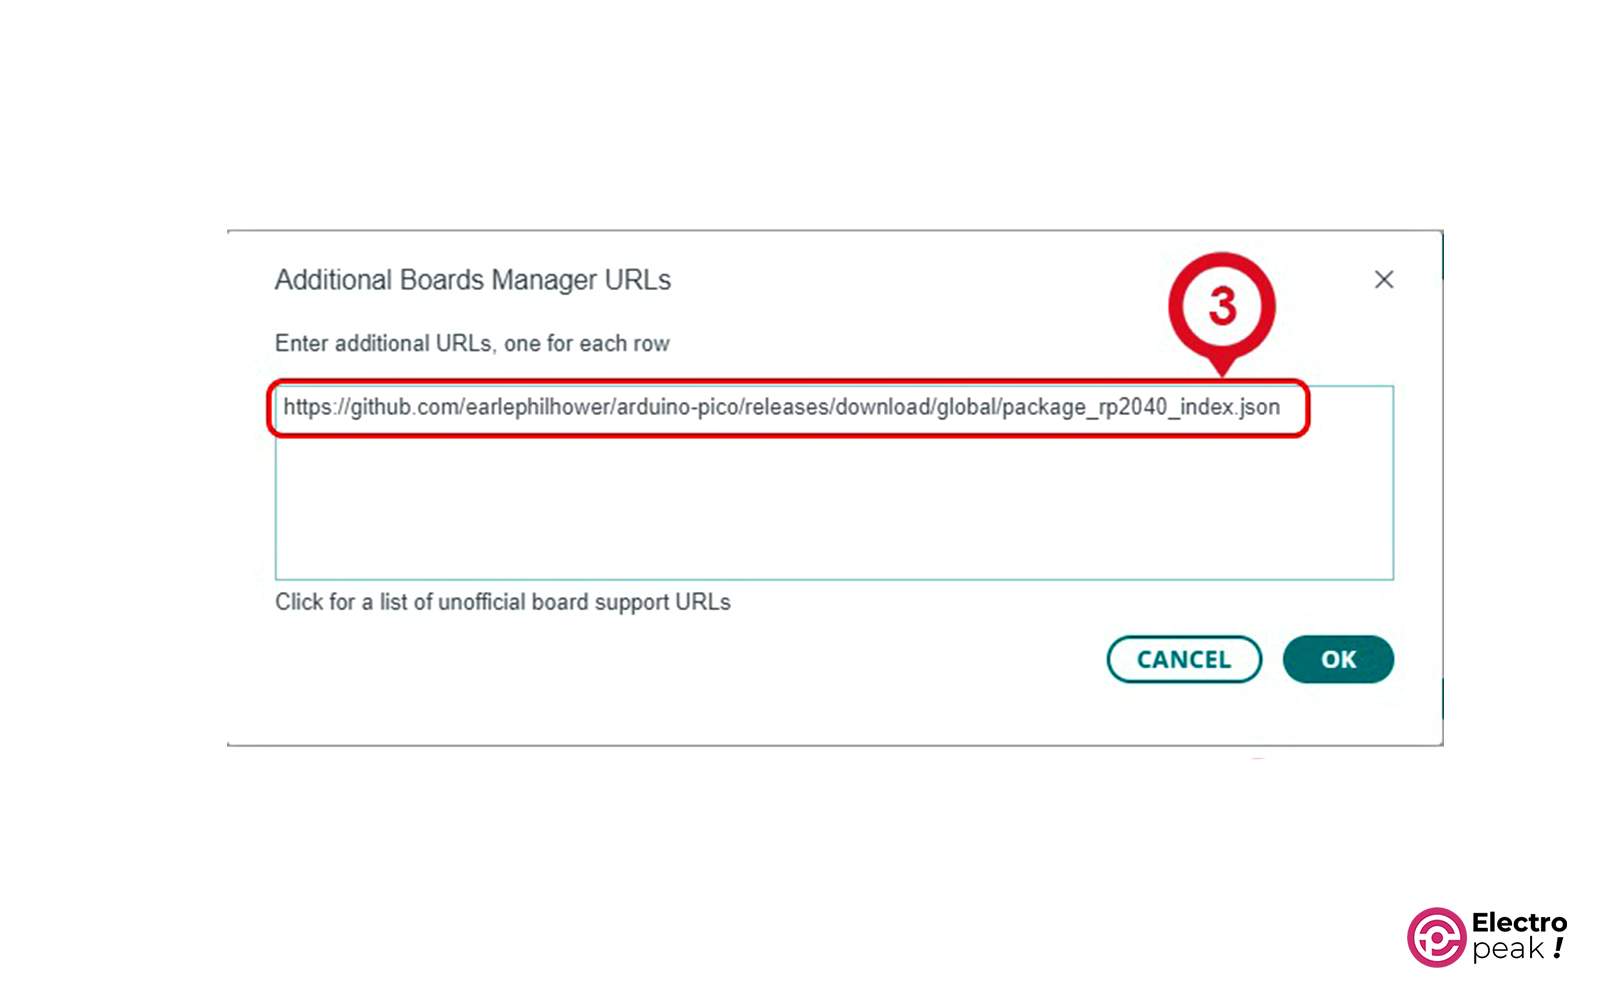
1. Add this link found at File -> Preferences -> “Additional boards manager URLs:” (image below)
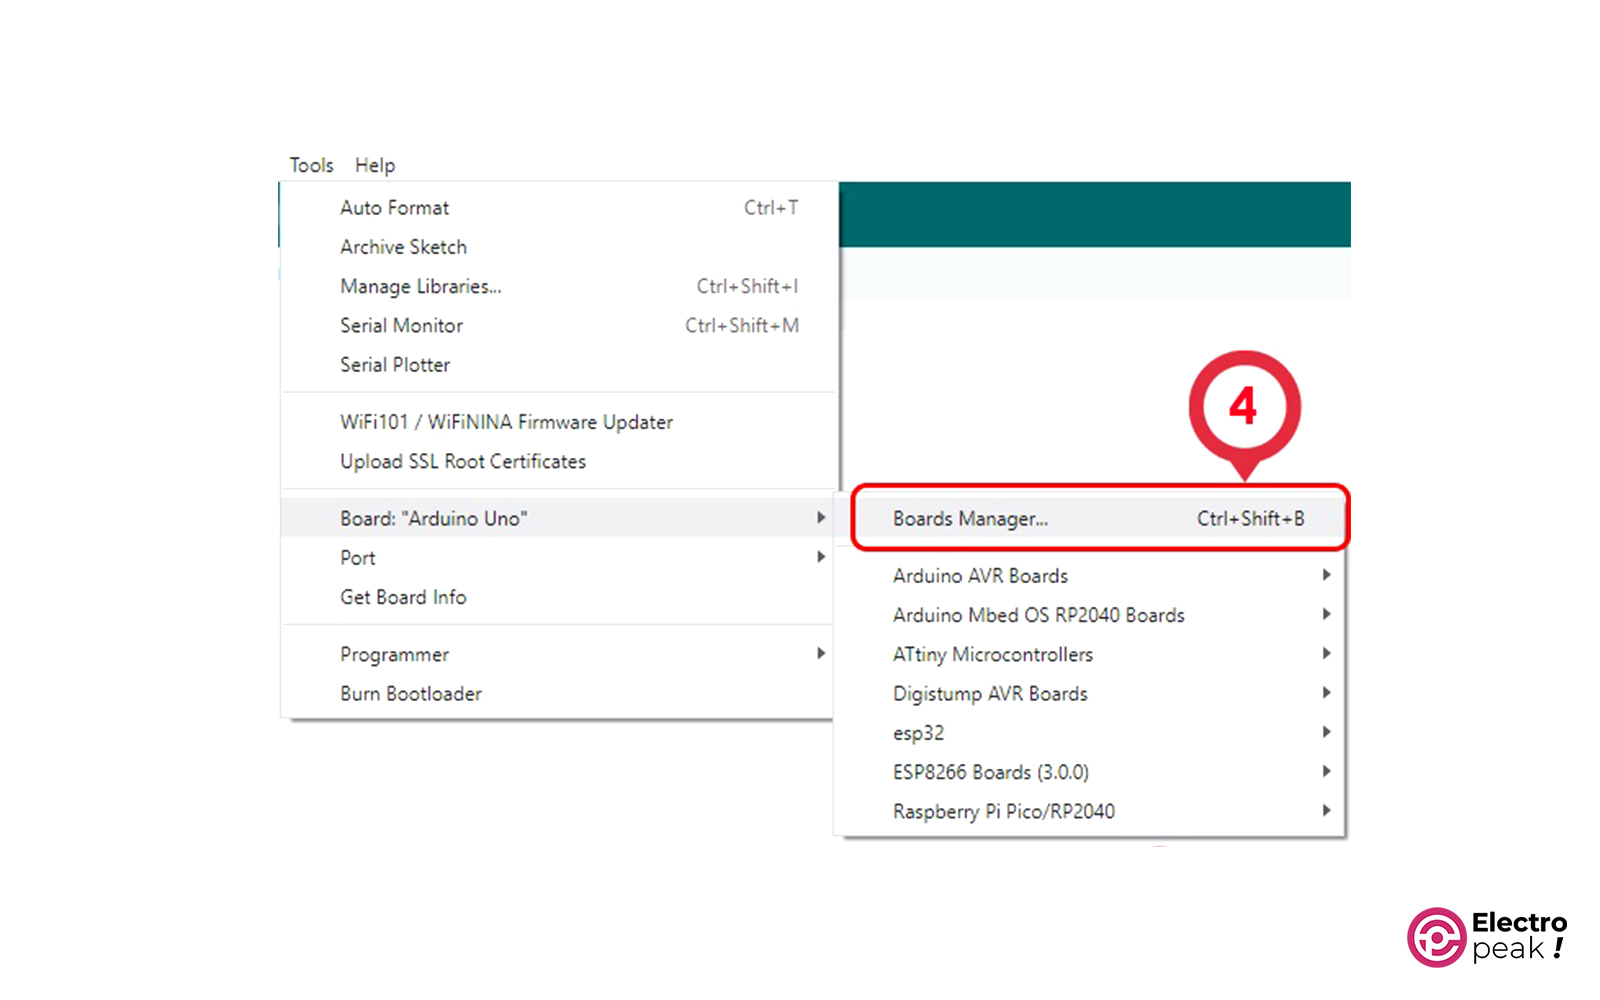
2. Go to Tools -> Board and click on “Boards Manager…”
3. Search for “Raspberry Pi Pico/RP2040” and then click on “Install.”
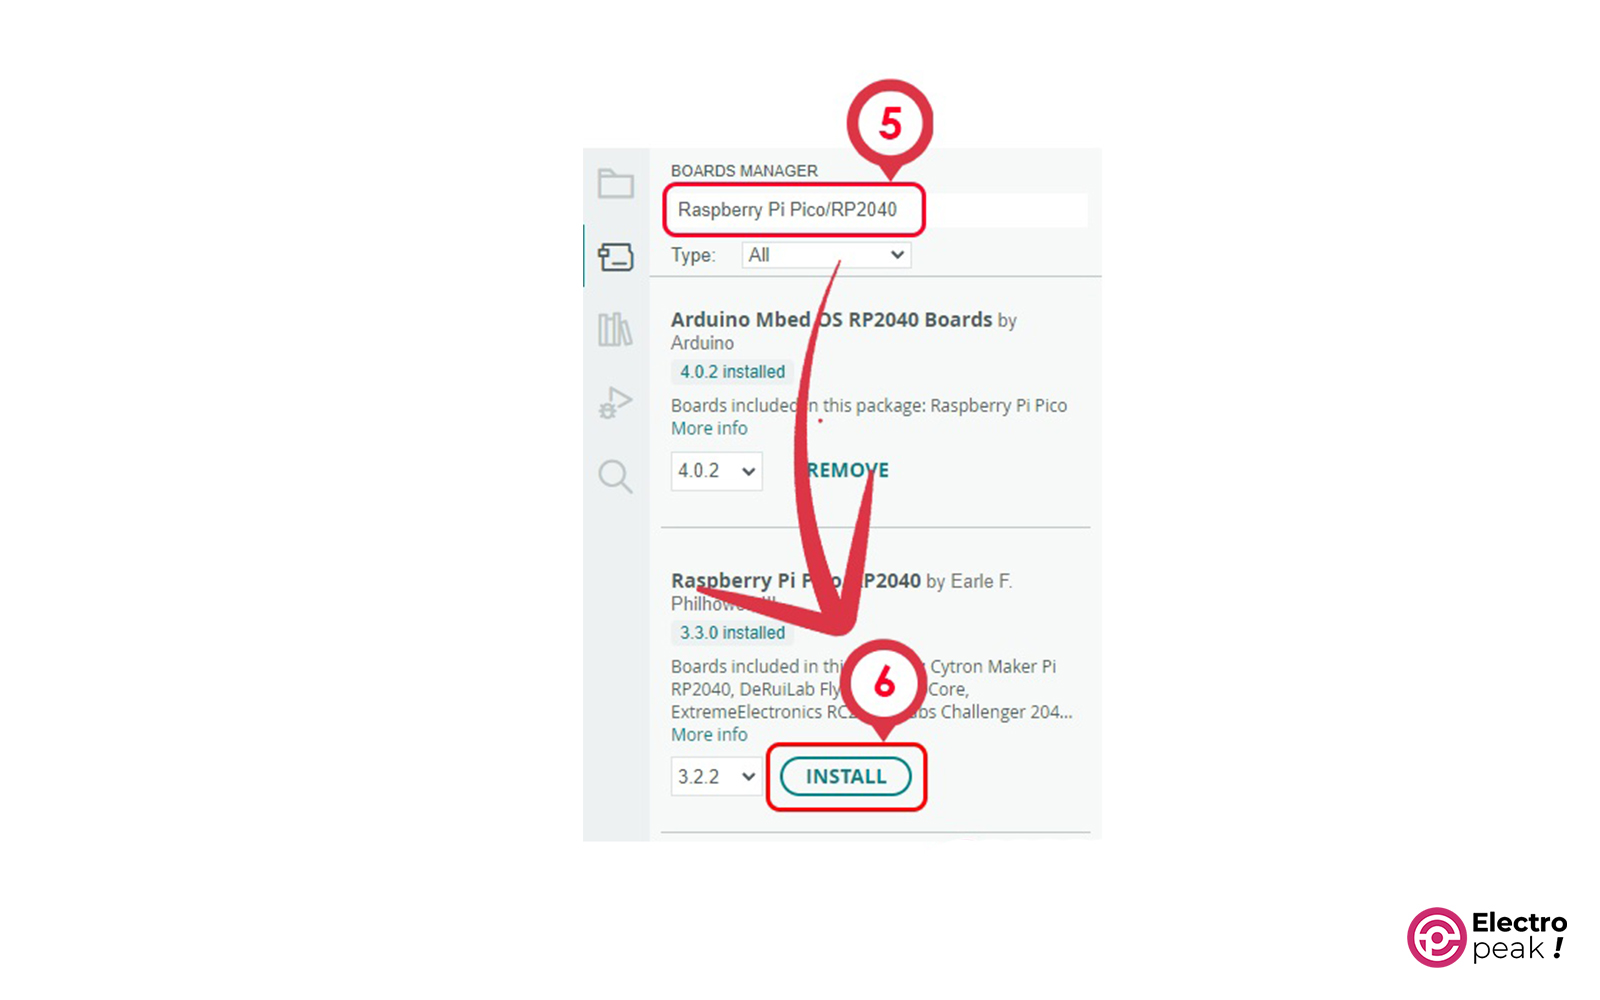
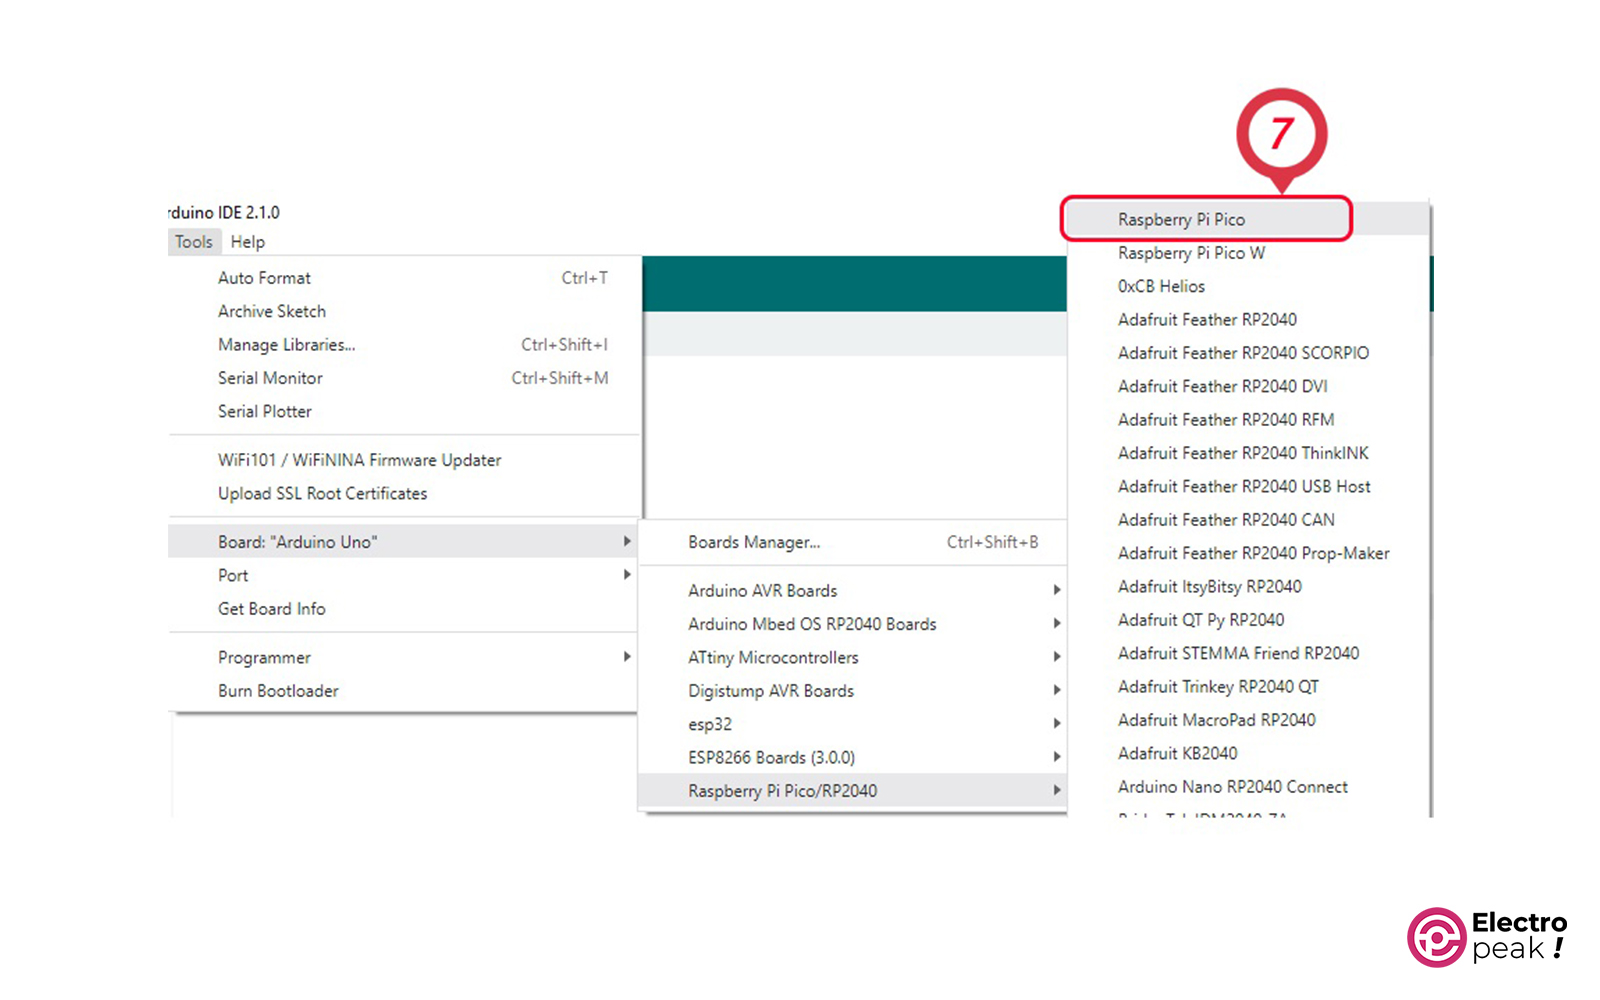
Now, you can select your desired board from “Tools -> Board:… -> Raspberry Pi Pico/RP2040” and start to write a code for it.
Code
All right, let’s program our Raspberry Pi Pico board.
Select this board as shown below.
Next, open the “Fade.ino” file from Files -> Examples -> RP2040.
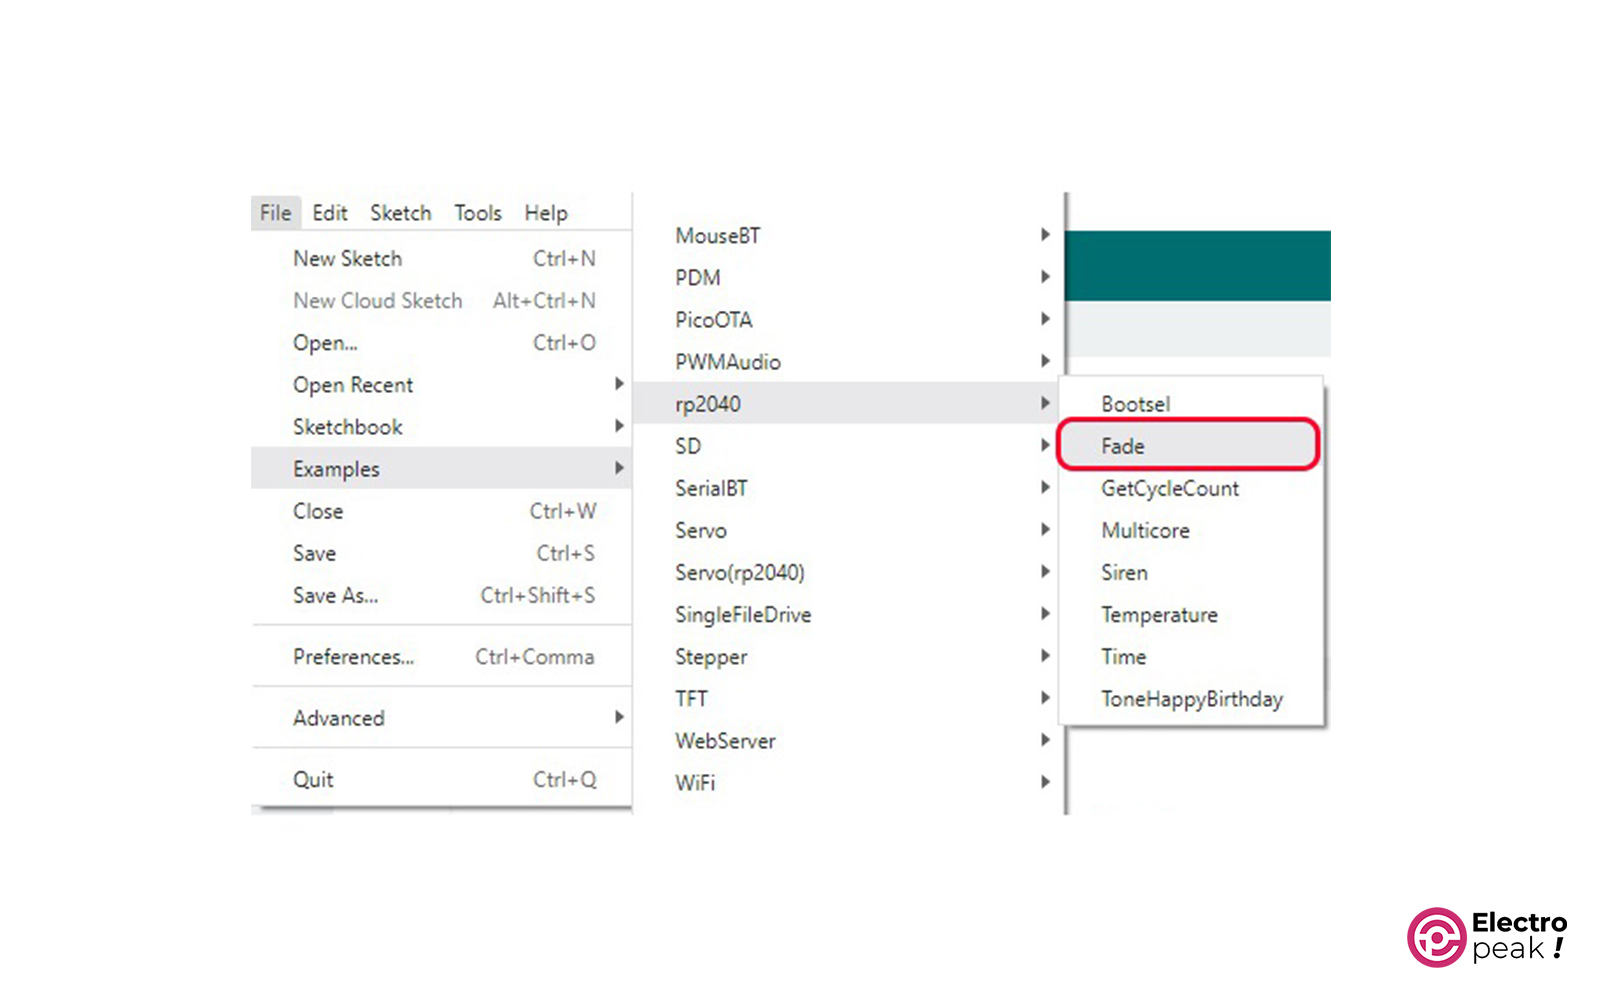
You will see the code below:
/*
 Fade

 This example shows how to fade the onboard Raspberry Pi Pico LED

 This example code is in the public domain.

 http://www.arduino.cc/en/Tutorial/Fade
*/

int led = LED_BUILTIN; // the PWM pin that the LED is attached to
int brightness = 0; // brightness of LED
int fadeAmount = 5; // how many points to fade the LED by

// the setup routine runs once when you press reset:
void setup() {
 // declare pin to be an output:
 pinMode(led, OUTPUT);
}

// the loop routine runs over and over again forever:
void loop() {
 // set the brightness
 analogWrite(led, brightness);

 // change the brightness for next time through the loop:
 brightness = brightness + fadeAmount;

 // reverse the direction of the fading at the end of the fade:
 if (brightness <= 0 || brightness >= 255) {
 fadeAmount = -fadeAmount;
 }
 // wait for 30 milliseconds to see the dimming effect
 delay(30);
}
This code turns on and off the LED on the Raspberry Pi Pico board at a slow rate.
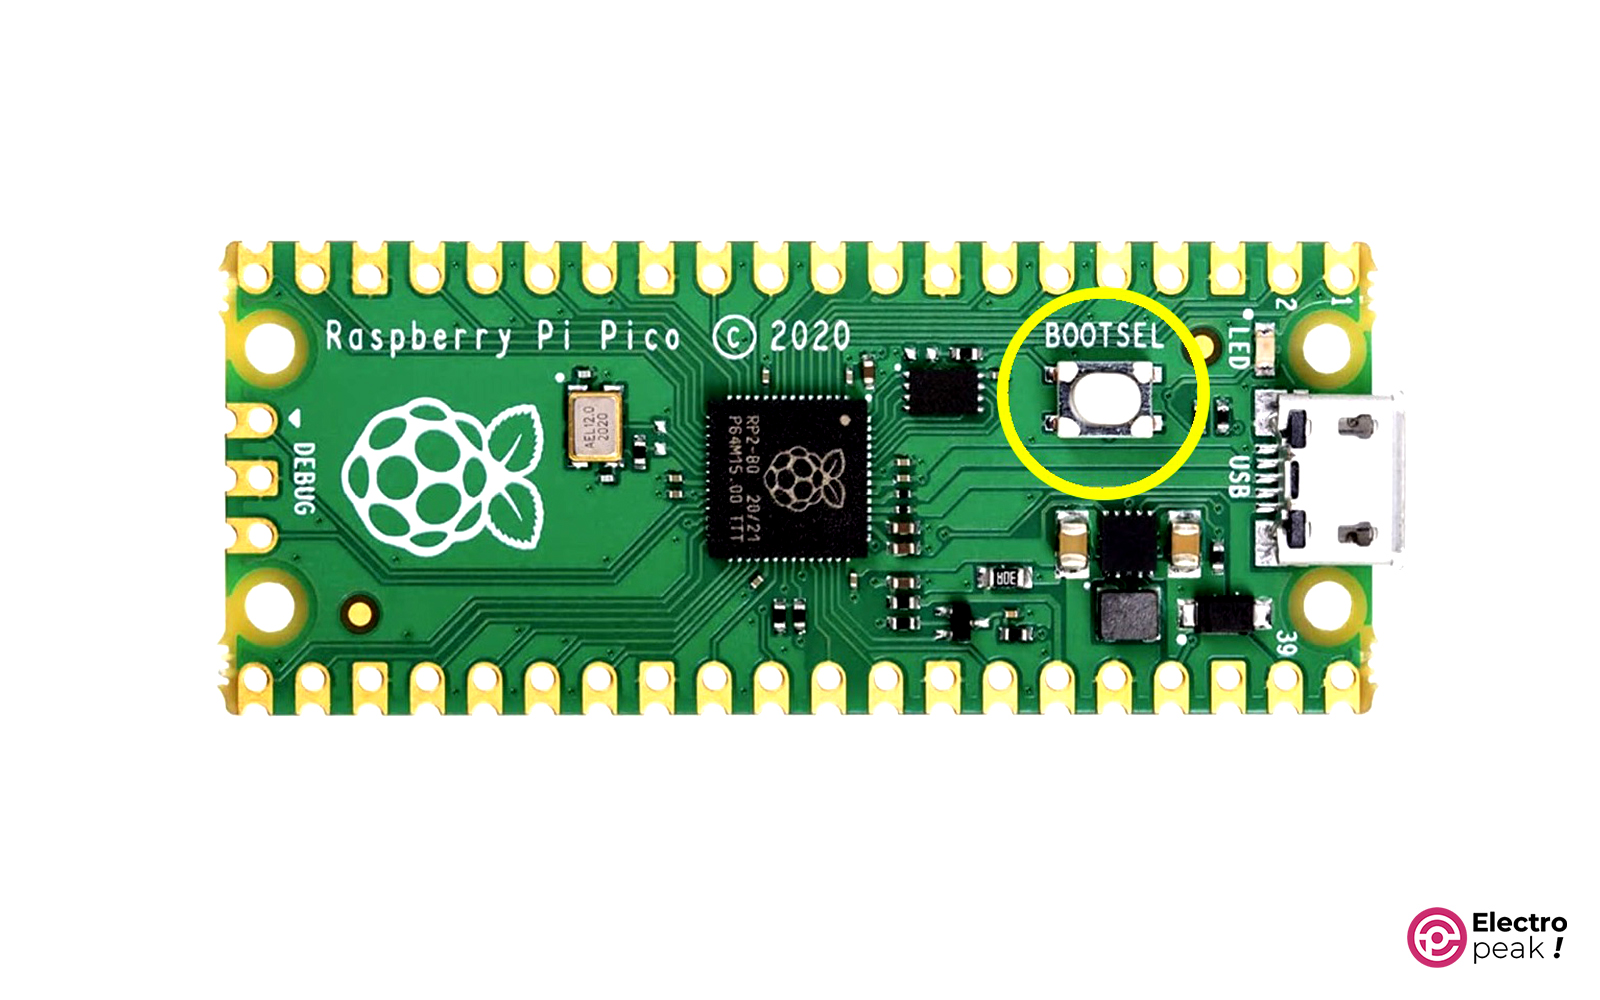
To upload this code, you should disconnect your Raspberry Pi Pico board from the computer and then reconnect it while holding the “BOOT SEL” button on the board. This way, your board will enter the Bootloader mode and the computer will recognize it as “Mass Storage.”
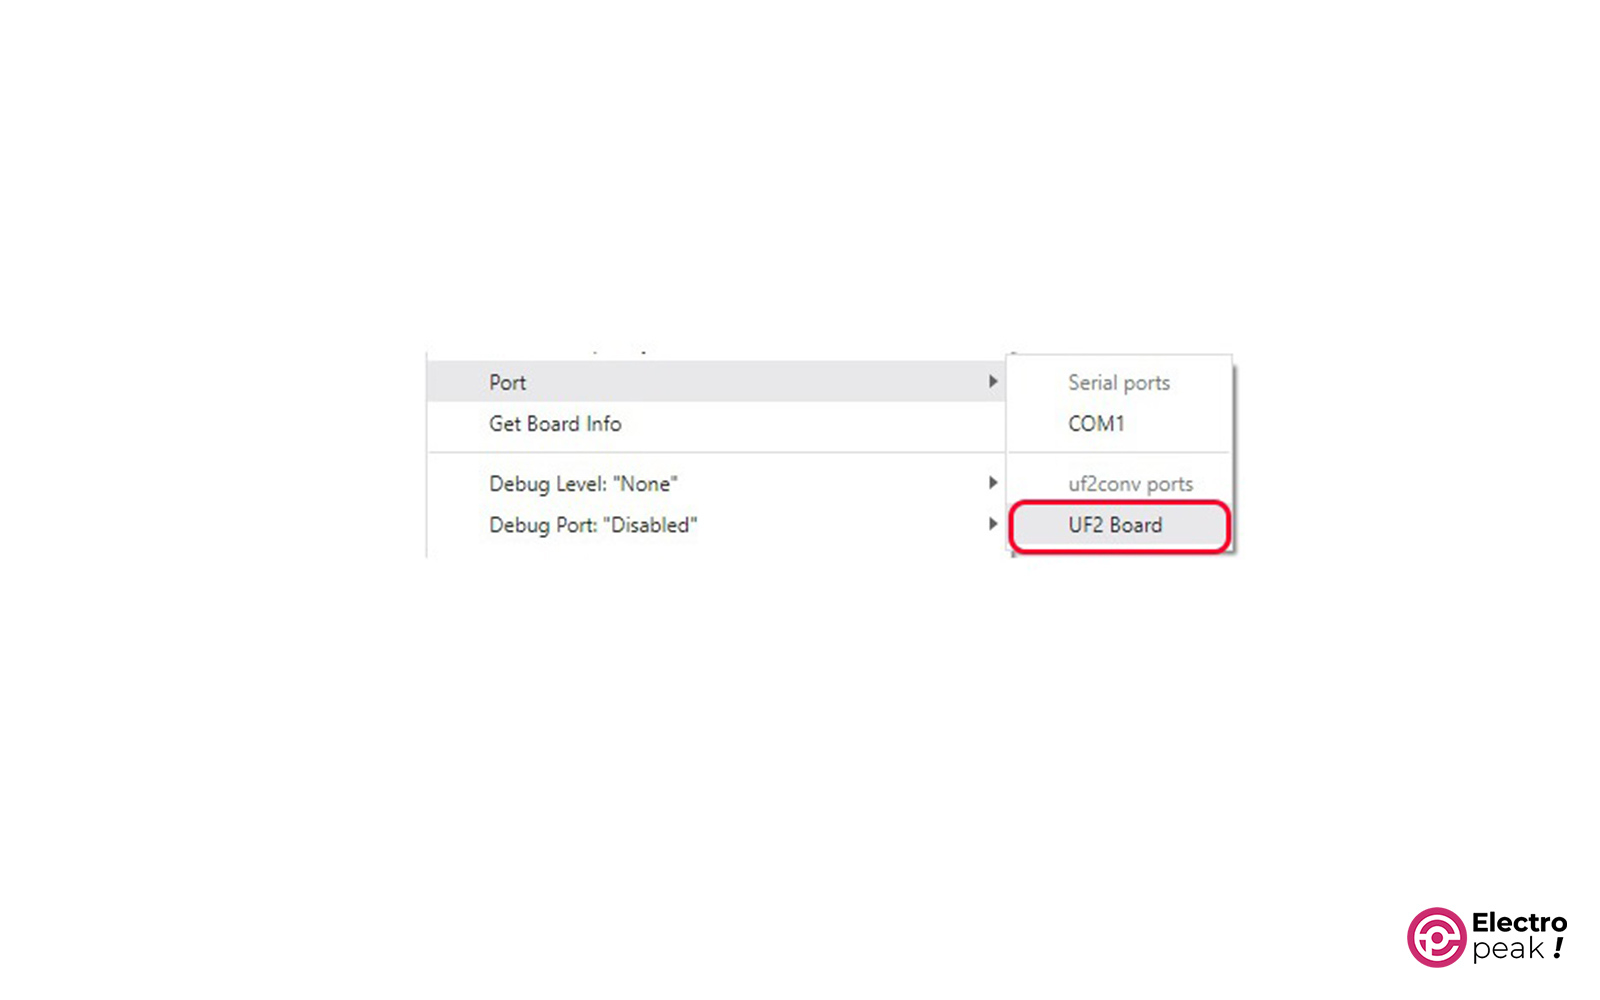
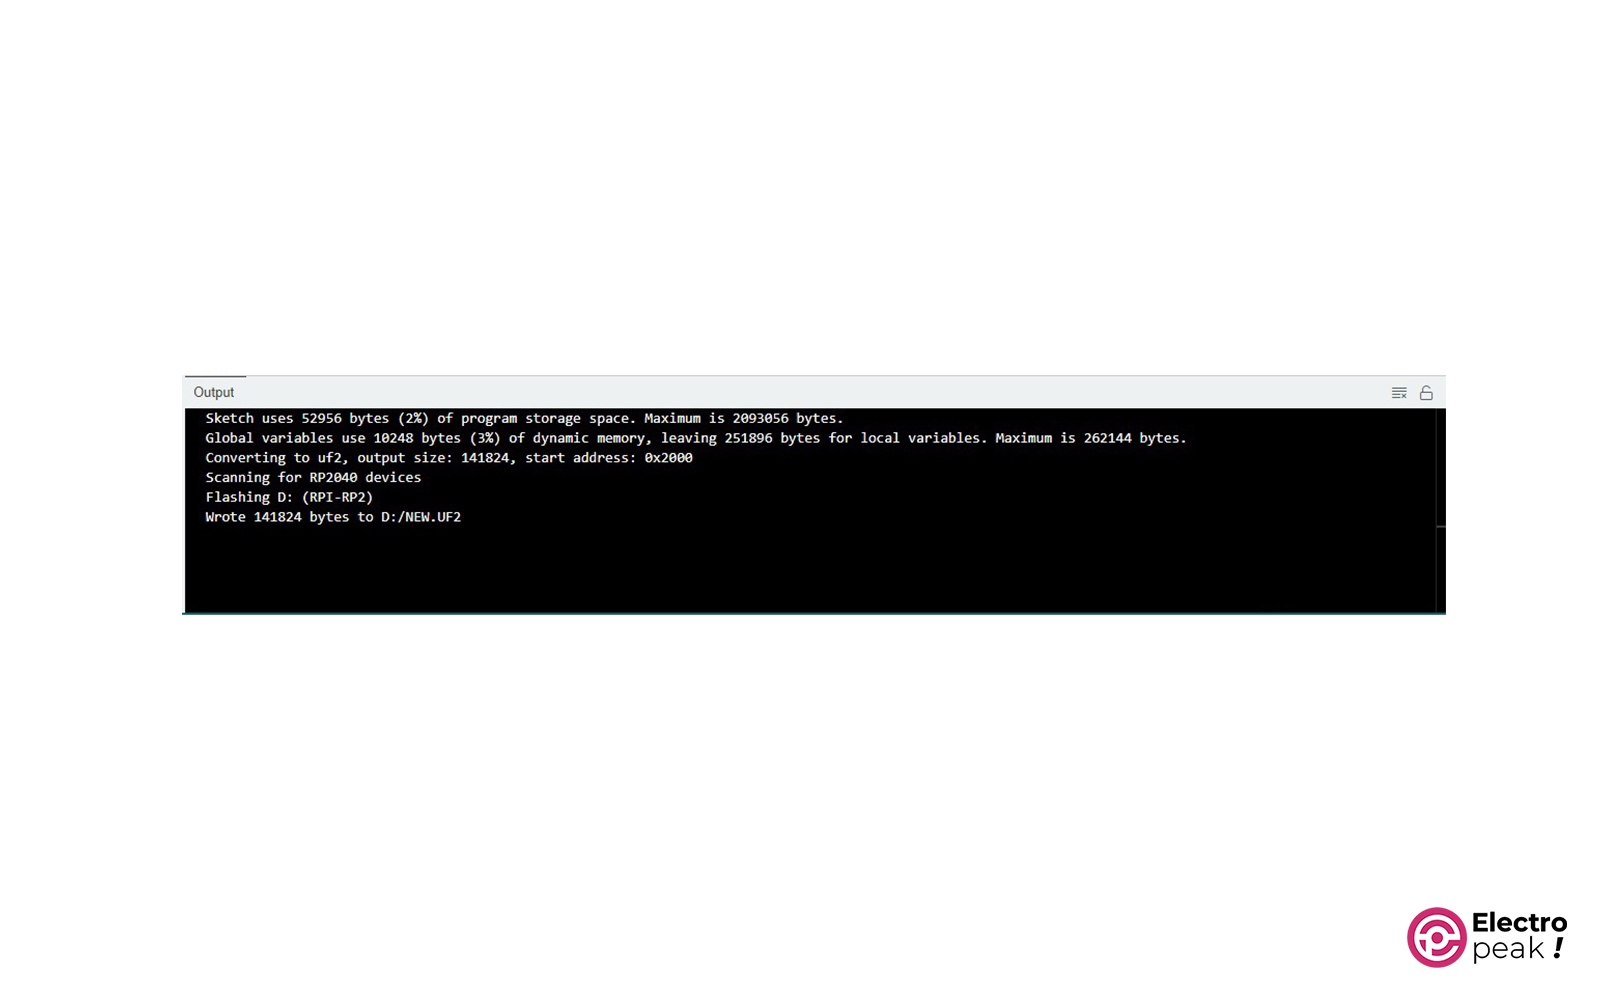
Select the “UF2 Board” option found at Tools -> Port and then click on “Upload.”
If done correctly, your board will be programmed and you’ll see the image below.
What’s Next?
In this tutorial, you learned how to work with the Raspberry Pi Pico board in Arduino IDE software. Considering its strengths compared to other boards supported by Arduino IDE, Raspberry Pi Pico is a suitable choice for your project.
There are many boards based on the RP2040 chip, offering various features. These include supporting communication protocols, such as NFC, LORA, WiFi, Bluetooth, and CAN, as well as other versions of the board that have a screen. You can now work with them all.
Here are some of these boards:
- Arduino Nano RP2040 Connect
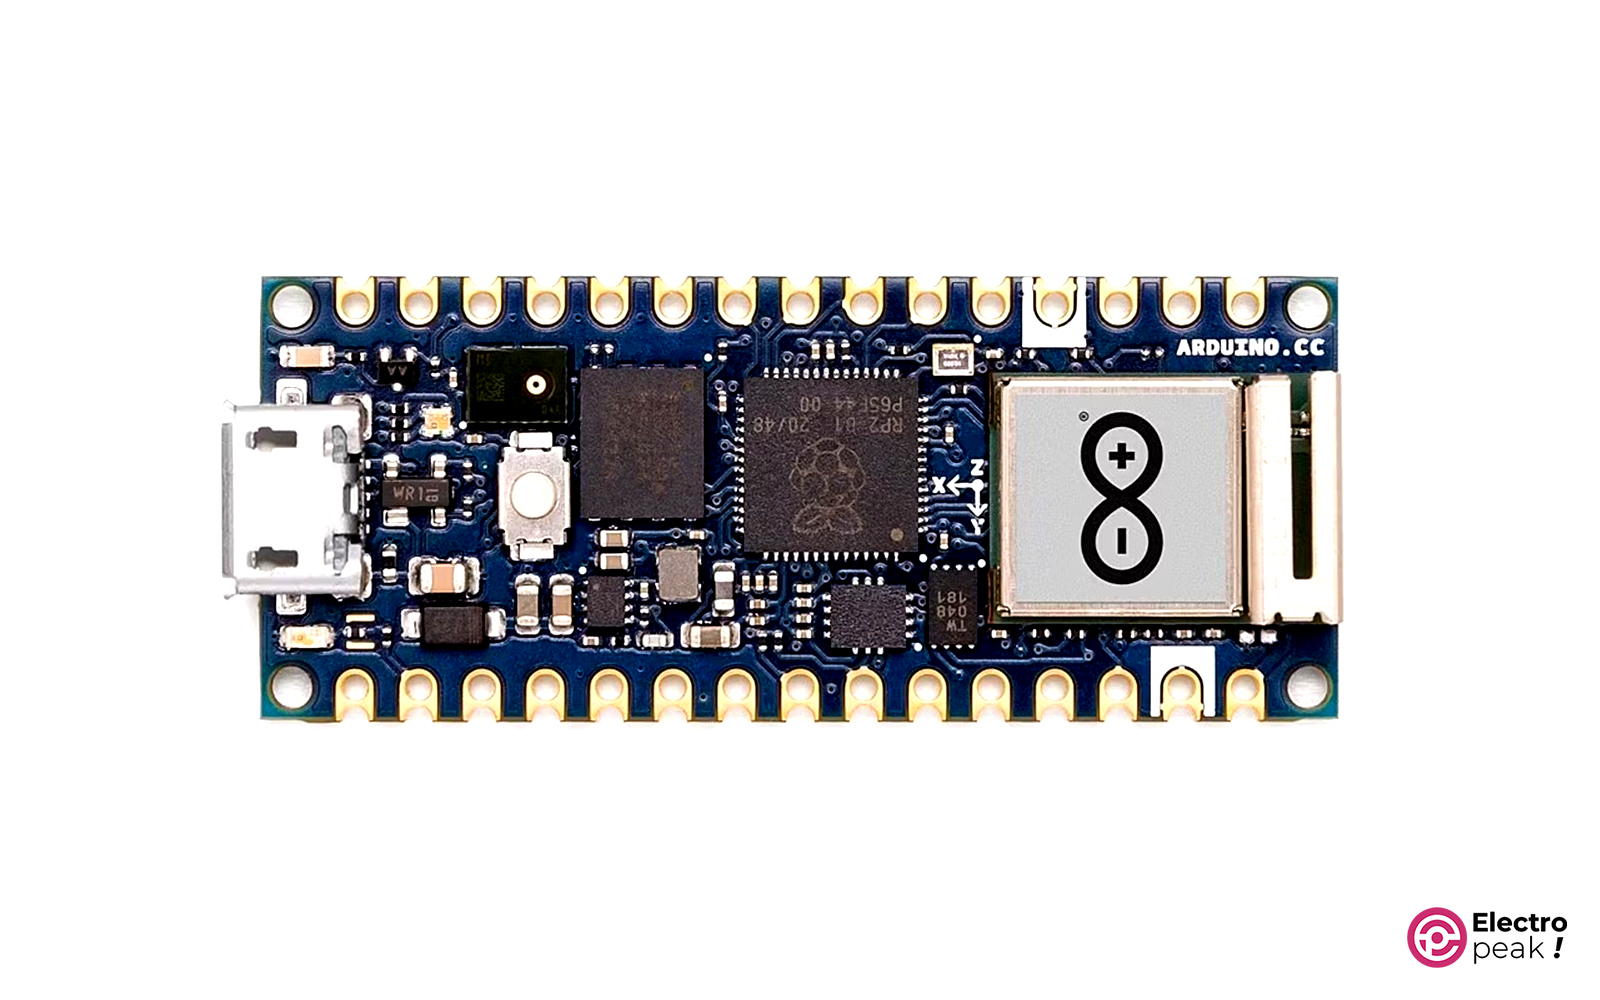
Besides the RP2040 chip, this board has Bluetooth and WiFi connectivity, an accelerometer and gyroscope sensor, and an Omnidirectional microphone, and the flash memory of this board has been upgraded to 16 MB.
- SparkFun MicroMod RP2040
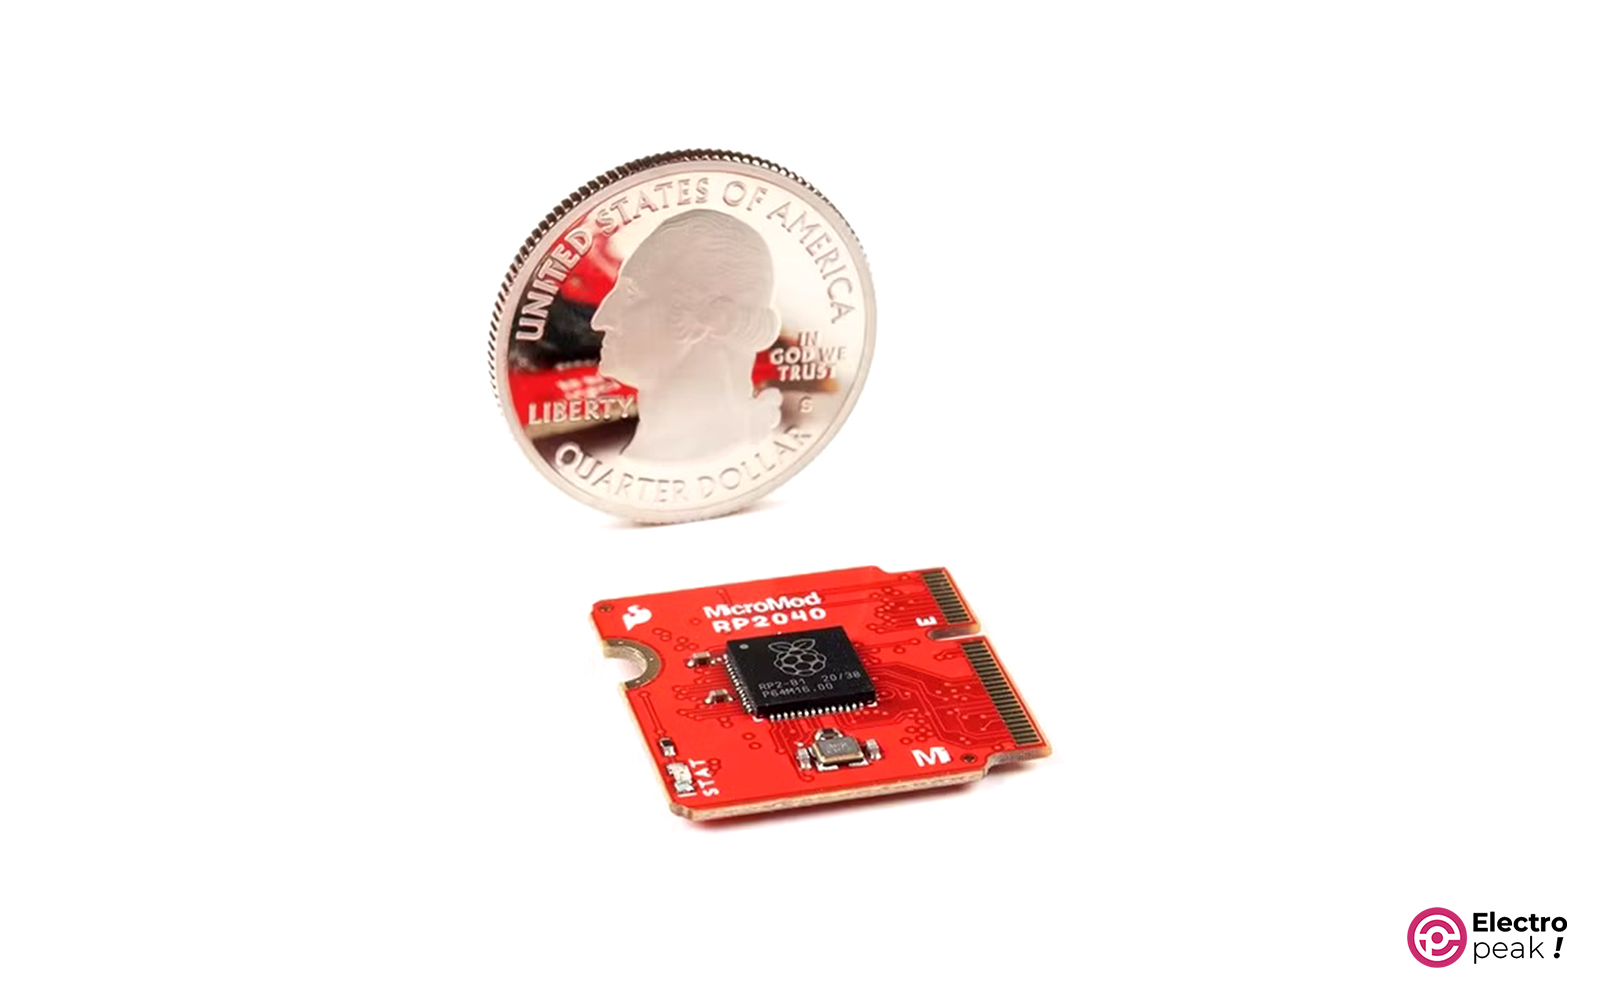
It’s one of the smallest boards manufactured for the RP2040 chip. You can also mount it on another board with an M.2 connecter. All the pins of the RP2040 chip are accessible and you can use them in different projects.
- Pimoroni Motor 2040 Quad Motor Controller

It can handle four motors on its own, and no other component is needed.
- Waveshare RP2040 LCD 1.28

By providing 30 multi-purpose pins, this board offers all the functions of Raspberry Pi Pico. It also has an accelerometer and gyroscope sensor, a lithium battery management circuit, and above all, a circular 1.28-inch 65000 color IPS screen.
