
Introduction
Welcome to the world of micro:bit! In this tutorial, you will learn how to code and program micro:bit using either MakeCode or Python. These two programming platforms offer different approaches to programming the micro:bit, catering to a wide range of learners and developers. Whether you prefer a block-based visual programming environment like MakeCode or the flexibility of text-based coding with Python, you will gain the skills to bring your ideas to life and create exciting projects with the micro:bit.
What You Will Learn
- Getting familiar with Micro:bit microcontrollers
- Different versions of Micro:bit
- Advantages of Micro:bit microcontrollers
- How to program Micro:bit using web-based Python software
- How to program Micro:bit using web-based Microsoft MakeCode software
Micro:bit Board in a Nutshell
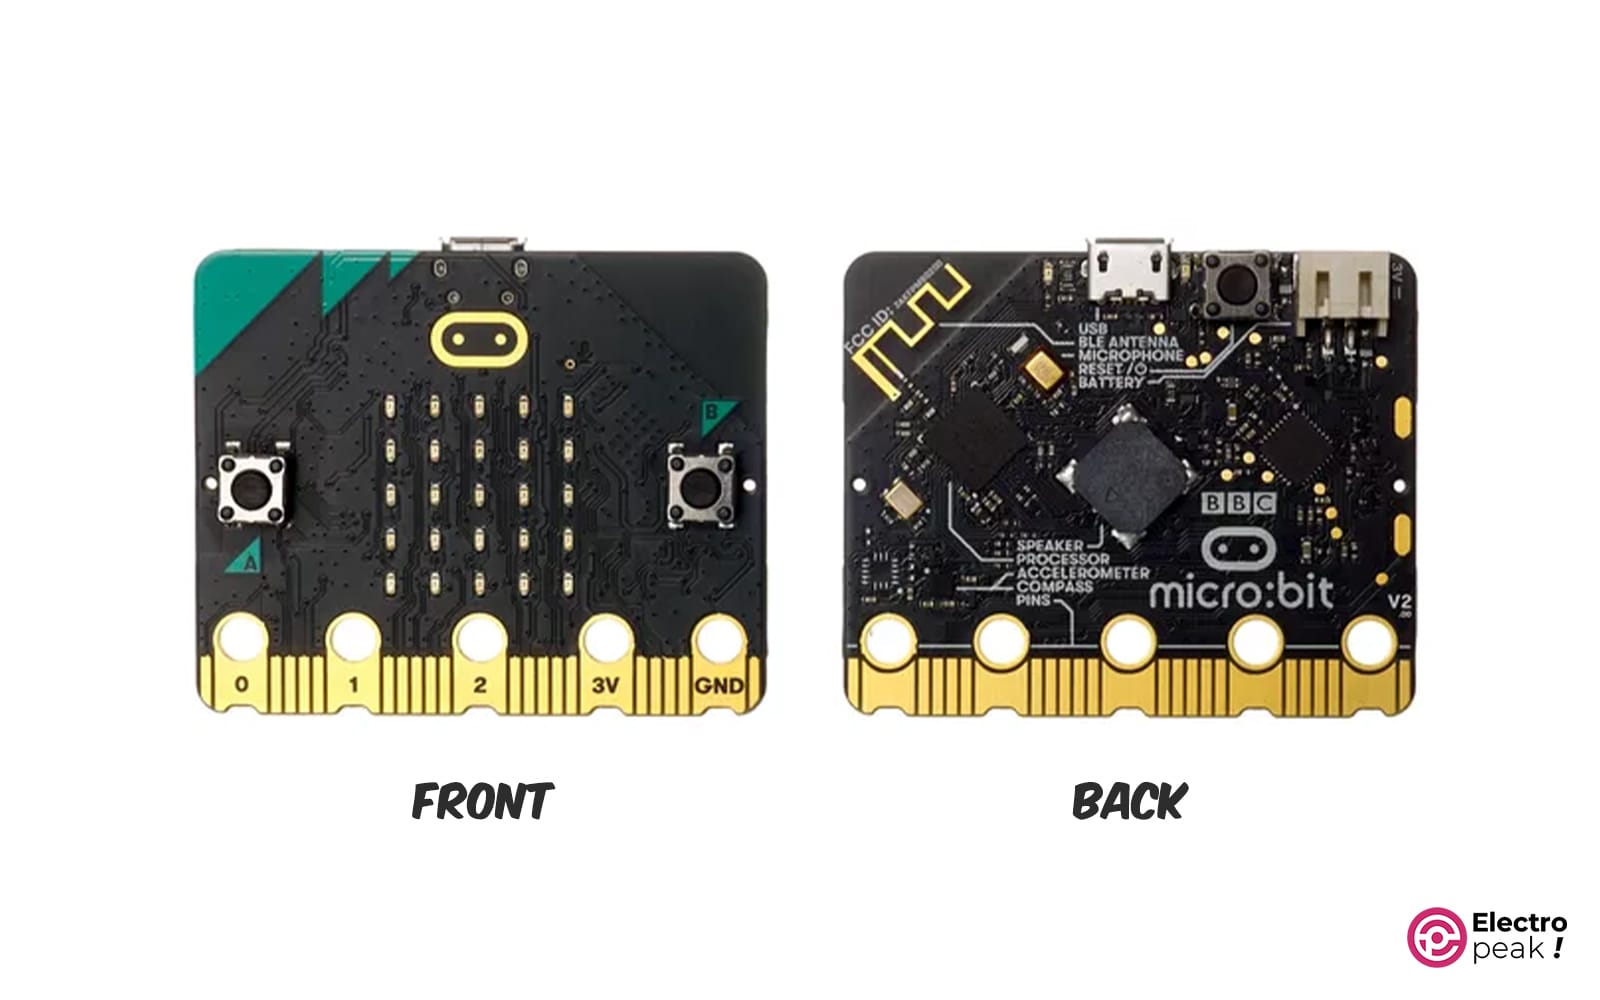
Since 2010, when Arduino became popular among microcontroller-based boards, different types of microcontroller-based boards have been manufactured. The Micro:bit board is based on the nRF series microcontrollers of Nordic company. The first version of micro:bit was released in 2016. In the image below, you can see the newer version Micro:bit v2.2.
The microcontroller used on Micro:bit is nRD52833, which is a 32-bit microcontroller based on Arm-Cortex-M4.
Here are other specifications:
- Flash memory: 512 KB
- RAM: 128 KB
- Working frequency: 64 MHz
- Program interface: SWD and J-Link/OB
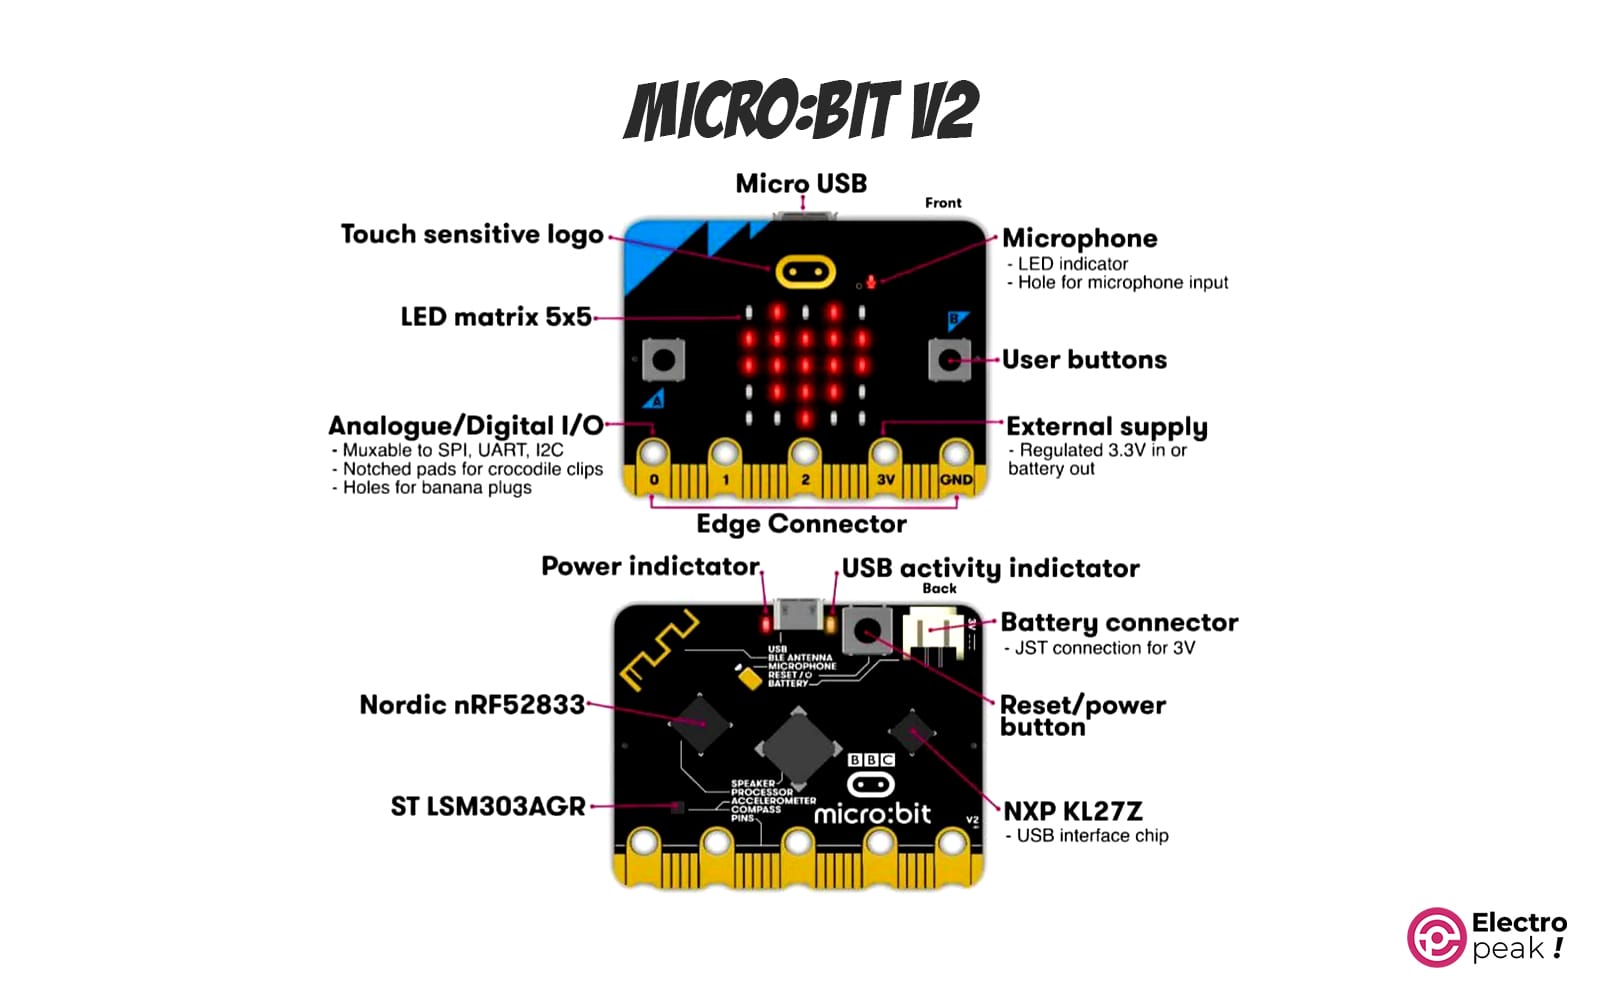
As shown in the image above, micro:bit has the following peripherals:
- Bluetooth version 5.1 with BLE capability
- 2.4 GHz RF communication with a data exchange speed of 1 or 2 Mbps
- 2 push buttons
- 25 x 5×5 LED matrix
- LSM303AGR motion sensor with built-in accelerometer and compass
- Thermometer sensor with a resolution of 0.25 degrees and an accuracy of 5 degrees within the temperature range of -40 to 105 °C
- Speaker
- MEMs microphone with an LED indicator
- Micro USB port for programming and serial communication with 12Mbit/s speed
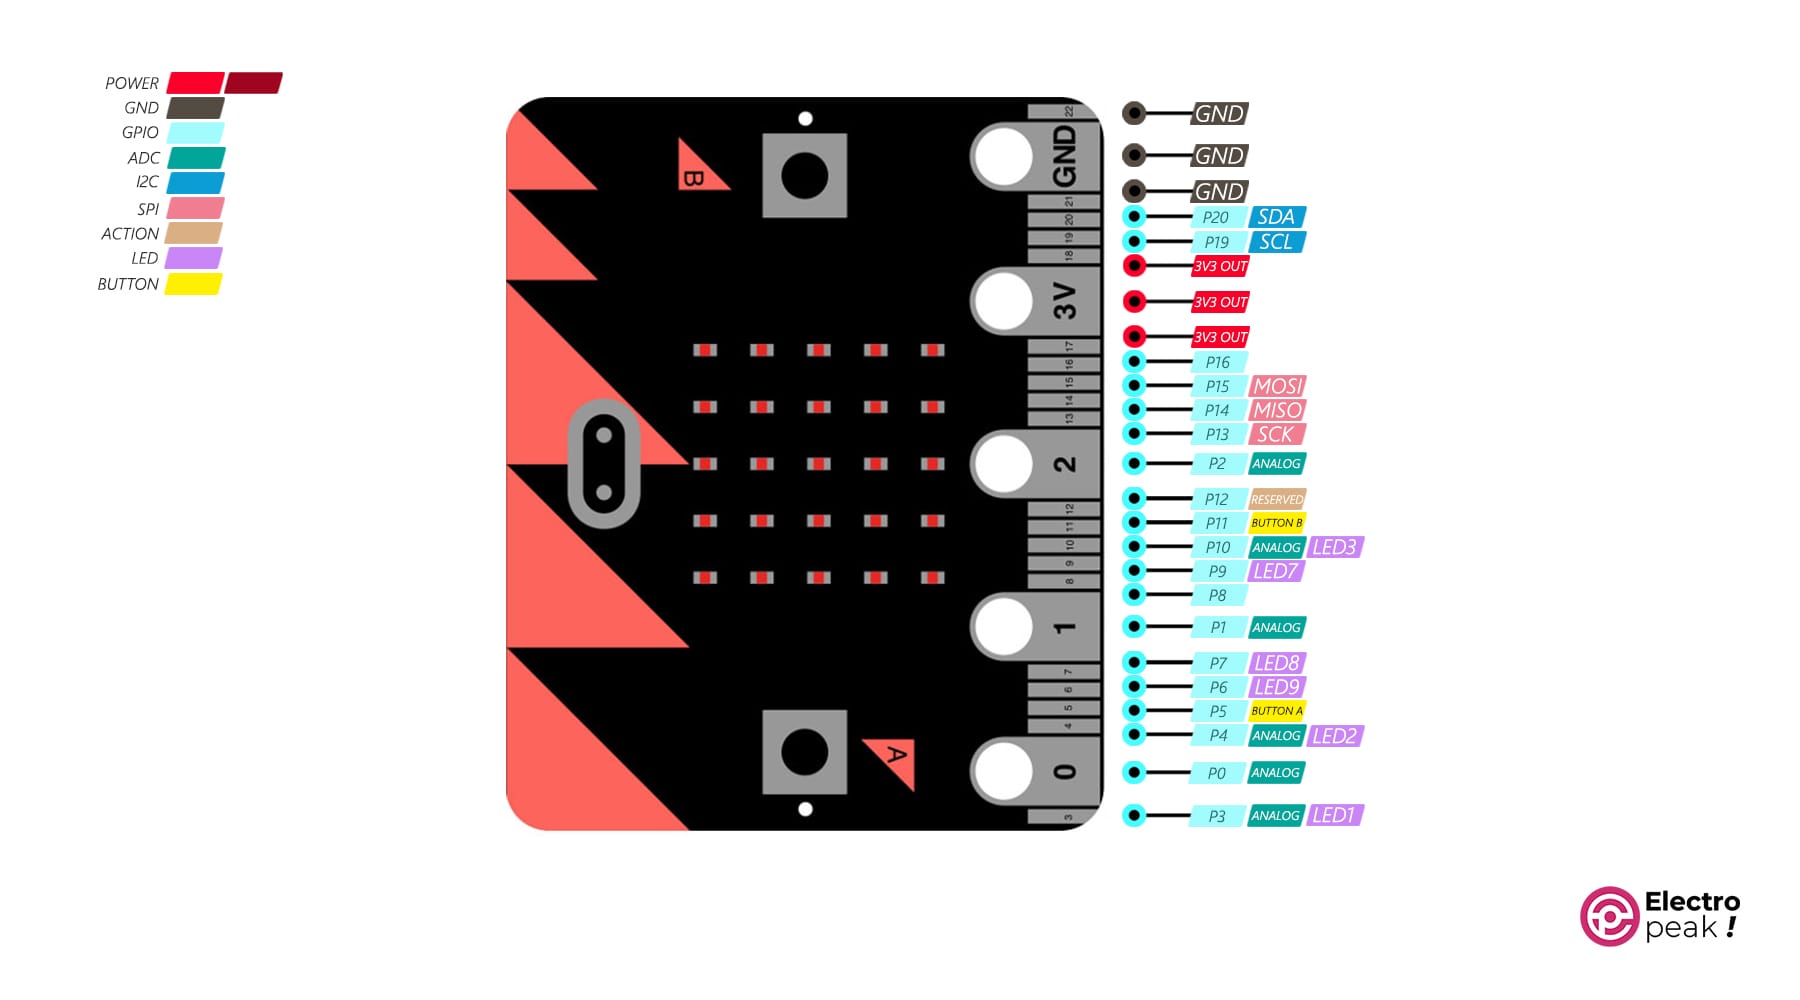
Also, micro:bit has 19 GPIO pins as follows:
- You can define all of the 19 pins as GPIO
- I2C and SPI communication
- Simultaneous control of 3 PWM signals on each of the 19 output pins
- You can define 6 pins as ADC (10 bits)
- The possibility of connecting a touch sensor to 3 pins
- The possibility of defining each pin as a UART communication pin
Of course, among these 19 pins, 2 pins are reserved for push buttons and 6 pins are for controlling the display and the brightness sensor.
Micro:bit vs. Microbit V2
There are two versions of Micro:bit boards available, with some minor differences between them. In this article, we will focus on the improvements made in the Micro:bit V2 board.
General Comparison
In general, the Micro:bit V2 board has some additional features compared to the V1 board. For example, the Bluetooth module has been upgraded from version 4 to version 5.0, and the board now includes a microphone, and a speaker, which has an LED indicator. Additionally, the V2 board has a touch-sensitive logo and an OFF button to turn off the board.
Hardware Comparison
The hardware of the Micro:bit V2 board has also been improved. The microcontroller has been upgraded from nRF51822 to nRF52833, which has increased the flash memory from 256 to 512 KB and the RAM from 16 to 128 KB.
Programming Languages for Micro:bit
The Micro:bit board supports various programming languages such as Python, Javascript, and Microsoft MakeCode. Each of these languages has its own advantages. For example, Python is more text-oriented and allows the user to write complex codes and use external libraries. On the other hand, MakeCode is more suitable for beginners due to its block-oriented programming.
As mentioned, each of these software has some advantages, but the most important factor is user-friendliness.
Next, we will introduce these two programming software.
Python Programming for Micro:bit
The Python programming environment is web-based and can be run on browsers such as Chrome, Edge, and Firefox. For the first time, you need an internet connection to work with Python, but after that, the data will be saved in the cache of your browser, and you can use Python offline. Of course, the help option is disabled in offline mode.
The Python programming environment has become a bit more text-oriented compared to MakeCode, allowing users to define the program details in writing.
The image below shows the programming environment of Python.
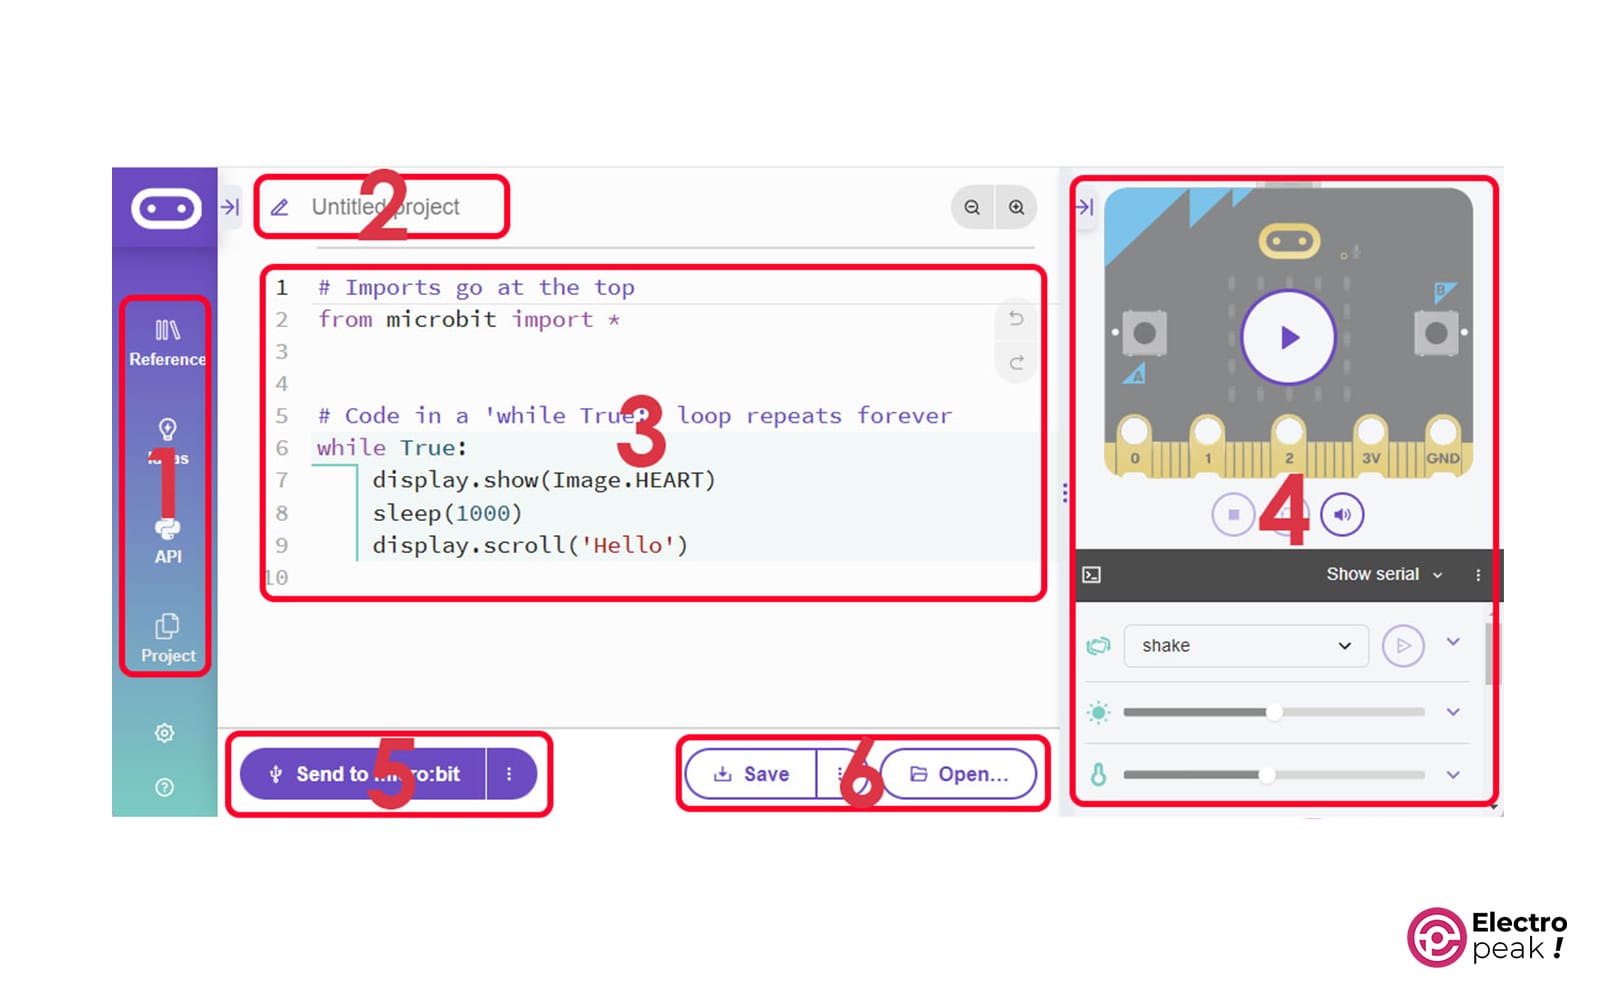
The main page of the Python programming environment contains a simple code that, if programmed on Micro:bit, will show a heart symbol on the LED matrix once, and then after a 1-second delay, you will see the word “Hello”.
Now, let’s talk about the different parts of this page (shown in the image above).
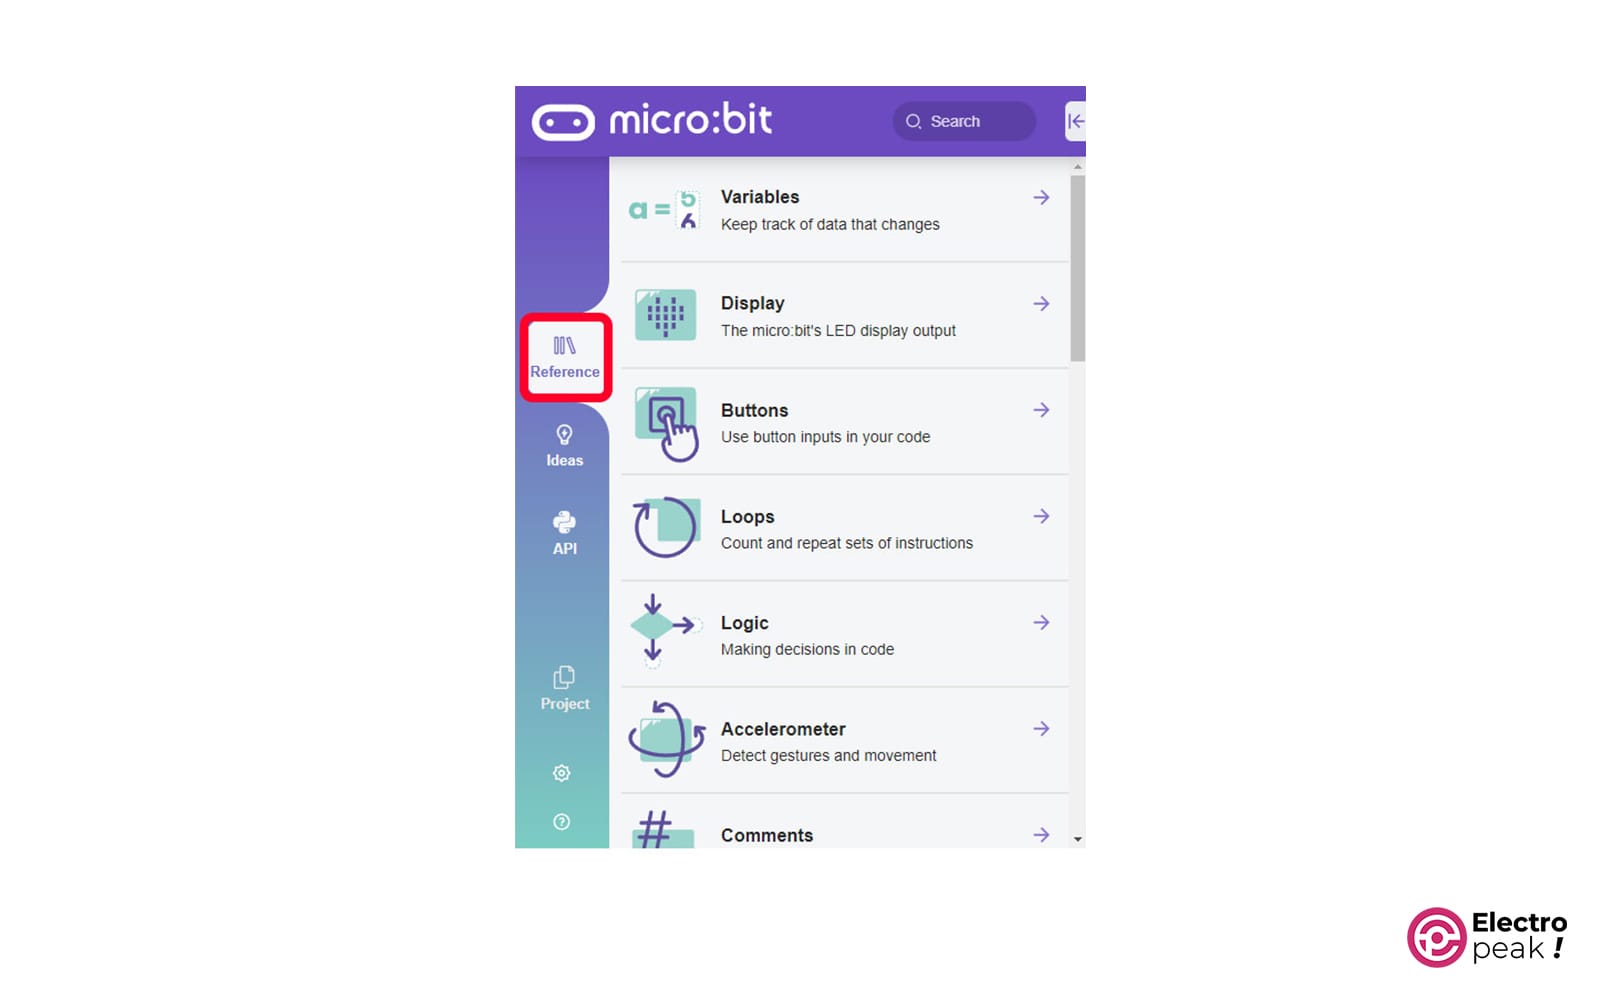
Part 1: User Guide
This section (the Reference, Ideas, and API options) provides help for programming. For example, by clicking on the Reference, users can access the reference guide of the coding language, which contains the reference of all the sensors and modules of the Micro:bit board.
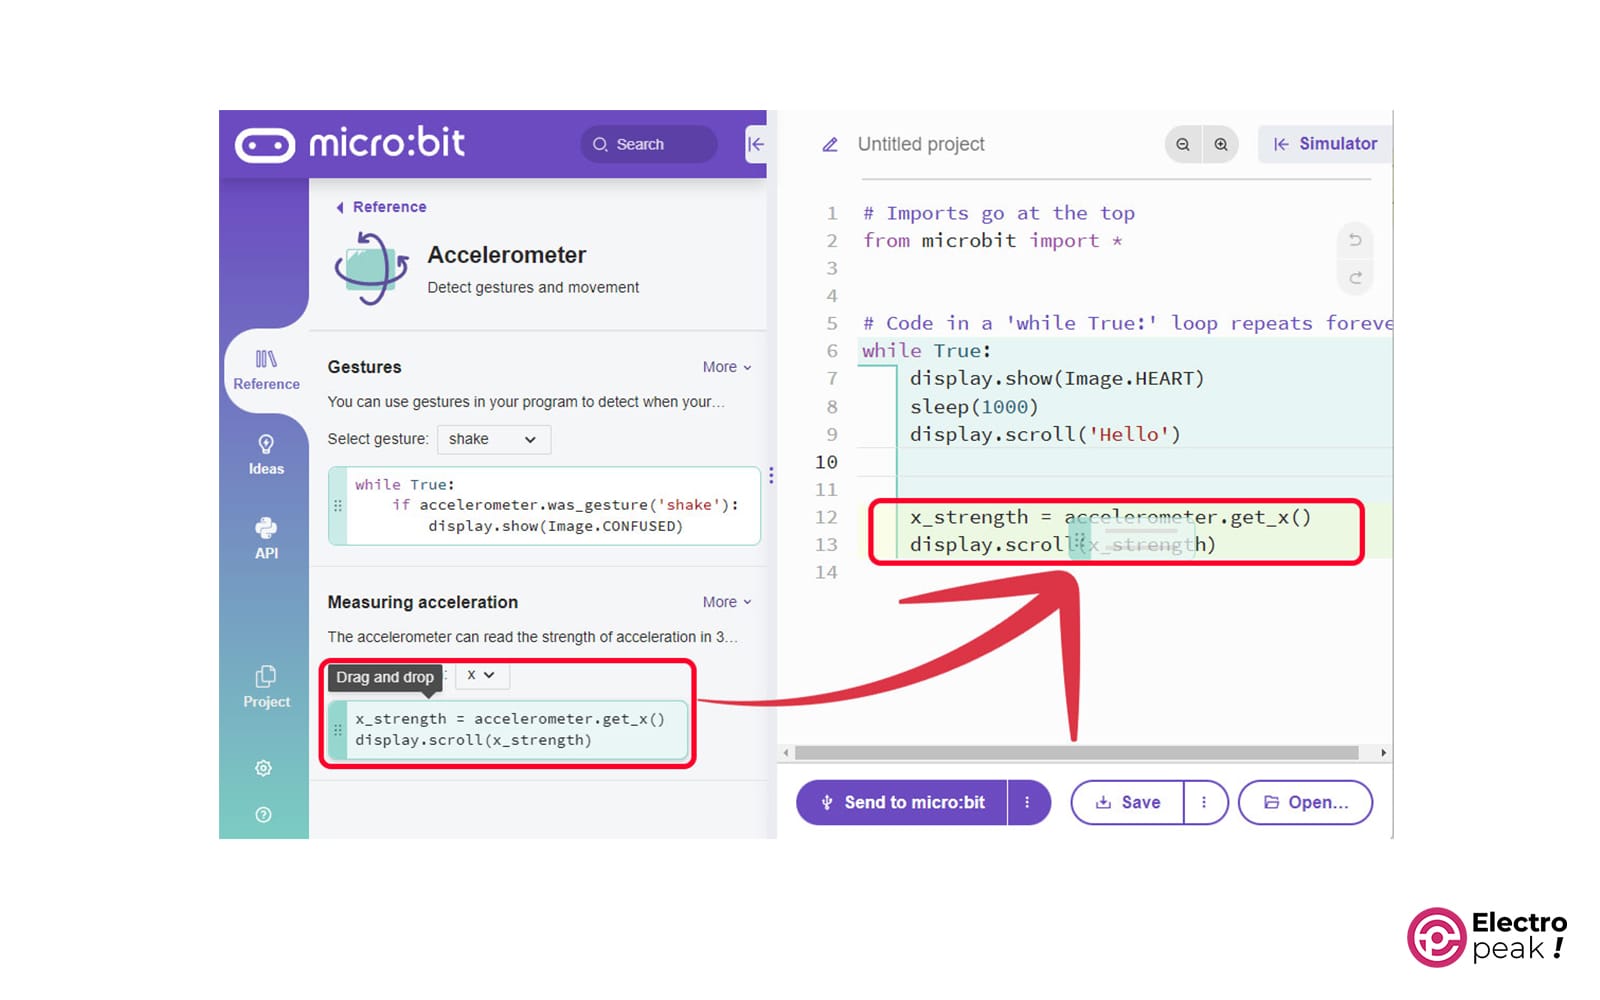
For example, the Accelerometer comes with sample codes to help you read the acceleration state or value. You can simply drag and drop them into your code.
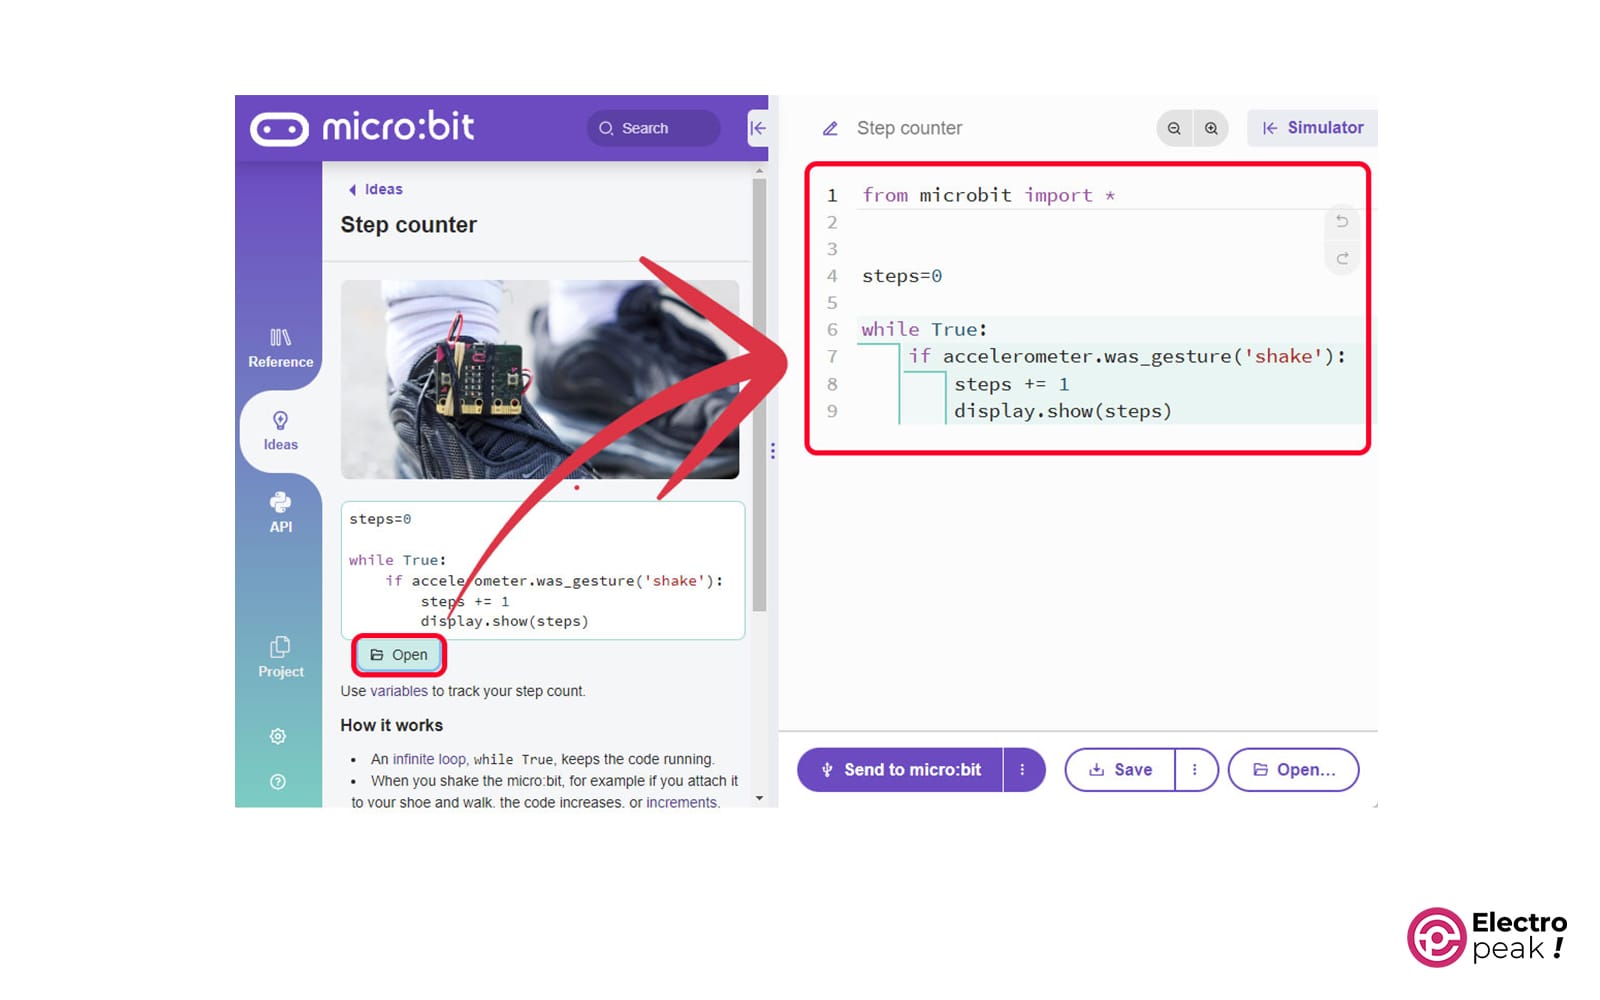
If you click on “Ideas,” you’ll find various examples.
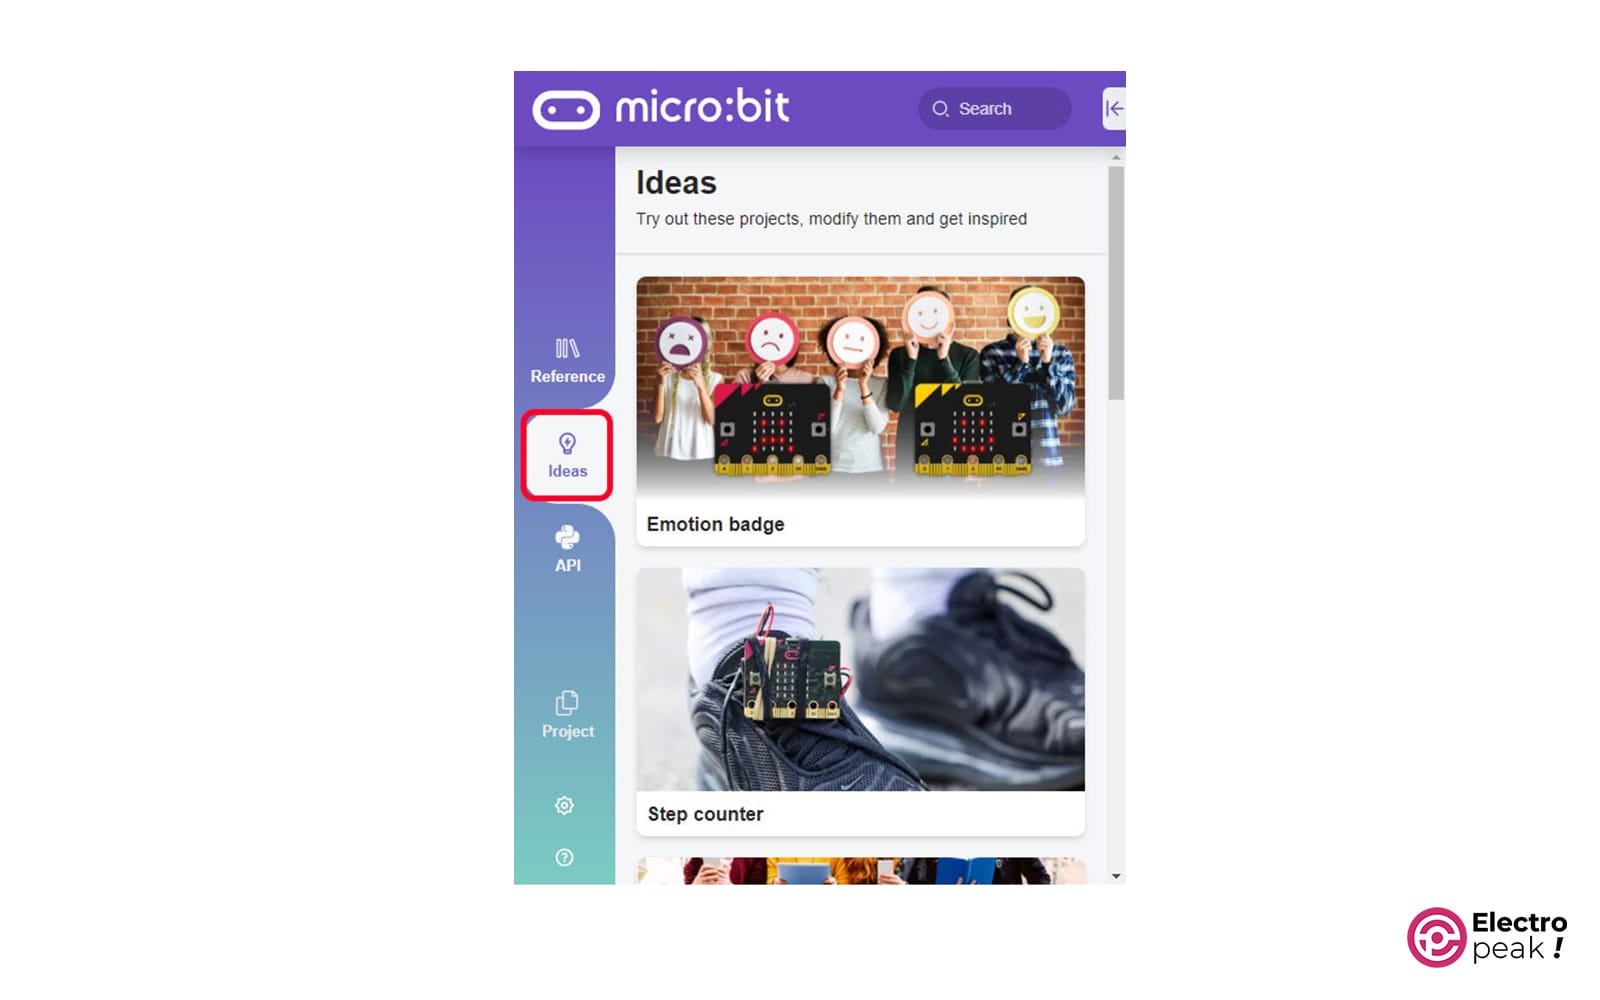
For example, you can click on the Step counter to view its code. You can also open the code in the programming environment by clicking on the Open option.
Clicking on the last option, API, displays the commands to call input and output values to/from sensors and modules.
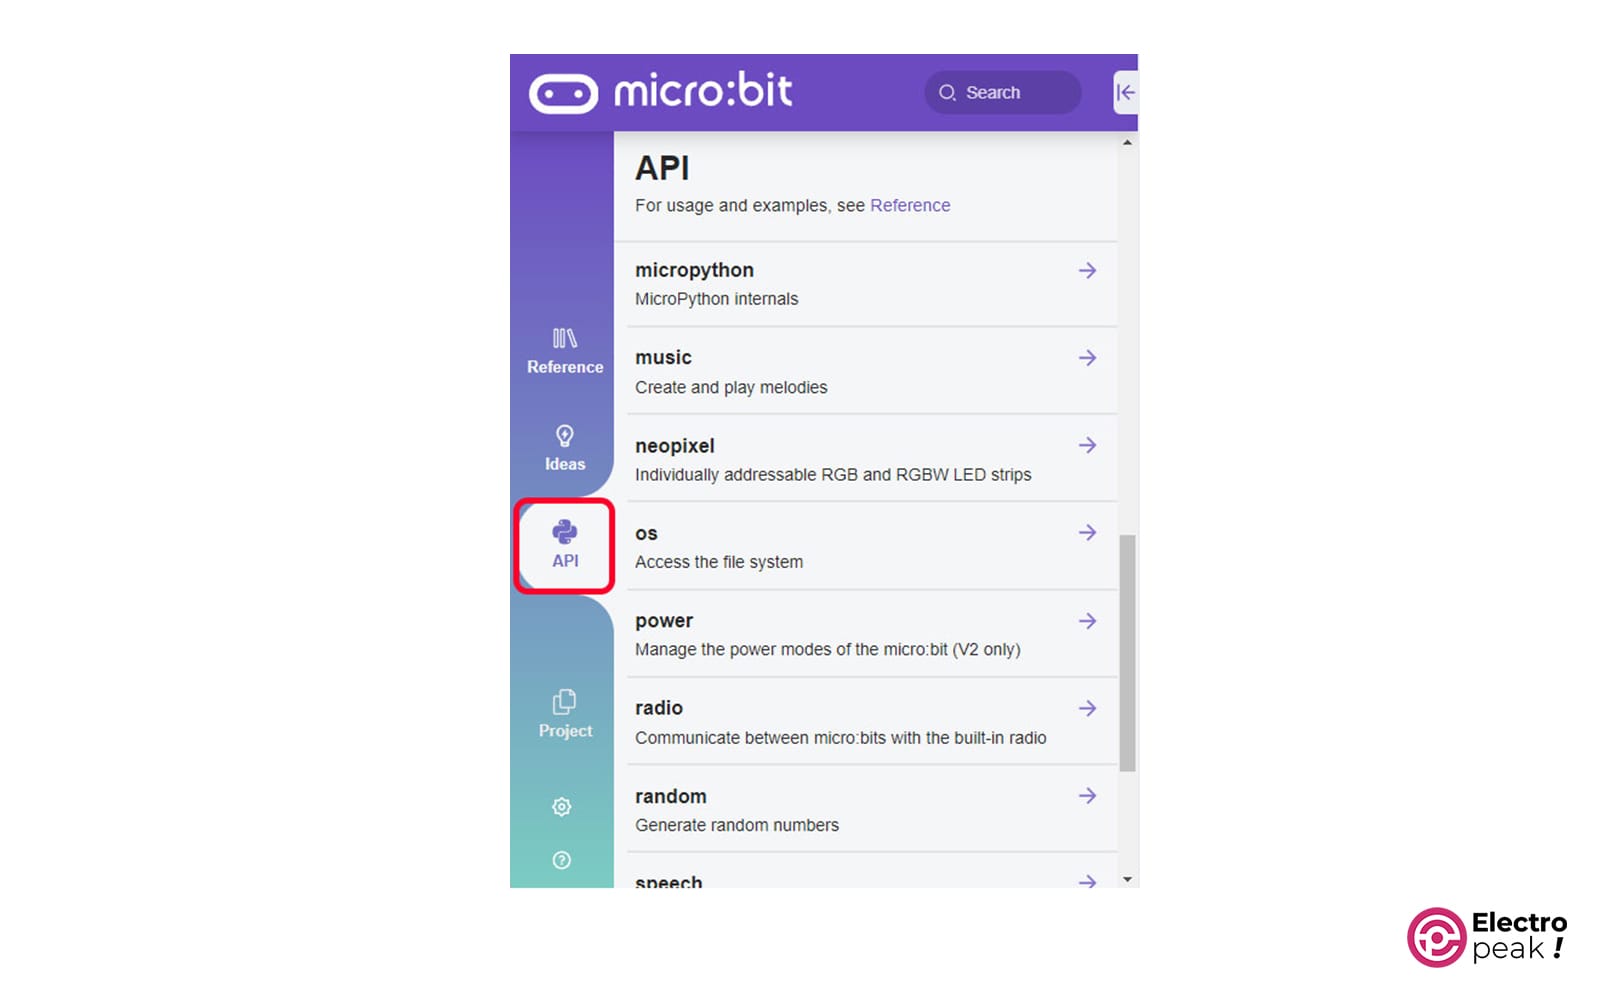
Click on “accelerometer” to access the functions for reading the accelerometer data. If you copy it into the code environment and assign a variable to it, you can measure the acceleration in different directions. Or, you can click on the Micro:bit option to gain access to the main operators of the microcontroller, such as reset, sleep, or control commands of GPIO pins and temperature of the microcontroller.
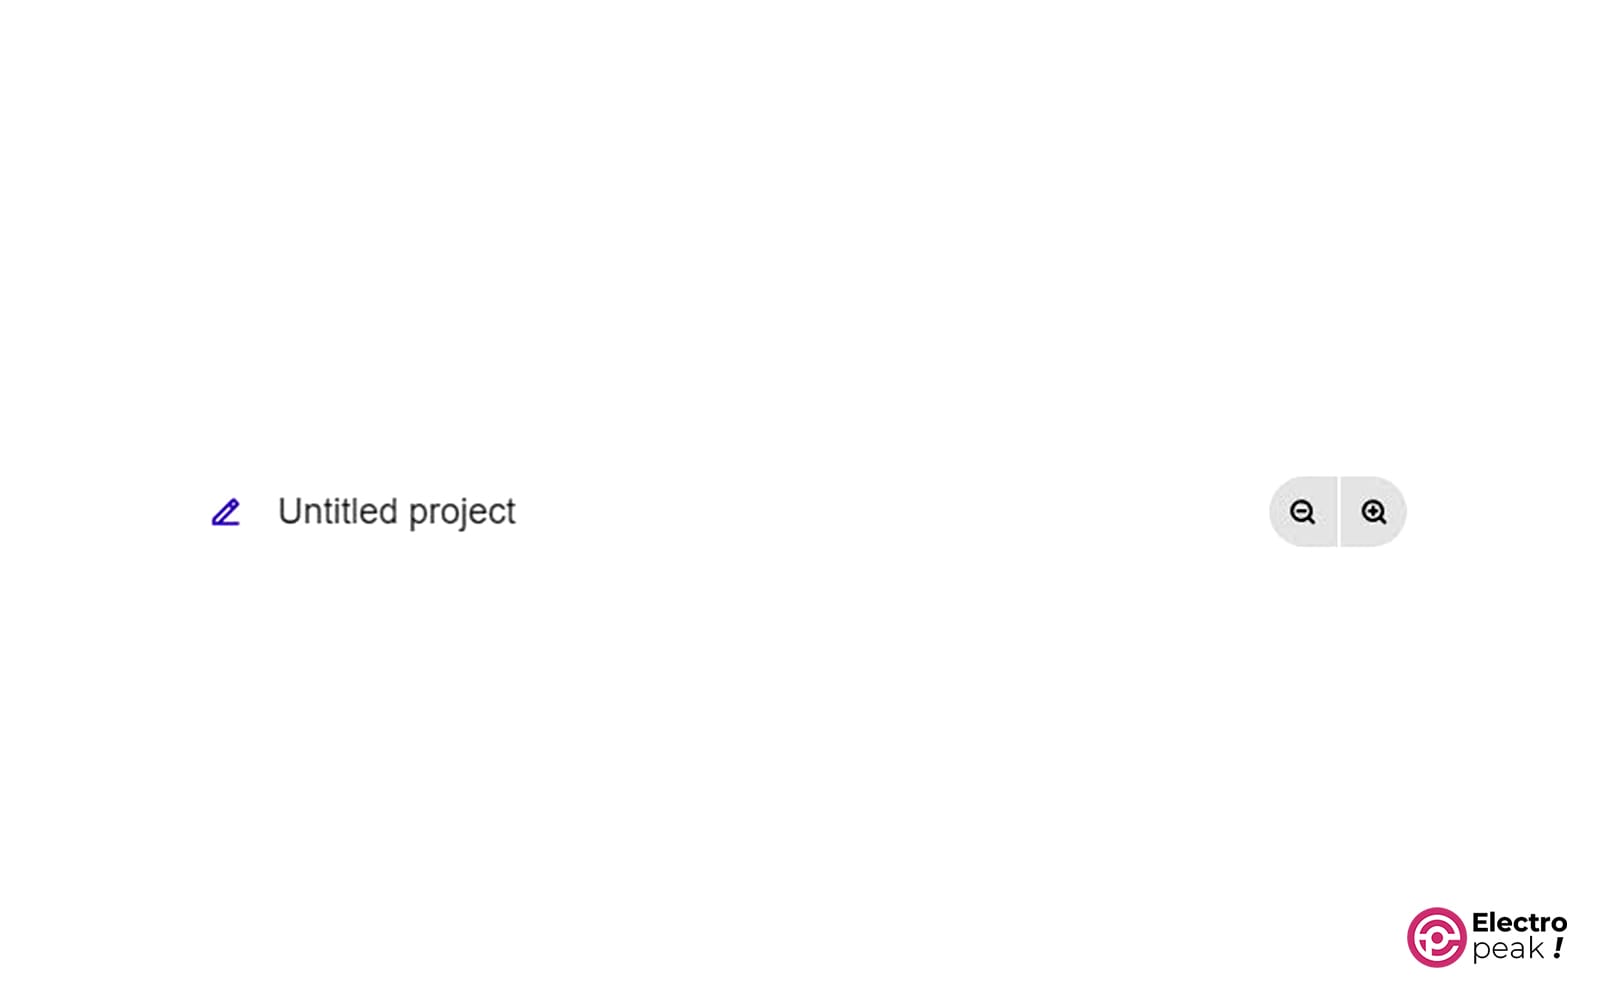
Part 2: Project Name
Enter your project name in this field.
Part 3: Code
As mentioned in part 1, this is where you can write your code.
Part 4: Code Simulation
Python allows you to simulate the written code. For example, in the image below, if you click on Play, you can view your written code in a simulated form.
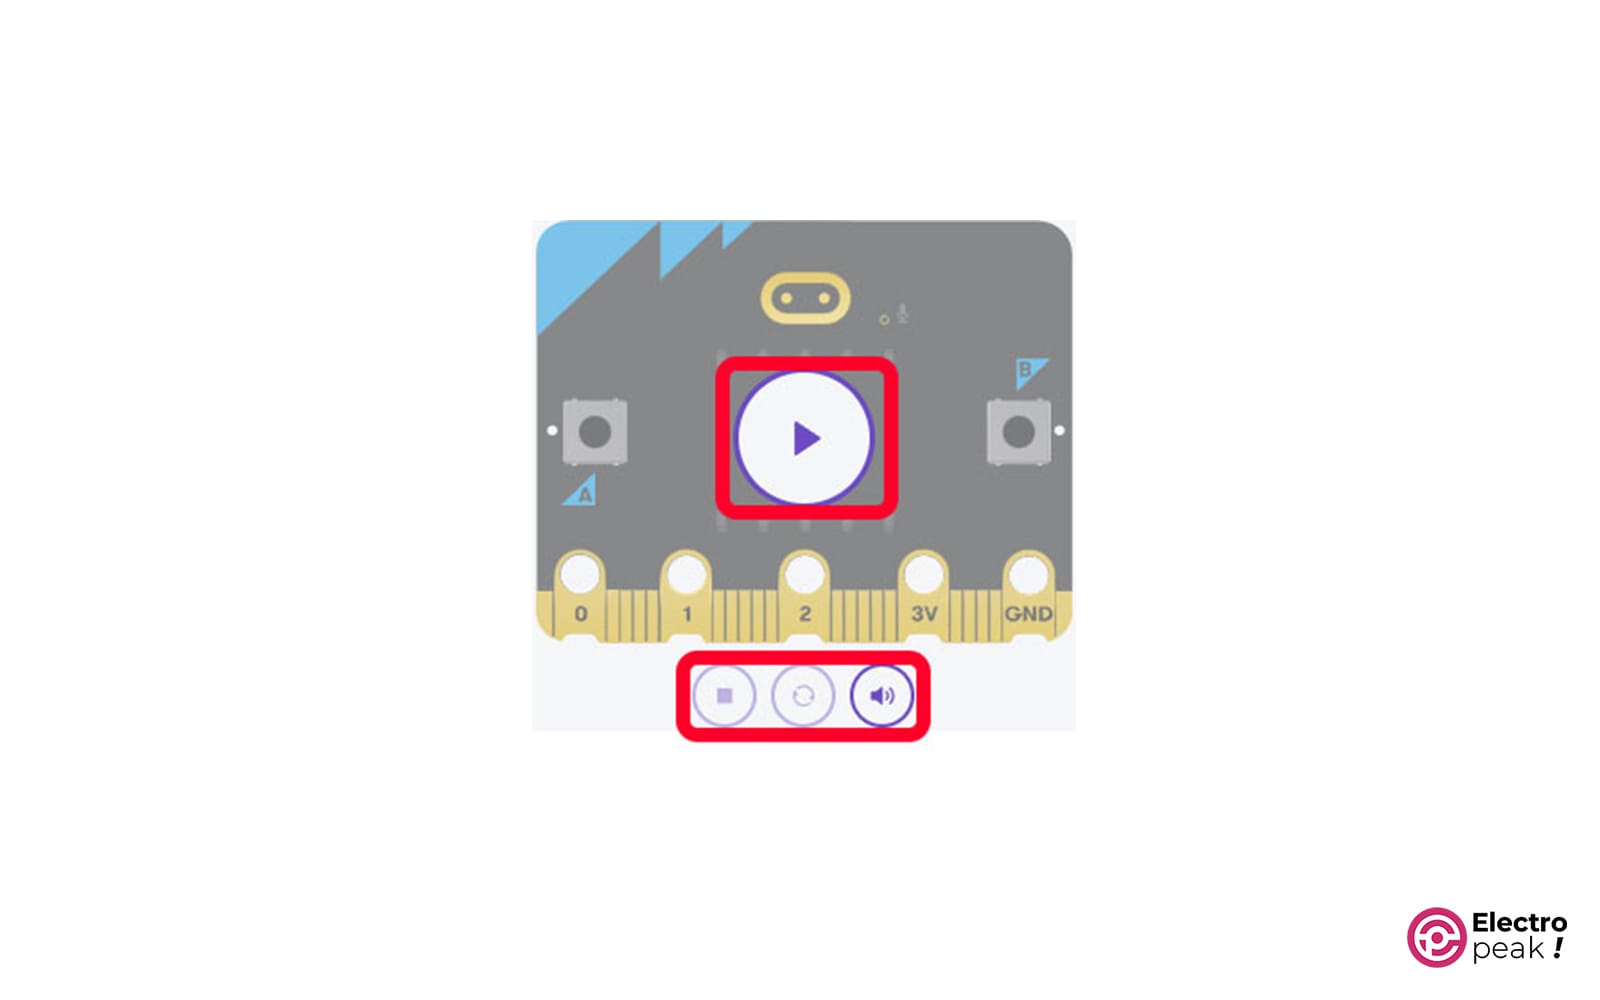
Also, there are 3 buttons at the bottom of the image. Use them —from left to right— to stop/restart the simulation or turn off/on the sound.
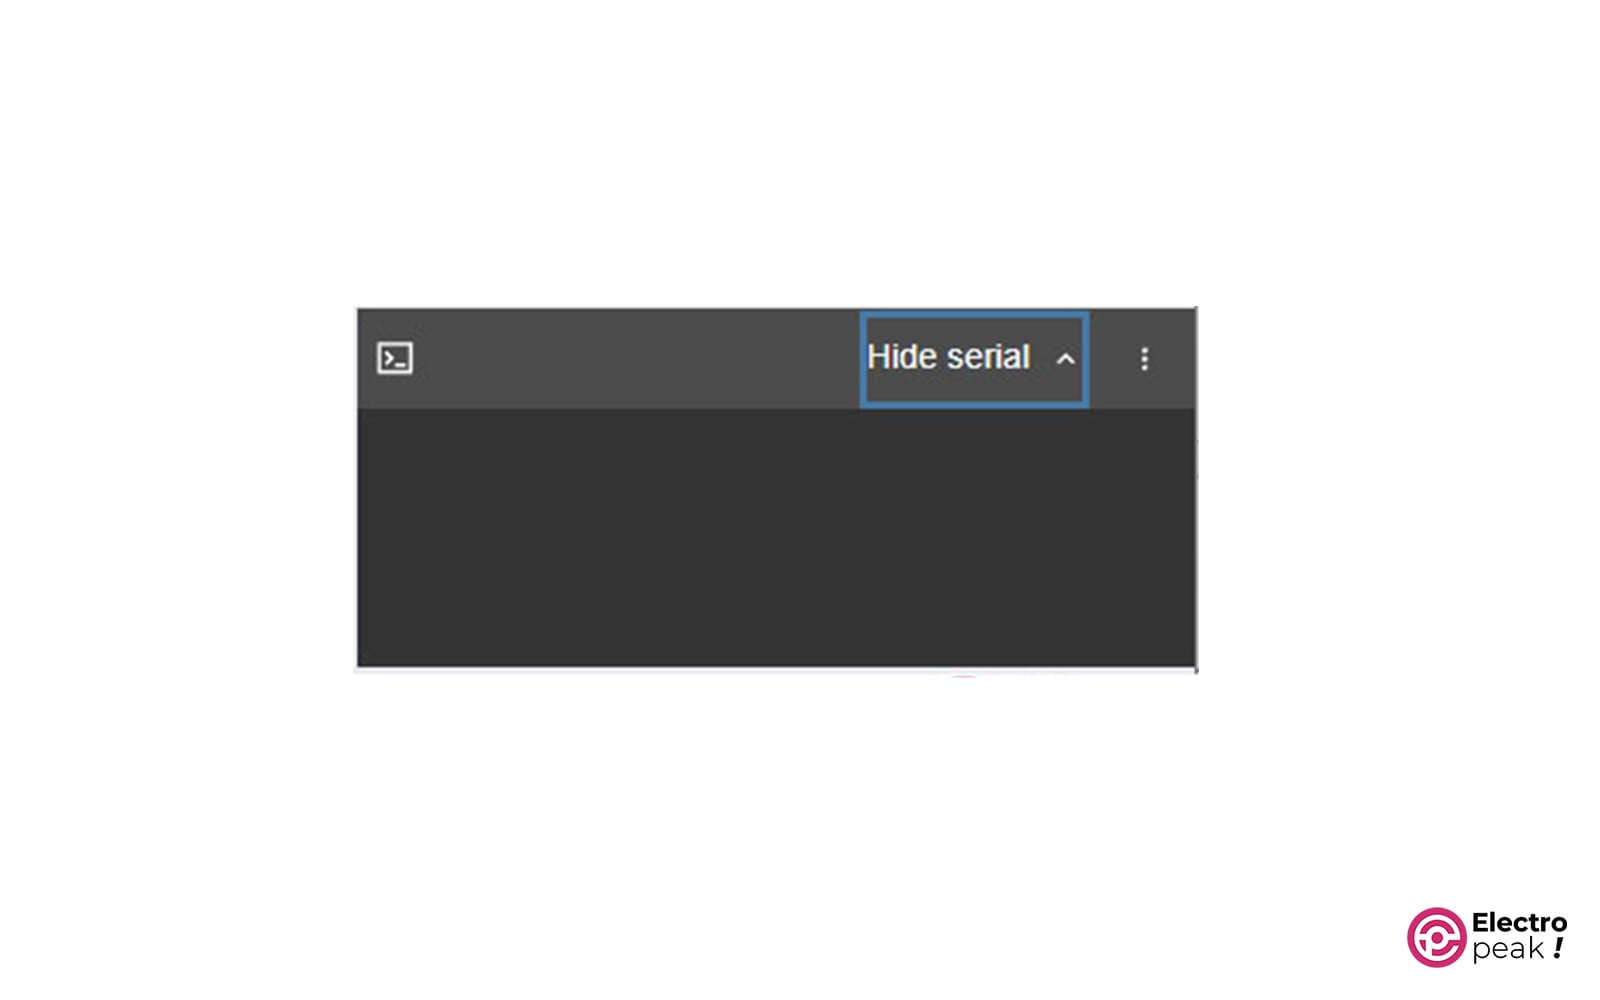
A little further down, you will see a section through which you can monitor the data exchanged on the serial port.
And the options on the following image allow the user to change the state of the Micro:bit board inputs during simulation.

In this image, from top to bottom, you can enter the following inputs into the simulation: accelerometer, temperature, heading, microphone, push buttons, touchpads, and wireless messages. And the Data Logger section at the bottom of this image can save data on the computer if needed.
Part 5: Programming
Connect the Micro:bit board to the computer with a micro USB cable. When you click on this button, the browser will ask for the port number of the Micro:bit board and then start programming it.
Part 6: Saving or Opening a File
In this section, you can save your project or open your code file from the location where you saved it earlier.
Programming Micro:bit with Microsoft MakeCode
Like Python, Microsoft MakeCode is Web-based and can be used offline by installing it on your system. You can download the software via this link, and access the programming environment through this link.
In this tutorial, you will learn about the Microsoft MakeCode online tool. Open this tool to view the main page (as shown in the image below).
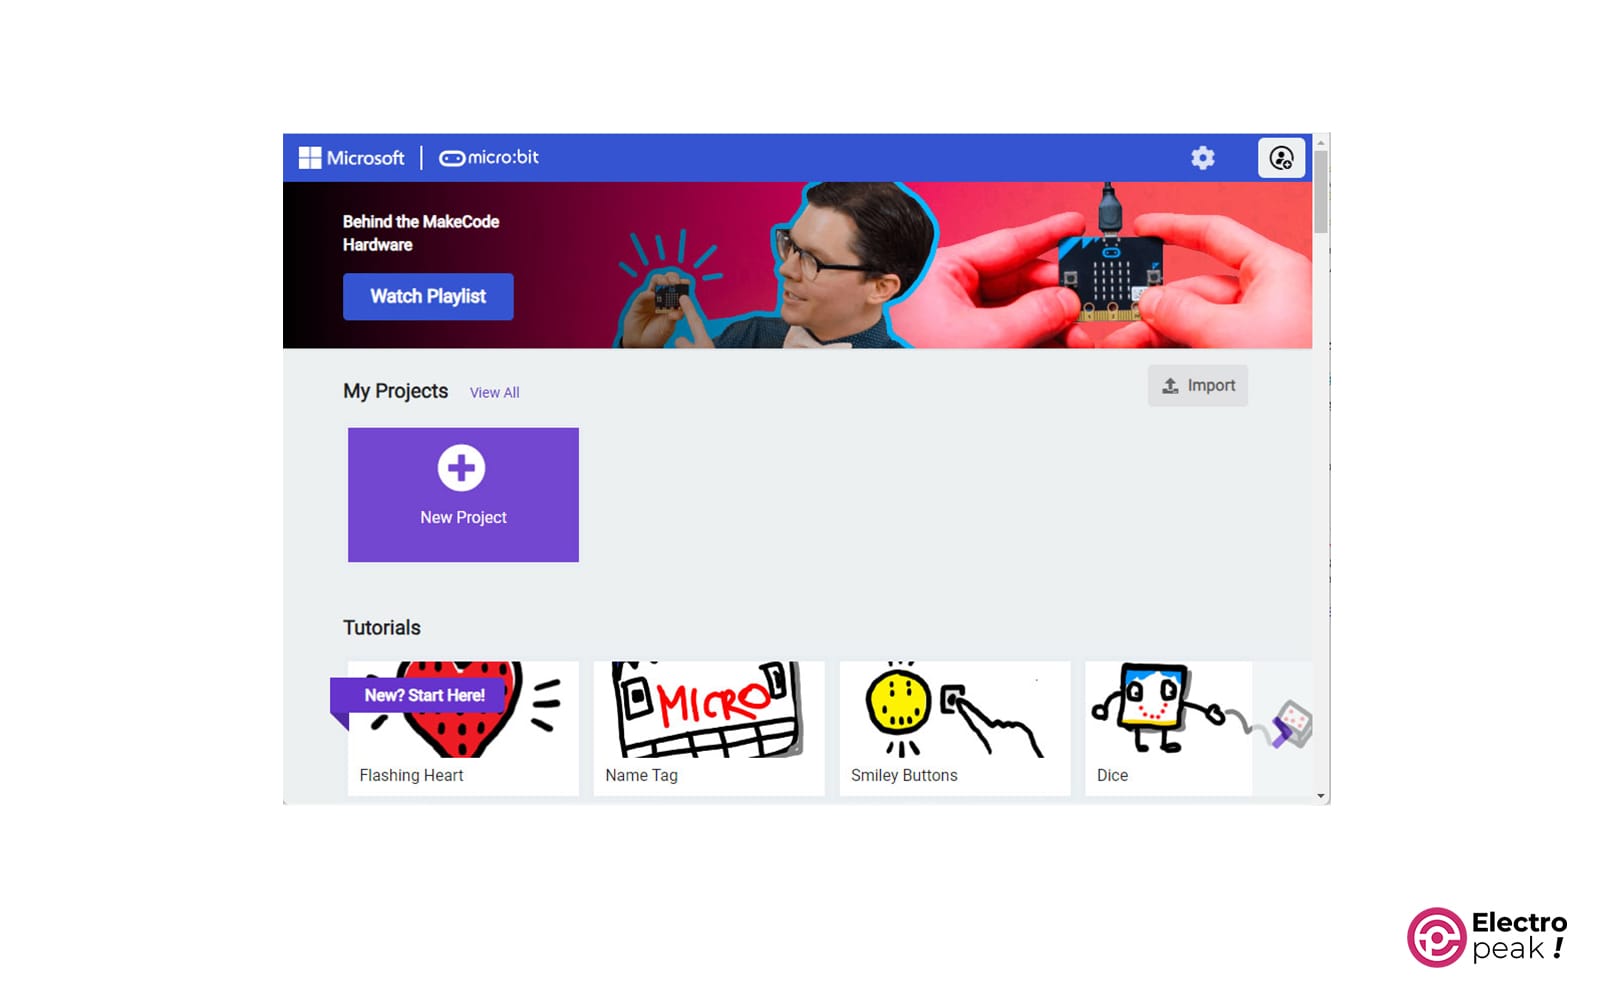
At the bottom of the page, there are many examples in different fields (games, audio playback, toys, wireless communication, etc.) along with instructions, training of electronic components, and practical tools and modules.
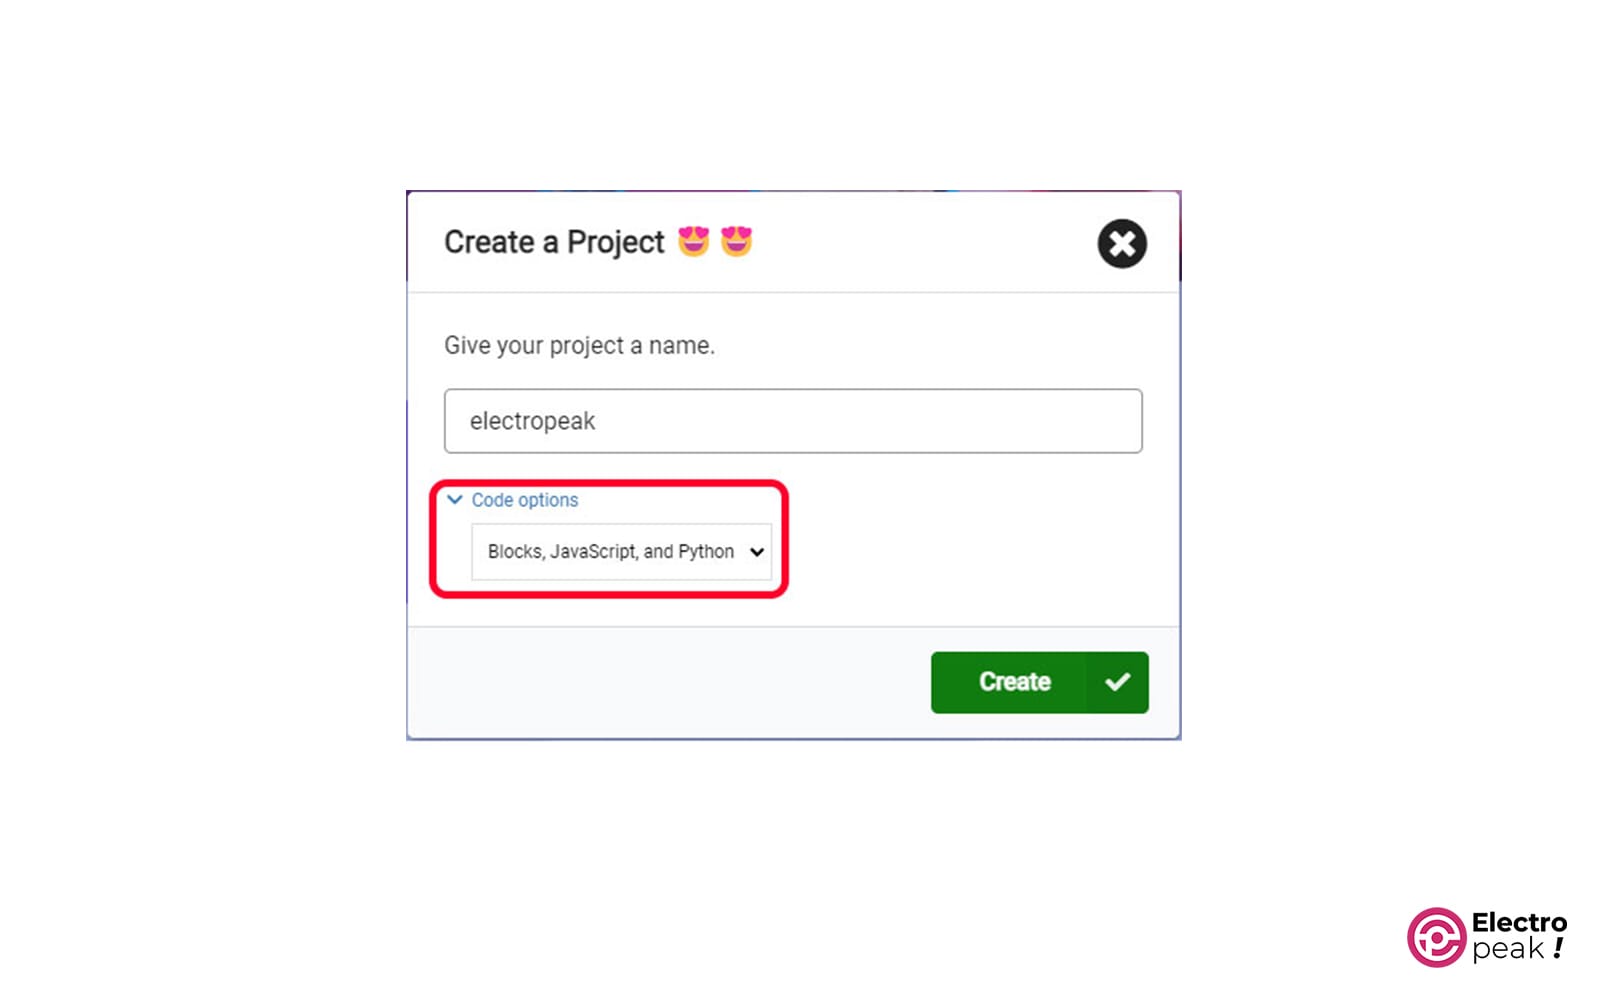
To create a new project, just click on “New Project,” enter the project name, and click on “Create.” If you want to use a specific programming language for coding, you can specify it in the section shown in the image below. By default, you’ll use blocks that are written in Python and JavaScript in this software.
After clicking on “Create,” you will arrive at the main programming page. If this is your first time here, the multi-step guide will take you through the different parts of the programming environment.
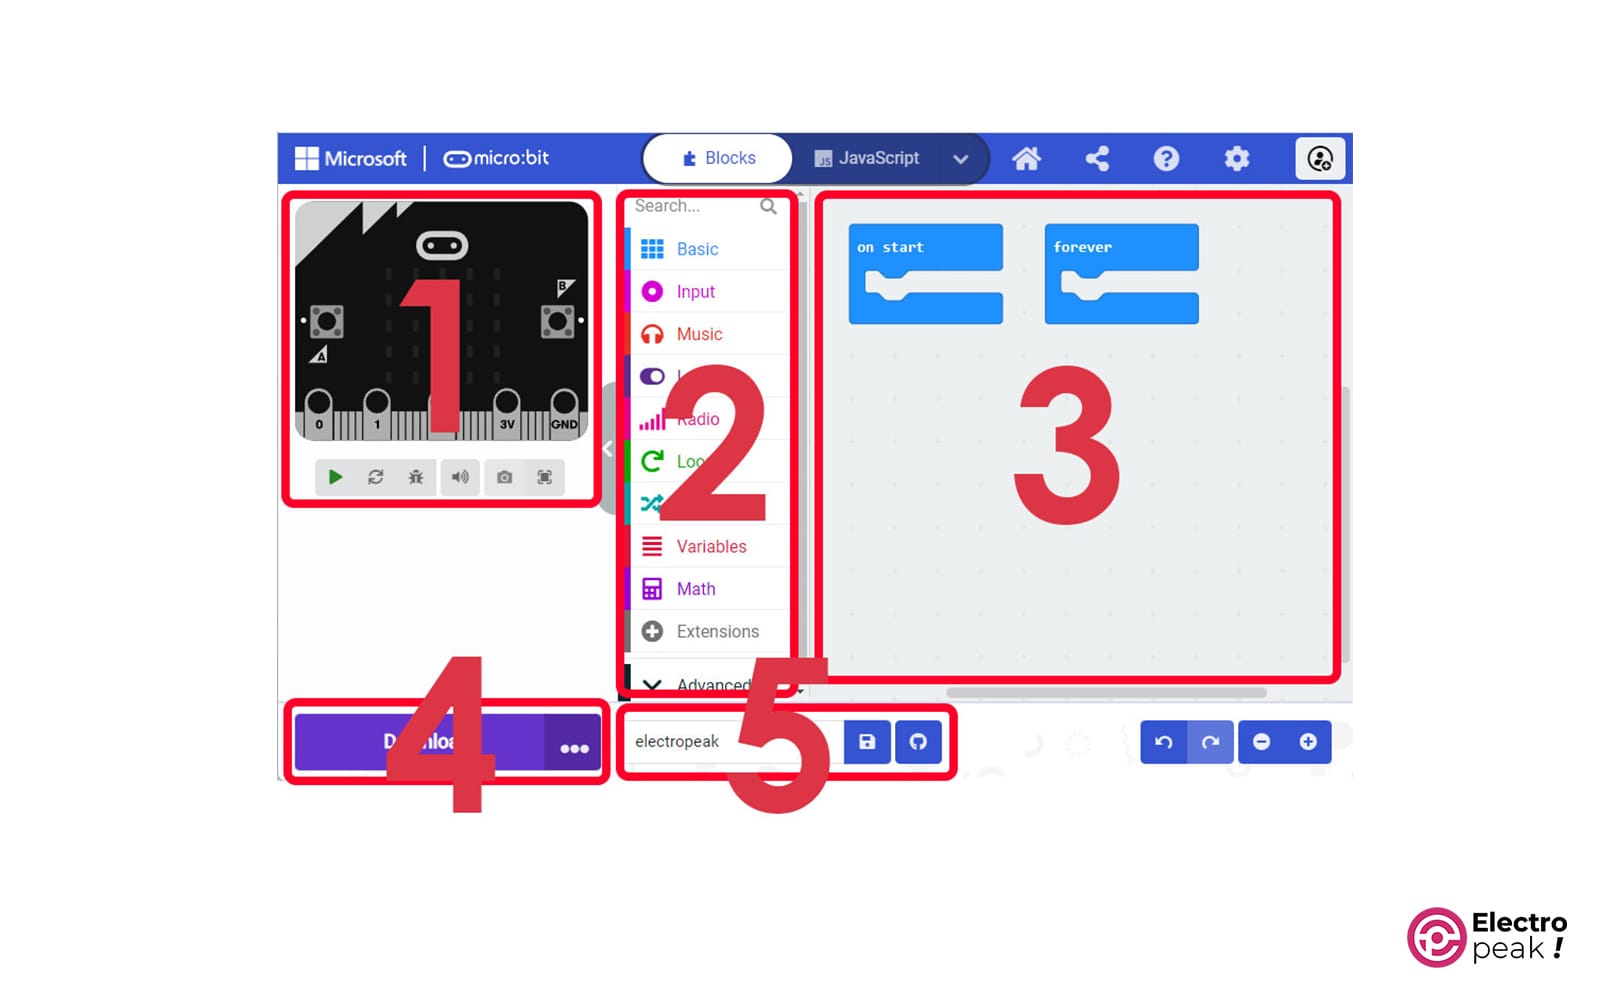
The different parts of this tool are numbered in the above image. First, let’s take a brief look at what each part does:
1: Code simulation
2: Different programming tools (blocks).
3: Blocks Stacking
4: Micro:bit programming
5: Select/edit the project name and save it
Now, let’s see in detail what each part does:
Part 1: Code Simulation
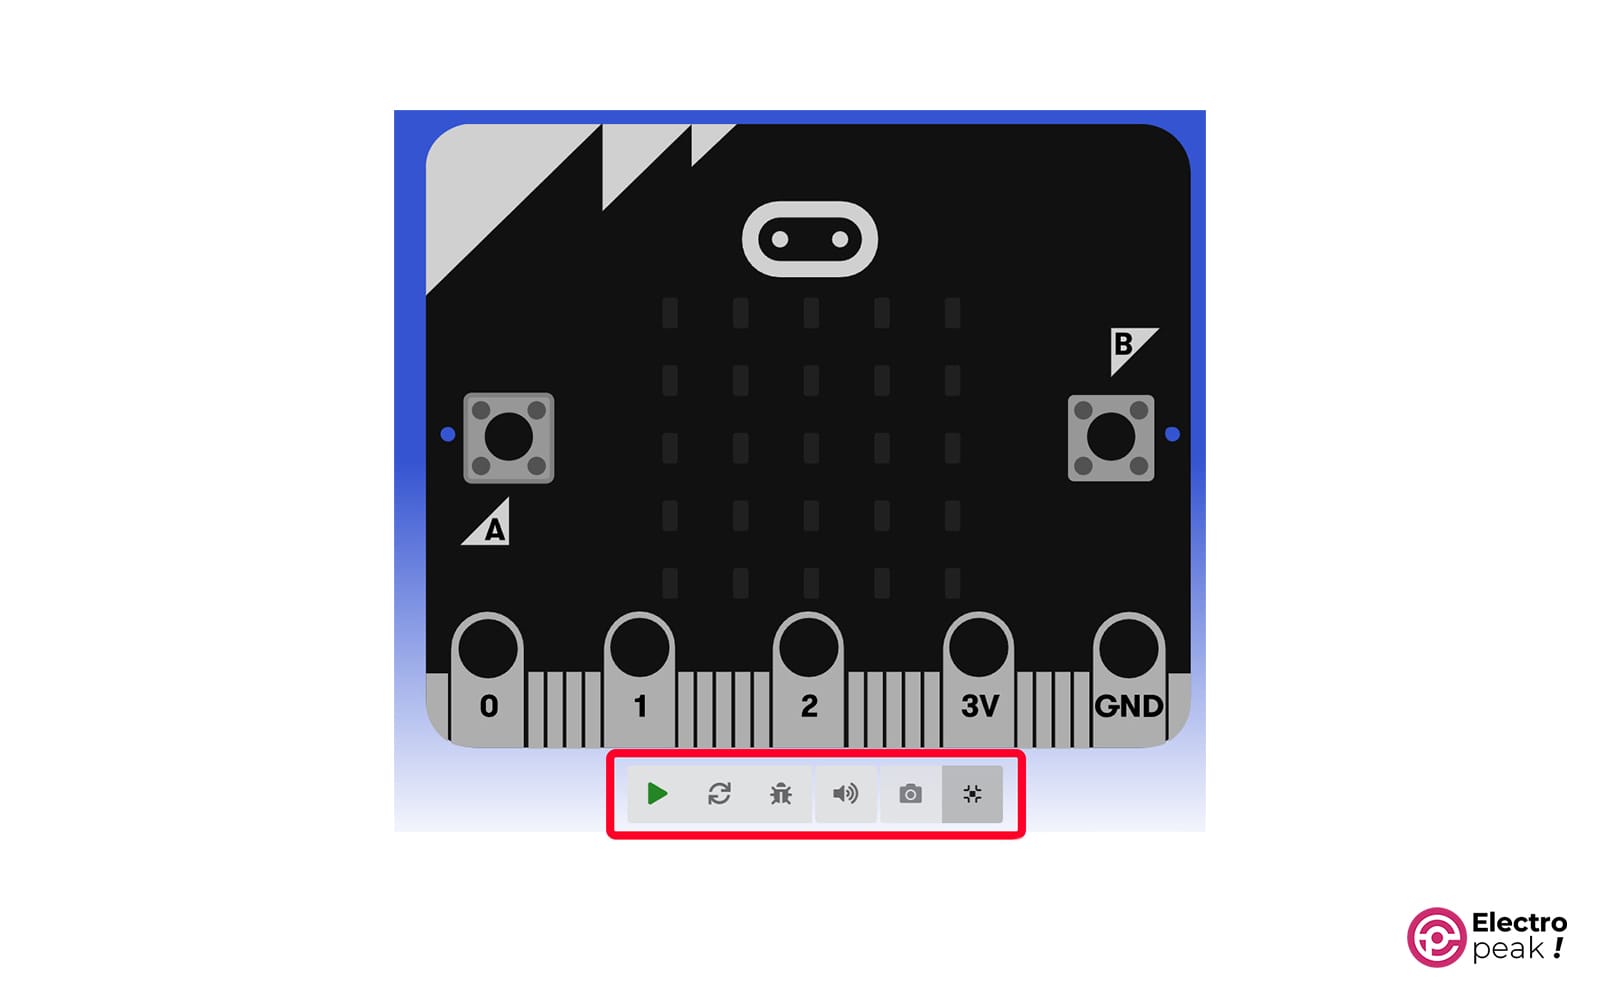
As you can see in the image above, there are 6 buttons at the bottom of the page. From left to right, they perform the following tasks: start/stop the simulation, restart, enable/disable Debug, Mute/Unmute, enable/disable the camera, and the full-screen mode.
This section helps you make sure that your code works correctly before programming the Micro:bit board.
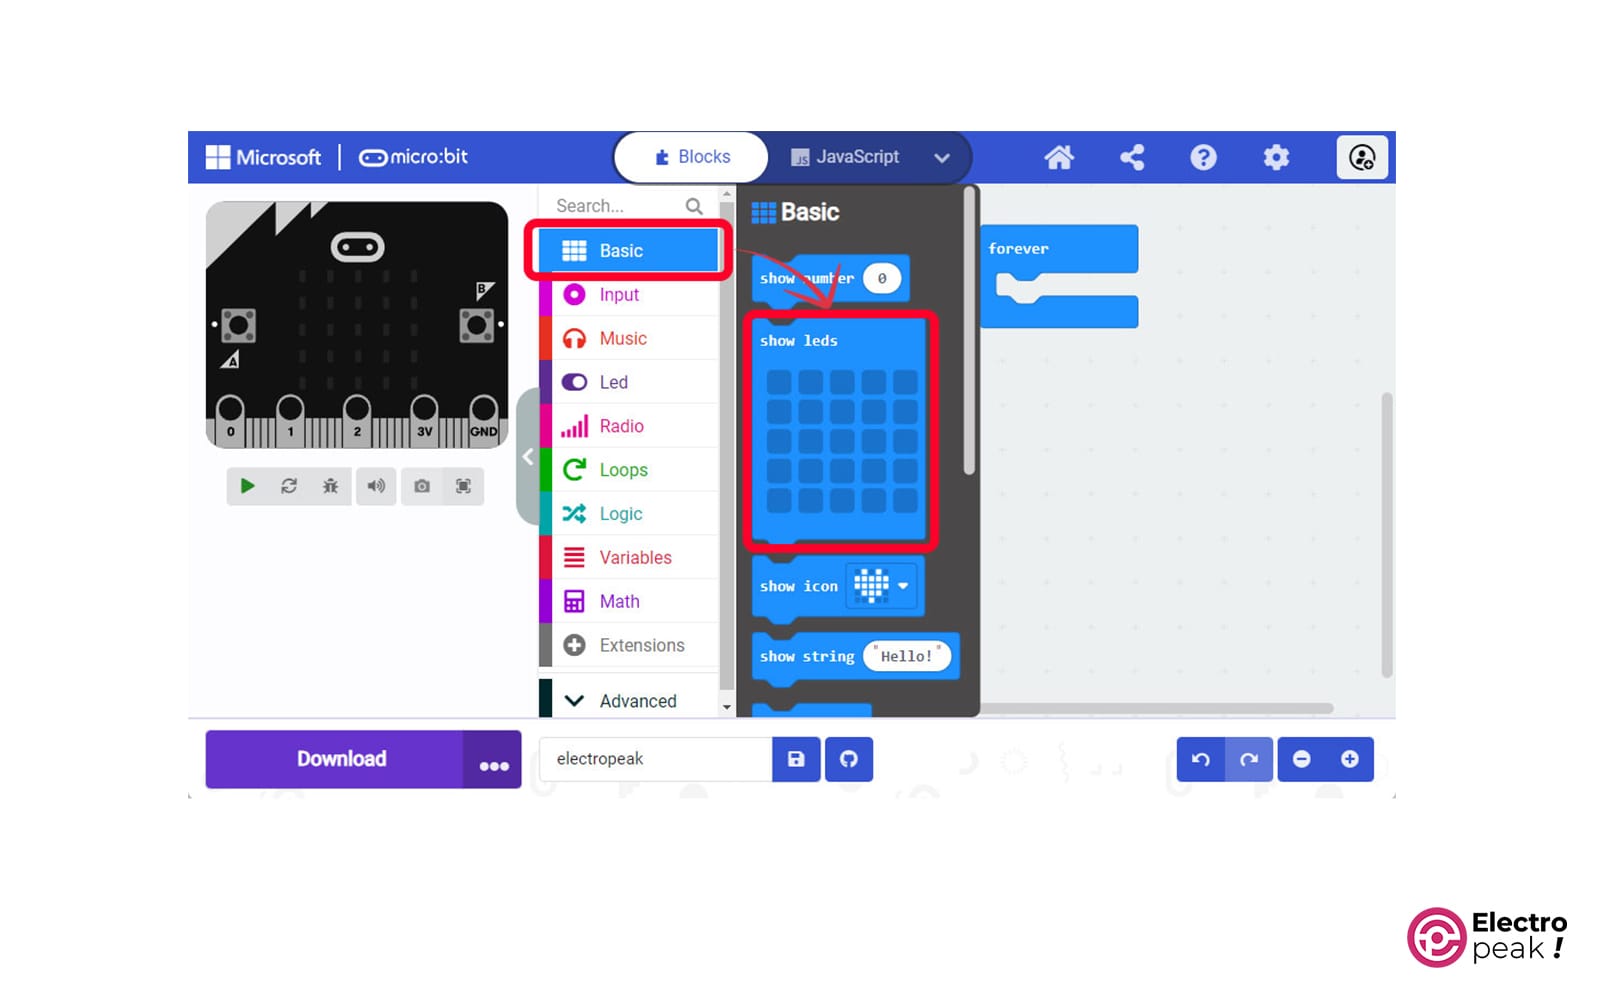
Part 2: Different programming tools (blocks)
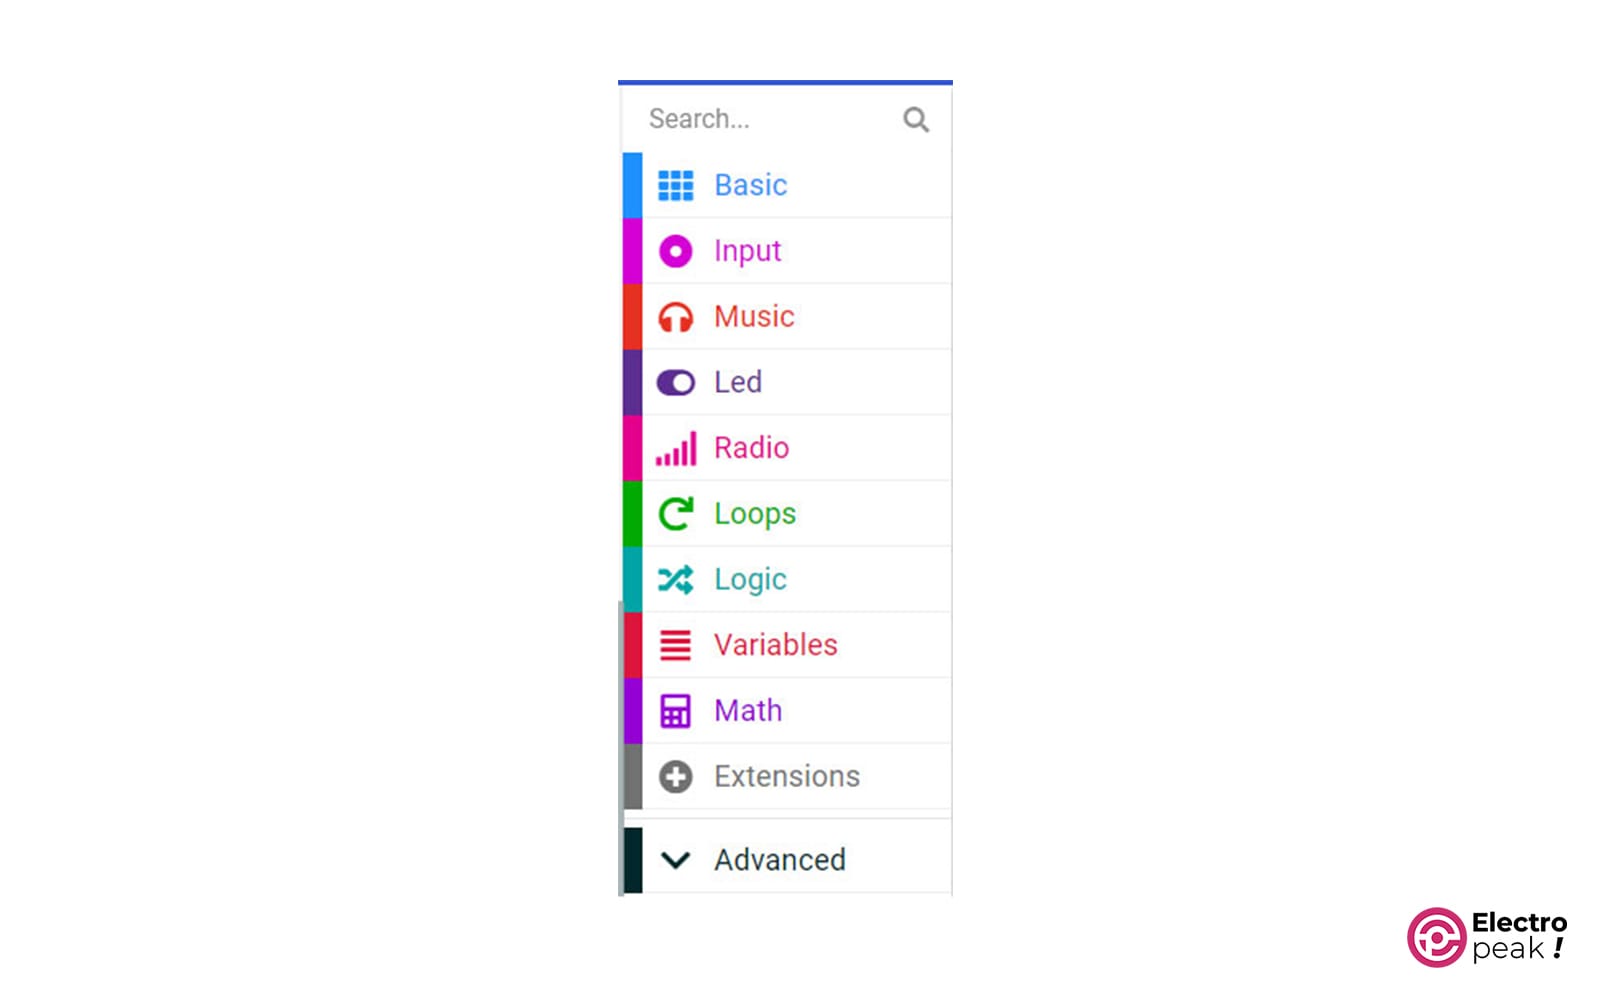
As you can see in the image above, the blocks for each field are arranged separately. For example, the first one is for basic blocks. You can drag the “show leds” block into the programming environment to display your desired shape on the LED matrix display.
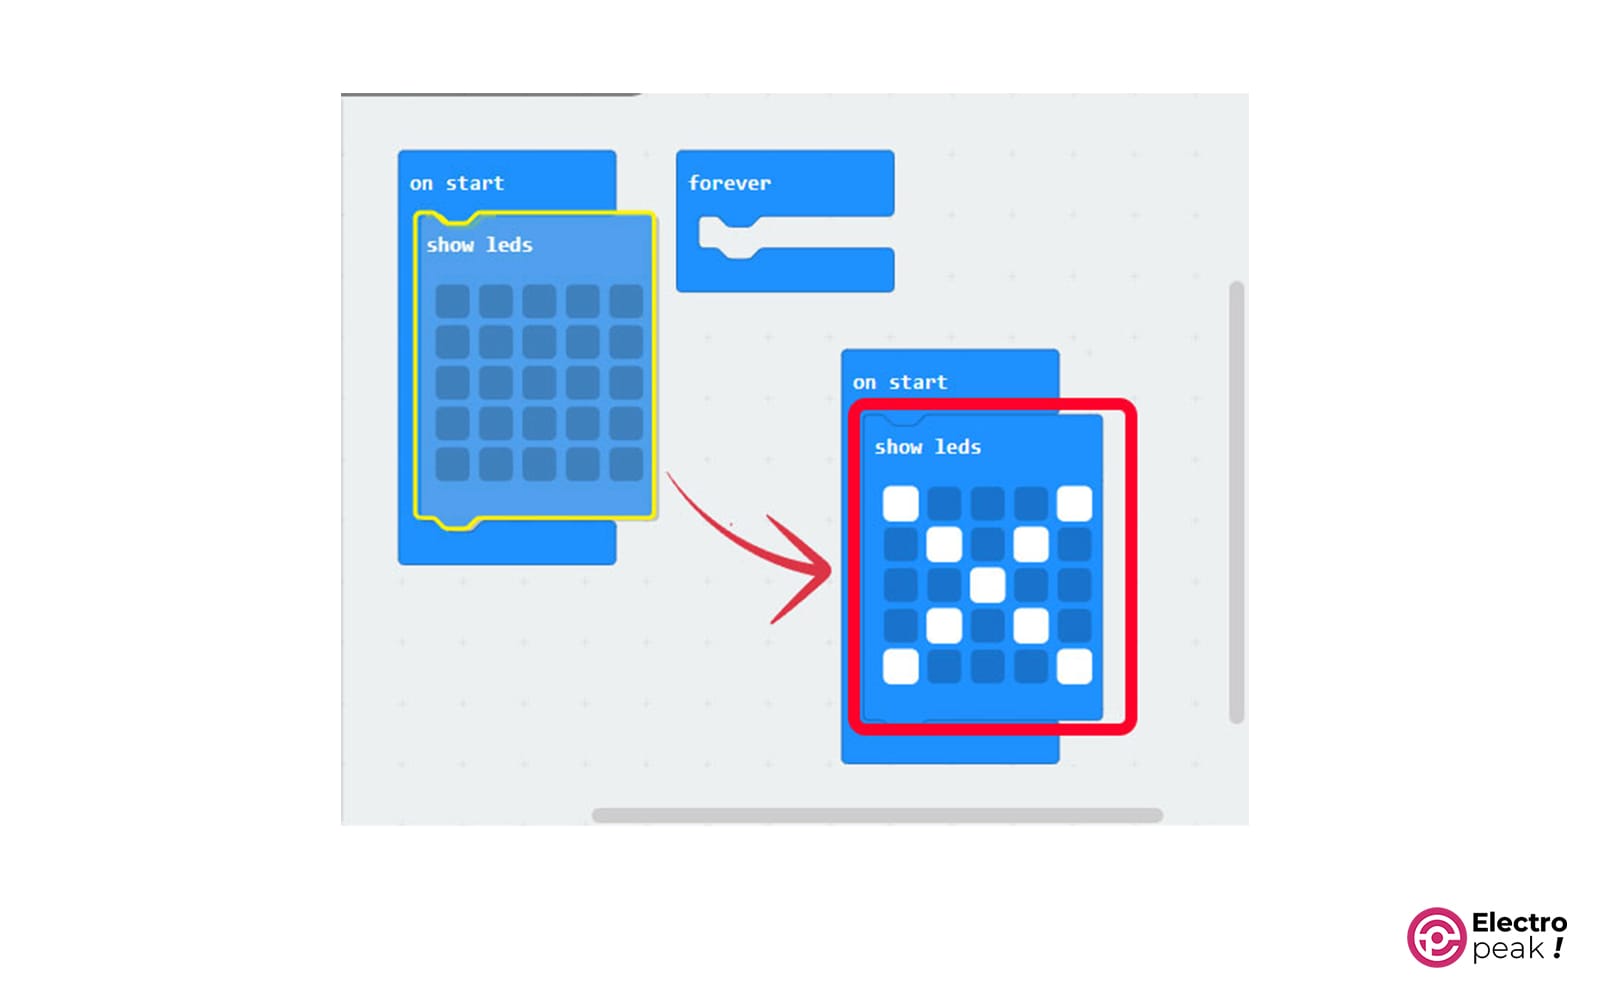
To do this, click on the squares to turn them on. (Look at the image below).
Part 3: Block Stacking
As explained in part 2, here, we put together the blocks to create a program.
Every project you create has two sections: “on start” and “forever.” (This will be very familiar to those who have worked with Arduino and may not need an explanation.)
The “on start” section, as the name suggests, is for the program that we want to execute every time we turn on the Micro:bit board.
The “forever” section is for the program that we want the Micro:bit board to execute and repeat constantly.
For example, if we place the “show leds” block in the “on start” section, the Micro:bit board will display the shape we defined when the program starts executing.
Parts 4 and 5 do not need any explanation and we will skip them.
What’s Next?
In this tutorial, we learned about Micro:bit boards. If you are new to electronics, you will enjoy working with this board. So, depending on your skills, choose either the Python or MakeCode software to start programming.
