
Overview
In this article, you will learn how to control DC, Stepper, and servo motors by Arduino and L293D. At the end of this tutorial, you should be able to control spinning direction, acceleration, speed, power and shaft position.
If you do not know what L293D is, we suggest reading L293D: Theory, Diagram, Simulation & Pinout .
Why Driving Motors with L293D?
Driving electromotors needs a high current. In addition, spinning direction and speed are two important parameters to be controlled. These requirements can be handled by using a microcontroller (or a development board like Arduino). But there is a problem; Microcontrollers cannot provide enough current to run the motor and if you connect the motor to the microcontroller directly, you may damage the microcontroller. For example, Arduino UNO pins are limited to 40mA of current which is far less than the 100-200mA current necessary to control a small hobby motor. To solve this, we should use a motor driver. Motor drivers can be connected to the microcontroller to receive commands and run the motor with a high current.
L293D is one of the most popular motor drivers to run DC motors with up to 1A current load.L293D has 4 outputs which makes it suitable for 4-wire stepper motors. L293D can also be used to drive servo motors. In this project, you will learn how to drive motors with L293 and Arduino UNO as the controller. To learn more about L293D, do not miss this article: L293D: Theory, Diagram, Simulation & Pinout.
Required Materials
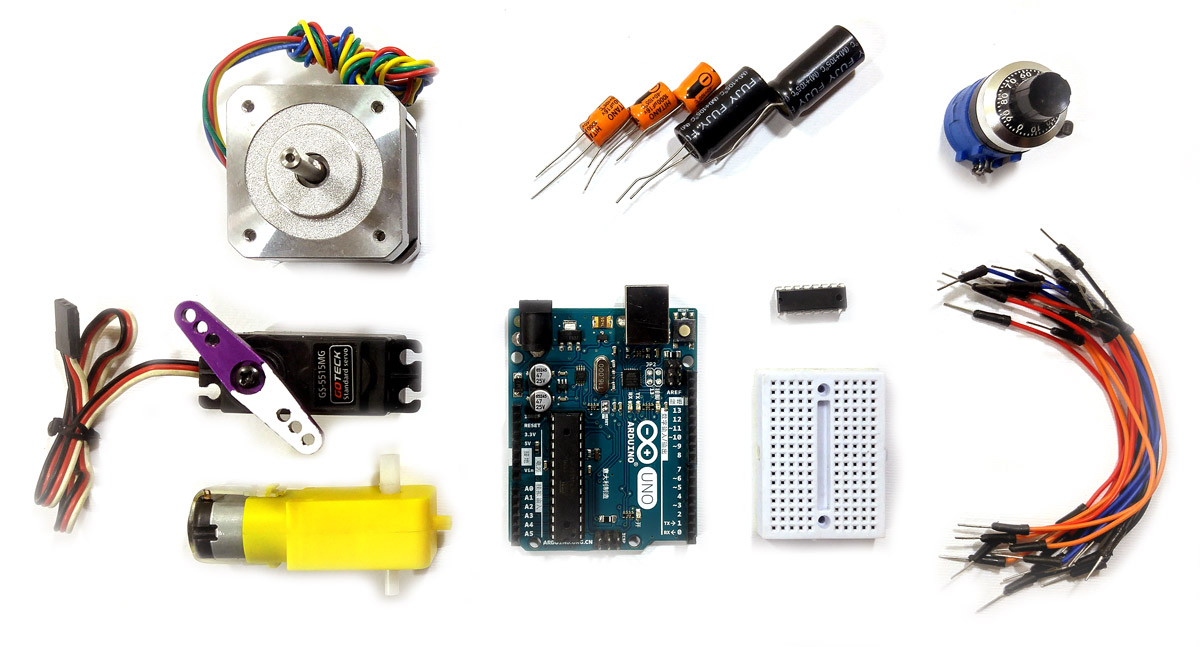
Hardware Components
Software Apps
Controlling DC Motors
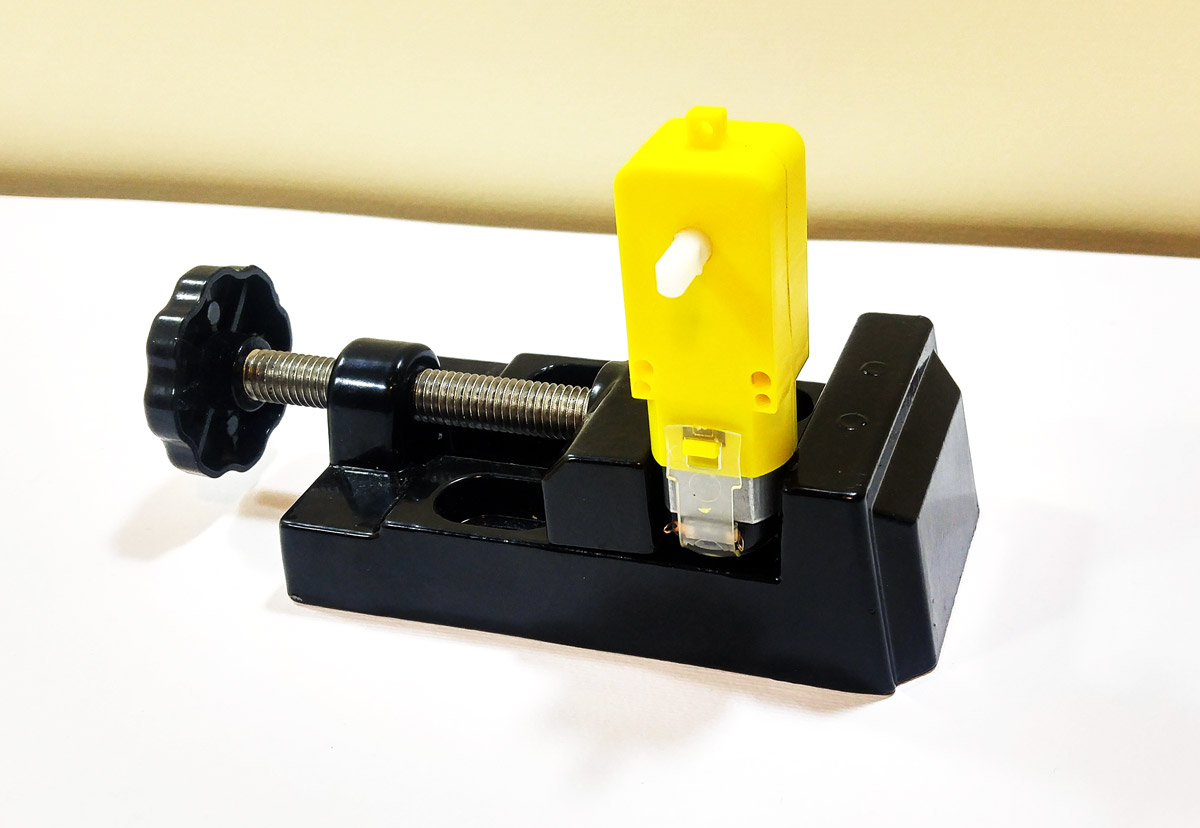
There are several types of DC motors, but here we will use a simple brushed DC motor. It has small plastic gears and is quite easy to drive. This motor is suitable for small robots and toys.
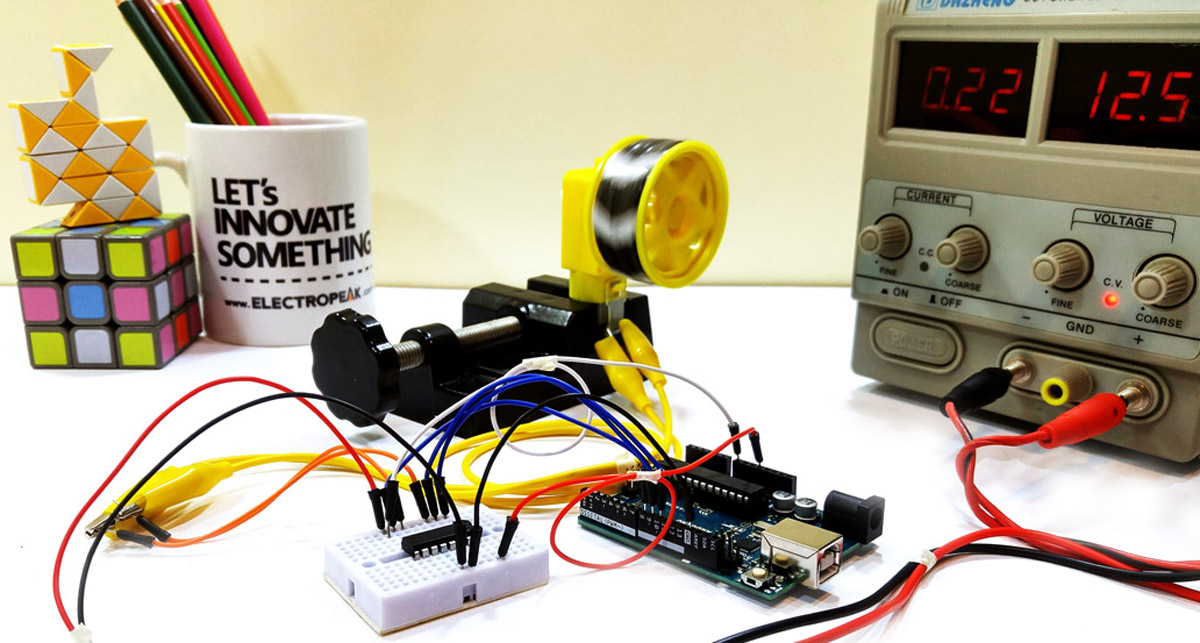
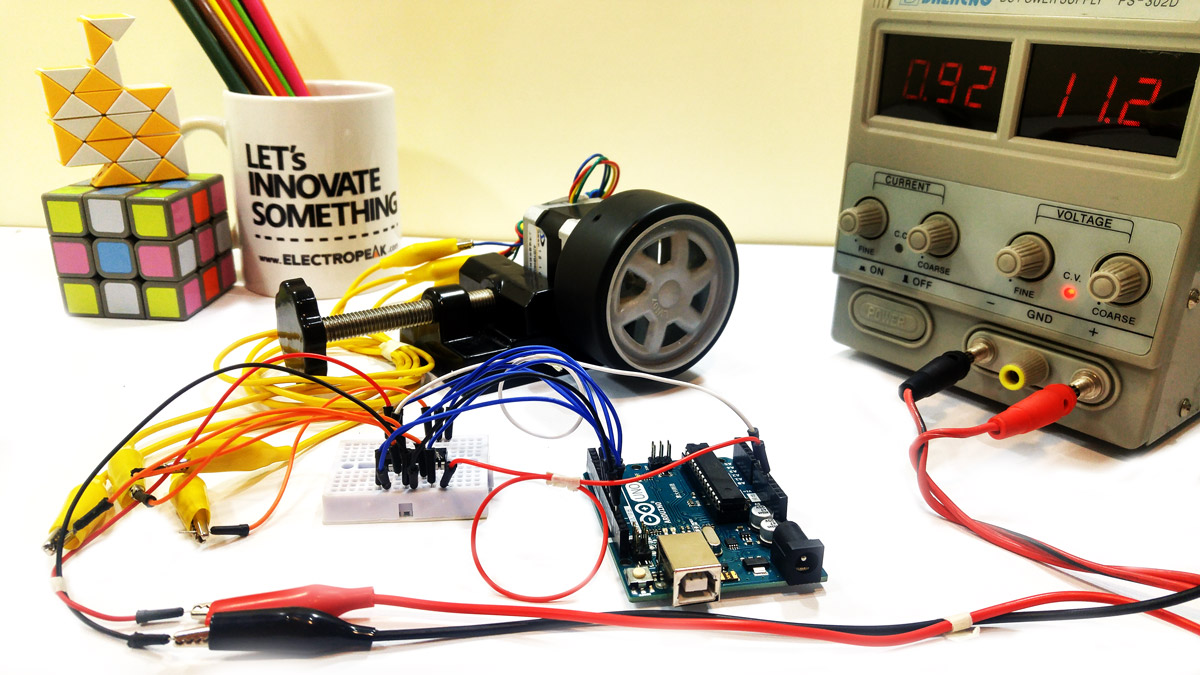
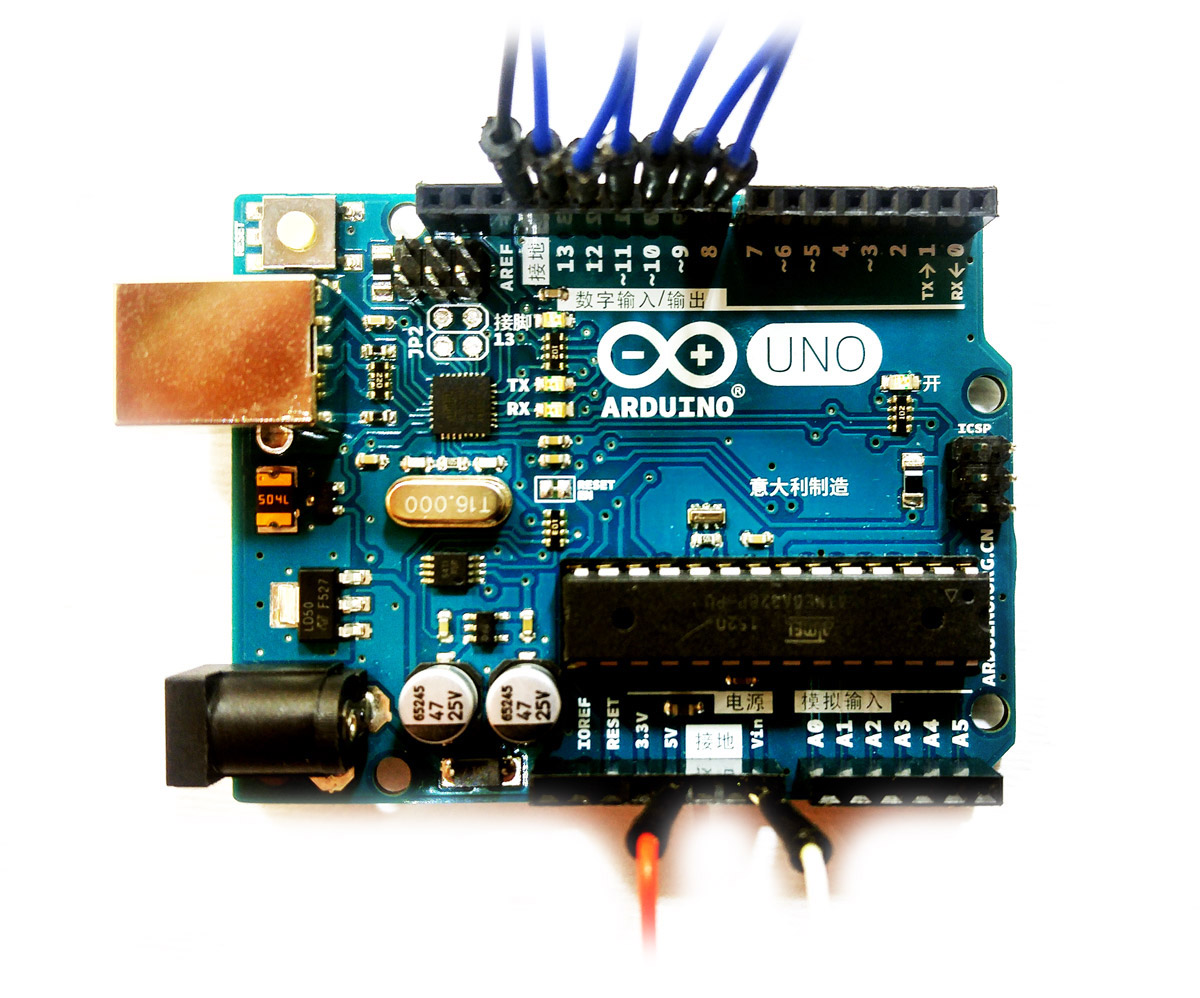
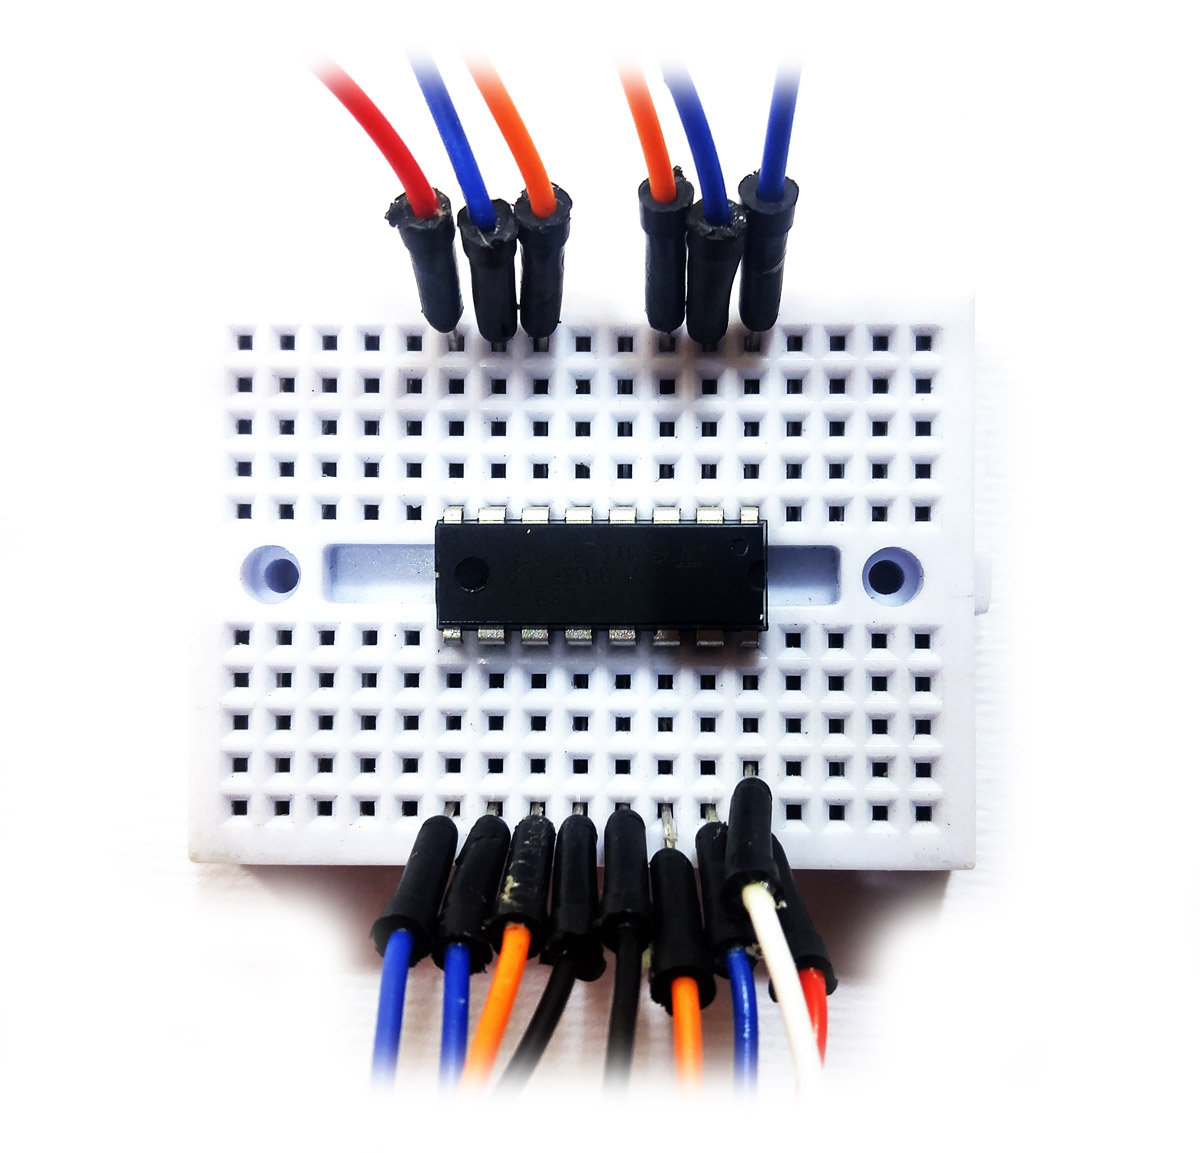
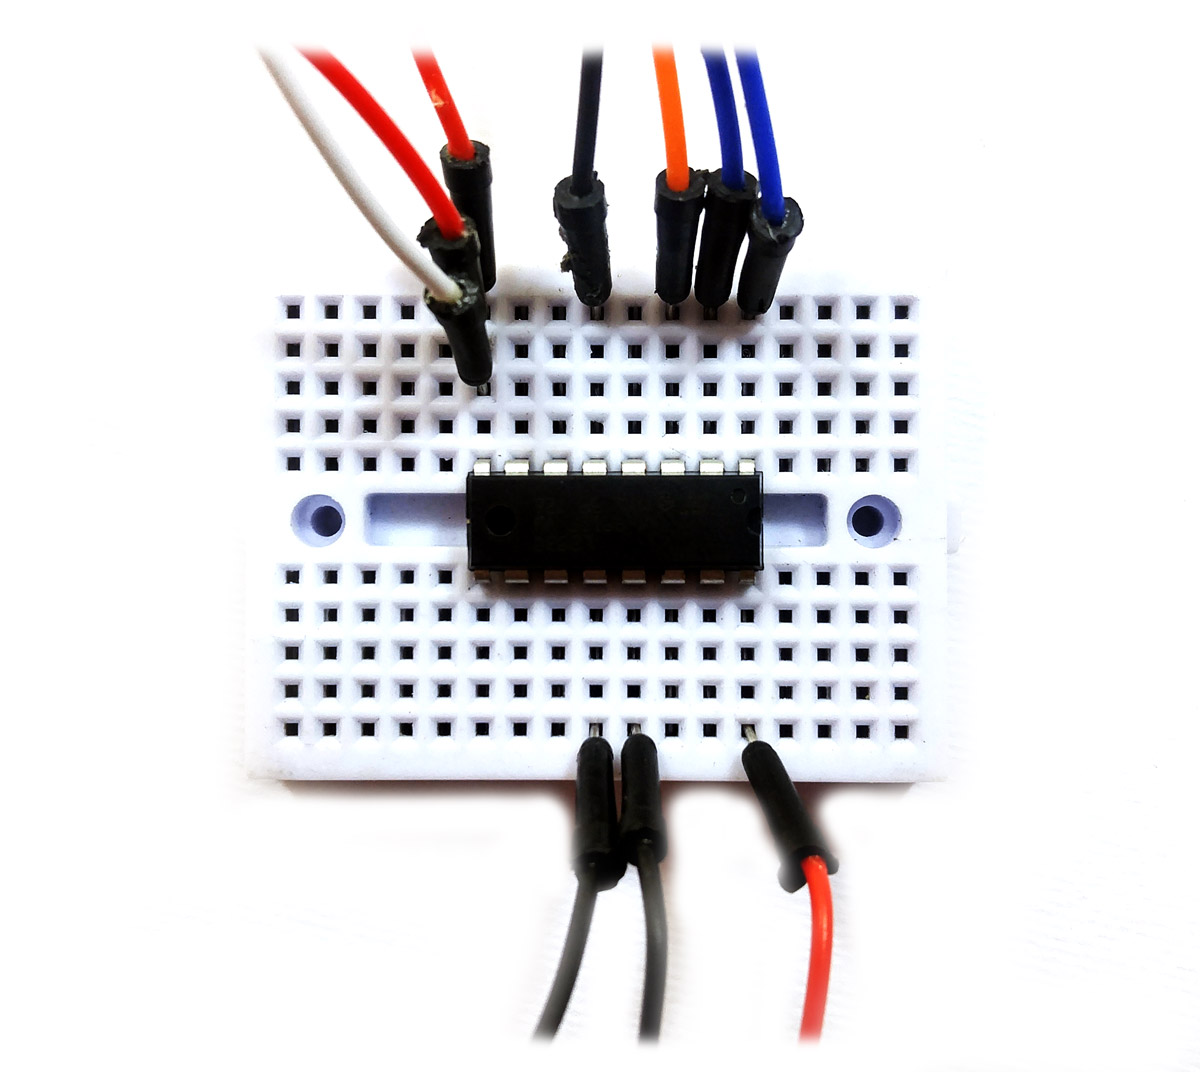
Circuit
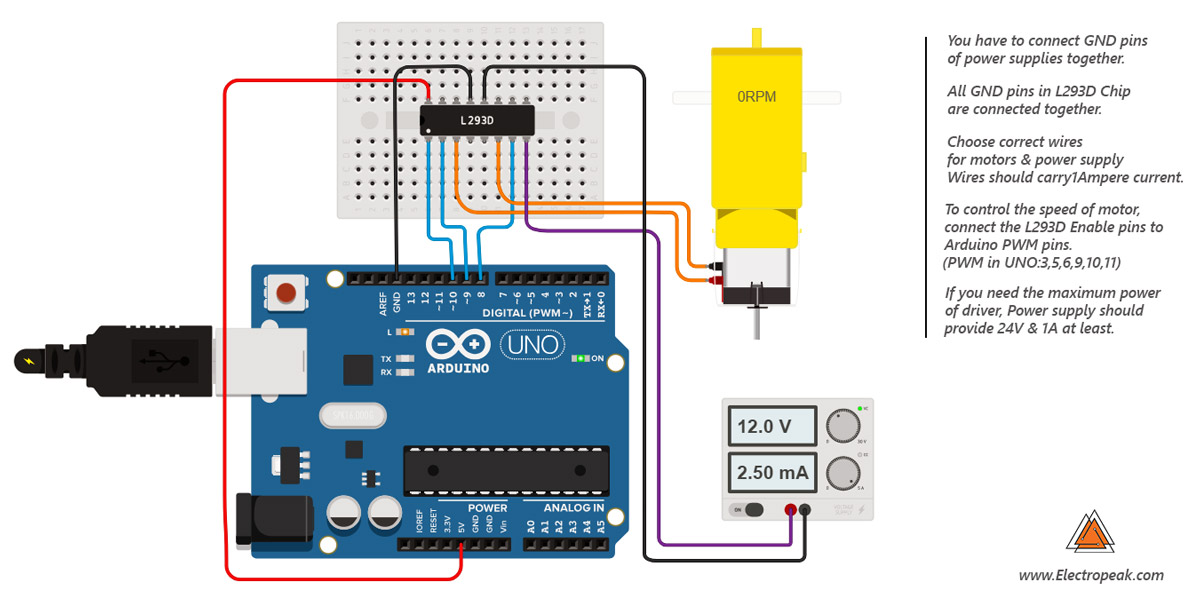
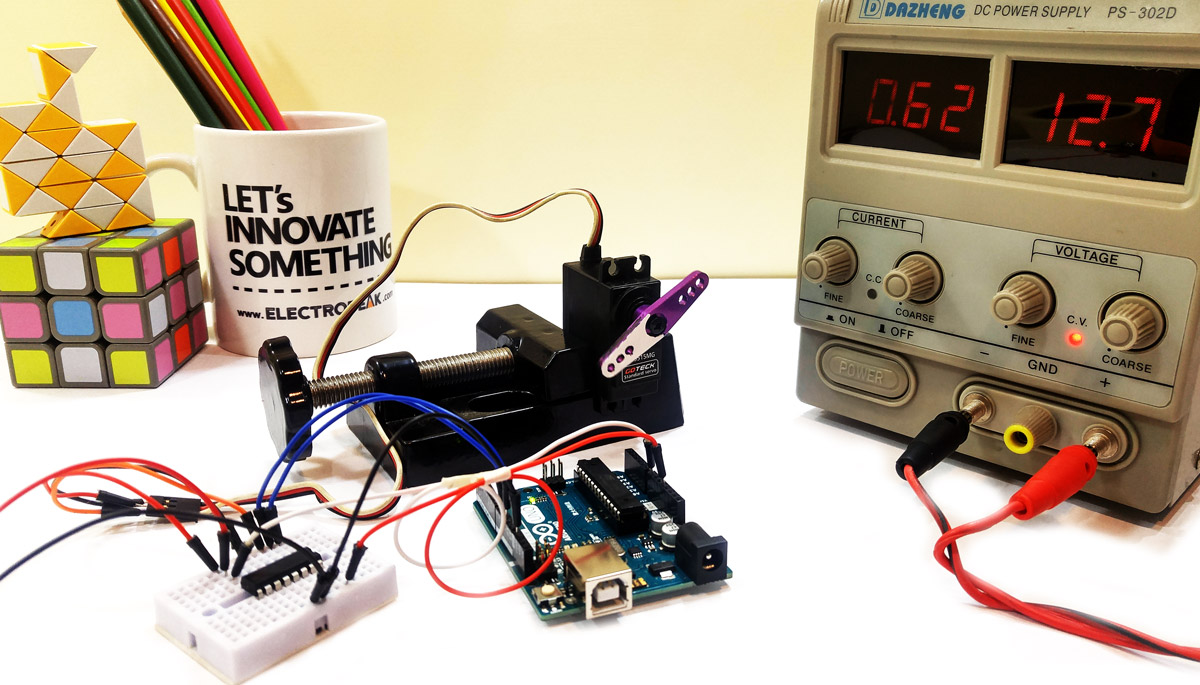
In this circuit, the adjustable Power supply can be replaced with a 9V battery or power adapter. Make sure all wires and cables are connected correctly and then upload the code.
Code
// Basic sketch for trying out the L293D by www.Electropeak.com
// Running single DC motor by L293D
// 20/08/2018


#define MOTOR_EN_1_2  10
#define MOTOR_IN1     9
#define MOTOR_IN2     8

#define slow 64
#define normal 128
#define fast 255

int Speed;

void Forward_Rev(void){
  analogWrite(MOTOR_EN_1_2, Speed);
  digitalWrite(MOTOR_IN1, HIGH);
  digitalWrite(MOTOR_IN2, LOW);
}

void Backward_Rev(void){
  analogWrite(MOTOR_EN_1_2, Speed);
  digitalWrite(MOTOR_IN1, LOW);
  digitalWrite(MOTOR_IN2, HIGH);
}

void Forward_ramp_up(void){
  digitalWrite(MOTOR_IN1, HIGH);
  digitalWrite(MOTOR_IN2, LOW);
  for (int i=0; i<255; i++) { analogWrite(MOTOR_EN_1_2, i); delay(10); } } void Forward_ramp_down(void){ digitalWrite(MOTOR_IN1, HIGH); digitalWrite(MOTOR_IN2, LOW); for (int i=255; i>=0; i--) {
    analogWrite(MOTOR_EN_1_2, i);
    delay(10);
  }
}

void Backward_ramp_up(void){
  digitalWrite(MOTOR_IN1, LOW);
  digitalWrite(MOTOR_IN2, HIGH);
  for (int i=0; i<255; i++) { analogWrite(MOTOR_EN_1_2, i); delay(10); } } void Backward_ramp_down(void){ digitalWrite(MOTOR_IN1, LOW); digitalWrite(MOTOR_IN2, HIGH); for (int i=255; i>=0; i--) {
    analogWrite(MOTOR_EN_1_2, i);
    delay(10);
  }
}

void Brake(void){
  digitalWrite(MOTOR_IN1, HIGH);
  digitalWrite(MOTOR_IN2, HIGH);
}

void setup() {

  Serial.begin(9600);
  Serial.println("L293D DC motor test");

  pinMode(MOTOR_EN_1_2, OUTPUT);
  pinMode(MOTOR_IN1, OUTPUT);
  pinMode(MOTOR_IN2, OUTPUT);
}

void loop() {

  Speed=normal; // Normal Speed

  Forward_Rev();
  delay(1000);
  Brake();
  delay(500);
  Backward_Rev();
  delay(1000);
  Brake();
  delay(500);
  Forward_ramp_up();
  Forward_ramp_down();
  Backward_ramp_up();
  Backward_ramp_down();

}
Controlling a Stepper Motor
In this project we use a four-wire stepper motor. You can control stepper motors in three modes. Single step, half step, and power step. You should know the stepper motor wiring connections. If you don’t, use an ohm meter to find out.
Circuit

Code
This code is just for first time running. To improve the performance of motor, you can use the example code of Arduino libraries.
// Basic sketch for trying out the L293D by www.Electropeak.com
// Running 4-wire Stepper motor by L293D
// 20/08/2018

#define MOTOR_EN_1_2  10
#define MOTOR_EN_3_4  11
#define MOTOR_IN1     9
#define MOTOR_IN2     8
#define MOTOR_IN3     12
#define MOTOR_IN4     13

#define forward  0
#define backward 1

#define slow   10
#define normal 5
#define fast   2

#define single_step   0
#define power_step    1
#define half_step     2

int speeed;
int direcshen;
int stepping;

void stepp(void){

  digitalWrite(MOTOR_EN_1_2, HIGH);
  digitalWrite(MOTOR_EN_3_4, HIGH);

if (direcshen==forward){
  if (stepping==single_step){
    digitalWrite(MOTOR_IN1, HIGH);
    digitalWrite(MOTOR_IN2, LOW);
    digitalWrite(MOTOR_IN3, LOW);
    digitalWrite(MOTOR_IN4, LOW);
    delay(speeed);
    digitalWrite(MOTOR_IN1, LOW);
    digitalWrite(MOTOR_IN2, HIGH);
    digitalWrite(MOTOR_IN3, LOW);
    digitalWrite(MOTOR_IN4, LOW);
    delay(speeed);
    digitalWrite(MOTOR_IN1, LOW);
    digitalWrite(MOTOR_IN2, LOW);
    digitalWrite(MOTOR_IN3, HIGH);
    digitalWrite(MOTOR_IN4, LOW);
    delay(speeed);
    digitalWrite(MOTOR_IN1, LOW);
    digitalWrite(MOTOR_IN2, LOW);
    digitalWrite(MOTOR_IN3, LOW);
    digitalWrite(MOTOR_IN4, HIGH);
    delay(speeed);
  }
  if (stepping==half_step){
    digitalWrite(MOTOR_IN1, HIGH);
    digitalWrite(MOTOR_IN2, LOW);
    digitalWrite(MOTOR_IN3, LOW);
    digitalWrite(MOTOR_IN4, LOW);
    delay(speeed);
    digitalWrite(MOTOR_IN1, HIGH);
    digitalWrite(MOTOR_IN2, HIGH);
    digitalWrite(MOTOR_IN3, LOW);
    digitalWrite(MOTOR_IN4, LOW);
    delay(speeed);
    digitalWrite(MOTOR_IN1, LOW);
    digitalWrite(MOTOR_IN2, HIGH);
    digitalWrite(MOTOR_IN3, LOW);
    digitalWrite(MOTOR_IN4, LOW);
    delay(speeed);
    digitalWrite(MOTOR_IN1, LOW);
    digitalWrite(MOTOR_IN2, HIGH);
    digitalWrite(MOTOR_IN3, HIGH);
    digitalWrite(MOTOR_IN4, LOW);
    delay(speeed);
    digitalWrite(MOTOR_IN1, LOW);
    digitalWrite(MOTOR_IN2, LOW);
    digitalWrite(MOTOR_IN3, HIGH);
    digitalWrite(MOTOR_IN4, LOW);
    delay(speeed);
    digitalWrite(MOTOR_IN1, LOW);
    digitalWrite(MOTOR_IN2, LOW);
    digitalWrite(MOTOR_IN3, HIGH);
    digitalWrite(MOTOR_IN4, HIGH);
    delay(speeed);
    digitalWrite(MOTOR_IN1, LOW);
    digitalWrite(MOTOR_IN2, LOW);
    digitalWrite(MOTOR_IN3, LOW);
    digitalWrite(MOTOR_IN4, HIGH);
    delay(speeed);
    digitalWrite(MOTOR_IN1, HIGH);
    digitalWrite(MOTOR_IN2, LOW);
    digitalWrite(MOTOR_IN3, LOW);
    digitalWrite(MOTOR_IN4, HIGH);
    delay(speeed);
  }
  if (stepping==power_step){
    digitalWrite(MOTOR_IN1, HIGH);
    digitalWrite(MOTOR_IN2, HIGH);
    digitalWrite(MOTOR_IN3, LOW);
    digitalWrite(MOTOR_IN4, LOW);
    delay(speeed);
    digitalWrite(MOTOR_IN1, LOW);
    digitalWrite(MOTOR_IN2, HIGH);
    digitalWrite(MOTOR_IN3, HIGH);
    digitalWrite(MOTOR_IN4, LOW);
    delay(speeed);
    digitalWrite(MOTOR_IN1, LOW);
    digitalWrite(MOTOR_IN2, LOW);
    digitalWrite(MOTOR_IN3, HIGH);
    digitalWrite(MOTOR_IN4, HIGH);
    delay(speeed);
    digitalWrite(MOTOR_IN1, HIGH);
    digitalWrite(MOTOR_IN2, LOW);
    digitalWrite(MOTOR_IN3, LOW);
    digitalWrite(MOTOR_IN4, HIGH);
    delay(speeed);
  }
 }
 if (direcshen==backward){
  if (stepping==single_step){
    digitalWrite(MOTOR_IN4, HIGH);
    digitalWrite(MOTOR_IN3, LOW);
    digitalWrite(MOTOR_IN2, LOW);
    digitalWrite(MOTOR_IN1, LOW);
    delay(speeed);
    digitalWrite(MOTOR_IN4, LOW);
    digitalWrite(MOTOR_IN3, HIGH);
    digitalWrite(MOTOR_IN2, LOW);
    digitalWrite(MOTOR_IN1, LOW);
    delay(speeed);
    digitalWrite(MOTOR_IN4, LOW);
    digitalWrite(MOTOR_IN3, LOW);
    digitalWrite(MOTOR_IN2, HIGH);
    digitalWrite(MOTOR_IN1, LOW);
    delay(speeed);
    digitalWrite(MOTOR_IN4, LOW);
    digitalWrite(MOTOR_IN3, LOW);
    digitalWrite(MOTOR_IN2, LOW);
    digitalWrite(MOTOR_IN1, HIGH);
    delay(speeed);
  }
  if (stepping==half_step){
    digitalWrite(MOTOR_IN4, HIGH);
    digitalWrite(MOTOR_IN3, LOW);
    digitalWrite(MOTOR_IN2, LOW);
    digitalWrite(MOTOR_IN1, LOW);
    delay(speeed);
    digitalWrite(MOTOR_IN4, HIGH);
    digitalWrite(MOTOR_IN3, HIGH);
    digitalWrite(MOTOR_IN2, LOW);
    digitalWrite(MOTOR_IN1, LOW);
    delay(speeed);
    digitalWrite(MOTOR_IN4, LOW);
    digitalWrite(MOTOR_IN3, HIGH);
    digitalWrite(MOTOR_IN2, LOW);
    digitalWrite(MOTOR_IN1, LOW);
    delay(speeed);
    digitalWrite(MOTOR_IN4, LOW);
    digitalWrite(MOTOR_IN3, HIGH);
    digitalWrite(MOTOR_IN2, HIGH);
    digitalWrite(MOTOR_IN1, LOW);
    delay(speeed);
    digitalWrite(MOTOR_IN4, LOW);
    digitalWrite(MOTOR_IN3, LOW);
    digitalWrite(MOTOR_IN2, HIGH);
    digitalWrite(MOTOR_IN1, LOW);
    delay(speeed);
    digitalWrite(MOTOR_IN4, LOW);
    digitalWrite(MOTOR_IN3, LOW);
    digitalWrite(MOTOR_IN2, HIGH);
    digitalWrite(MOTOR_IN1, HIGH);
    delay(speeed);
    digitalWrite(MOTOR_IN4, LOW);
    digitalWrite(MOTOR_IN3, LOW);
    digitalWrite(MOTOR_IN2, LOW);
    digitalWrite(MOTOR_IN1, HIGH);
    delay(speeed);
    digitalWrite(MOTOR_IN4, HIGH);
    digitalWrite(MOTOR_IN3, LOW);
    digitalWrite(MOTOR_IN2, LOW);
    digitalWrite(MOTOR_IN1, HIGH);
    delay(speeed);
  }
  if (stepping==power_step){
    digitalWrite(MOTOR_IN4, HIGH);
    digitalWrite(MOTOR_IN3, HIGH);
    digitalWrite(MOTOR_IN2, LOW);
    digitalWrite(MOTOR_IN1, LOW);
    delay(speeed);
    digitalWrite(MOTOR_IN4, LOW);
    digitalWrite(MOTOR_IN3, HIGH);
    digitalWrite(MOTOR_IN2, HIGH);
    digitalWrite(MOTOR_IN1, LOW);
    delay(speeed);
    digitalWrite(MOTOR_IN4, LOW);
    digitalWrite(MOTOR_IN3, LOW);
    digitalWrite(MOTOR_IN2, HIGH);
    digitalWrite(MOTOR_IN1, HIGH);
    delay(speeed);
    digitalWrite(MOTOR_IN4, HIGH);
    digitalWrite(MOTOR_IN3, LOW);
    digitalWrite(MOTOR_IN2, LOW);
    digitalWrite(MOTOR_IN1, HIGH);
    delay(speeed);
  }
 }
}

void setup() {

  Serial.begin(9600);
  Serial.println("L293D Stepper motor test");

  pinMode(MOTOR_EN_1_2, OUTPUT);
  pinMode(MOTOR_EN_3_4, OUTPUT);
  pinMode(MOTOR_IN1, OUTPUT);
  pinMode(MOTOR_IN2, OUTPUT);
  pinMode(MOTOR_IN3, OUTPUT);
  pinMode(MOTOR_IN4, OUTPUT);

}

void loop() {

  direcshen=forward;     // choose forward or backward
  speeed=fast;           // choose slow, normal or fast
  stepping=half_step;    // choose single, power or half step
  for (int i=0;i<=60;i++)
  {stepp();}

  direcshen=backward;     // choose forward or backward
  speeed=normal;           // choose slow, normal or fast
  stepping=power_step;    // choose single, power or half step
  for (int i=0;i<=50;i++)
  {stepp();}

  direcshen=backward;     // choose forward or backward
  speeed=slow;;           // choose slow, normal or fast
  stepping=single_step;    // choose single, power or half step
  for (int i=0;i<=30;i++)
  {stepp();}

}
Controlling a Servo Motor
Micro servo motors (also known as 9 grams servo) are very useful in small robotics projects like a robot arms. You should produce PWM signals to control servo motors. Servo motors can be very fast and powerful based on their type and size.
Circuit
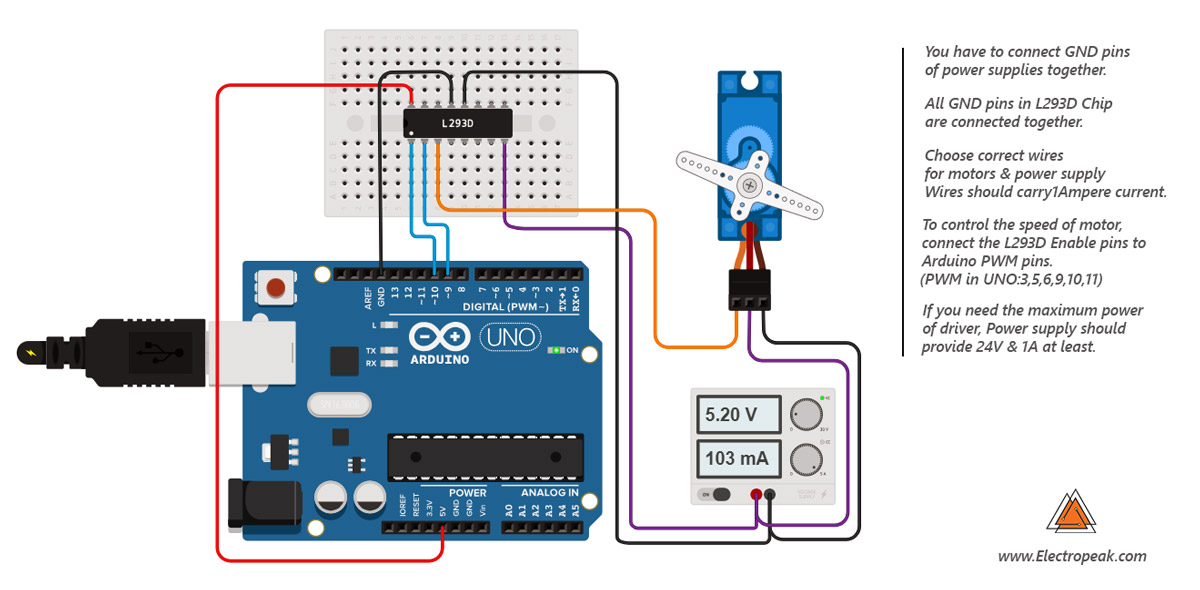
Code
This is a code from Arduino libraries.
#include  <Servo.h>

Servo myservo;  // create servo object to control a servo
// twelve servo objects can be created on most boards

int pos = 0;    // variable to store the servo position

void setup() {
  digitalWrite(10,HIGH);
  myservo.attach(9);  // attaches the servo on pin 9 to the servo object
}

void loop() {
  for (pos = 0; pos <= 180; pos += 3) { // goes from 0 degrees to 180 degrees // in steps of 1 degree myservo.write(pos); // tell servo to go to position in variable 'pos' delay(5); // waits 15ms for the servo to reach the position } for (pos = 180; pos >= 0; pos -= 3) { // goes from 180 degrees to 0 degrees
    myservo.write(pos);              // tell servo to go to position in variable 'pos'
    delay(5);                       // waits 15ms for the servo to reach the position
  }
}

Comments (4)
I’d like to have found your website some time ago . At age 73 most electronics are a very steep learning curve so your site is a great help.
🙂
Ecxelen information. The further job is to make it work in our specific place. Thanks!
You’re quite welcome! We’re so glad we could help.