
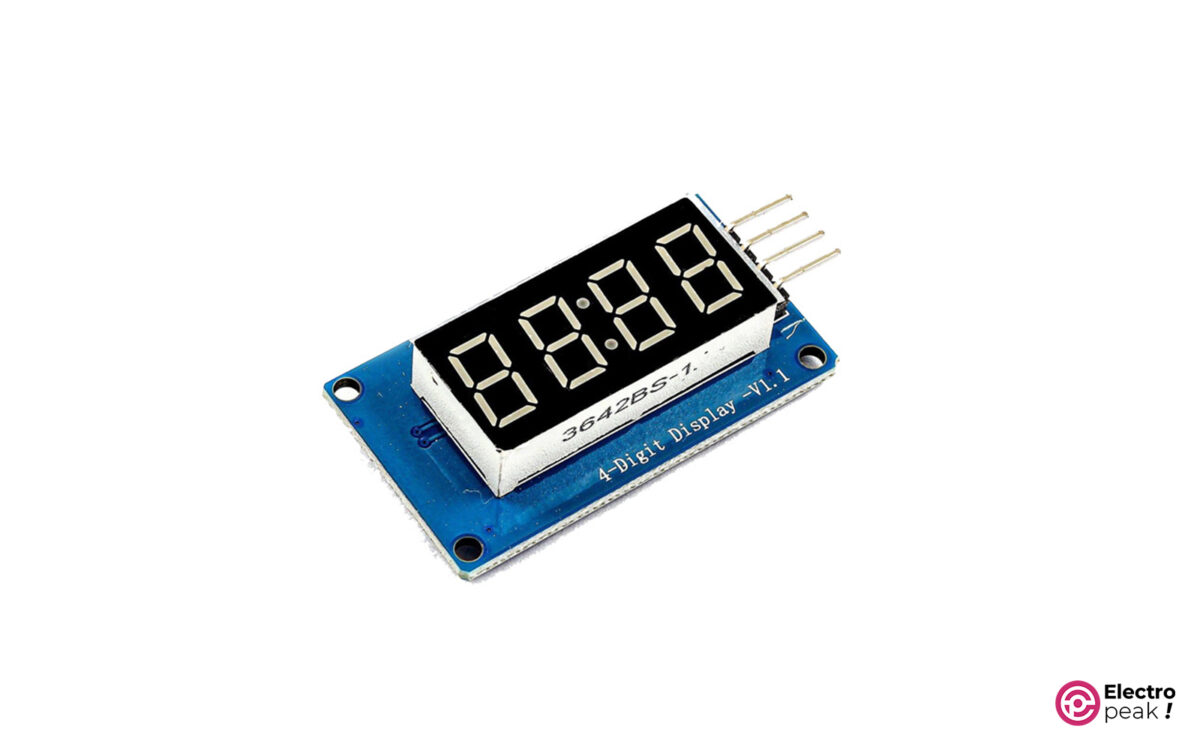
TM1637 Display Module Features
The 4-digit 7-segment display module—with a TM1637 driver—can display various outputs. It communicates with the microcontroller using only two pins—SCL and SDA. The chip of the TM1637 Display Module allows us to scan the 8*2 keypad. This module also offers eight different modes to adjust the display background light. In addition, it operates within a voltage range of 3.5 to 5V.
Below, you can download the TM1637 driver datasheet.
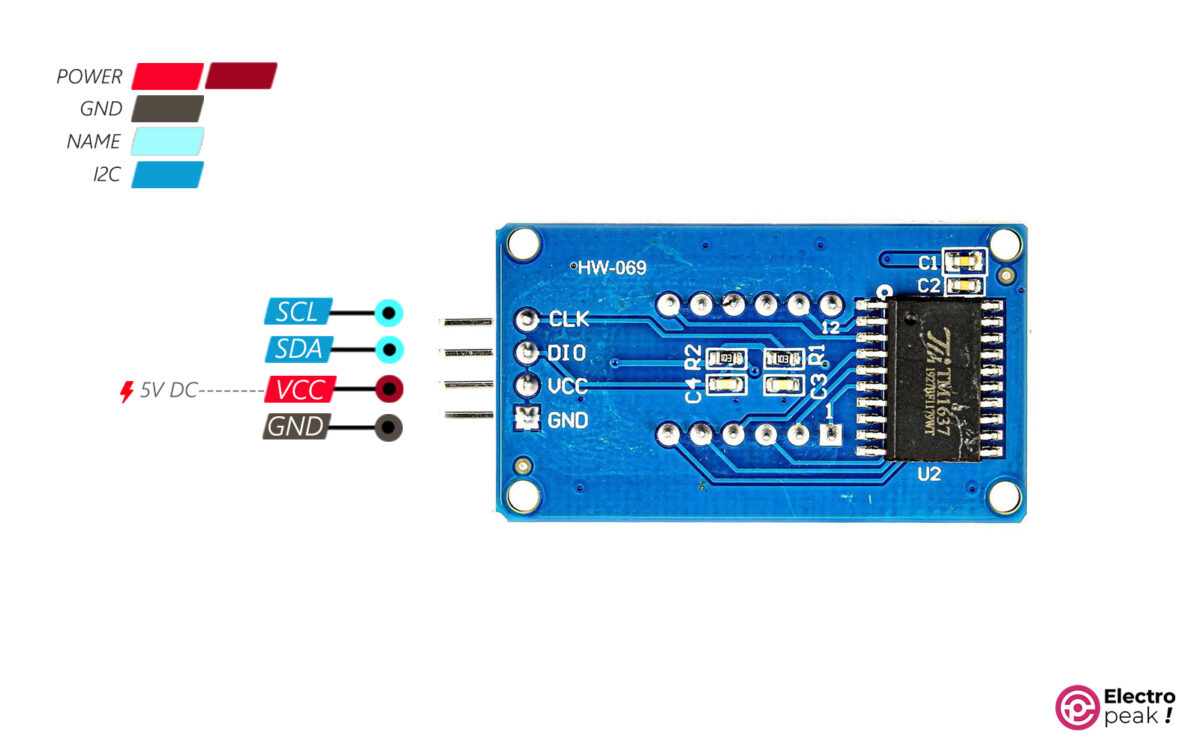
TM1637 Display Module Pinout
The TM1637 display module has four pins:
VCC: Display power supply (3.3 to 5.5V)
GND: Ground
SLC: Data synchronization
SDA: Data information
Here’s the pinout in the image below:
Required Materials
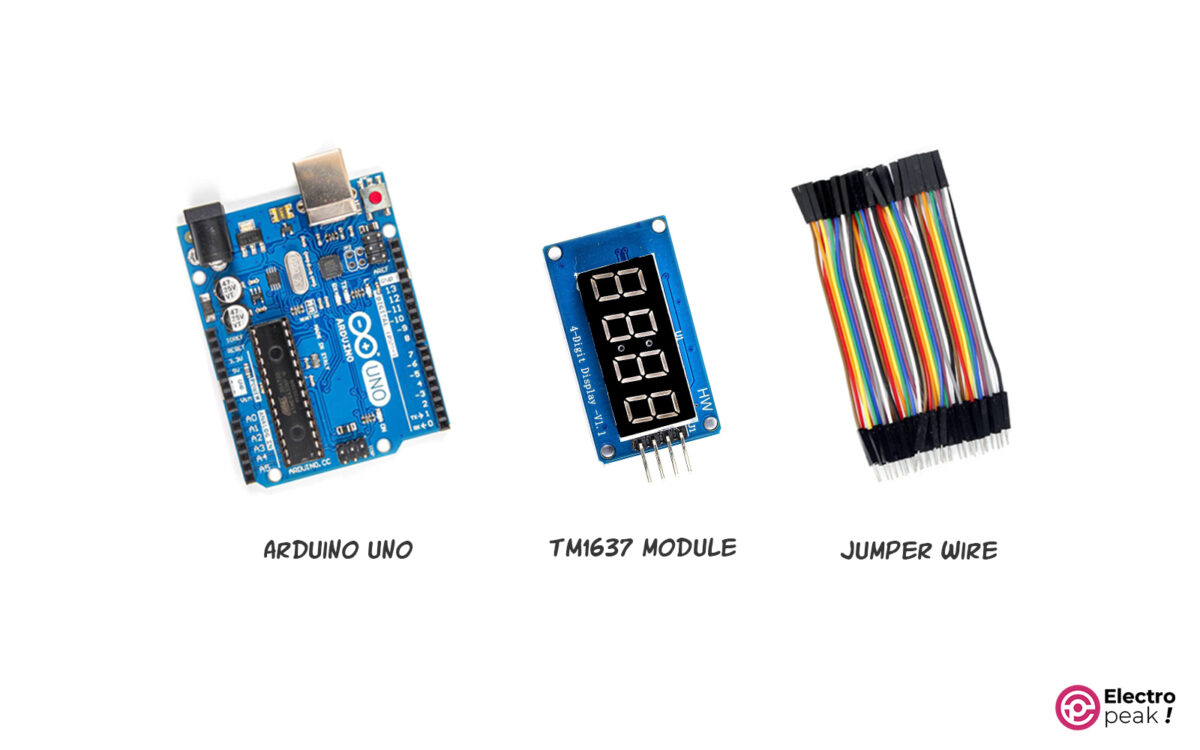
Hardware Components
Interfacing “TM1637” Display Module with Arduino
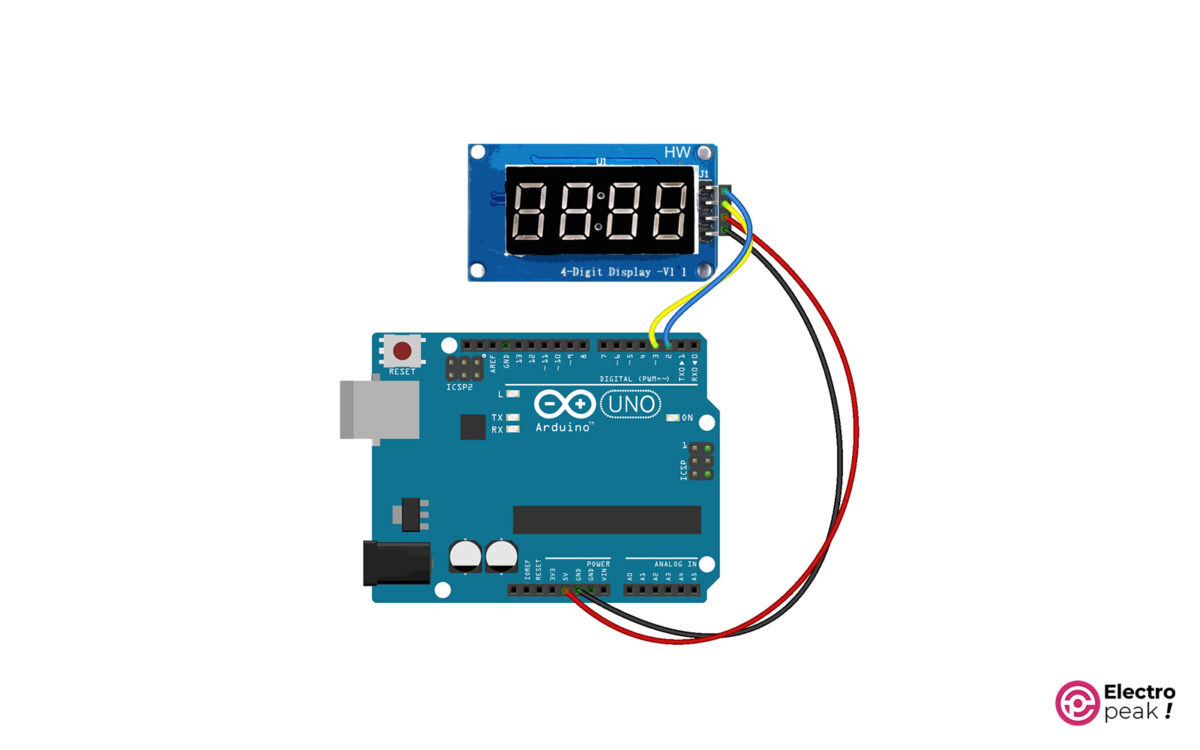
Step 1: Wiring
Connect the module to Arduino as shown in the image below.
Step 2: Library
Install this library on your Arduino.
Step 3: Code
Upload the following code to your Arduino board.
/**
 * @file basic.ino
 * @ingroup examples
 * @brief Basic library usage example
 *
 * This example shows how to display different types of values on the display.
 */

/**
 *
 * Visit https://github.com/AKJ7/TM1637/ for more info
 *
 * API
 * class TM1637 {
 public:
 static constexpr uint8_t TOTAL_DIGITS = 4;
 TM1637(uint8_t clkPin, uint8_t dataPin) noexcept;
 TM1637(const TM1637&) = delete;
 TM1637& operator=(const TM1637&) = delete;
 ~TM1637() = default;
 void begin();
 inline void init();
 inline Animator* refresh();
 template <typename T>
 typename type_traits::enable_if<
 type_traits::is_string<T>::value ||
 type_traits::is_floating_point<T>::value ||
 type_traits::is_integral<T>::value,
 Animator*>::type
 display(const T value, bool overflow = true, bool pad = false, uint8_t offset = 0);
 Animator* displayRawBytes(const uint8_t* buffer, size_t size);
 void offMode() const noexcept;
 void onMode() const noexcept;
 inline void colonOff() noexcept;
 inline void colonOn() noexcept;
 inline Animator* switchColon() noexcept;
 void clearScreen() noexcept;
 inline void setDp(uint8_t value) noexcept;
 inline uint8_t getBrightness() const noexcept;
 void changeBrightness(uint8_t value) noexcept;
 void setBrightness(uint8_t value) noexcept;
 };

 class Animator
 {
 Animator(uint8_t clkPin, uint8_t dataPin, uint8_t totalDigits);
 void blink(Tasker::duration_type delay);
 void fadeOut(Tasker::duration_type delay);
 void fadeIn(Tasker::duration_type delay);
 void scrollLeft(Tasker::duration_type delay);
 void off() const;
 void on(DisplayControl_e brightness) const;
 void reset(const String& value);
 void clear();
 void refresh();
 }

 struct DisplayDigit
 {
 DisplayDigit& setA();
 DisplayDigit& setB();
 DisplayDigit& setC();
 DisplayDigit& setD();
 DisplayDigit& setE();
 DisplayDigit& setF();
 DisplayDigit& setG();
 DisplayDigit& setDot();
 operator uint8_t();
 }
 */

#include <TM1637.h>


// Instantiation and pins configuration
// Pin 3 - > DIO
// Pin 2 - > CLK
TM1637 tm(2, 3);

void setup()
{
 tm.begin();
 tm.setBrightness(4);
}

void loop()
{
 // Display Integers:
 tm.display(1234);
// delay(1000);
//
// // Display float:
// tm.display(29.65);
// delay(1000);
//
// // Display String:
// tm.display("PLAY");
// delay(1000);
// tm.display("STOP");
// delay(1000);
}
This code displays two numbers and two words for testing the module.
