I2C 16x2 Character LCD Features
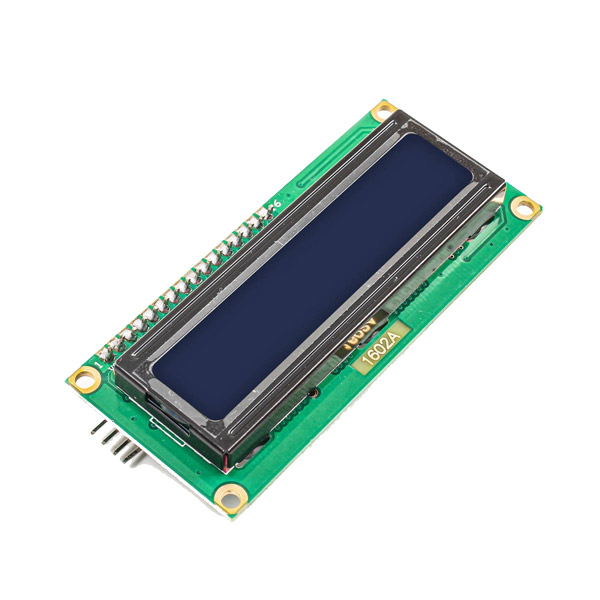
The 16×2 character LCD has two rows with the ability to display 16 ASCII characters on each row. Normal 16×2 character LCDs use 7 digital pins, while this module with I2C interface has reduced this number to 2 pins. A potentiometer is also included to adjust the display contrast. These LCDs have many applications and are used in cases such as: copiers and fax machines, laser printers, industrial testing tools, etc.
You can download the datasheet of this module here.
I2C 16x2 Character LCD Pinout
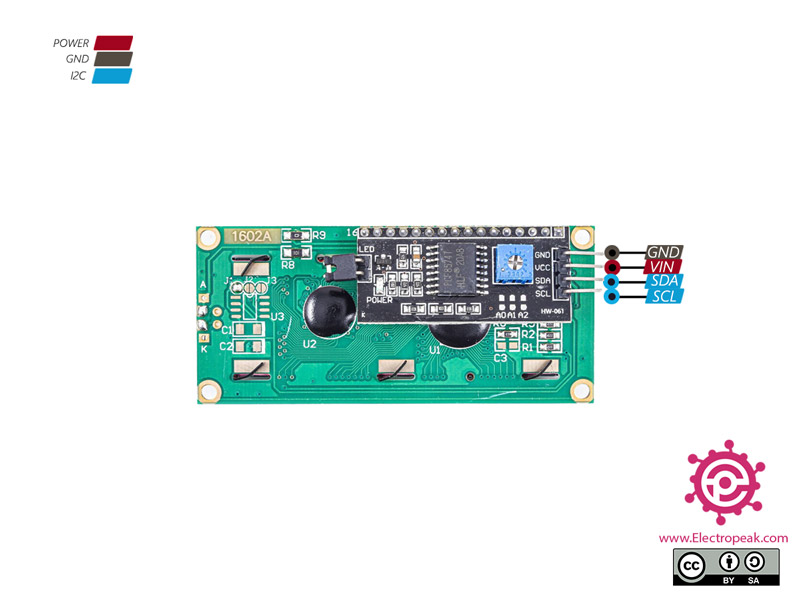
This sensor has 4 pins:
- VCC: Module power supply – 5V
- GND: Ground
- SDA: I2C Data
- SCL: I2C Clock
You can see the pinout of this module in the image below.
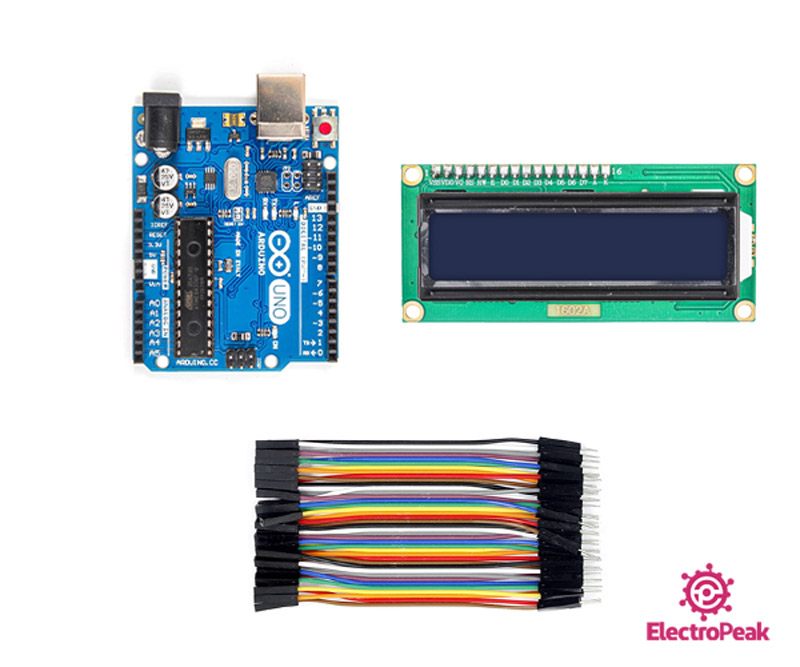
Required Materials
Hardware Components
Software Apps
Interfacing I2C 16x2 Character LCD with Arduino
Step 1: Circuit
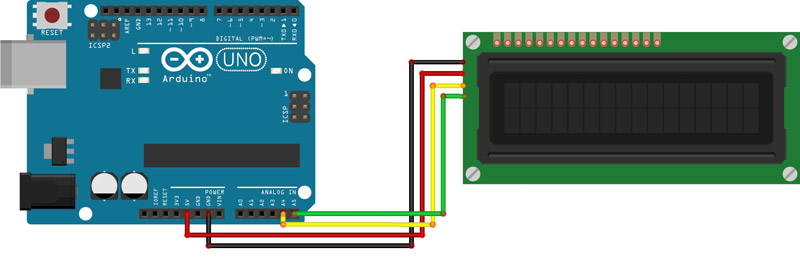
The following circuit shows how you should connect Arduino to this module. Connect wires accordingly.
Step 2: Installing Library
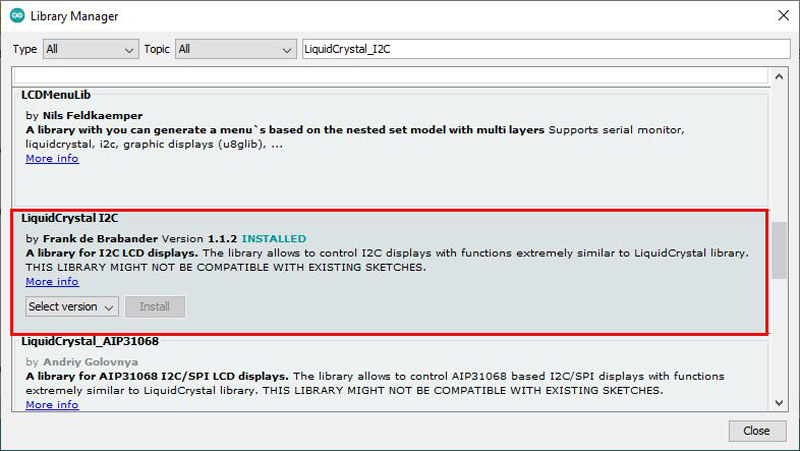
Go to Library manager and search for LiquidCrystal_I2C library and then install it as shown below.
Tip
If you need more help with installing a library on Arduino, read this tutorial: How to Install an Arduino Library
Step 3: Scanning I2C Address
Upload the following code to your Arduino.
   /*
  Character-LCD-I2C-1602
  made on 31 oct 2020
  Home

  based on Arduino Library Examples
*/

#include <Wire.h>

void setup() {
  Wire.begin();

  Serial.begin(9600);
  while (!Serial); // Leonardo: wait for serial monitor
  Serial.println("\nI2C Scanner");
}

void loop() {
  int nDevices = 0;

  Serial.println("Scanning...");

  for (byte address = 1; address < 127; ++address) {
    // The i2c_scanner uses the return value of
    // the Write.endTransmisstion to see if
    // a device did acknowledge to the address.
    Wire.beginTransmission(address);
    byte error = Wire.endTransmission();

    if (error == 0) {
      Serial.print("I2C device found at address 0x");
      if (address < 16) {
        Serial.print("0");
      }
      Serial.print(address, HEX);
      Serial.println("  !");

      ++nDevices;
    } else if (error == 4) {
      Serial.print("Unknown error at address 0x");
      if (address < 16) {
        Serial.print("0");
      }
      Serial.println(address, HEX);
    }
  }
  if (nDevices == 0) {
    Serial.println("No I2C devices found\n");
  } else {
    Serial.println("done\n");
  }
  delay(5000); // Wait 5 seconds for next scan
}
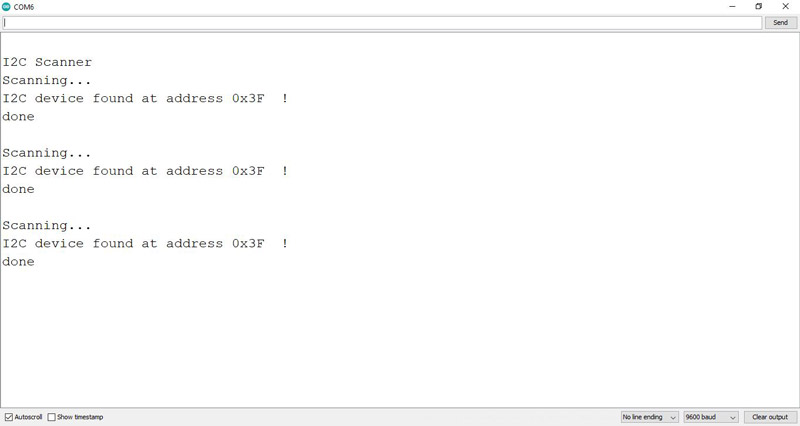
Before using this module, you must first get the I2C address through the above code and enter it in your main program.
The following image appears in the Serial Monitor. The I2C address is 0x3F.
Step 4: Code
Upload the following code to your Arduino.
    /*
  Character-LCD-I2C-1602
  modified on 31 oct 2020
  by Amir Mohammad Shojaee @ Electropeak
  Home

  based on LiquidCrystal_I2C Library Arduino Examples
*/

#include <Wire.h>
#include <LiquidCrystal_I2C.h>

LiquidCrystal_I2C lcd(0x3F,20,4);  // set the LCD address to 0x3F for a 16 chars and 2 line display

void setup()
{
  lcd.init();                      // initialize the lcd
  lcd.backlight();
  Serial.begin(9600);
}

void loop()
{
  // when characters arrive over the serial port...
  if (Serial.available()) {
    // wait a bit for the entire message to arrive
    delay(100);
    // clear the screen
    lcd.clear();
    // read all the available characters
    while (Serial.available() > 0) {
      // display each character to the LCD
      lcd.write(Serial.read());
    }
  }
}
The required libraries must be included first. Next, we enter the I2C address that we obtained in the previous section. Then, the program waits for the user to write a phrase. When the user enters a phrase in the Serial Monitor field, the same phrase appears on the LCD.
The two images below are the results of displaying the phrase “1602 LCD” on the screen. This phrase is first written in the Serial Monitor. It then appears on the LCD when you send it.
