AD9833 Signal Generator Module Features
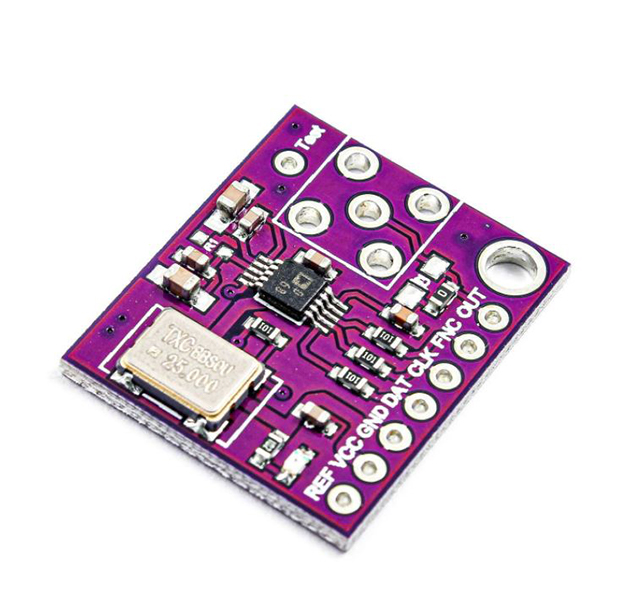
In many projects we need a signal with a specific waveform and frequency. The AD9833 signal generator module is a low-cost module for such applications. This module is capable of generating sine, triangular, square and half-square waveforms. You can adjust the frequency of generated signal from 1Hz to 12.5MHz. The communication protocol of this module is SPI.
AD9833 Signal Generator Module Pinout
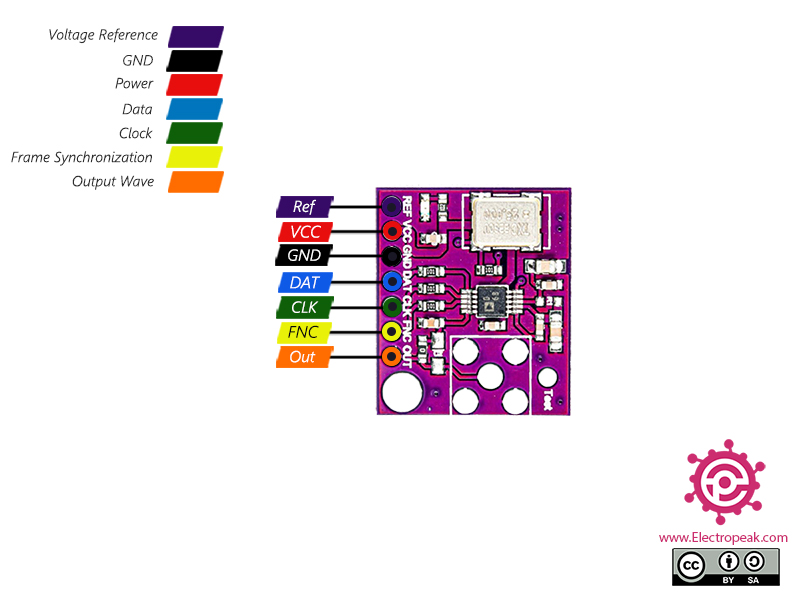
This module has 7 pins:
- Ref: Reference voltage
- VCC: Module power supply – 5V
- GND: Ground
- DAT: SPI Bus Data pin
- CLK: SPI Bus Clock pin
- FNC: SPI Bus Load pin
- Out: Output of the function generator
You can see the pinout of this module here.
Required Material
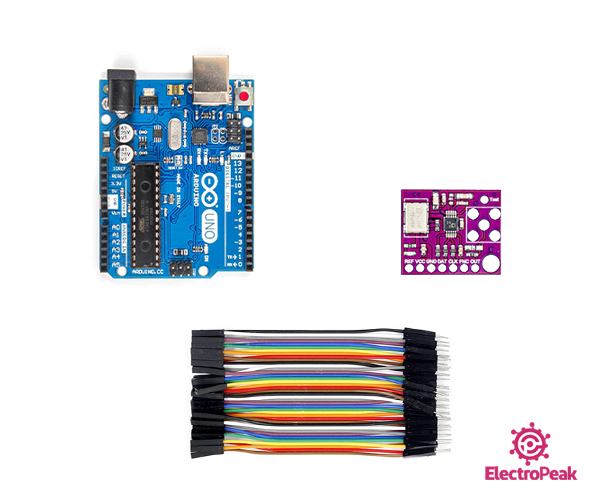
Hardware component
Software
Interfacing AD9833 Signal Generator Module with Arduino
Step 1: Circuit
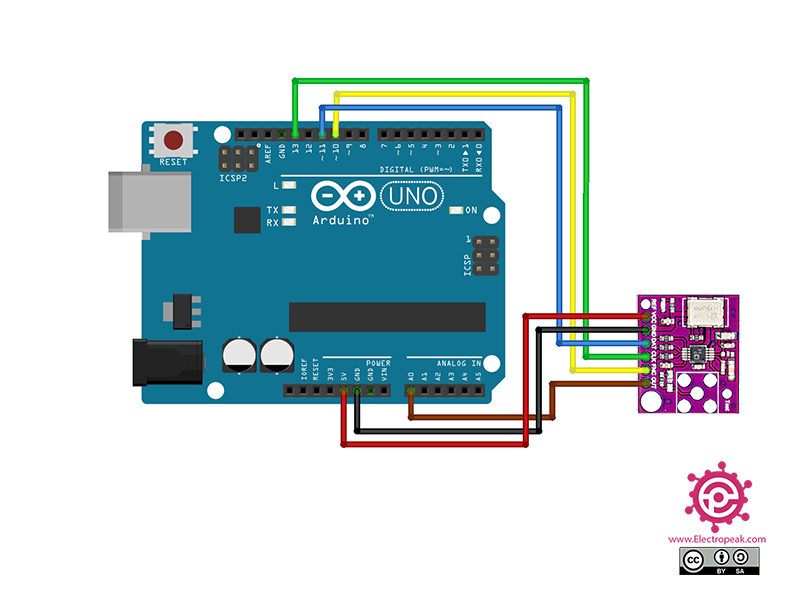
The following circuit shows how you should connect Arduino to AD9833 module. Connect wires accordingly.
Step 2: Library
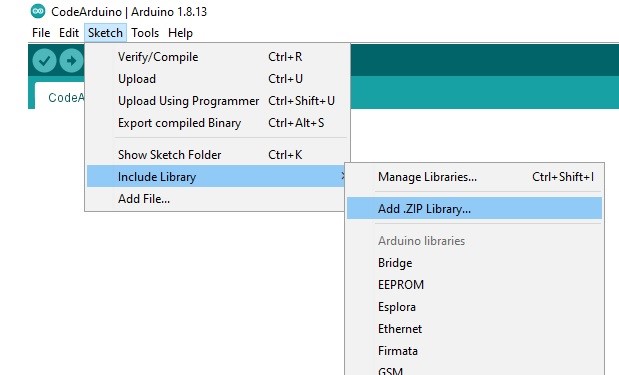
Download AD9833 library here. Then go to Include Library and install it.
Note
If you need more help with installing a library on Arduino, read this tutorial: How to Install an Arduino Library
Step 3: Code
Upload the following code to your Arduino. After that, open the Serial Plotter.
  /*
  Modified on Feb 03, 2021
  Modified by MehranMaleki from Arduino Examples
  Home
*/

#include <AD9833.h>     // Include the library

#define FNC_PIN 10       // Can be any digital IO pin
#define Frequency 1      // Frequency = 1Hz

//--------------- Create an AD9833 object ----------------
// Note, SCK and MOSI must be connected to CLK and DAT pins on the AD9833 for SPI
AD9833 gen(FNC_PIN);       // Defaults to 25MHz internal reference frequency

void setup() {
  Serial.begin(9600);
  // This MUST be the first command after declaring the AD9833 object
  gen.Begin();

  // Apply a 1000 Hz sine wave using REG0 (register set 0). There are two register sets: REG0 and REG1.
  // Each one can be programmed for:
  //   Signal type - SINE_WAVE, TRIANGLE_WAVE, SQUARE_WAVE, and HALF_SQUARE_WAVE
  //   Frequency - 0 to 12.5 MHz
  //   Phase - 0 to 360 degress (this is only useful if it is 'relative' to some other signal
  //           such as the phase difference between REG0 and REG1).
  // In ApplySignal, if Phase is not given, it defaults to 0.
  gen.ApplySignal(SQUARE_WAVE, REG0, Frequency);

  gen.EnableOutput(true);   // Turn ON the output - it defaults to OFF
  // There should be a 1 Hz square wave on the output of the AD9833
}

void loop() {
  Serial.println(analogRead(A0));

  delay(10);
}
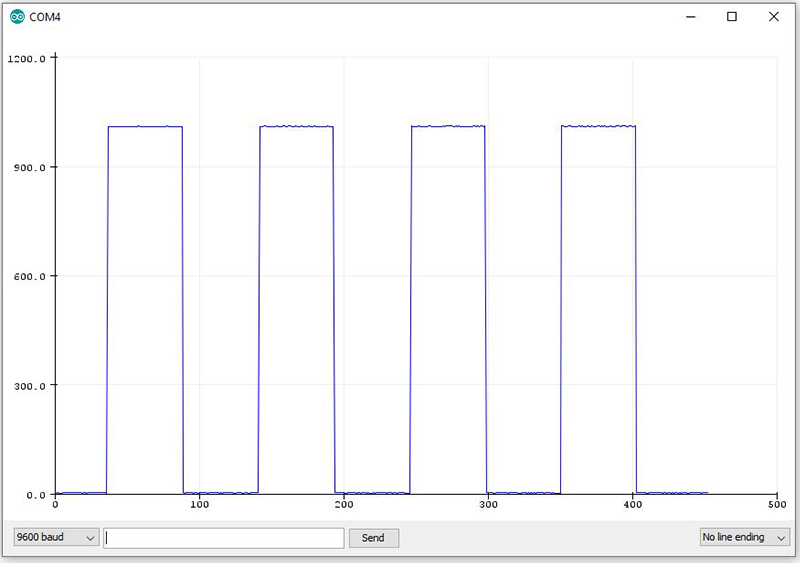
In the above code, we have generated a square wave with 1Hz frequency. Then, we take samples of the signal generated by the module every 10 milliseconds, and display it in the the Serial plotter.
The output is as follows.

Comments (20)
Assalam o Alaikum
Good job Mehran maleki sb.
From where this module can be obtained?
Amjad Farooq
Hi dear friend. You’re welcome, and also thanks for your motivating comment.
The purchase links for the components used in this tutorial are provided in the “Hardware component” section.
Can you able to saw me the square wave output of 1.7Mhz frequency using that AD9833 by arduino.
Yes, it’s quite easy! Just change the variable “Frequency” from 1 to 1700000 in the line 10 and you’ll get what you want.
I found it easy to get this module working. But the frequency jumps a little at 3.1MHz. The crystal frequency is not jumping so I assume it’s something digital Do you have any idea why it could be jumping? (trace is not stable on an oscilloscope).
Hi,
What device do you use to measure the output signal frequency of the module? My first guess is that the module is properly generating the signal but the measuring device is not capable of accurately measuring the output signal frequency. Make sure your measuring device is well designed for measuring frequencies in the orders of MHz.
Im using actually your program (whch is super nice and simple ) to have my signals but I am clueless where to start when I want to connect two frequency generators ad9833 , I have lots of pins available to select the second ad9833 but im not too proficient with code to select a second one … the idea is to have two ad9833, program the frequency to the first one then to the second one and then enable the output for both
Hi,
The AD9833 has only one waveform output.
There are 2 frequency registers and 2 phase registers. Once these are set, you can select which frequency/phase is used for output by selection bits in the control register.
You can use multiple devices by connecting all SCLK and SDATA pins to Arduino SPI SCK and MOSI and use separate data output pins (‘slave select’) to each AD9833’s FSYNC pin.
It should handle 15MHz SPI so you could write a control word in around 1uS, so the speed at which you could write different control bits will be limited by the speed of your program. With a tight loop you could probably switch between two frequencies at more than 10kHz.
The difficult part will be making a PCB for eight AD9833’s and providing master clock to them all.
Hey I was wondering if you had the code to generate a sin and a triangle wave as well
Hi dear
yes.offcure. you just need replace SQUARE_WAVE in this function gen.ApplySignal(SQUARE_WAVE, REG0, Frequency);
with SINE_WAVE = 0x2000 or TRIANGLE_WAVE = 0x2002.
you can find all in AD9833.h Library
good luck
GOOD JOB.
I just can’t get the image as yours, don’t know what can be wrong?
Hi
How did you test it? Could you send me the image you have?
Do we really need FSYNC?
Hi Jesse,
According to the library, this pin should be connected to the microcontroller.
This pin is in fact the chip select.
Here is the library
Hi my image doesn’t look the same. It looks like there’s lots of noise. How might I fix it?
Thanks!
Hello Maria,
Could you share an image of your output result?
Upload the image to a cloud service and share the link here.
Can I get 0.5 Hz sine wave output from AD9833
Hello,
According to the library documentation, this mode supports frequencies up to 12.5 MHz with frequency steps as small as 0.1 Hz in sine, triangle, and square waveforms. Based on this, if you require a smooth sine wave, such as with 0.5 Hz, it’s advisable to use a model with the smallest frequency step. However, it’s essential to consider the intended purpose.
What’s the intended use case? There might be alternative methods available.
Hello MMehran MALEKI,
I found your article very interesting and I wanted to test it. I loaded the library you recommended but the compiler blocks on line 28 (gen.Enable….). I thought it could be a different version of the library, so I tried with all versions of the AD9833 unfortunately without result. Do you have an explanation? Thank you for your answer and good luck
Hello,
I tested this code with the provided library on an Arduino Uno board, and it worked without any errors.
I recommend using this library with Arduino IDE v1.8.19 (there may be some issues with Arduino IDE v2).
If you plan to try this code on other boards like ESP or STM, let me know, and I can test it on those boards as well.