MPU9250 + BMP280 Module Features
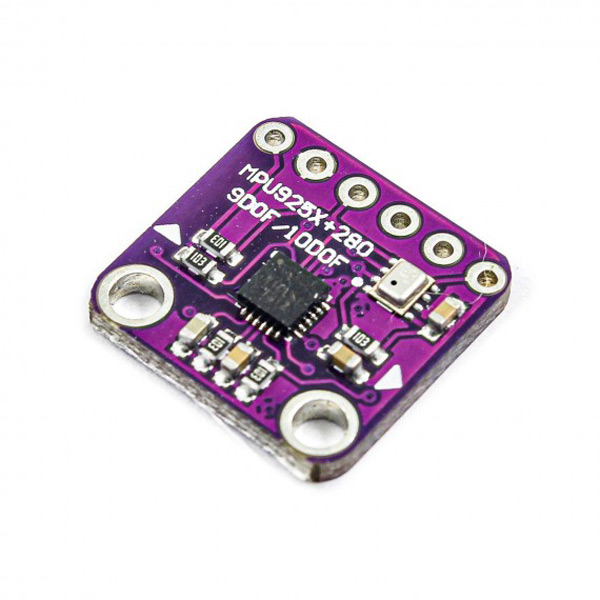
This module combines a 9-axis MPU8250 IMU and a BMP180 atmospheric pressure sensor. Therefore you have a 10DOF sensor in one place! It can communicate with arduino or any other microcontroller via I2C protocol. Using FreeIMU functions and source code, you can easily build an AHRS system to use in UAVs, VTOLs, model airplanes, etc. You can also use it in industrial, medical, … devices.
MPU9250 + BMP280 Module Pinout
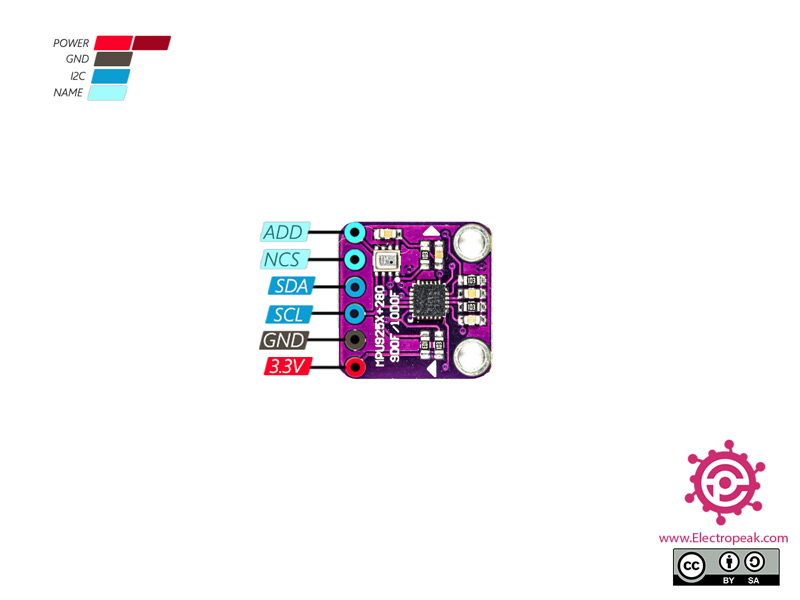
This sensor has 6 pins. 4 pins are more useful:
- +3V3: Module power supply – 3.3 V
- GND: Ground
- SLC: I2C Clock
- SDA: I2C data
You can see pinout of this module in the image below.
You can download the datasheet of this module here.
Required Materials
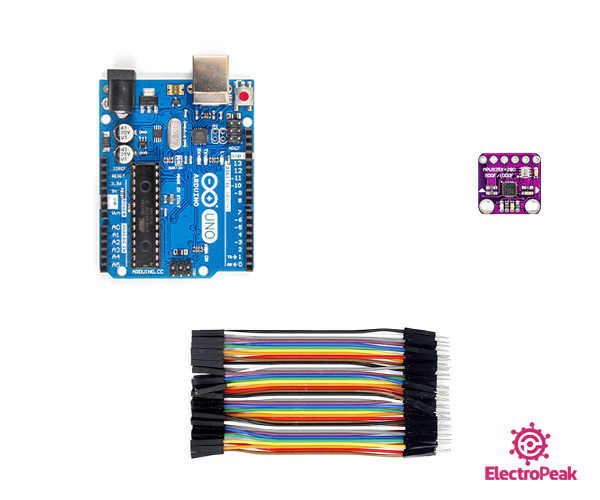
Hardware Components
Software Apps
Interfacing MPU9250 + BMP280 Module with Arduino
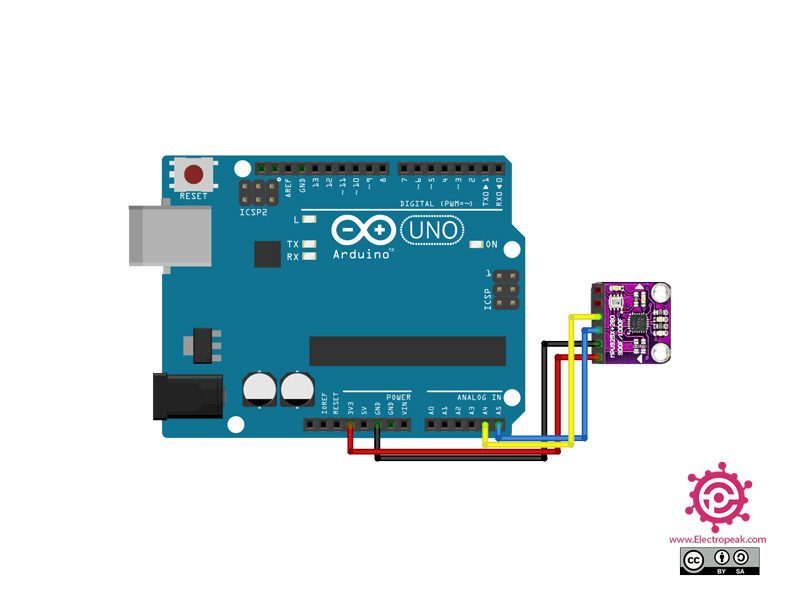
Step 1: Circuit
Step 2: Code
Install following library on your Arduino.
Tip
If you need more help with installing a library on Arduino, read this tutorial: How to Install an Arduino Library
/*
  by MohammedDamirchi
  Home
*/


#include <MPU9250_asukiaaa.h>
#include <Adafruit_BMP280.h>

#ifdef _ESP32_HAL_I2C_H_
#define SDA_PIN 21
#define SCL_PIN 22
#endif

Adafruit_BMP280 bme; // I2C
MPU9250_asukiaaa mySensor;
float aX, aY, aZ, aSqrt, gX, gY, gZ, mDirection, mX, mY, mZ;

void setup() {
  Serial.begin(115200);
  while (!Serial);

#ifdef _ESP32_HAL_I2C_H_ // For ESP32
  Wire.begin(SDA_PIN, SCL_PIN);
  mySensor.setWire(&Wire);
#endif

  bme.begin();
  mySensor.beginAccel();
  mySensor.beginGyro();
  mySensor.beginMag();

  // You can set your own offset for mag values
  // mySensor.magXOffset = -50;
  // mySensor.magYOffset = -55;
  // mySensor.magZOffset = -10;
}

void loop() {


  if (mySensor.accelUpdate() == 0) {
    aX = mySensor.accelX();
    aY = mySensor.accelY();
    aZ = mySensor.accelZ();
    aSqrt = mySensor.accelSqrt();
    Serial.print("accelX: " + String(aX));
    Serial.print("\taccelY: " + String(aY));
    Serial.print("\taccelZ: " + String(aZ));
    Serial.print("\taccelSqrt: " + String(aSqrt));
  }

  if (mySensor.gyroUpdate() == 0) {
    gX = mySensor.gyroX();
    gY = mySensor.gyroY();
    gZ = mySensor.gyroZ();
    Serial.print("\tgyroX: " + String(gX));
    Serial.print("\tgyroY: " + String(gY));
    Serial.print("\tgyroZ: " + String(gZ));
  }

  if (mySensor.magUpdate() == 0) {
    mX = mySensor.magX();
    mY = mySensor.magY();
    mZ = mySensor.magZ();
    mDirection = mySensor.magHorizDirection();
    Serial.print("\tmagX: " + String(mX));
    Serial.print("\tmaxY: " + String(mY));
    Serial.print("\tmagZ: " + String(mZ));
    Serial.print("\thorizontalDirection: " + String(mDirection));
  }

  Serial.print("\tTemperature(*C): ");
  Serial.print(bme.readTemperature());


  Serial.print("\tPressure(Inches(Hg)): ");
  Serial.print(bme.readPressure()/3377);


  Serial.print("\tApproxAltitude(m): ");
  Serial.print(bme.readAltitude(1013.25)); // this should be adjusted to your local forcase


  Serial.println(""); // Add an empty line

  }
After uploading the code, by moving the module, you can see the output in the serial monitor.
