
Introduction
RFID, which stands for radio frequency identification, enables data reading and identification of unique tags using radio waves. RFID modules operate on specific frequencies, requiring tags that match the reader module’s frequency.
In this article, we will design and implement a simple identification system using a 125KHz RFID module and the Wiegand protocol.
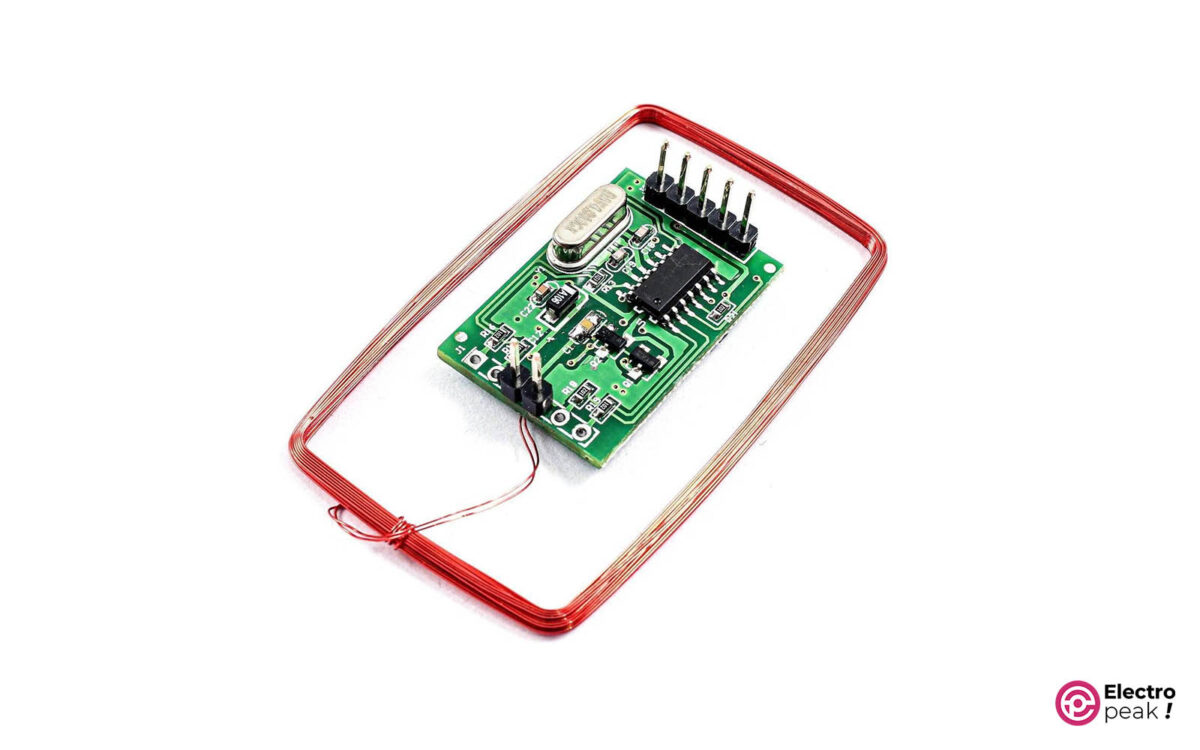
The module used in this article works with the Wiegand communication protocol that includes two pins—DATA0 and DATA1—while the RDM6300 module has a Serial communication protocol.
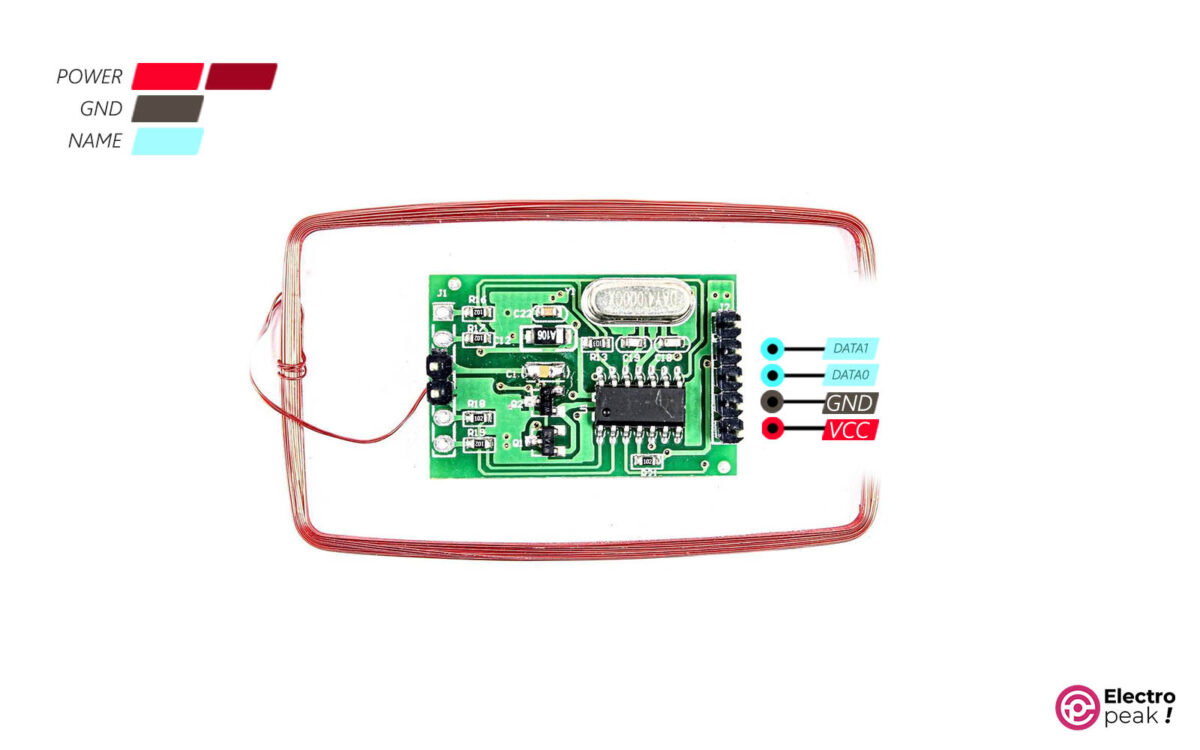
125KHz RFID Reader Module Pinout (Wiegand Protocol)
This module has four pins:
• VIN: module power supply
• GND: Ground
• DATA 0: data line (Wiegand communication protocol)
• DATA 1: data line (Wiegand communication protocol)
Required Materials
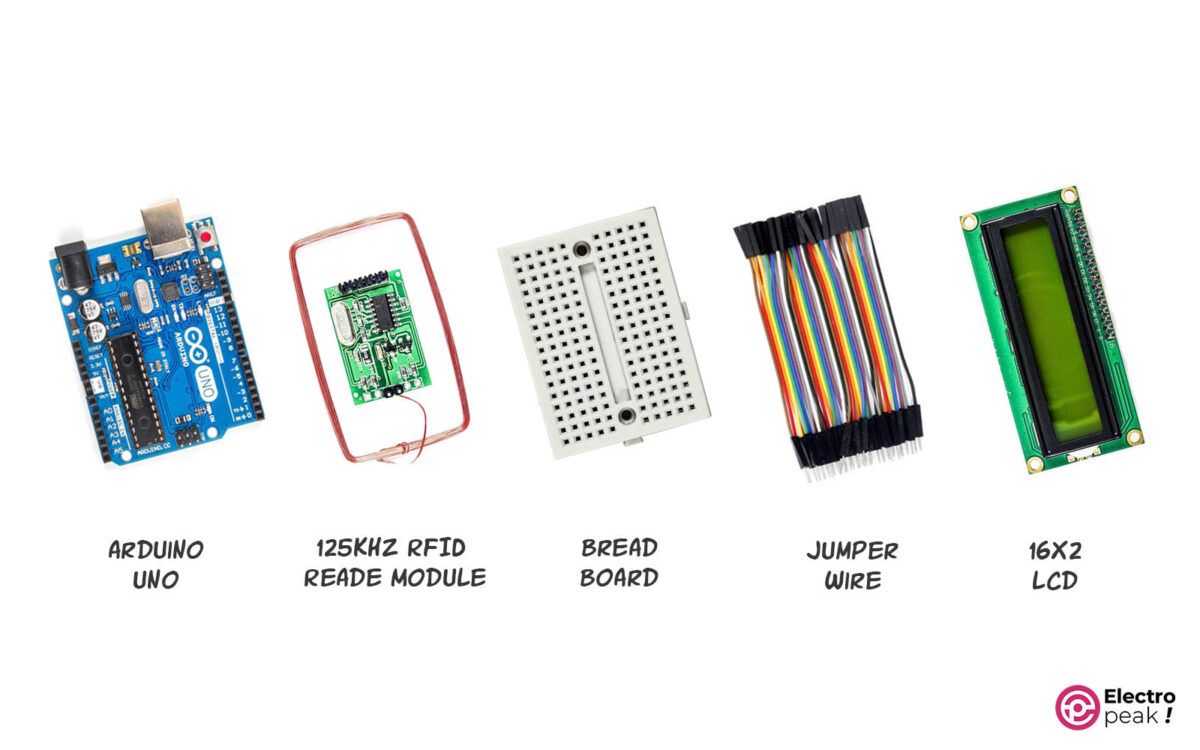
Hardware Components
Software
Interfacing ‘125KHz RFID Reader' Module with Arduino
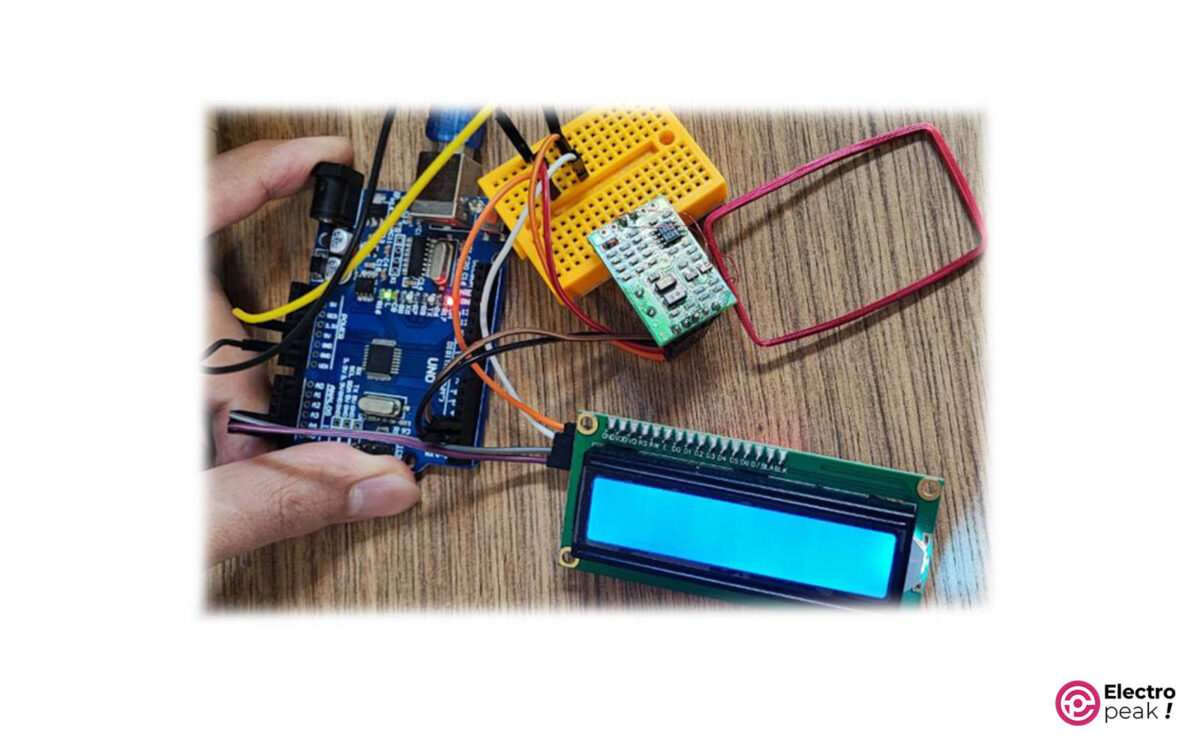
Step 1: Wiring
Connect the wires as shown below:

Step 2: Code
This step consists of three parts:
1- Installing the required libraries
2- Receiving a specific code for each tag
3- Displaying an arbitrary word according to the identified tag
1- Installing Libraries
You can download the Weigand communication protocol library from here.
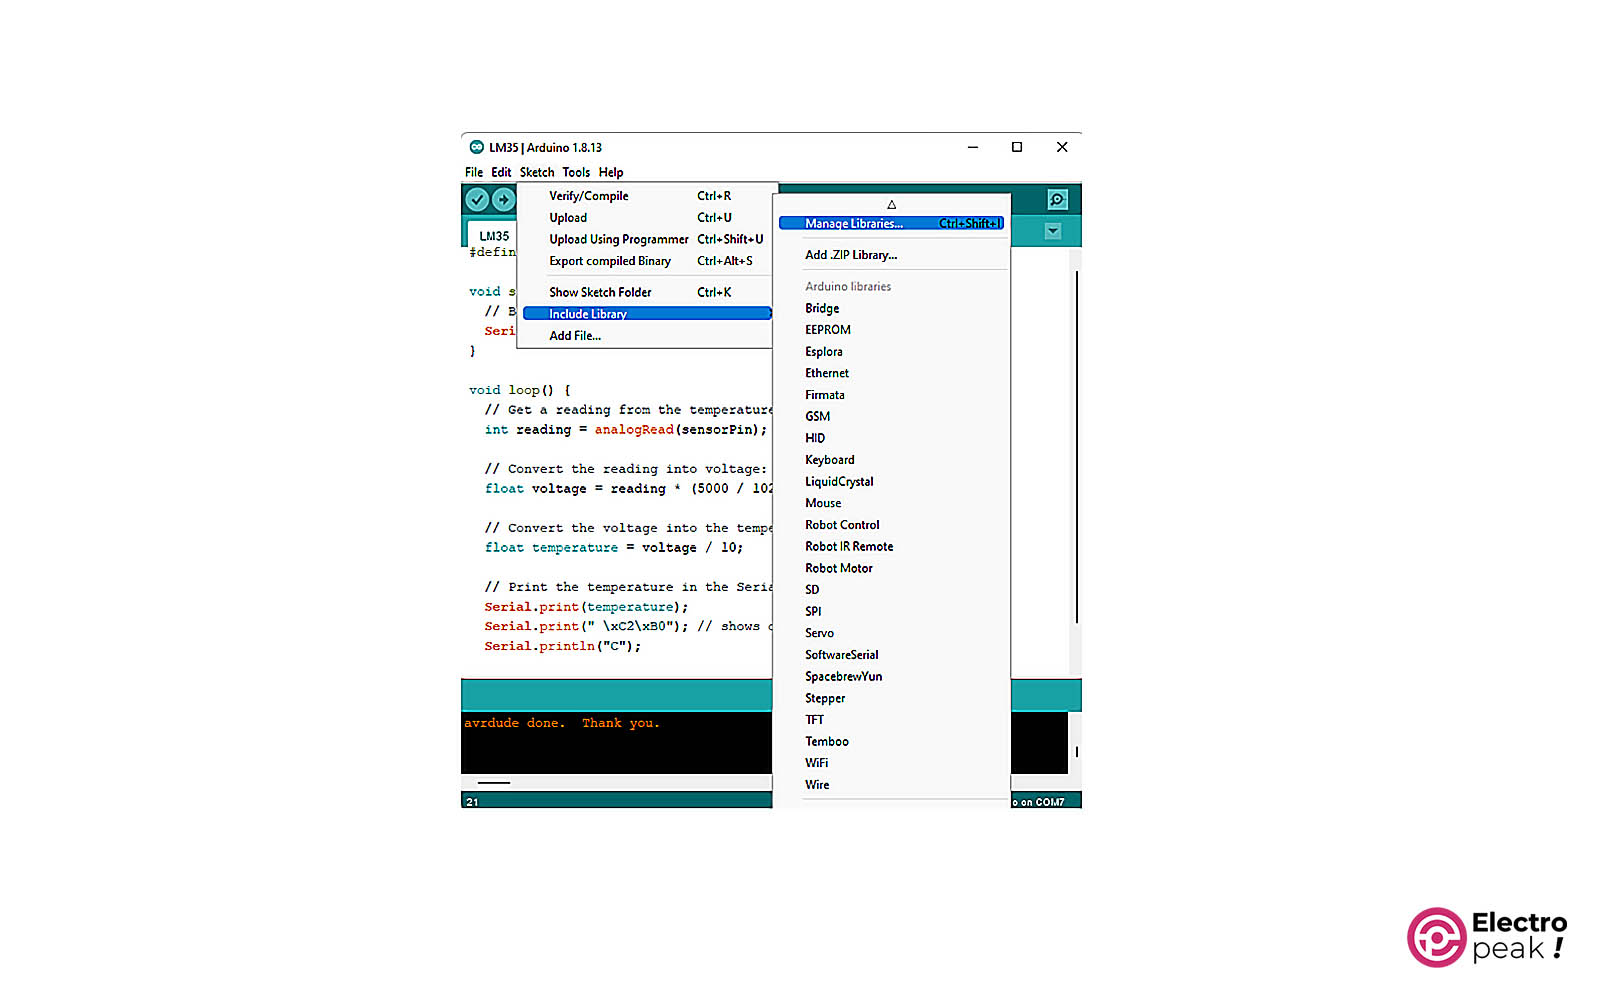
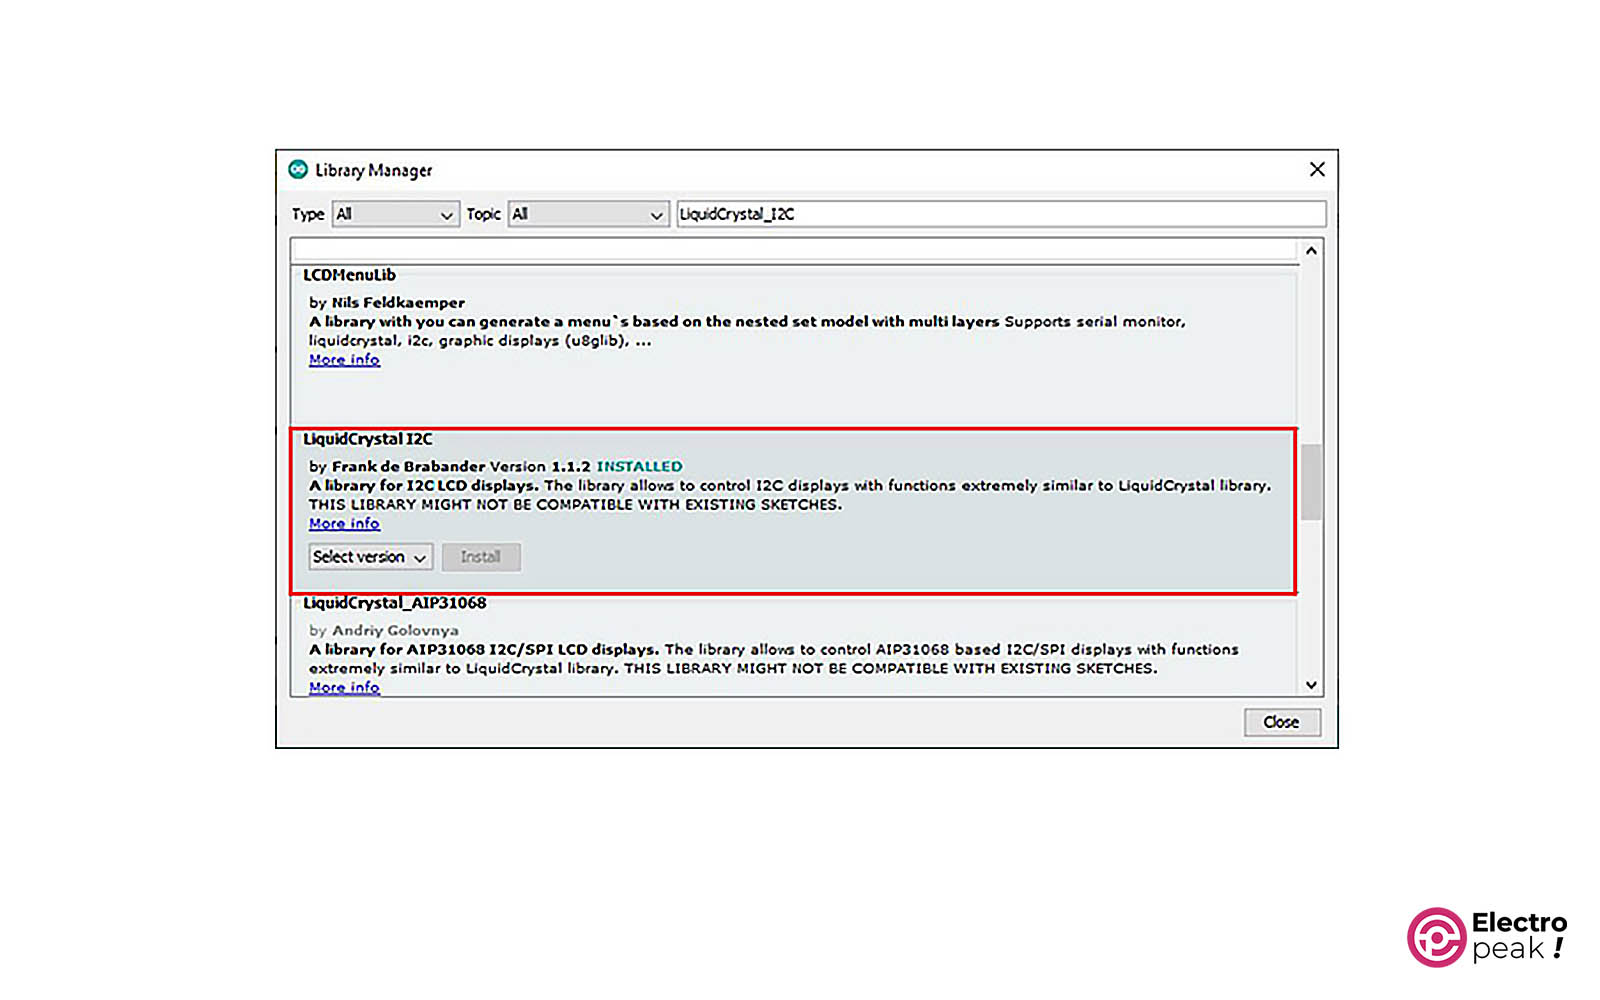
In addition, to install the character LCD library, follow these steps: (1) run the Arduino software, (2) go to the “Sketch” section, (3) select “Include Library,” and (4) click on “Manage Libraries.” In the opened window, look for “LiquidCrystal_I2C” (as shown in the second image below) and install the desired library.
2- Receiving a Specific Code for Each Tag
Upload the code below to your Arduino
#include <Wiegand.h>

WIEGAND wg;

void setup() {
 Serial.begin(9600);

 // default Wiegand Pin 2 and Pin 3 see image on README.md
 // for non UNO board, use wg.begin(pinD0, pinD1) where pinD0 and pinD1
 // are the pins connected to D0 and D1 of wiegand reader respectively.
 wg.begin();
}

void loop() {
 if(wg.available())
 {
// Retrieve the code from the Wiegand reader
int code =wg.getCode();
// Print the code to the serial monitor
Serial.print("code: ");
Serial.println(code);
 }
}
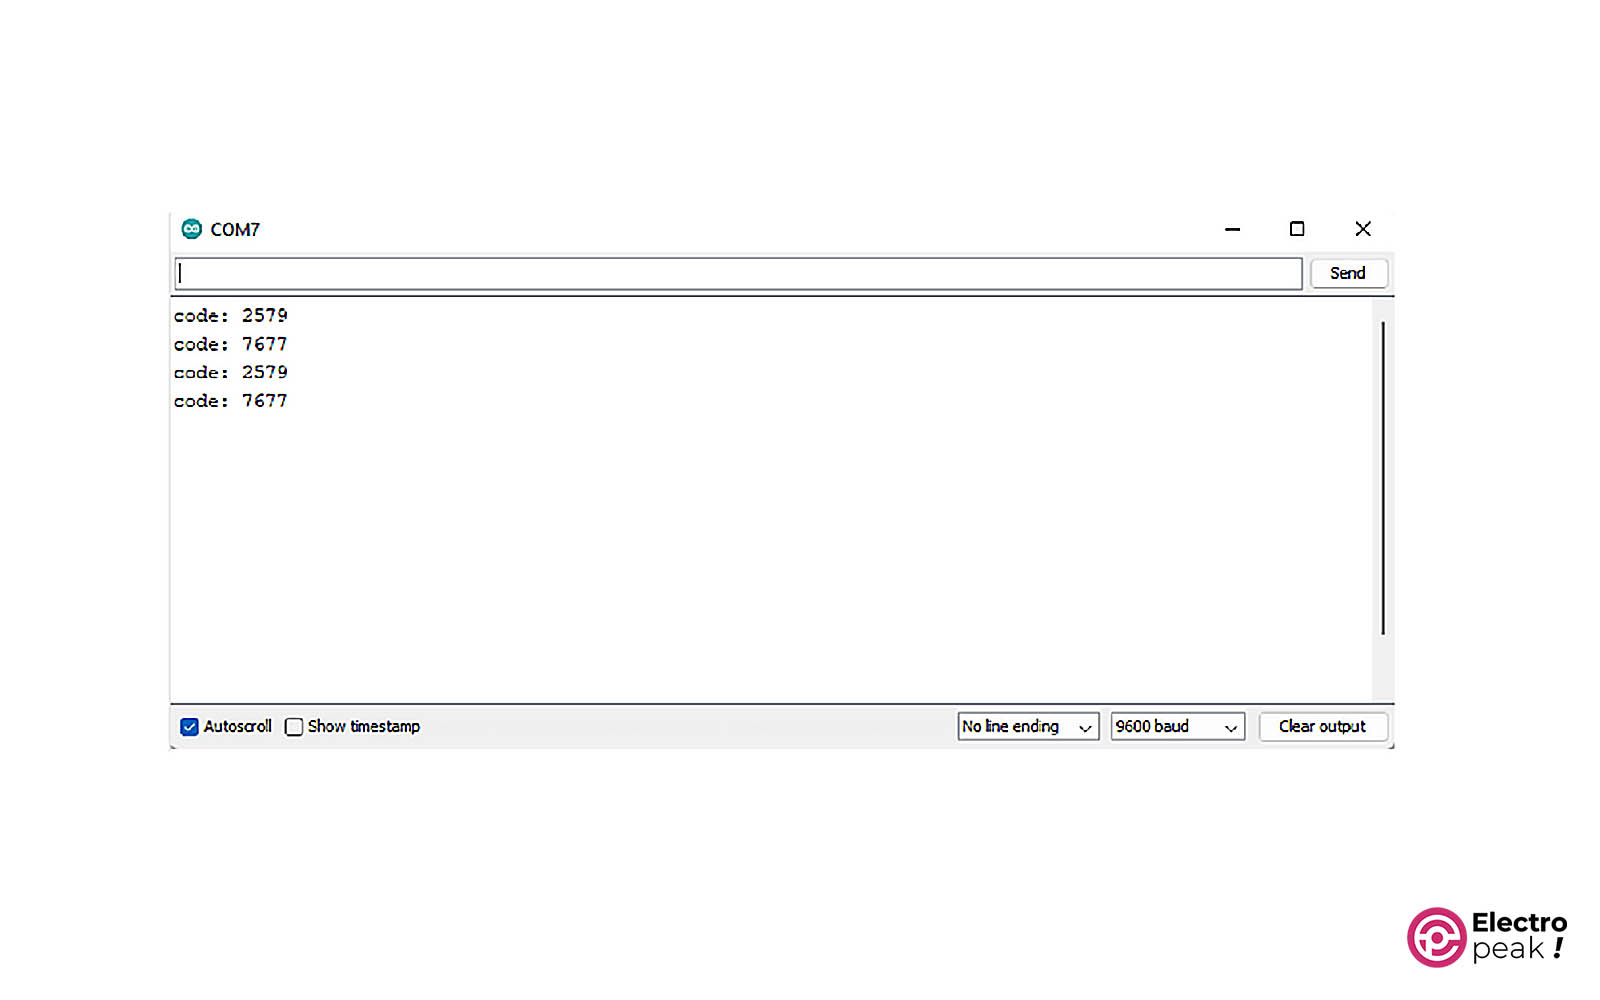
Once uploaded, open the Serial Monitor window.
In this window, you will see a unique ID for each Tag that approaches the antenna of the RFID module. Since we have tested two tags, we will have two IDs. Make a note of these IDs for the next section.
Code Explanation:
int code =wg.getCode();
// Print the code to the serial monitor
Serial.print("code: ");
Serial.println(code);
Here, the code reads data using the Wiegand protocol and stores it in the “code” variable. It is then displayed in the Serial Monitor window.
3- Displaying an Arbitrary word According to the identified Tag
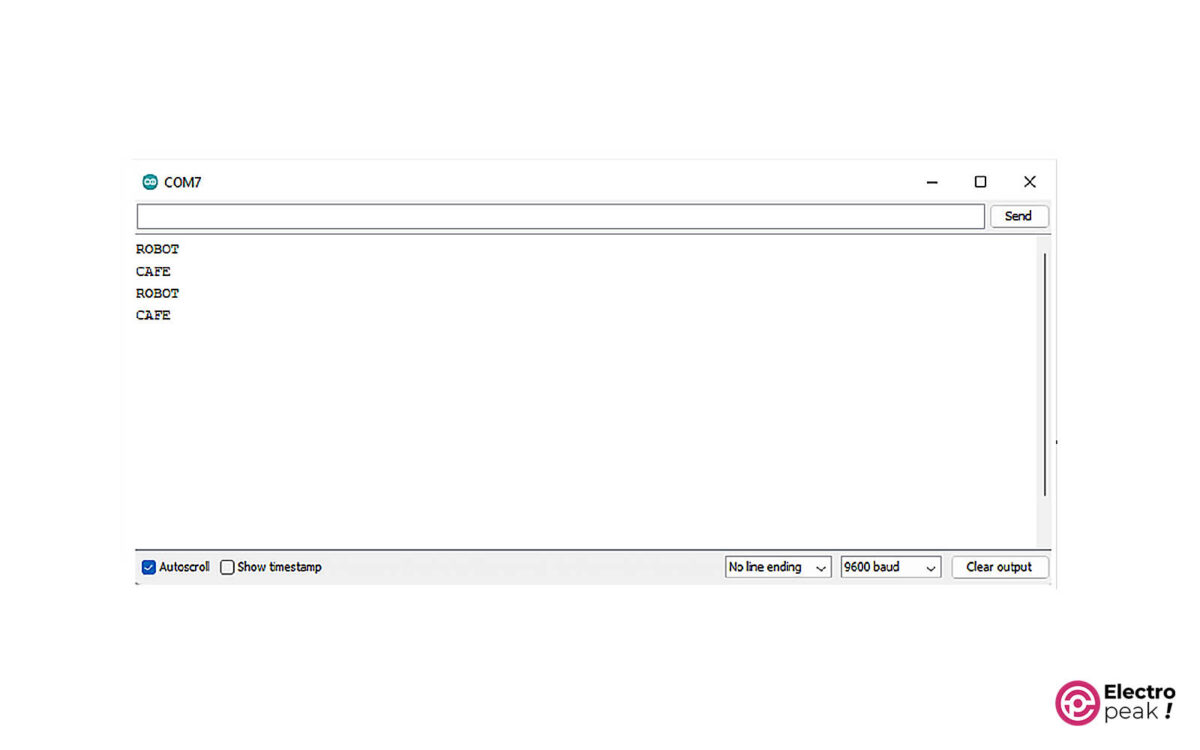
In this section, the goal is to display a unique word on the screen when each tag is brought closer to the antenna of the RFID module. To do this, upload the following code to your Arduino:
#include <Wire.h>
#include <LiquidCrystal_I2C.h>
LiquidCrystal_I2C lcd(0x27,20,4); // set the LCD address to 0x27 for a 16 chars and 2 line display
WIEGAND wg;
void setup() {
Serial.begin(9600); // Initialize the serial communication
lcd.init(); // initialize the lcd
lcd.backlight(); // Turn on the backlight of the LCD
// default Wiegand Pin 2 and Pin 3 see image on README.md
// for non UNO board, use wg.begin(pinD0, pinD1) where pinD0 and pinD1
// are the pins connected to D0 and D1 of wiegand reader respectively.
wg.begin();
}
void loop() {
if(wg.available())
{
int code =wg.getCode();
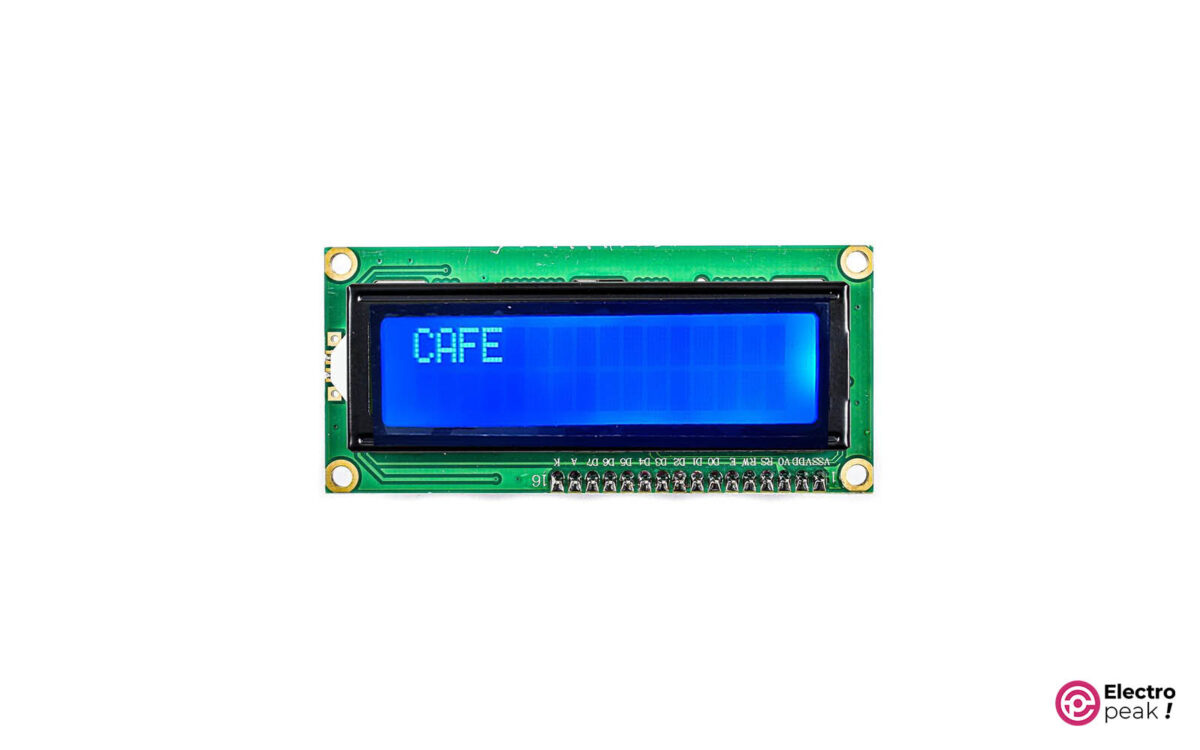
if(code==2579){ // Check if the code matches a specific value
Serial.print("CAFE");
Serial.print('\n');
lcd.setCursor(0,0);
lcd.print("CAFE"); // Display "CAFE" on the LCD
delay(2000);
lcd.clear();
}
if(code==7677){
Serial.print("ROBOT");
Serial.print('\n');
lcd.setCursor(0,0);
lcd.print("ROBOT");
delay(2000); // Wait for 2 seconds
lcd.clear(); // Clear the LCD
}
}
}

Code Explanation:
if(code==2579){  // Check if the code matches a specific value
      Serial.print("CAFE");
      Serial.print('\n');
  lcd.setCursor(0,0);
  lcd.print("CAFE"); // Display "CAFE" on the LCD
  delay(2000);
  lcd.clear();
    }
        if(code==7677){
      Serial.print("ROBOT");
      Serial.print('\n');
  lcd.setCursor(0,0);
  lcd.print("ROBOT");
  delay(2000); // Wait for 2 seconds
  lcd.clear();  // Clear the LCD
    }
Here, we specify that if the condition of the “if” loop is met (the tag comes close to the antenna), the screen will display the corresponding word. Next, the command is given to the Serial Monitor window to display the word.

Comments (2)
Hi dear friend.
I tried to launch exactly this module with the method you said. But the module did not send anything to me. I tested this with two different modules, but I didn’t get any results.
can you guide me Have you ever encountered such a problem?
Hi Pourya,
First, ensure you are using the correct card/tag for testing the module.
You can test your tag using your phone if it has NFC capability. Turn on NFC and tap the tag to the NFC part of your phone. If your phone detects the tag, it means the tag operates at 13.56MHz and is not compatible with this module (only Android phones can detect this type of tag; Apple devices can see it but do not react).
If your phone does not detect the tag, it might operate at 125KHz or 915MHz (UHF). You can also test the tag with a door control system that supports 125KHz tags.
Once you’ve confirmed the tag frequency, the module should be straightforward to set up. The module uses the WIEGAND protocol, which doesn’t require additional configuration.