
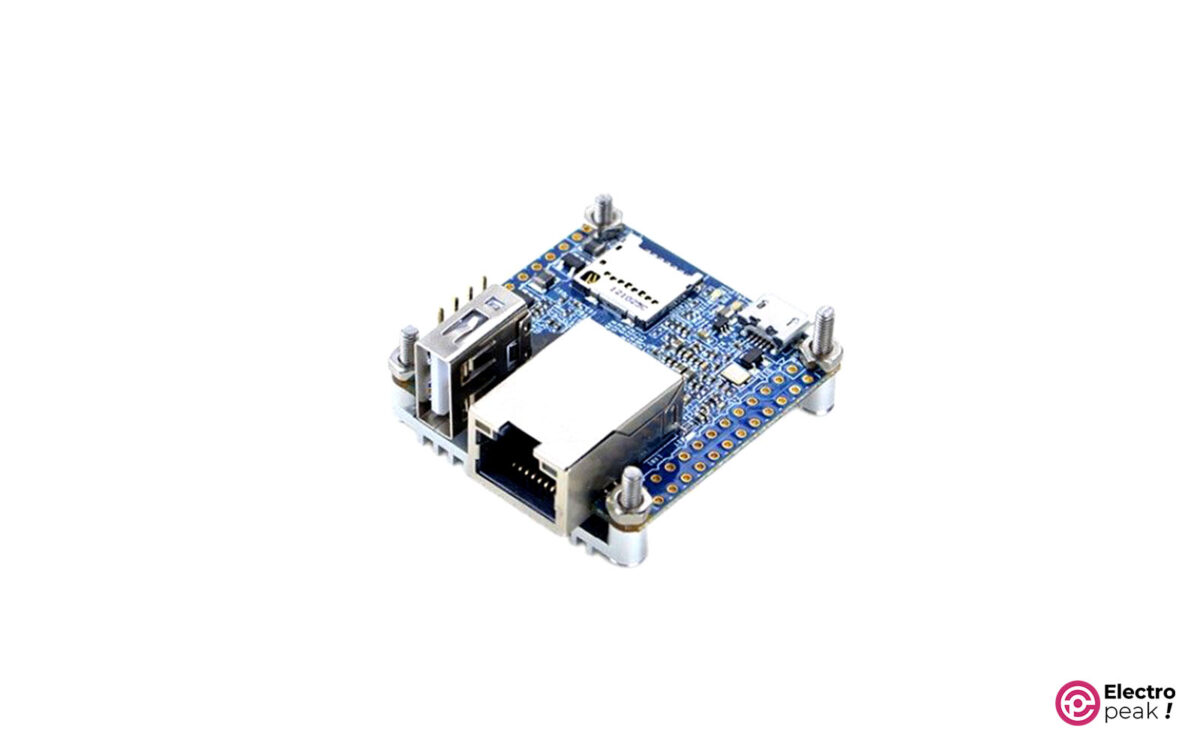
NanoPi NEO2 Features
The NanoPi NEO2 quad-core board is a new ARM-based board equipped with a powerful H5 processor, Wi-Fi network, 512MB memory, and GPIO pins. It’s an affordable product that uses a 64-bit quad-core H5 Allwinner processor, which follows the ARM Cortex-A53 architecture and has an internal Hexa-core Mali-450 graphics processor. The board shares the same form and port compatibility as the Neo board.
The NanoPi NEO2 quad-core board supports the operating system images of Ubuntu Core and Armbian. Its Gigabit Ethernet connections and USB ports make it suitable for applications requiring large and fast data transfer. With dimensions of 4cm×4cm, it provides a compact space to install and work with the operating system via an SD socket.
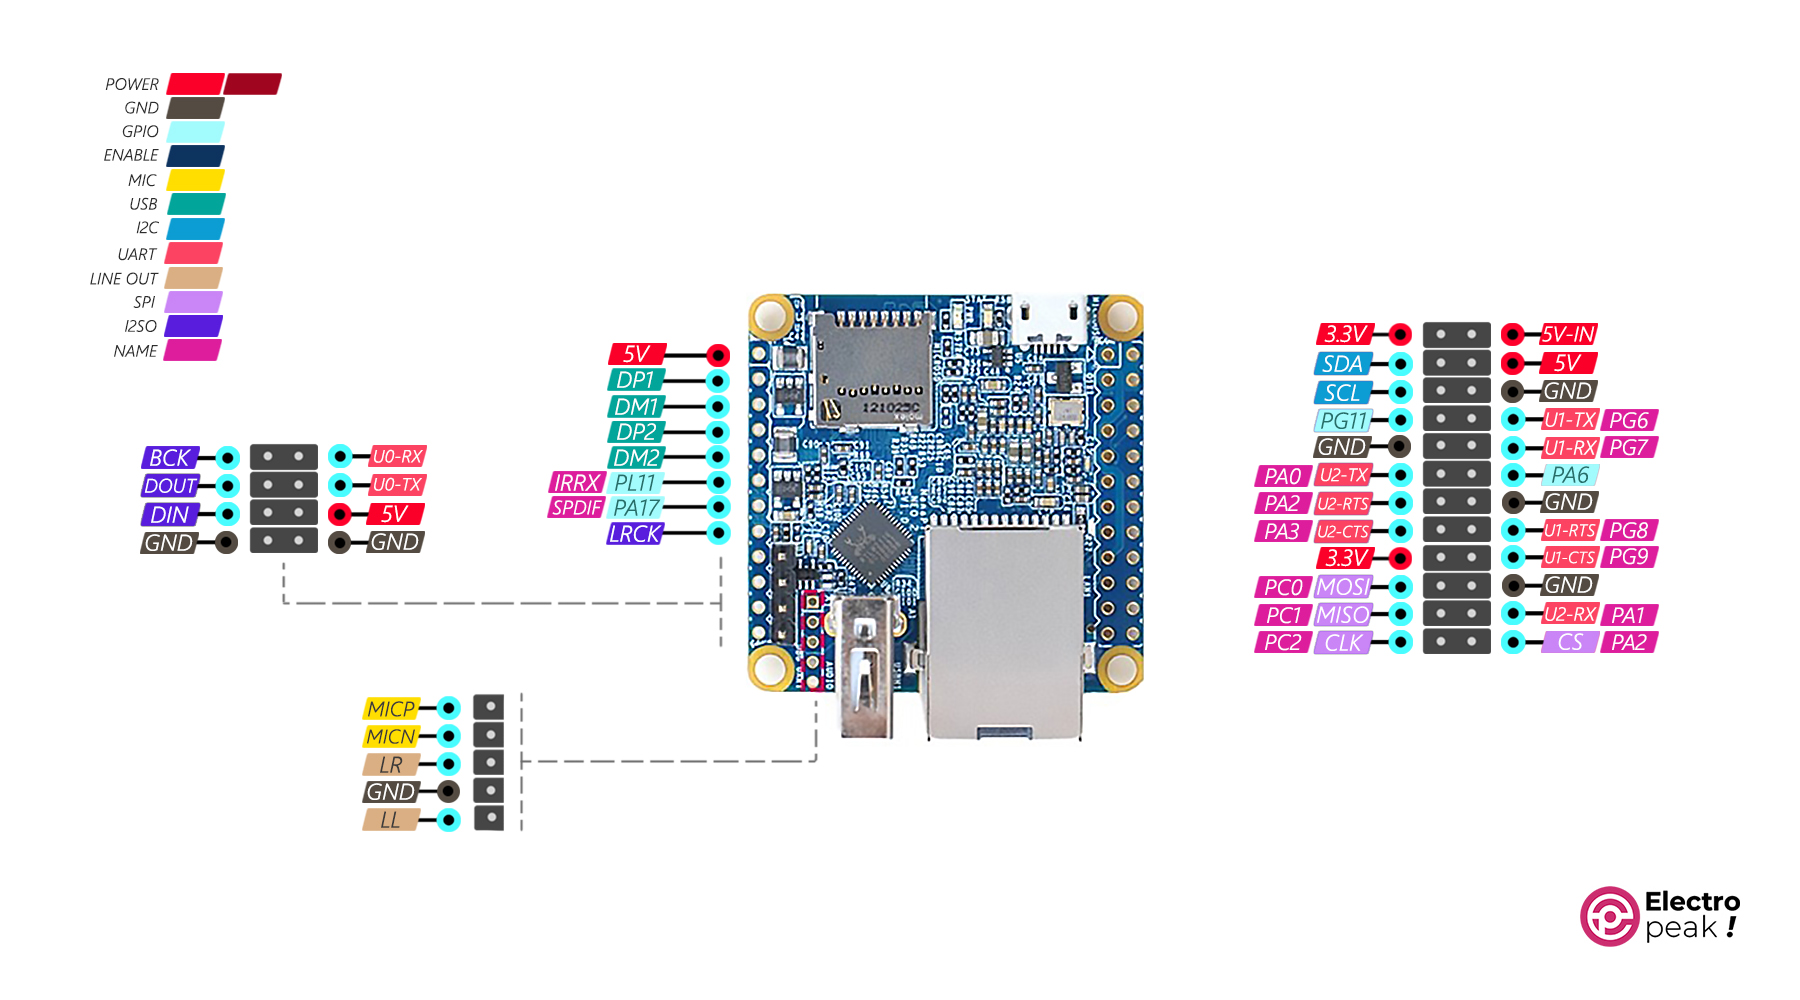
NanoPi NEO2 Board Pinout
Here are the pins of the NanoPi NEO2 board:
• 5V-3.3V: Output voltage (3.3 and 5V).
• GND: Ground.
• DIN (Data Input or Serial Data (SD)): Responsible for carrying the digital audio data stream and serving as an audio data input in the I2S communication.
• DOUT (Data Output or Serial Data Output (SDO)): Transmits the digital audio data stream toward the output.
• BCK (Bit Clock): Also known as BCLK (bit clock) or SCK (serial clock), it provides the clock signal for synchronizing data transfer between devices. This signal determines the timing of individual bits in the audio data stream. The BCK pin generates a clock pulse for each bit of the audio data.
• LRK (Left/Right Clock): Also known as LRCLK (left/right clock) or WS (word select), it carries information indicating whether the current audio data represents the left or right channel of a stereo audio signal. This pin acts as a synchronization signal and helps distinguish between the left and right audio channels.
• SPDIF: Connects to external audio devices, such as digital audio receivers or amplifiers that support SPDIF input.
• IRRX: Receives infrared (IR) signals.
• DM-DP: Two data lines used for transmitting and receiving digital signals in USB communication.
• SCK: Synchronization (SPI protocol.)
• CS: Sub-devices selection (SPI protocol.)
• MOSI: Data transmit line (SPI protocol.)
• MISO: Data receive line (SPI protocol.)
• RXD: USART Data receiver (connected to the TX pin of the opposing device.)
• TXD: USART Data transmitter (connected to the RX pin of the opposing device.)
• CTS (Clear to Send): An input signal used in UART communication, indicating the receiver’s readiness to receive data. When the CTS pin is asserted (HIGH), it signifies that the receiver is ready. The transmitter can check the CTS pin before sending data to ensure that the receiver is ready.
• RTS (Request to Send): An output signal used in UART communication, typically controlled by the transmitter. When the transmitter intends to send data, it asserts the RTS pin. The receiver monitors the RTS pin to know when to expect data.
• PA/PG/PL/PC: Abbreviation for “PORT A/G/L/” and used for general-purpose inputs and outputs (GPIO).
• SCL: Data synchronization (I2C protocol).
• SDA: Data information (I2C protocol).
• MICP: Used to connect an external microphone to the board (the positive line or microphone signal).
• MICN: Used to connect an external microphone to the board (the negative line or microphone signal).
• LOR: Audio output data for connecting to external devices such as speakers or amplifiers (the right channel output).
• LOL: Audio output data for connecting to external devices such as speakers or amplifiers (the left channel output).
The image below shows the pinout of the NanoPi NEO2 board.
For more information, go to this link.
Required Materials
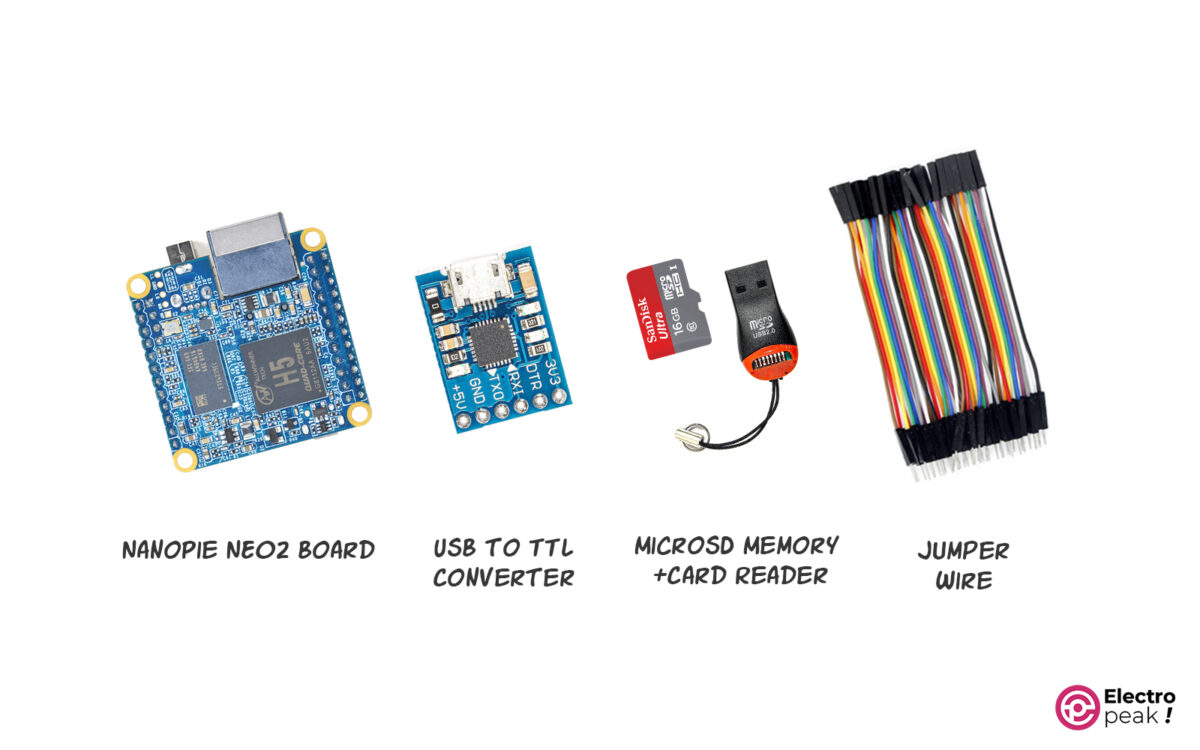
Hardware Components
Setting Up the NanoPi NEO2 Board with Armbian OS
Step 1: Installing Armbian on MicroSD
Connect a compatible MicroSD card (minimum 8GB) to your computer using a card reader. Download the Armbian operating system image file from this link.
Also, download and install the Win32DiskImager software from this link.
Connect the SD card to your computer using a RAM reader and then follow these steps:
1. Run Win32DiskImager on your computer.
2. Click on the folder icon next to “Image File.”
3. Go to the location where you saved the Armbian OS image file.
4. Select the image file and click on “Open.”
5. From the Device dropdown menu, select the correct drive for the MicroSD card.
6. Click on “Write.”
7. Confirm the warning by clicking “Yes” to erase all data on the selected drive.
8. Wait for the writing process to complete.
9. Once you see the confirmation message, the Armbian OS has been successfully installed on the MicroSD card. You can now use this MicroSD card to boot your board with Armbian.
10. Insert the MicroSD card into your board.
Step 2: Installing Armbian on NanoPi NEO2
Download and install the appropriate version of Putty software for your computer from this link. Now, follow the steps below:
1. Connect the USB-to-Serial converter to your computer.
2. Connect the RX pin of the converter to the TX pin of NanoPi NEO2, and vice versa.
3. Connect the GND pin of the USB-to-Serial converter to the GND pin of NanoPi NEO2.
4. Run the Putty software.
5. Open the Device Manager on your computer.
6. Look for “Ports (COM & LPT)” and open it.
7. Identify the USB-to-Serial port associated with the converter and make a note of its port number (COM1 or COM2). You can disconnect and reconnect the converter to ensure it.
8. Go to the “Serial” section in the Putty software.
9. Choose the COM port associated with the USB-to-Serial converter that you noted earlier.
10. Set the Speed to 115200.
11. Click on the “Open” button to start the serial connection.
12. Connect NanoPi NEO2 to your computer via USB (the LED on the board should turn on).
13. Now, you should see the Armbian boot process and console output in the Putty terminal window.
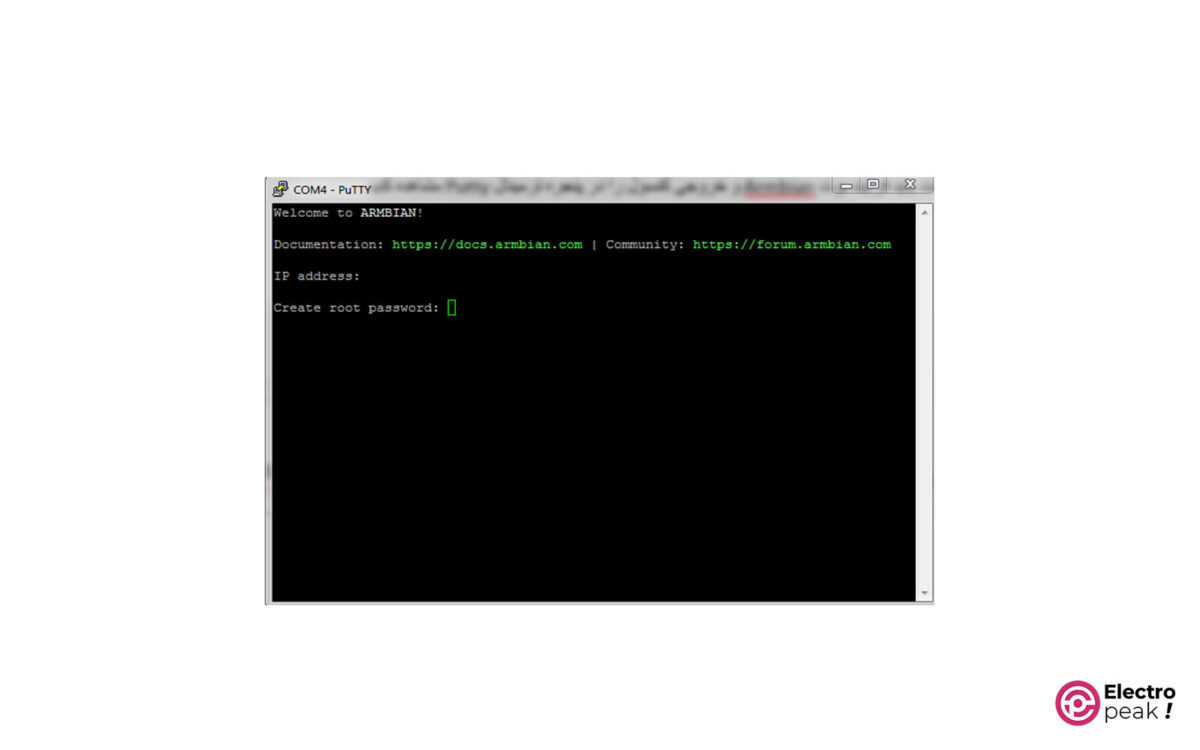
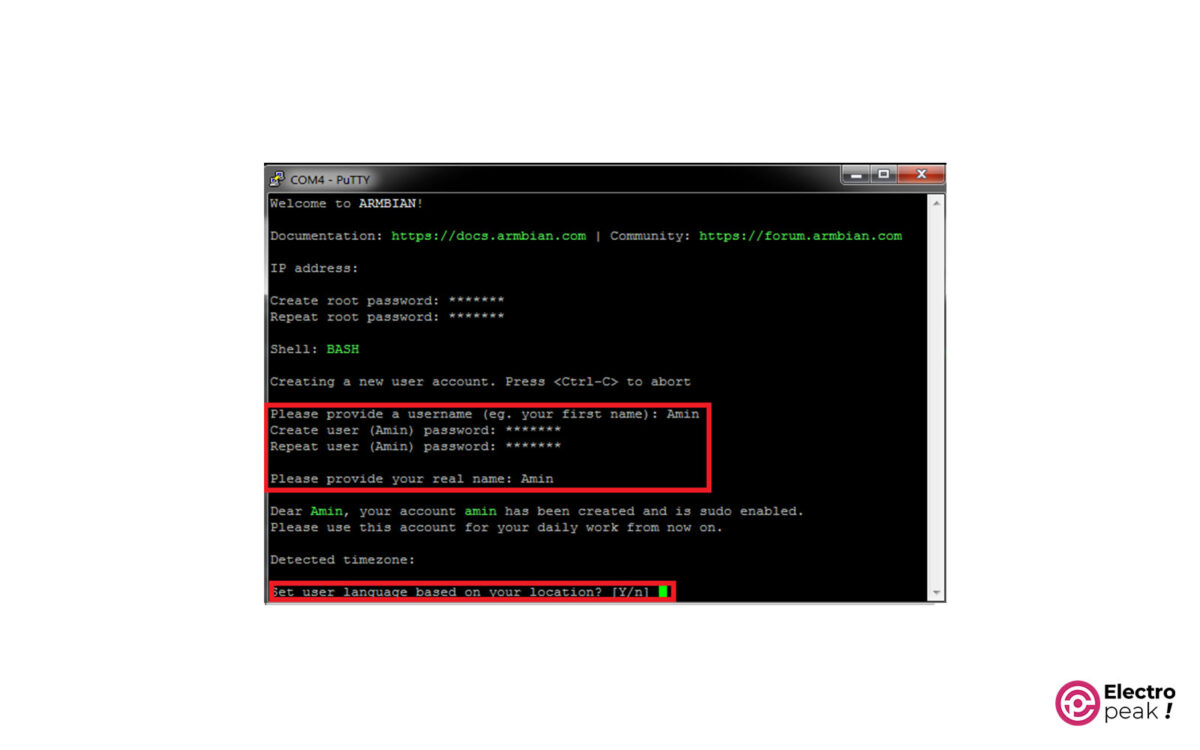
When Armbian boots up and you see the following image, choose a password for the root user.
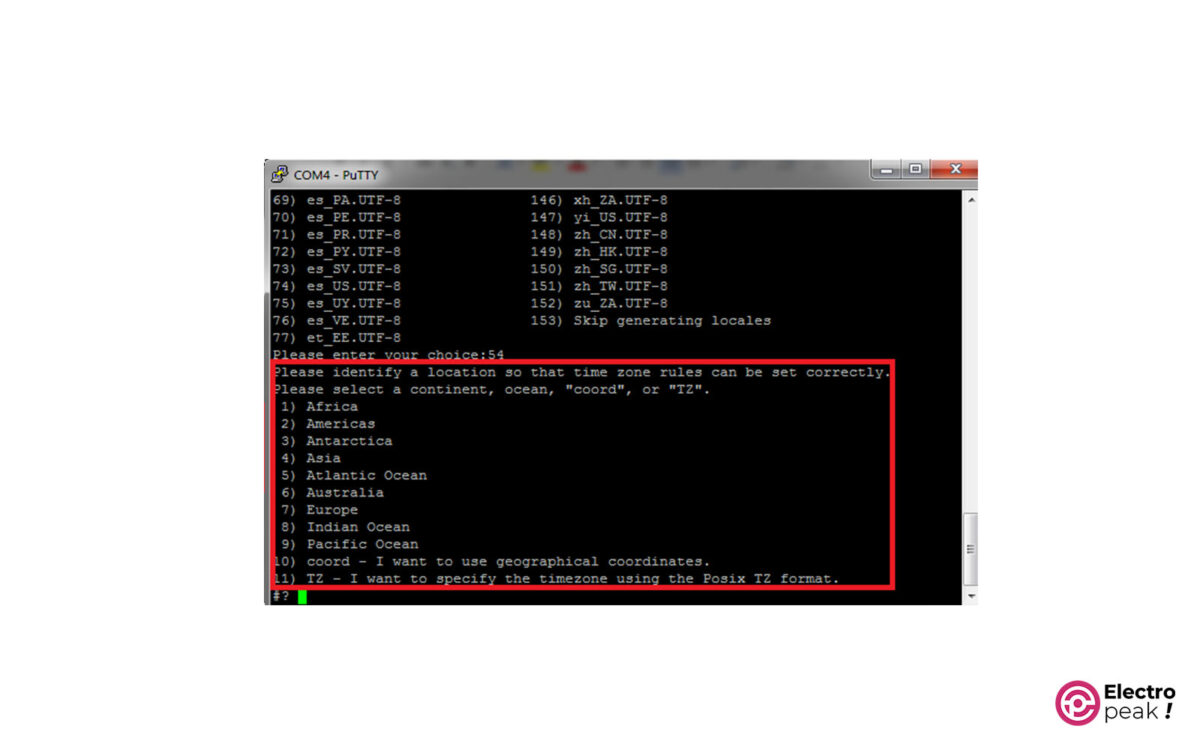
Then, select a username and password for it. After that, enter ‘y’ to select the desired language for the program and enter the number 54 to choose the English language.
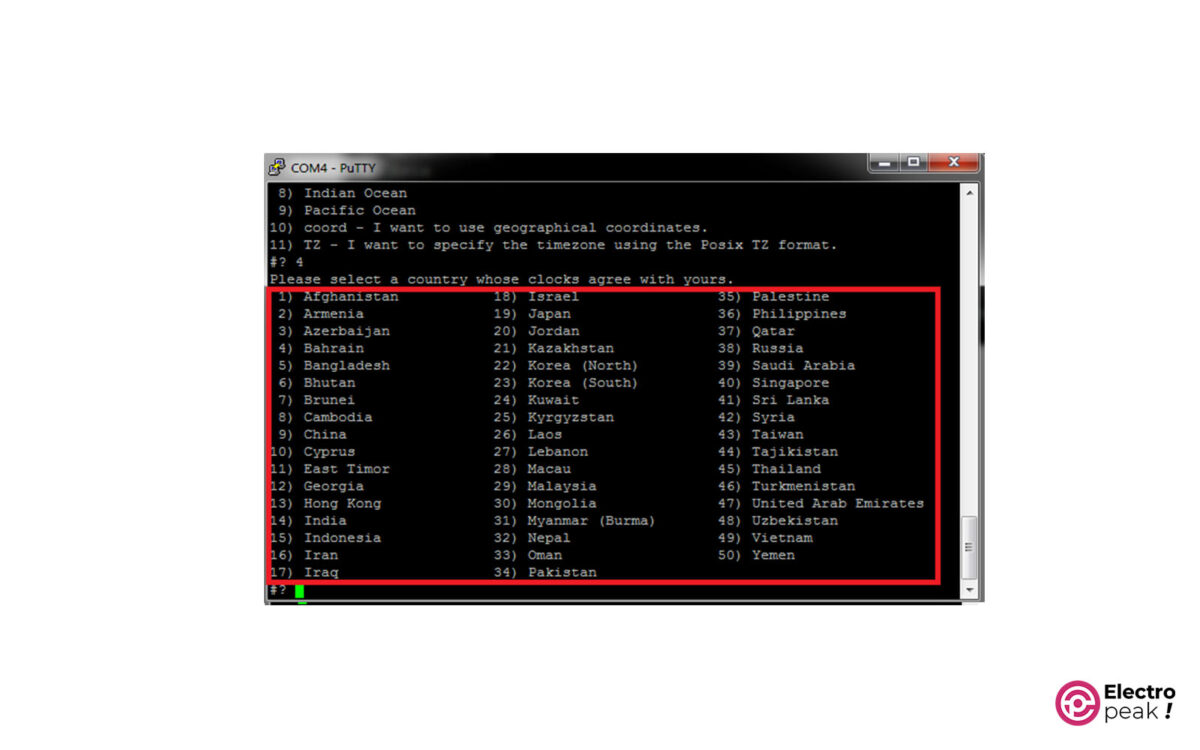
Next, select your continent and country.
In the final step, if the information is correct, enter 1 for confirmation.

Finally, it’s recommended to connect the NanoPi NEO2 board to the internet using a cable or Wi-Fi and execute the following two commands to update the packages:
apt update
apt upgrade
