Many Arduino users have written and developed code addons for Arduino. With These addons, called “Library”, complex tasks can be done by writing a few lines of code. One of the biggest advantages of Arduino boards over other processor boards is the availability these libraries. With these libraries, you will be able to interface various parts using Arduino boards in a very short time.
What’s a Library?
A library is a collection of code that is pre-written and stored in a file in order to perform a specific task. One of the main applications of libraries is to simplify interfacing and using sensors, modules and other electronic devices. Using Arduino Libraries is as easy as importing it at the beginning of your project file with single line of code; But before that you have to install and add it to the Arduino IDE. There are three methods to do this which we will cover in the rest of this article.
Method 1: Installing Library Using Library Manager
Go to the Sketch menu and then click on Manage Library from the Include Library section.
Then search for the name of the desired part. For example, I am going to install the RC522 module library (RFID read and write module).
After selecting the desired library, click on the install button. Hooray! Now you have the latest version of this library on your system.
Note
If you want to install an older version of the library, first select the version you want and then click Install.
Once the installation is complete, the desired library will be added to the list of libraries.
Method 2: Installing the library using the ZIP File
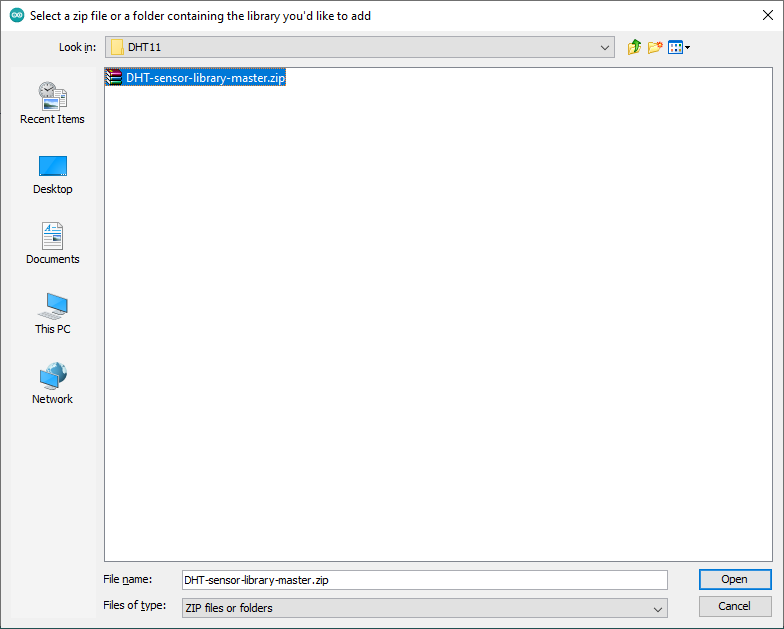
If you have a zip file of a library with a .ZIP extension, navigate to Sketch > Include Library > Add ZIP Library.
Then select ZIP file of the library and click Open.
To make sure the library is installed properly, check the list of your libraries.
Method 3: Installing the library manually
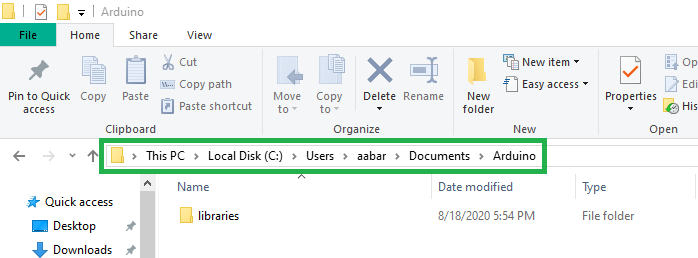
First, from the File menu, select Preferences and find the storage location of the libraries from the Sketchbook location box.
Now open this location.
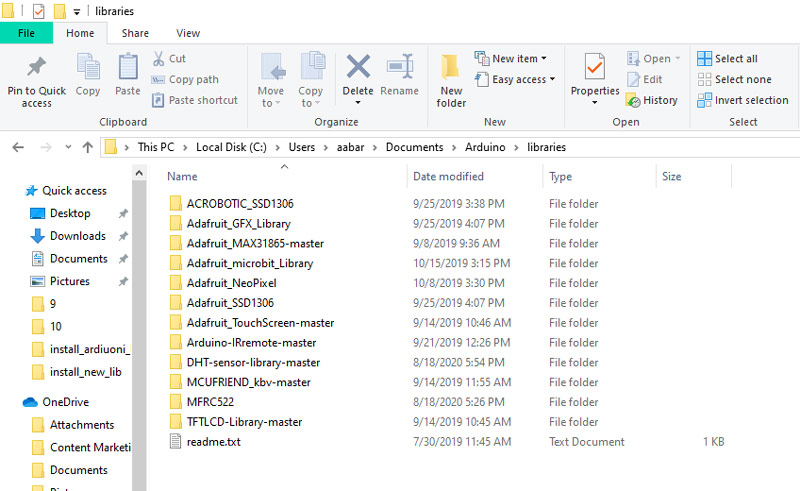
Copy the desired library folder to the libraries folder. Note that the library file should not be compressed.
To make sure the library is installed properly, check the list of libraries in Arduino IDE.
How to Install a New Board and Processor in Arduino IDE
Although most of the required boards are installed by default on the Arduino IDE software, however, sometimes we need to add other boards and processors to the software. There are 2 ways to this:
Method 1: Only to Install Arduino and Genuino Boards
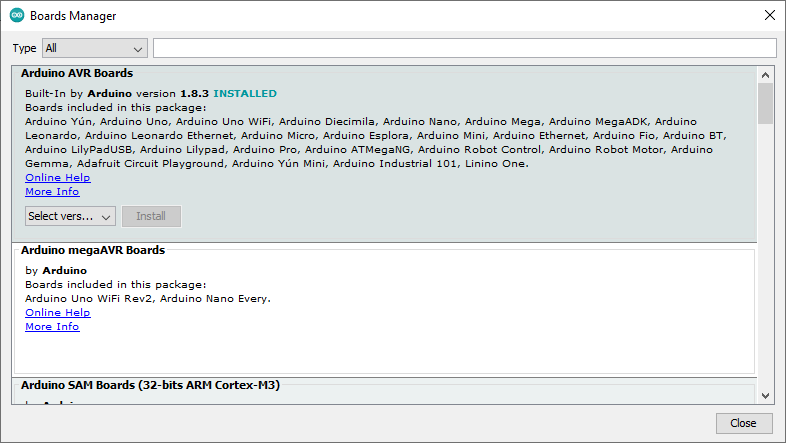
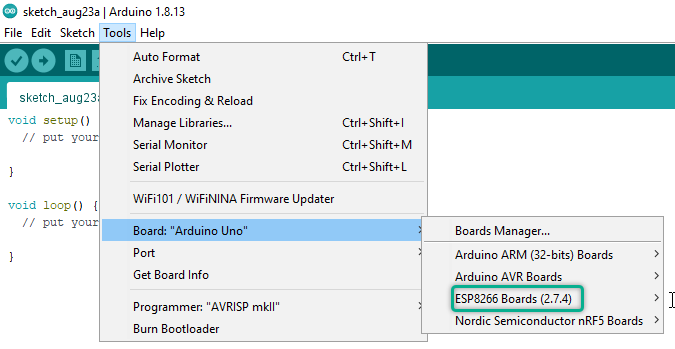
Currently this method is used only for Arduino and Genuino family boards. To install these boards, just go to the Boards Manager section from the Board menu.
Then install it by searching for the desired processor.
After that, the board will be added to the list of boards.
Method 2: Adding a link in JSON format
To install boards made by companies other than Arduino (such as esp8266 boards), you must use the JSON link.
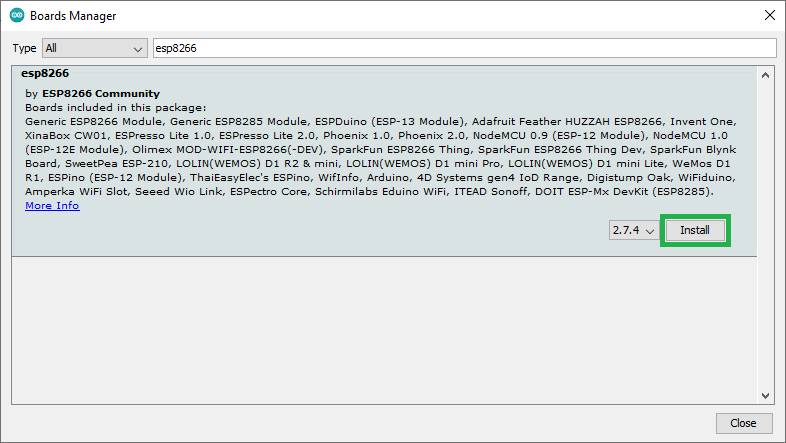
Step 1: Find the Json link for the board by searching the internet. For example, I’m going to install ESP8266 boards.
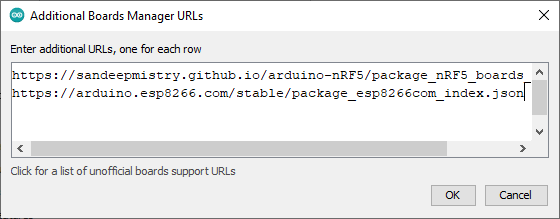
Step 2: Go to the Preferences section from the File menu in the Arduino IDE software. In the Additional Board Manager URLs section, you must enter your board link that you found in the first step. Click on the icon shown in the figure below to open the links window.
Now add your link to the bottom of the list and then click OK.
Step 3: Go to the Boards Manager section from the Board menu and search for the desired board name.
After finding the boards, you can install it. If you done installation steps properly, you will have the desired board in your list of installed boards.
![install library using library manager [1]](https://electropeak.com/learn/wp-content/uploads/2020/09/Arduino-Lib-Manage-lib1.png)
![install library using library manager [2]](https://electropeak.com/learn/wp-content/uploads/2020/09/Arduino-Lib-Manage-lib2.png)
![install library using library manager [3]](https://electropeak.com/learn/wp-content/uploads/2020/09/Arduino-Lib-Manage-lib3.png)
![install Arduino library using zip file [1]](https://electropeak.com/learn/wp-content/uploads/2020/09/Arduino-Lib-Zip-lib1.png)
![install Arduino library using zip file [2]](https://electropeak.com/learn/wp-content/uploads/2020/09/Arduino-Lib-Zip-lib3-1.jpg)
![install Arduino library using zip file [3]](https://electropeak.com/learn/wp-content/uploads/2020/09/Arduino-Lib-Manually-lib1.jpg)


Comment (1)
[…] Note If you need more help with installing an Arduino library, you can visit this link. […]