
Introduction
Have you ever wondered about wireless serial communication? It’s one of the most popular methods for people working with microcontrollers, especially the Arduino family. With this type of communication, you can send and receive all sorts of text data and even debug your code.
But sometimes, dealing with all those wires can be difficult, especially when one side of the connection is hard to reach.
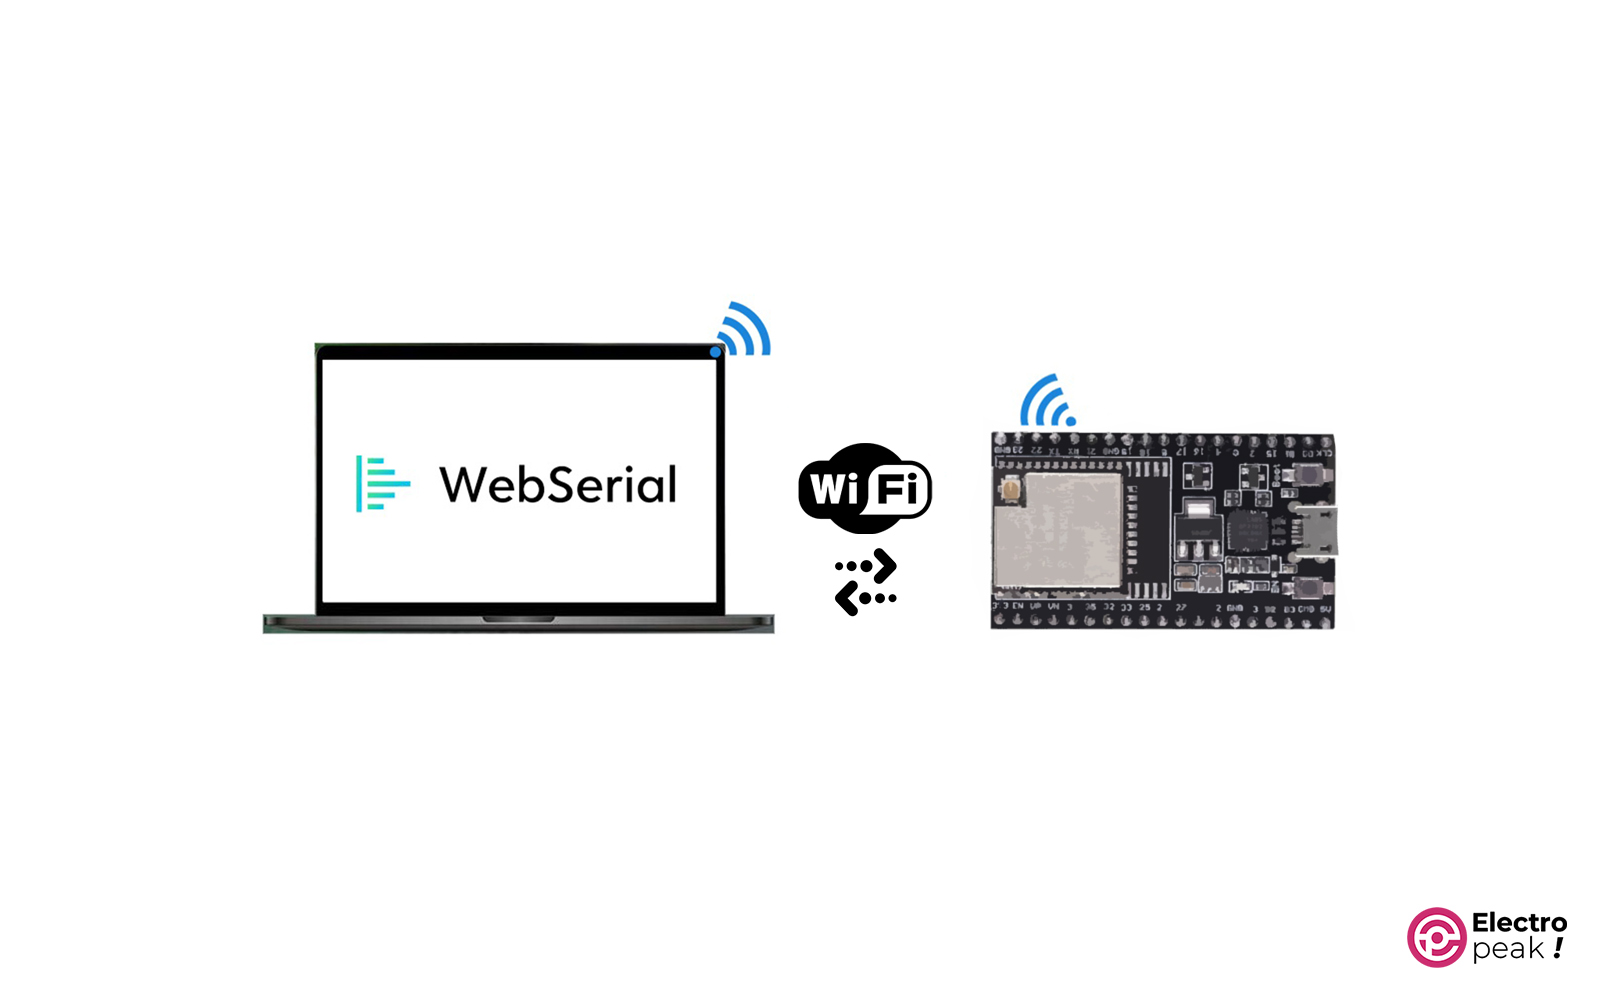
So, it would be awesome if you could just make this connection wireless. In this tutorial, we’ll show you step-by-step how to do just that using WebSerial.
ESP32 WebSerial is a game-changer in communication, bringing simplicity, efficiency, and flexibility to the world of connected devices. So, whether you’re a developer, a student, or a business owner, ESP32 WebSerial opens up a whole new realm of possibilities for your projects.
What You Will Learn
- How to work with the Wi-Fi network of ESP32 boards
- How to establish wireless serial communication using WebSerial
- How to send and receive text data wirelessly
ESP32 WebSerial: How it works
ESP32 WebSerial allows your ESP32 to communicate with other devices over the internet using a pseudo-serial communication protocol, so you don’t have to deal with complex network configurations.
To establish a wireless pseudo-serial communication with ESP32, you can use the WebSerial API of your web browser.
ESP32 WebSerial Features
- Based on WebSockets
- Real-time logging capability
ESP32 WebSerial: Benefits
ESP32 WebSerial comes with several benefits. First, its built-in web-based serial interface saves you from dealing with those complex network settings. It also simplifies the process of connecting to other devices, so setting up and managing the system will be a piece of cake.
Another advantage of ESP32 WebSerial is that it’s energy-efficient, which is ideal for battery-powered IoT applications. So, you can use it for things like wearable devices, smart sensors, and remote monitoring systems.
Required Materials
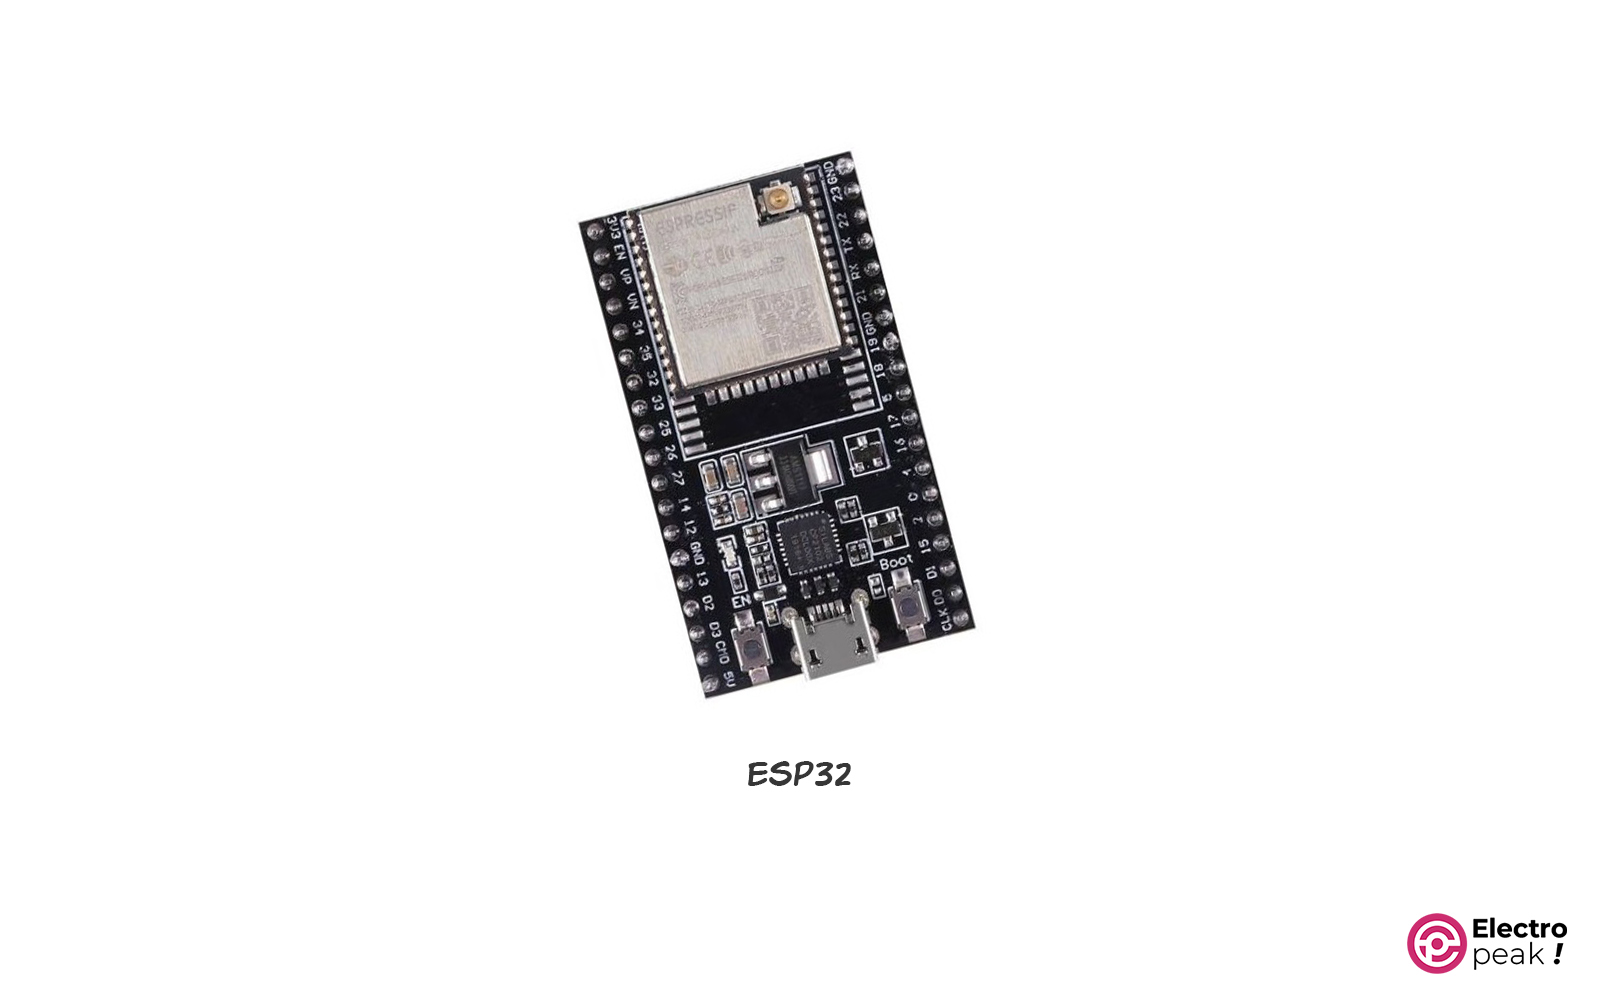
Hardware Components
*: You can also use any other ESP32 board.
Software
Establishing a Pseudo-Serial Communication with ESP32 WebSerial
Now, let’s prepare the ESP32 WebSerial and get it running.
Code
Follow the steps below:
1. Download the WebSerial, ESPAsyncWebServer, and AsyncTCP libraries.
2. Install the downloaded library files separately by going to Sketch -> Include Library -> Add. ZIP Library.
3. Open the ESP32 WebSerial example file from the following path:
File -> Examples -> WebServer -> Demo.ino
#include <Arduino.h>
#include <WiFi.h>
#include <AsyncTCP.h>
#include <ESPAsyncWebServer.h>
#include <WebSerial.h>

#define LED 4

AsyncWebServer server(80);

const char* ssid = "Caferobot-2G"; // Your WiFi SSID
const char* password = "caferobot.ir"; // Your WiFi Password

void recvMsg(uint8_t *data, size_t len){
 WebSerial.println("Received Data...");
 String d = "";
 for(int i=0; i < len; i++){
 d += char(data[i]);
 }
 WebSerial.println(d);
 if (d == "ON"){
 digitalWrite(LED, HIGH);
 }
 if (d=="OFF"){
 digitalWrite(LED, LOW);
 }
}

void setup() {
 Serial.begin(115200);
 pinMode(LED, OUTPUT);
 WiFi.mode(WIFI_STA);
 WiFi.begin(ssid, password);
 if (WiFi.waitForConnectResult() != WL_CONNECTED) {
 Serial.printf("WiFi Failed!\n");
 return;
 }
 Serial.print("IP Address: ");
 Serial.println(WiFi.localIP());
 // WebSerial is accessible at "<IP Address>/webserial" in browser
 WebSerial.begin(&server);
 WebSerial.msgCallback(recvMsg);
 server.begin();
}

void loop() {
 WebSerial.println("Hello!");
 delay(2000);
}
Code Cracking
Now, let’s break down the code:
1. Including the required libraries
#include <Arduino.h>
#include <WiFi.h>
#include <AsyncTCP.h>
#include <ESPAsyncWebServer.h>
#include <WebSerial.h>
2. Selecting the pin connected to the LED output
#define LED 4
3. Selecting the desired Wi-Fi network
const char* ssid = "REPLACE_WITH_YOUR_SSID";          // Your WiFi SSID
const char* password = "REPLACE_WITH_YOUR_PASSWORD";  // Your WiFi Password
4. Defining the recvMsg() function to receive and temporarily store the word we get:
In this function, the input characters from the WebSerial port are received all at once and stored in the variable ‘d’ after being converted to the char type.
If the stored word is equal to “FLASH,” the LED connected to GPIO4 will start flashing.
void recvMsg(uint8_t *data, size_t len){
 WebSerial.println("Received Data...");
 String d = "";
 for(int i=0; i < len; i++){
 d += char(data[i]);
 }
 WebSerial.println(d);
 if (d == "FLASH"){
 digitalWrite(LED, HIGH);
 delay(200);
 digitalWrite(LED, LOW);
 }
}
5. Setup() function
- Activating the serial communication
Serial.begin(115200);
- Defining the pin 4 as an output (for the LED)
pinMode(LED, OUTPUT);
- Setting the WiFi mode to Station and connecting to the specified WiFi network in the code
  WiFi.mode(WIFI_STA);
  WiFi.begin(ssid, password);
- Printing an error message in case the connection fails
  if (WiFi.waitForConnectResult() != WL_CONNECTED) {
    Serial.printf("WiFi Failed!\n");
    return;
  }
- Printing the IP address of the created web server in the serial monitor
Serial.print("IP Address: ");
  Serial.println(WiFi.localIP());
- Enabling WebSerial on the web server and defining the recvMsg() function as the data receiver from WebSerial
  WebSerial.begin(&server);
  WebSerial.msgCallback(recvMsg);
- Activating the server
server.begin();
6. Loop() function:
In this function, we print “Hello!” on the WebSerial port every 2 seconds.
void loop() {
  WebSerial.println("Hello!");
  delay(2000);
}
ESP32 Programming
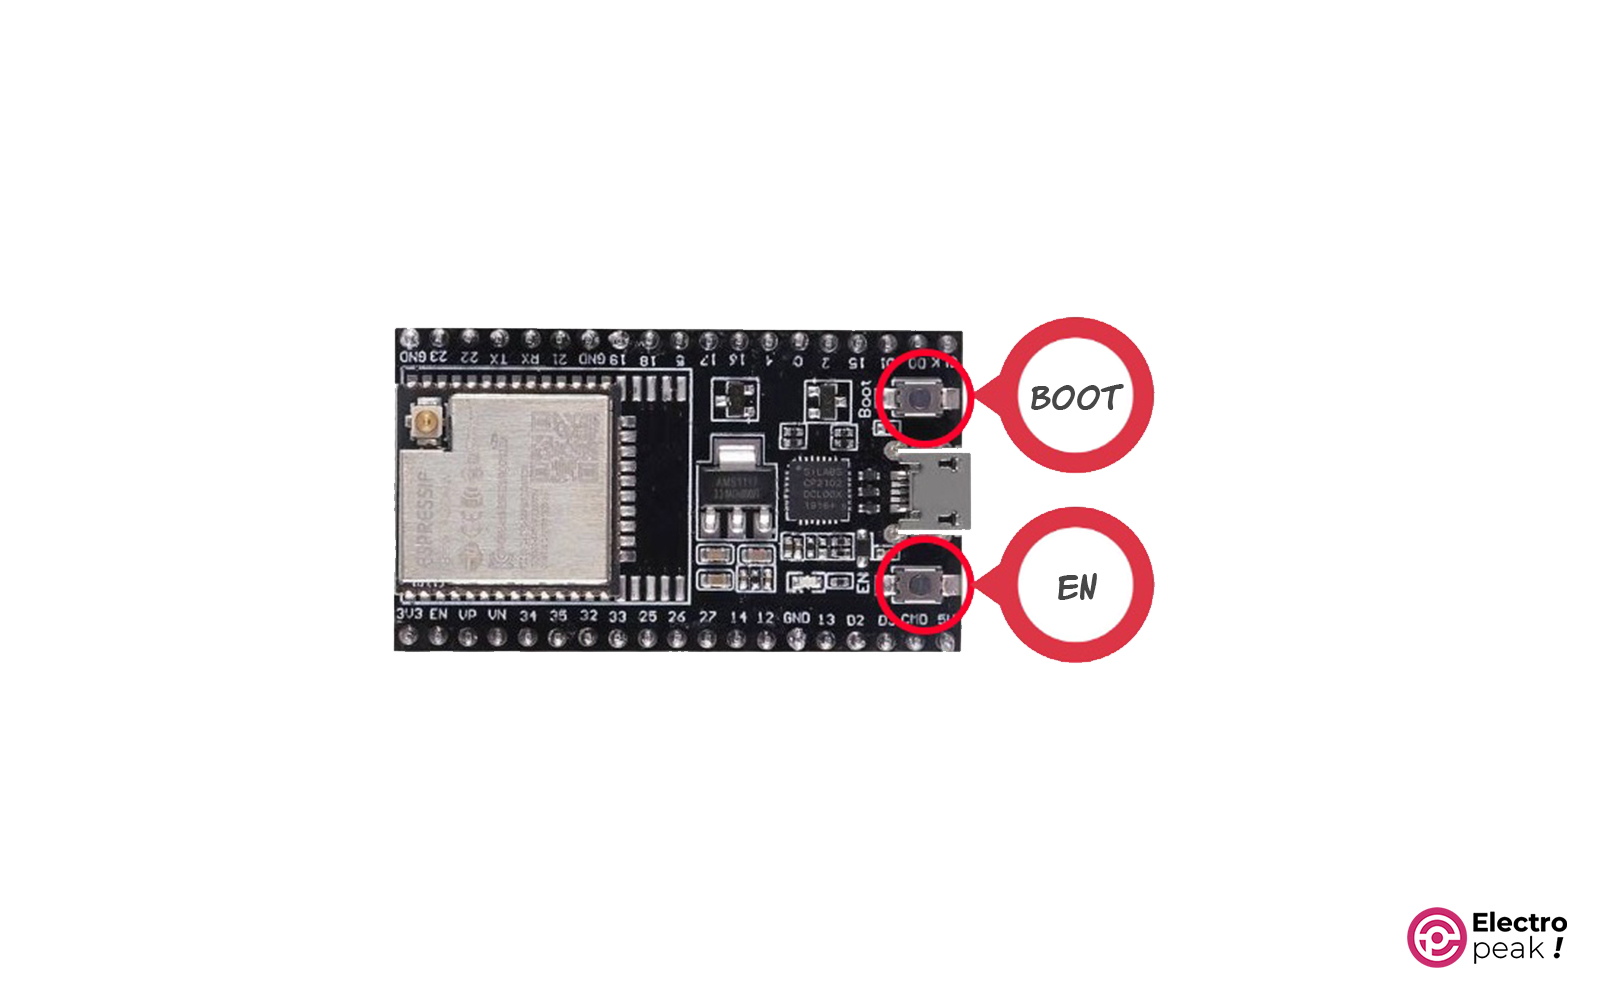
After making the necessary changes to the code, connect the ESP32 board to your computer and program it.
Then, press the “BOOT” and “EN” buttons as shown in the image below.
In the Arduino IDE software, select the port that matches your ESP32 board found at “Tools -> Port.” After that, open up the Serial Monitor window by clicking on “Tools -> Serial Monitor.” You will find the following output there:
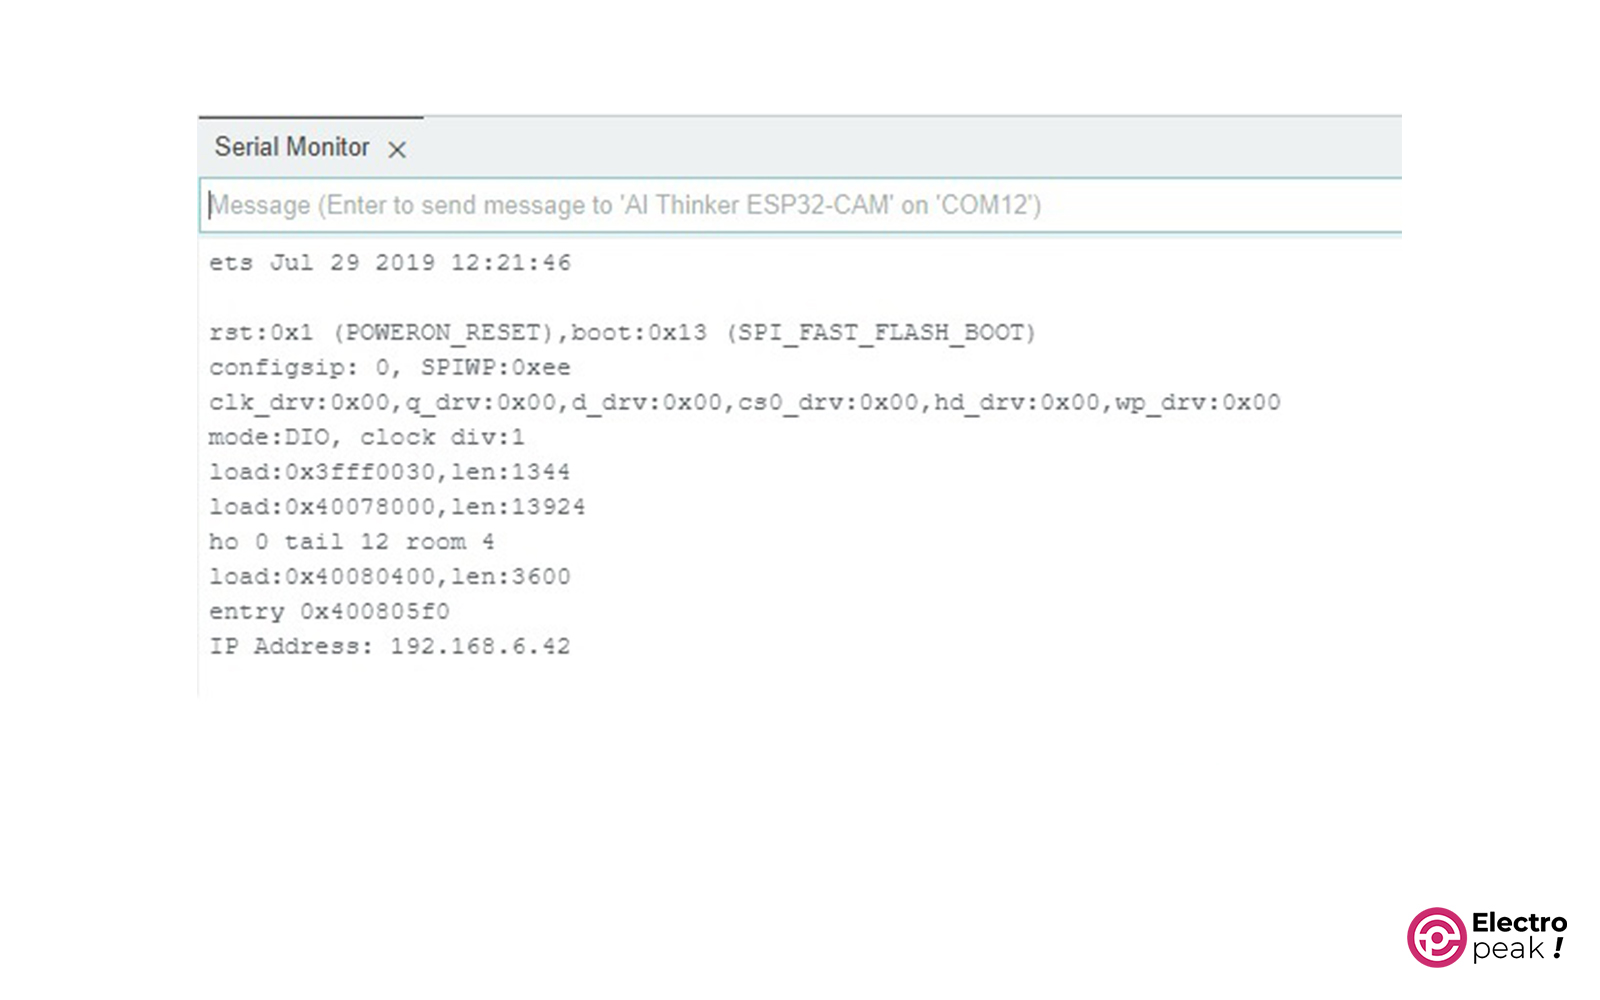
In the last line of the printed output in the Serial Monitor, there is the web server’s IP address. Type it in the following format in the browser to access the WebSerial page:
“Your IP Address”/WebSerial
You will see the following page in your browser.
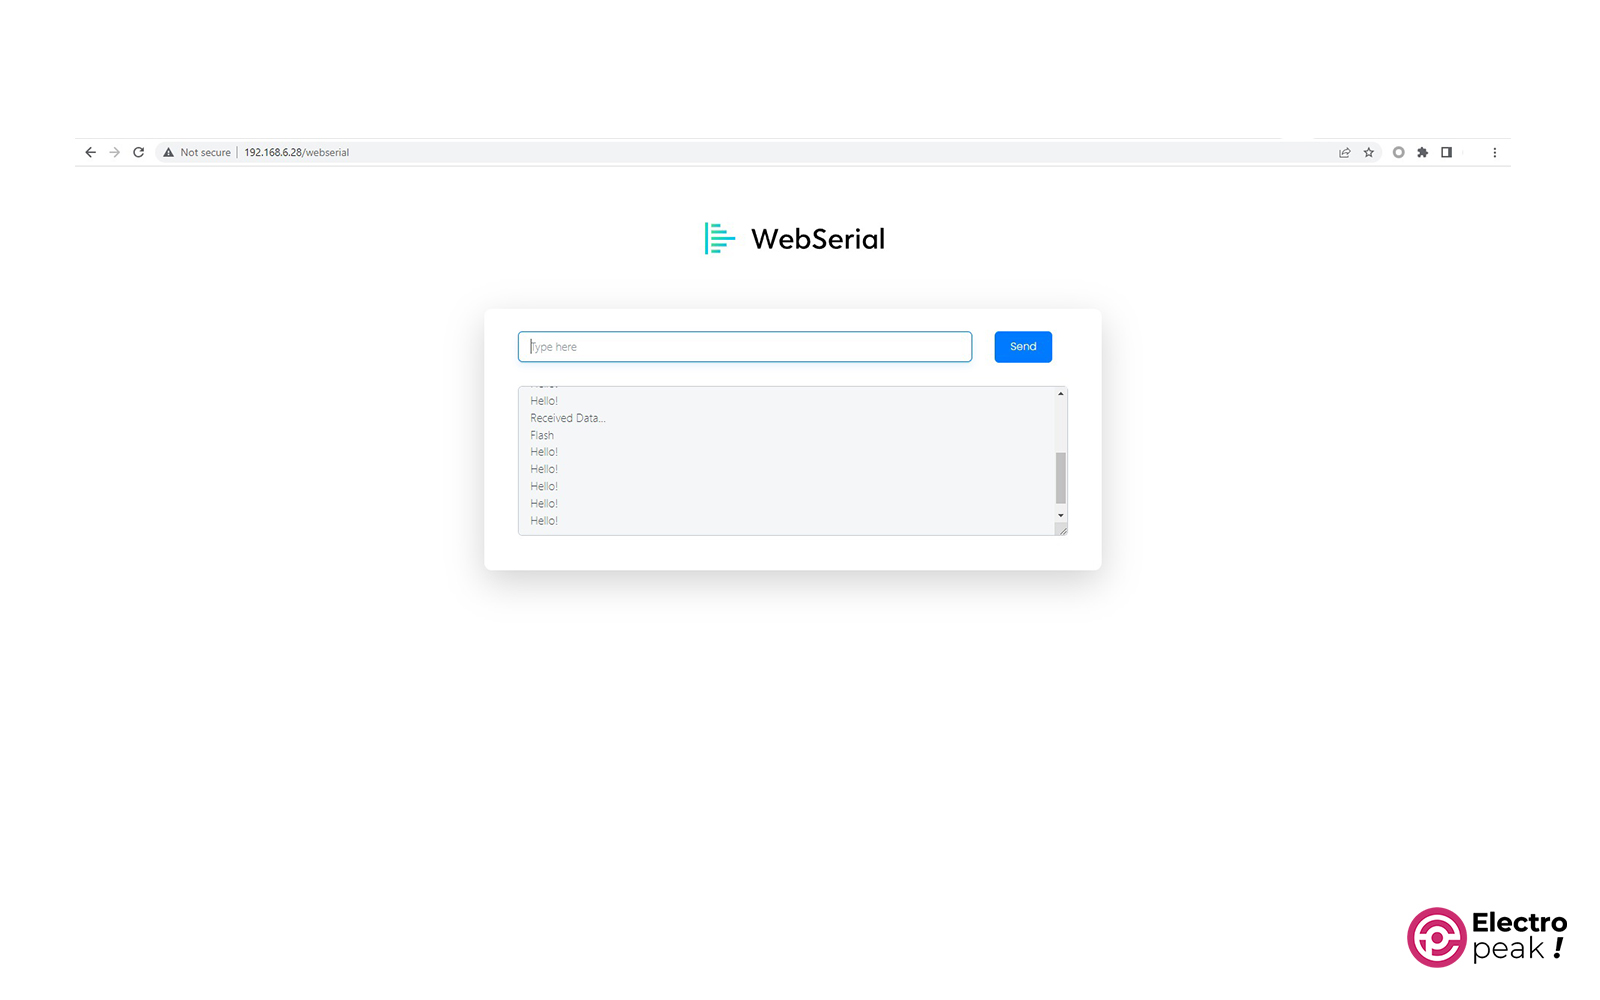
By typing the word “FLASH,” you can turn on the LED connected to pin 4 for 200 milliseconds and then turn it off.
What’s Next?
In this tutorial, you learned how to turn on the Wi-Fi connection of the ESP32 board, connect it to nearby networks, and exchange data wirelessly using serial communication.
The ESP32 WebSerial has many potential uses, from smart homes and industrial automation to healthcare and agriculture. And, as technology keeps moving forward, we’ll see even better applications in the future.
