
Introduction
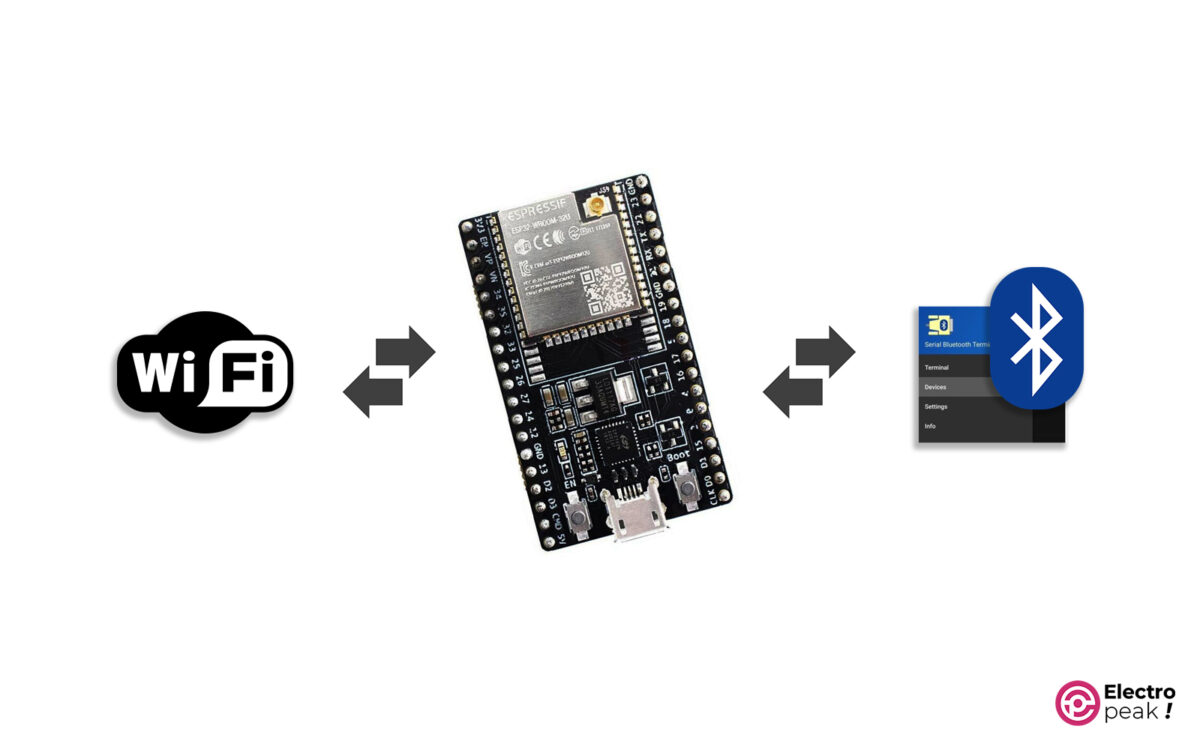
If you want to explore the endless features of ESP32 microcontrollers, you’ve come to the right place. All ESP32-based boards come with built-in WiFi and Bluetooth. WiFi allows the ESP32 to connect to the Internet and communicate with other devices, while Bluetooth facilitates wireless communication between the ESP32 and other Bluetooth-enabled devices.
In this step-by-step tutorial, we will learn how to configure WiFi on ESP32 using Bluetooth. Whether you’re a beginner or experienced, after reading this tutorial, you can effortlessly connect your ESP32 to the Internet and enjoy its full potential.
What You Will Learn
- Data transmission using the built-in Bluetooth of ESP32.
- Using Bluetooth data for WiFi configuration.
Benefits of Configuring ESP32 WiFi Using Bluetooth
It has several benefits. First, there’s no need to physically connect the ESP32 to a computer for initial WiFi configuration. (This comes in handy, especially when ESP32 is embedded in a device or there’s no way to reach it.) In addition, you don’t have to reprogram your ESP32 when modifying the WiFi settings.
This flexibility is so important, especially in environments where the WiFi network undergoes significant changes.
Required Materials
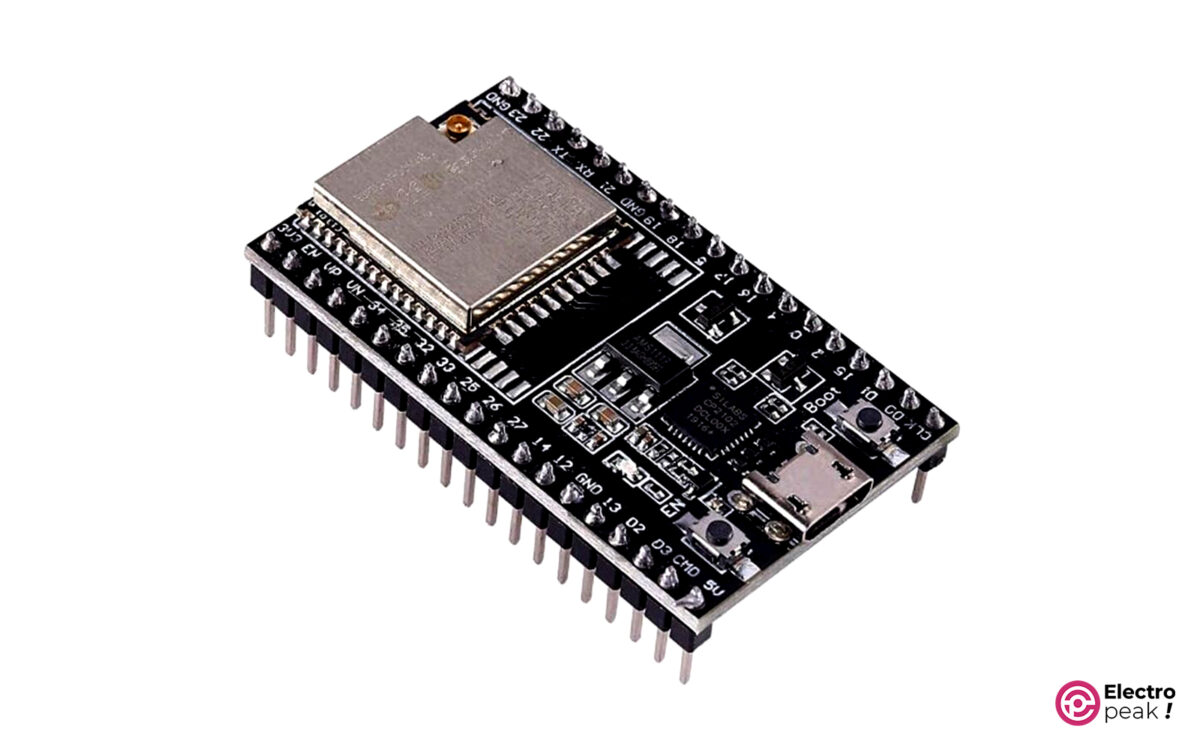
Hardware Components
Software Apps
Controlling ESP32 WiFi with Bluetooth
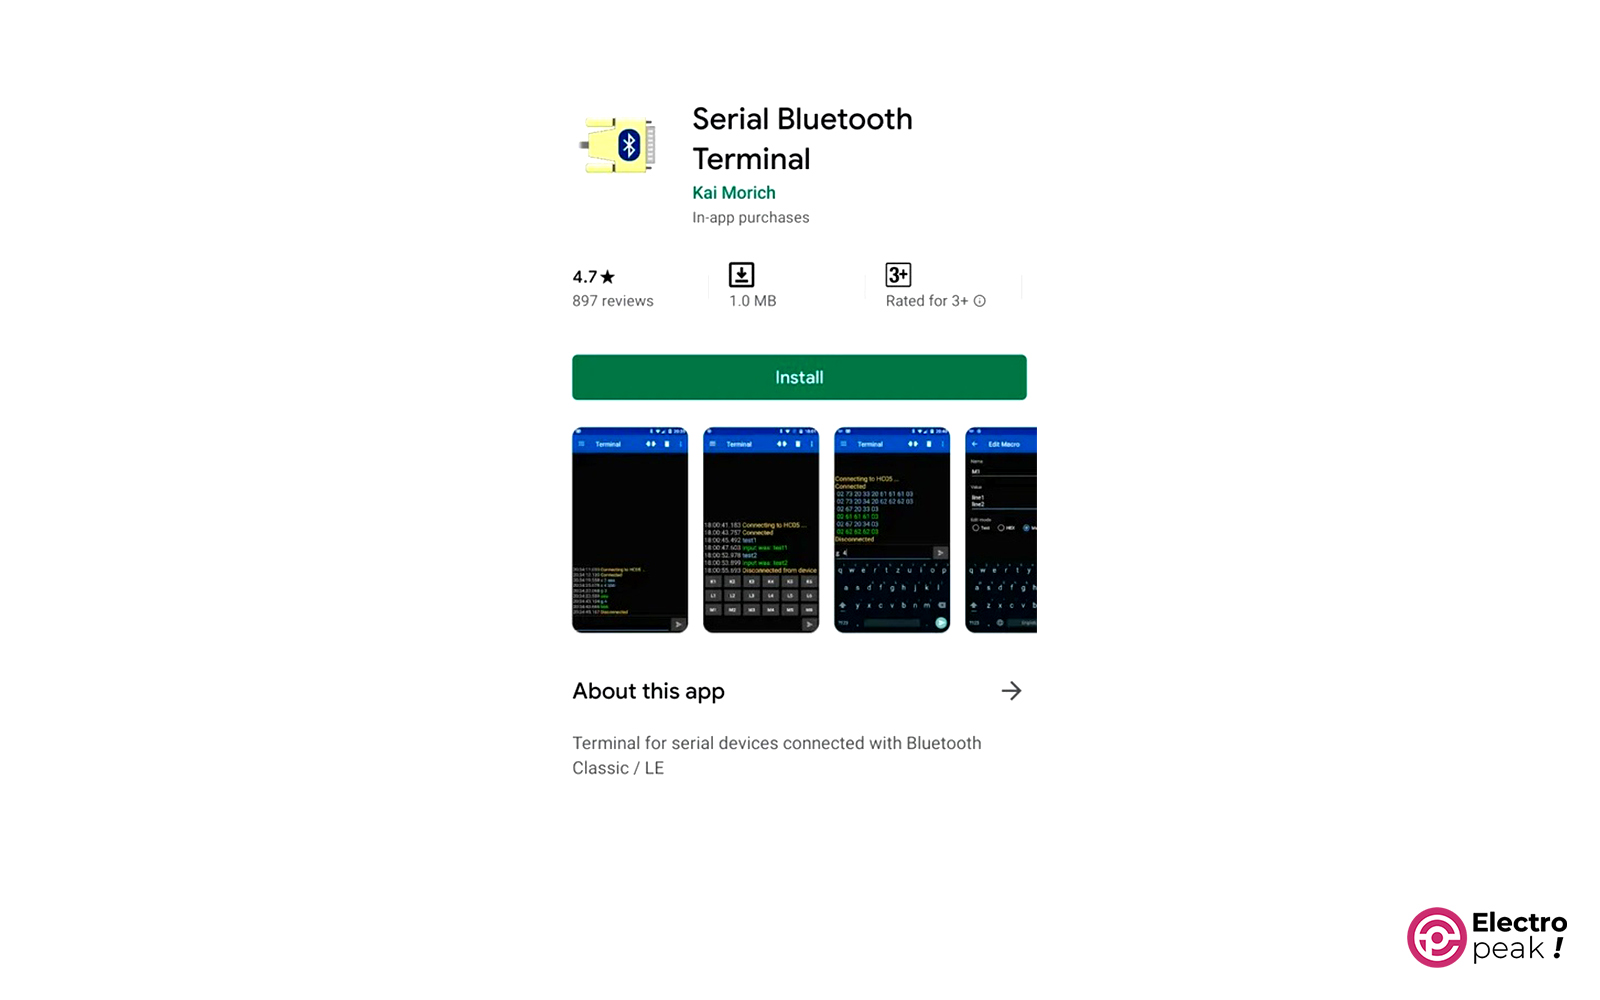
Step 1: Installing the “Serial Bluetooth Terminal” App
First you need to install Serial Bluetooth Terminal from Google Play
Step 2: Uploading Code to ESP32
First, install the ESP32 Add-on library in Arduino IDE. Then, upload the code below to your ESP32.
#include "BluetoothSerial.h"
#include <WiFi.h>

//#define USE_PIN // Uncomment this to use PIN during pairing. The pin is specified on the line below
const char *pin = "1218"; // Change this to more secure PIN.

String device_name = "ESP32-BT-WIFI-CONTROLLER";
BluetoothSerial SerialBT;

int i = 0;
String incoming_char;
String SSIDIN;
String PASSIN;
String header;
String ssids_array[50];
String network_string;
String connected_string;

int startchar;
int endchar;

long start_wifi_millis;
long wifi_timeout = 10000;

void setup() {
 //pinMode(LED_BUILTIN, OUTPUT);
 Serial.begin(115200);
 // Initialize the output variables as outputs

 SerialBT.begin(device_name); //Bluetooth device name
 Serial.printf("Device name: \"%s\"\n", device_name.c_str());
 //Serial.printf("The device with name \"%s\" and MAC address %s is started.\nNow you can pair it with Bluetooth!\n", device_name.c_str(), SerialBT.getMacString()); // Use this after the MAC method is implemented
 /*#ifdef USE_PIN
 SerialBT.setPin(pin);
 Serial.println("Using PIN");
 #endif*/
 while (!(SerialBT.available()));
 SerialBT.println("Scanning Wi-Fi networks");
 Serial.println("Scanning Wi-Fi networks");


 scan_wifi_networks();
A:
 SerialBT.println("Please enter the name of your WiFi.");
 while (!(SerialBT.available()));
 while (SerialBT.available()) {
 char c = SerialBT.read();
 incoming_char += c;
 Serial.write(c);
 }
 if (incoming_char.indexOf("ssid:") >= 0)
 {
 startchar = incoming_char.indexOf('<') + 1;
 endchar = incoming_char.indexOf('>', startchar);
 for (int i = startchar; i < endchar; i++)
 SSIDIN += incoming_char[i];
 Serial.println(SSIDIN);
 }
 else
 {
 SerialBT.println("Error:Enter SSID with following format -> ssid:...");
 goto A;
 }
 incoming_char = "";
 SerialBT.println("Please enter the password of your WiFi.");
 while (!(SerialBT.available()));
 while (SerialBT.available()) {
 char c = SerialBT.read();
 incoming_char += c;
 Serial.write(c);
 }
 if (incoming_char.indexOf("pass:") >= 0)
 {
 int startchar2 = incoming_char.indexOf('<') + 1;
 int endchar2 = incoming_char.indexOf('>', startchar2);
 for (int i = startchar2; i < endchar2; i++)
 PASSIN += incoming_char[i];
 Serial.println(PASSIN);
 }
 else
 {
 SerialBT.println("Error:Enter Pass with following format -> pass:...");
 goto A;
 }
 delay(500);

 SerialBT.println("Please wait for Wi-Fi connection...");
 Serial.println("Please wait for Wi_Fi connection...");
 //disconnect_bluetooth();

 start_wifi_millis = millis();
 const char* ssid = SSIDIN.c_str();
 const char* password = PASSIN.c_str();
 WiFi.begin(ssid, password);
 while (WiFi.status() != WL_CONNECTED) {
 delay(500);
 Serial.print(".");
 if (millis() - start_wifi_millis > wifi_timeout) {
 WiFi.disconnect(true, true);
 SerialBT.println("Could't connect to Wi-Fi...");
 Serial.println("Could't connect to Wi-Fi...");
 }
 }
 SerialBT.println("Connected");
 Serial.println("Connected");

 SerialBT.print("ESP32 IP: ");
 SerialBT.println(WiFi.localIP());
 Serial.print("ESP32 IP: ");
 Serial.println(WiFi.localIP());

 incoming_char = "";
 SSIDIN = "";
 PASSIN = "";
 //while (1);
}

void scan_wifi_networks()
{
 WiFi.mode(WIFI_STA);
 // WiFi.scanNetworks will return the number of networks found
 int n = WiFi.scanNetworks();
 if (n == 0) {
 SerialBT.println("no networks found");
 } else {
 SerialBT.println();
 SerialBT.print(n);
 SerialBT.println(" networks found");
 delay(1000);
 for (int i = 0; i < n; ++i) {
 ssids_array[i + 1] = WiFi.SSID(i);
 Serial.print(i + 1);
 Serial.print(": ");
 Serial.println(ssids_array[i + 1]);
 network_string = i + 1;
 network_string = network_string + ": " + WiFi.SSID(i) + " (Strength:" + WiFi.RSSI(i) + ")";
 SerialBT.println(network_string);
 }
 }
}

void disconnect_bluetooth()
{
 delay(1000);
 Serial.println("BT stopping");
 SerialBT.println("Bluetooth disconnecting...");
 delay(1000);
 SerialBT.flush();
 SerialBT.disconnect();
 SerialBT.end();
 Serial.println("BT stopped");
 delay(1000);
}

void loop() {
 delay(1000);
}
Our code in a nutshell:
• Establishing a two-way Bluetooth communication between the ESP32 and Android smartphones.
• Prompting the user connected to the ESP32 Bluetooth to enter the SSID and WiFi password.
• Processing the data received from Bluetooth by ESP32.
• Configuring and connecting to WiFi.
Code Cracking
We begin by including the installed libraries for ESP32 Bluetooth and WiFi.
#include "BluetoothSerial.h"
#include <WiFi.h>
Next, after picking a name for Bluetooth (created by ESP32), we define an “instance” for it.
String device_name = "ESP32-BT-WIFI-CONTROLLER";
BluetoothSerial SerialBT;
Setup() function:
This function first establishes serial communication with a baud rate of 115200.
Serial.begin(115200);
Next, we activate the ESP32 Bluetooth.
SerialBT.begin(device_name);
Now, we establish WiFi and scan the surrounding networks, displaying the SSID names and their signal strengths in the serial monitor and sending it to the device connected to the Bluetooth module.
scan_wifi_networks();
The code of the function above is as follows:
void scan_wifi_networks()
{
 WiFi.mode(WIFI_STA);
 // WiFi.scanNetworks will return the number of networks found
 int n = WiFi.scanNetworks();
 if (n == 0) {
 SerialBT.println("no networks found");
 } else {
 SerialBT.println();
 SerialBT.print(n);
 SerialBT.println(" networks found");
 delay(1000);
 for (int i = 0; i < n; ++i) {
 ssids_array[i + 1] = WiFi.SSID(i);
 Serial.print(i + 1);
 Serial.print(": ");
 Serial.println(ssids_array[i + 1]);
 network_string = i + 1;
 network_string = network_string + ": " + WiFi.SSID(i) + " (Strength:" + WiFi.RSSI(i) + ")";
 SerialBT.println(network_string);
 }
 }
}
Here, the operating mode of the ESP32 WiFi is selected, which includes:
• Station: ESP32 connects to an Access Point (e.g., a router).
• Access Point (Hotspot): Other devices can connect to ESP32 via WiFi.
• Access Point & Station: ESP32 acts as an Access Point while connecting to another Access Point as a Station.
We use the Station mode to connect the ESP32 board to the Internet, allowing us to access it via the Local Network. In this mode, the router serves as the Access Point, and the ESP32 as the Station.
Finally, the “scan-wifi_networks” function prints the number of discovered WiFi networks and their specs (SSID and signal strength) in the serial monitor.
Next, we send a message via Bluetooth, asking the user to enter the SSID of the WiFi network.
SerialBT.print(""Please enter the name of your WiFi." ");
Here, we use ESP32 to receive the string that contains the SSID and PASS, and then store it in the “incoming_char” string.
while (SerialBT.available()) {
    char c = SerialBT.read();
    incoming_char += c;
    Serial.write(c);
  }
We then check if the “incoming_char” string is formatted correctly.
if (incoming_char.indexOf("ssid:") >= 0)
 {
 startchar = incoming_char.indexOf('<') + 1;
 endchar = incoming_char.indexOf('>', startchar);
 for (int i = startchar; i < endchar; i++)
 SSIDIN += incoming_char[i];
 Serial.println(SSIDIN);
 }
If the Bluetooth message contains the word “SSID:” we extract the WiFi network name between ‘<‘ and ‘>’ characters and store it in the SSIDIN string.
If the transmitted text does not contain “SSID,” we prompt the user to follow the data transmission format and return the program to point A to repeat from that line.
else
 {
 SerialBT.println("Enter SSID with following format -> ssid:...");
 goto A;
 }
Point A is where we start receiving the Wi-Fi specifications.
After that, we print the following sentence in the Bluetooth port, asking the user to enter the desired Wi-Fi password.
SerialBT.println("Please enter the password of your WiFi.");
We do the same thing for the PASS as we did for the SSID.
if (incoming_char.indexOf("pass:") >= 0)
 {
 int startchar2 = incoming_char.indexOf('<') + 1;
 int endchar2 = incoming_char.indexOf('>', startchar2);
 for (int i = startchar2; i < endchar2; i++)
 PASSIN += incoming_char[i];
 Serial.println(PASSIN);
 }
 else
 {
 SerialBT.println("Enter Pass with following format -> pass:...");
 goto A;
 }
Now, it’s time to configure the ESP32 WiFi network according to the received data via Bluetooth.
WiFi.begin(ssid, password);
The code then checks the connection status for 10 seconds. If the ESP32 fails to connect to the Internet, an error message is printed in the serial monitor and then sent to the device connected to the Bluetooth module.
while (WiFi.status() != WL_CONNECTED) {
 delay(500);
 Serial.print(".");
 if (millis() - start_wifi_millis > wifi_timeout) {
 WiFi.disconnect(true, true);
 SerialBT.println("Could't connect to Wi-Fi...");
 Serial.println("Could't connect to Wi-Fi...");
 }
 }
If the connection is made successfully, the word “Connected” will be printed.
SerialBT.println("Connected");
  Serial.println("Connected");
Finally, the IP of the ESP32 module is displayed for the user.
SerialBT.print("ESP32 IP: ");
  SerialBT.println(WiFi.localIP());
  Serial.print("ESP32 IP: ");
  Serial.println(WiFi.localIP());
To disconnect Bluetooth, uncomment line 88 of the code.
//disconnect_bluetooth();
Using the function below, we first disconnect the Bluetooth communication between the ESP32 board and the user, and then with the Bluetooth module.
void disconnect_bluetooth()
{
  delay(1000);
  Serial.println("BT stopping");
  SerialBT.println("Bluetooth disconnecting...");
  delay(1000);
  SerialBT.flush();
  SerialBT.disconnect();
  SerialBT.end();
  Serial.println("BT stopped");
  delay(1000);
}
Step 3: Let's Get It Running!
After uploading the app to your ESP32, turn on the Bluetooth on your mobile phone and connect to ESP32-BT-Slave. If you have uncommented line 4, it will prompt you for a code, where you should enter the number 1218 to establish the connection.
Now it’s time to run the Serial Bluetooth Terminal app. Simply tap on the numbers 1 to 3 in the order shown below. When you successfully connect to ESP32 Bluetooth, you’ll see the text in section 4.
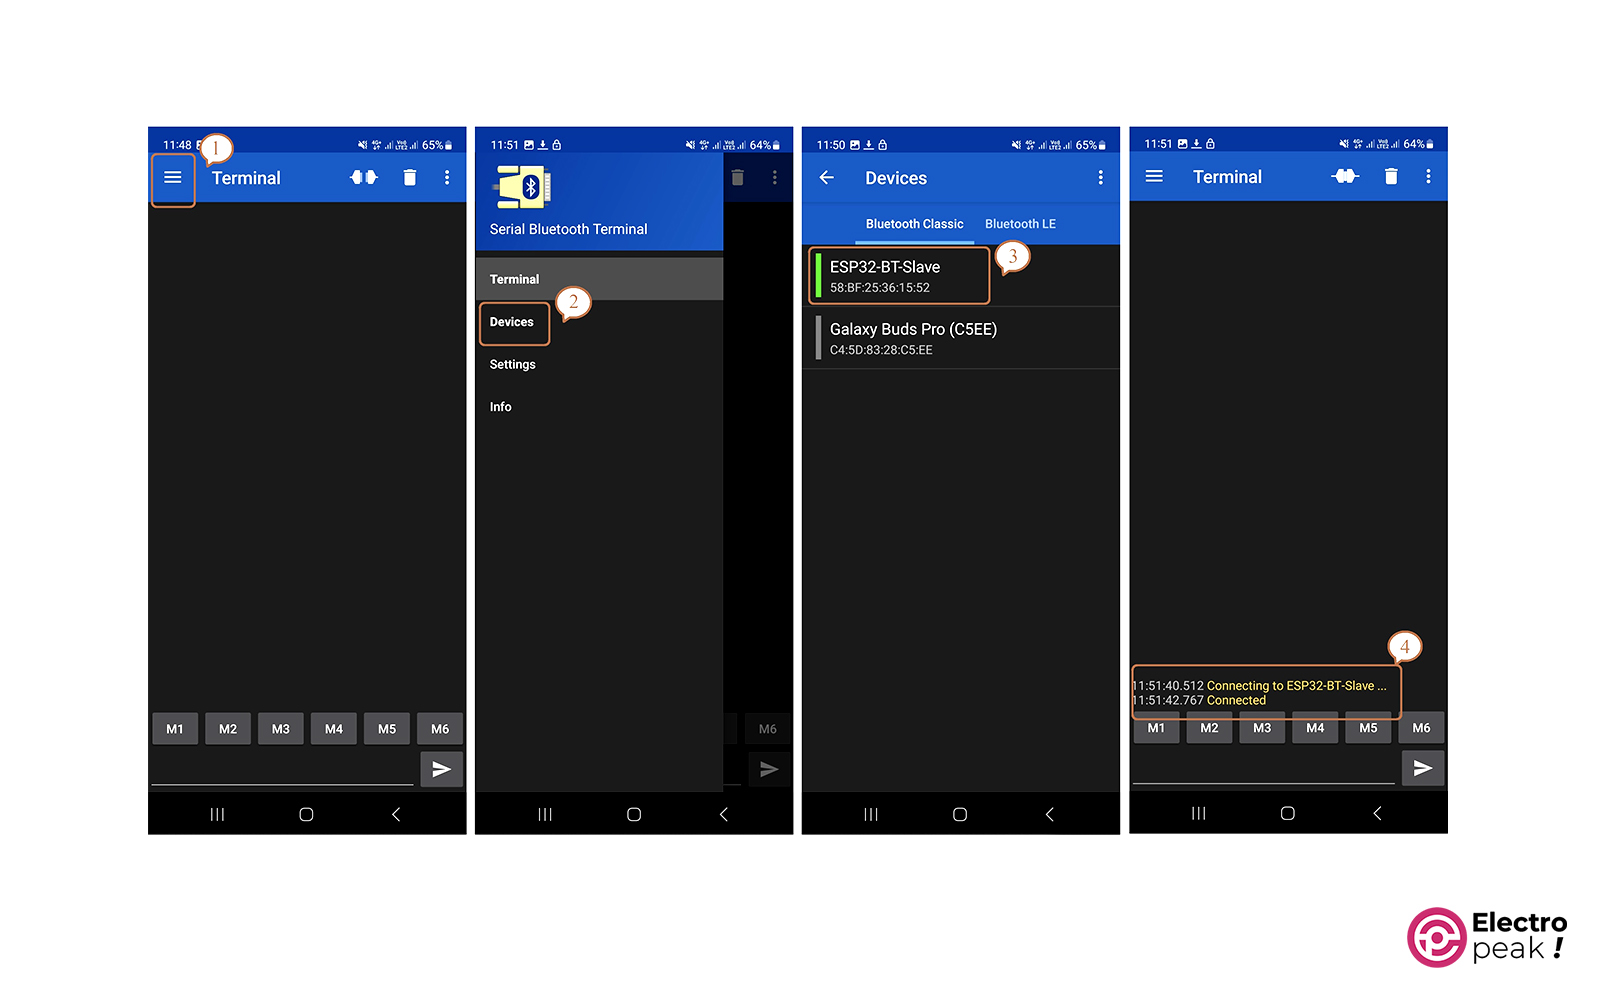
Once you see the word “Connected,” send a character to your ESP32. The app will display the active WiFi networks around you.
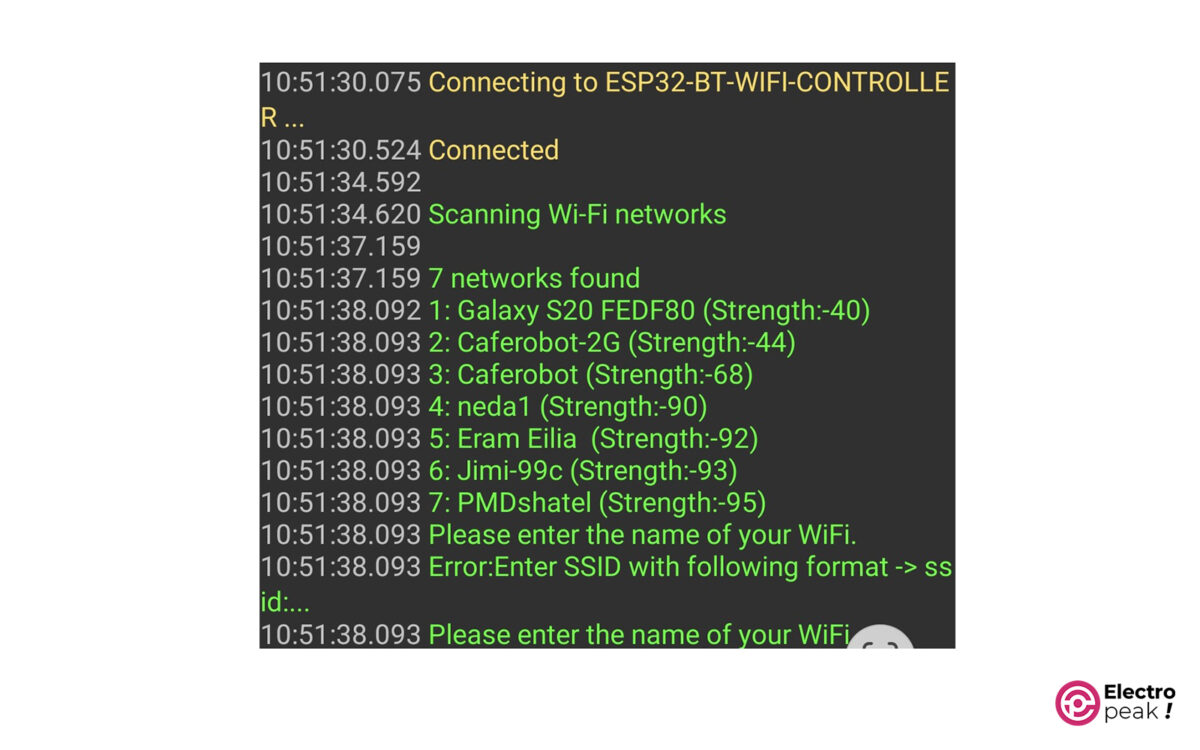
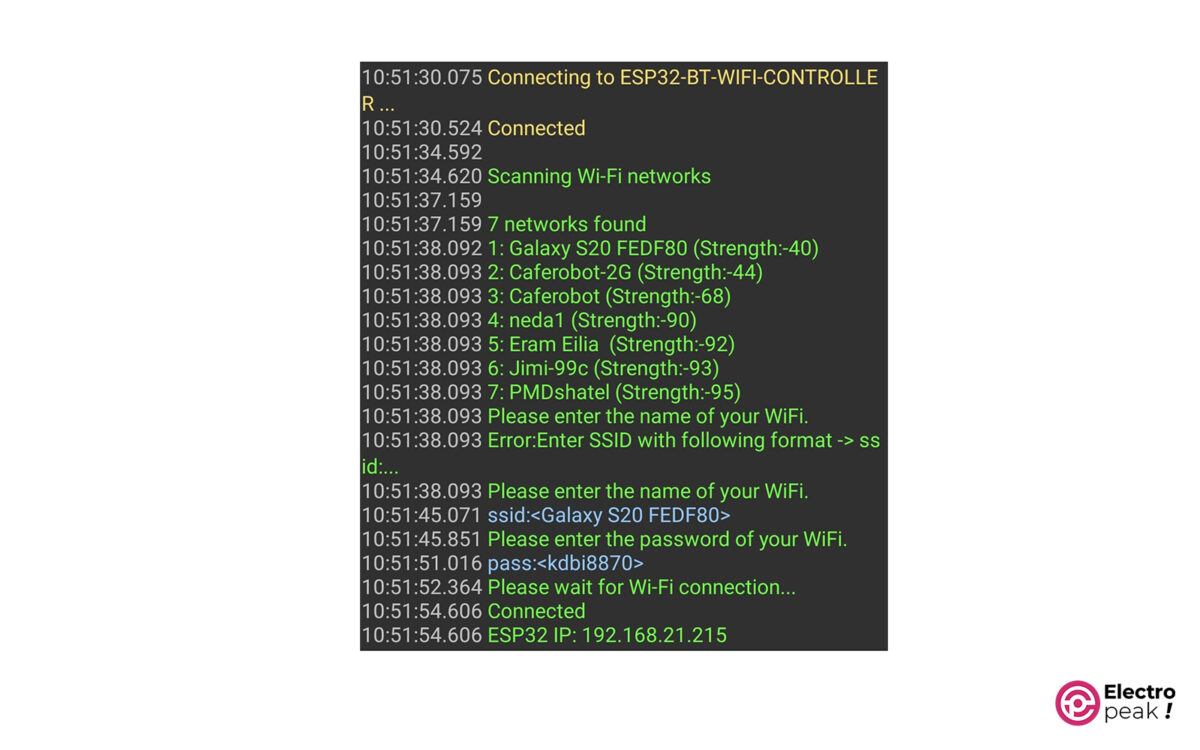
Now, select one of the available networks and enter its SSID and password separately in the following format:
ssid:<type your ssid here>
pass:<type your password here>
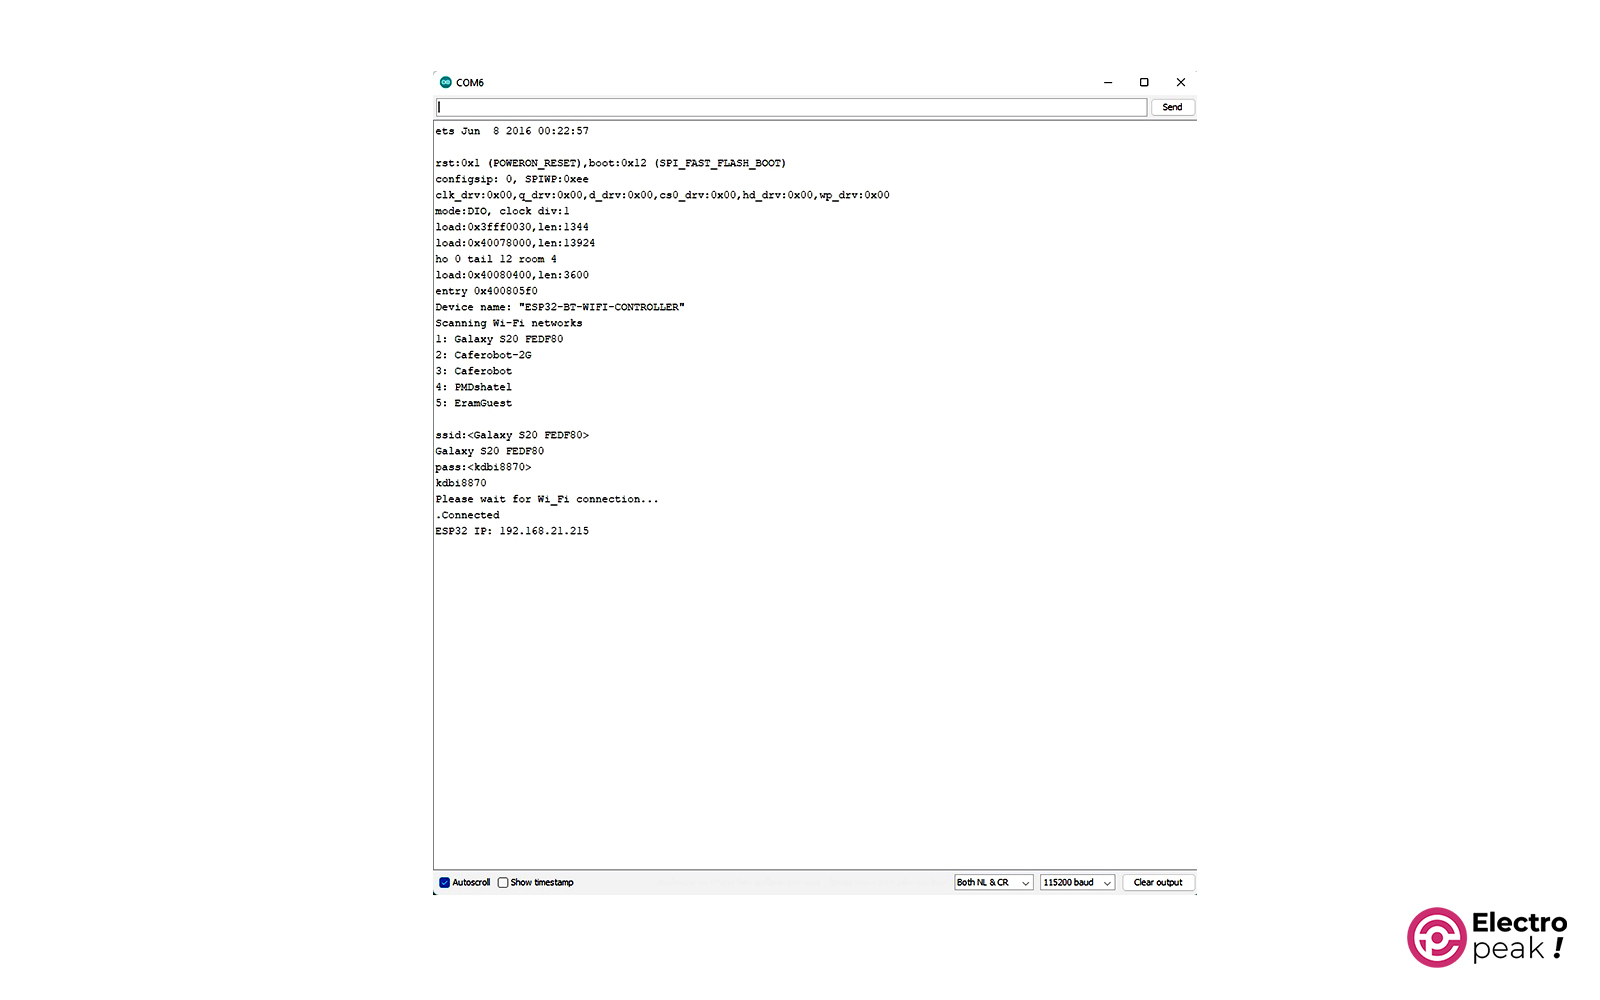
If you’ve followed all the steps correctly, the ESP32 will connect to the WiFi network and display its IP address through the serial port and Bluetooth.
What’s Next?
This tutorial covered the process of communicating with ESP32 and sending/receiving data via Bluetooth, as well as configuring the initial WiFi settings.
Using this tutorial and a bit of creativity, you can enhance your project with the following features:
1. Implementing secure communication protocols, such as encryption or authentication, to protect your WiFi configuration information.
2. Utilizing tools or automation scripts to automate the WiFi configuration process.
3. Implementing mechanisms for error handling and recovery in the WiFi configuration code.
With these tips, you can optimize your WiFi configuration process on ESP32.
In addition, you can explore other WiFi modes on ESP32, such as Access Point and Access Point & Station. With the Access Point mode, you can turn your ESP32 into a router and configure its SSID and password via Bluetooth from another ESP32 or device—like an Android phone.
Alternatively, with the Access Point & Station mode combined with Bluetooth, you can create a far-reaching and configurable WiFi network via Bluetooth.
In all three modes, by setting up a server and connecting various modules to your ESP32 board, you can upload and remotely view your desired data.

Comment (1)
thanks for sharing the code