US-100 Distance Sensor Features
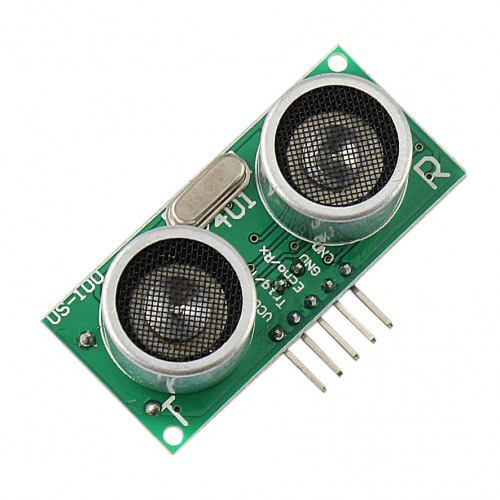
The US-100 is an ultrasonic transmitter and receiver module used to measure distance. The sensor operation is very simple. You only need to measure the return time of ultrasonic waves in order to measure the distance. Then you can divide this time by 2 and multiplied by the sound speed. The sensor measuring range is about 2 to 450 cm.
Note
The US-100 module has 2 different communication protocol.
Method 1: use serial communication
Method 2: use Trigger and Echo (similar to SRF04 and SRF05 modules)
If the jumper is connected on the back of the board, communication protocol is serial, otherwise, Method 2 is enabled.
You can download the datasheet of this module here.
US-100 Ultrasonic Distance Sensor Pinout
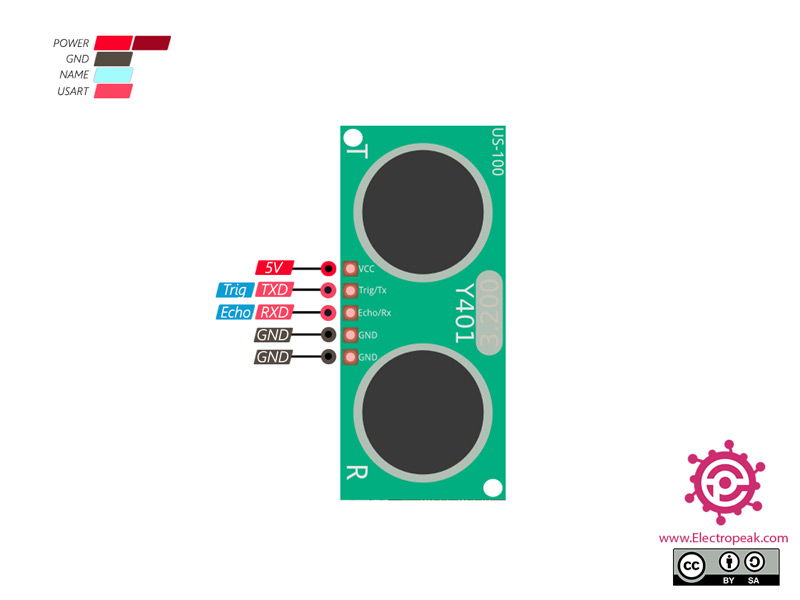
This sensor has 5 pins:
- 5V: Module power supply – 3.3-5 V
- GND: Ground
- Trig/Tx: A 10 microseconds pulse is required for ultrasonic transmitter to start working. This pin can also be used as a transmitter (RX) in serial communication.
- Echo/Rx: Shows the waves travel time as pulses. This base can also be used as a receiver (RX) in serial communication.
You can see the pinout of this module in the image bellow.
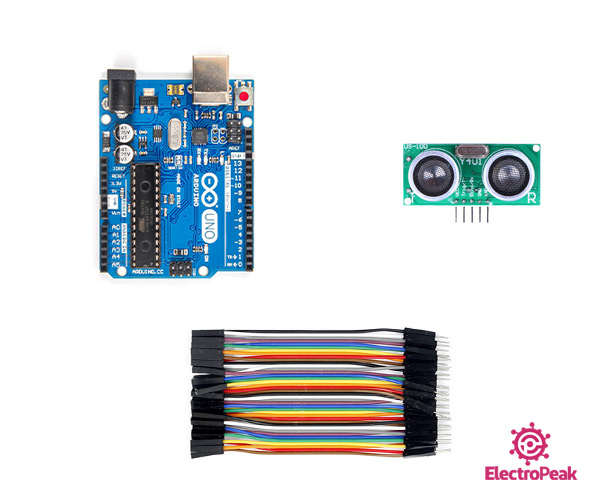
Required Materials
Hardware Components
Software Apps
Interfacing US-100 Ultrasonic Distance Sensor with Arduino
Step 1: Circuit
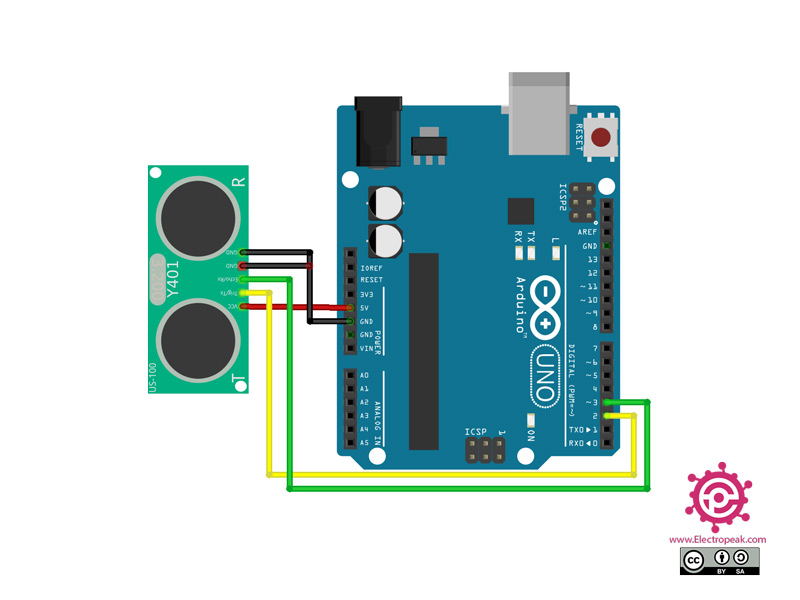
If you want to use serial communication, connect the module to the Arduino as follows.
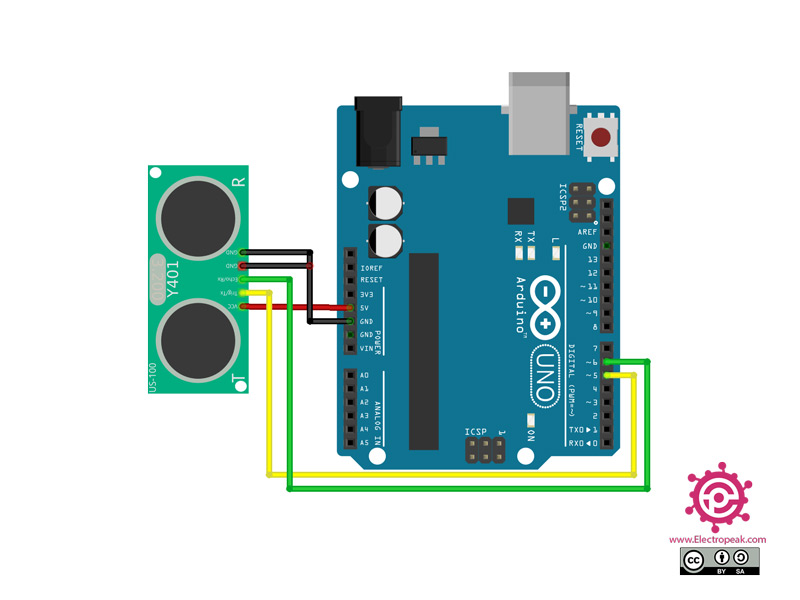
If you want to use Trigger and Echo pins, connect the module to the Arduino as follows.
Step 2: Interfacing code with serial communication
Upload the following code to your Arduino. This code displays the readings of the sensor in the serial monitor.
/*
  US-100 Ultrasonic Sensor - Serial Mode
  modified on 26 Sep 2020
  by Mohammad Reza Akbari @ Electropeak
  Home
*/

#include <SoftwareSerial.h>

SoftwareSerial mySerial(3, 2);

unsigned int HighByte = 0;
unsigned int LowByte  = 0;
unsigned int Len  = 0;

void setup() {

  Serial.begin(9600);
  mySerial.begin(9600);
}

void loop() {
  mySerial.flush();
  mySerial.write(0X55);                           // trig US-100 begin to measure the distance
  delay(500);
  if (mySerial.available() >= 2)                  // check receive 2 bytes correctly
  {
    HighByte = mySerial.read();
    LowByte  = mySerial.read();
    Len  = HighByte * 256 + LowByte;          // Calculate the distance
    if ((Len > 1) && (Len < 10000))
    {
      Serial.print("Distance: ");
      Serial.print(Len, DEC);
      Serial.println("mm");
    }
  }
  delay(300);
}
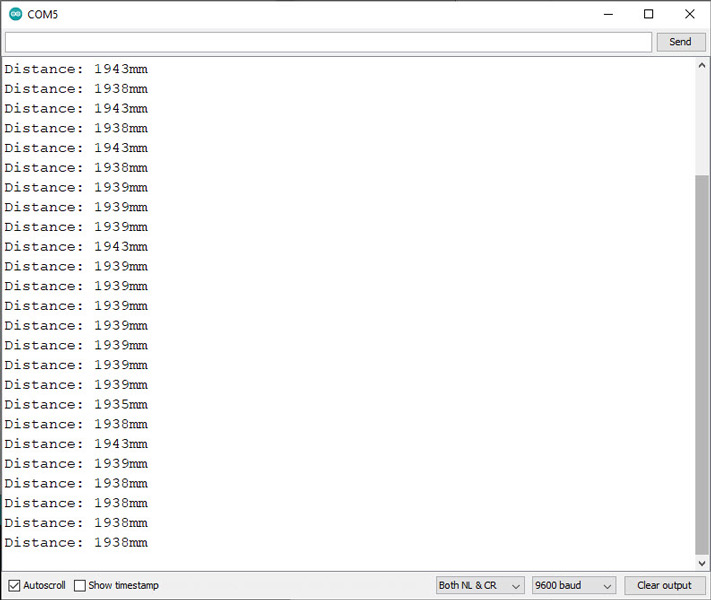
After running the code, you will see the following image in the serial monitor.
Step 3: Interfacing code with Trigger and Echo
Upload the following code to your Arduino. This code displays the readings of the sensor in the serial monitor.
/*
  US-100 Ultrasonic Sensor - Triggrt_Echo Mode
  modified on 26 Sep 2020
  by Mohammad Reza Akbari @ Electropeak
  Home

*/

const int pingPin = 5; // Trigger Pin of Ultrasonic Sensor
const int echoPin = 6; // Echo Pin of Ultrasonic Sensor

long duration;

void setup() {
  pinMode(pingPin, OUTPUT);
  pinMode(echoPin, INPUT);
  digitalWrite(pingPin, LOW);
  Serial.begin(9600);
}

void loop() {
  digitalWrite(pingPin, HIGH);
  delayMicroseconds(10);
  digitalWrite(pingPin, LOW);
  duration = pulseIn(echoPin, HIGH);
  Serial.print(duration / 29 / 2);
  Serial.println(" cm");
  delay(300);
}
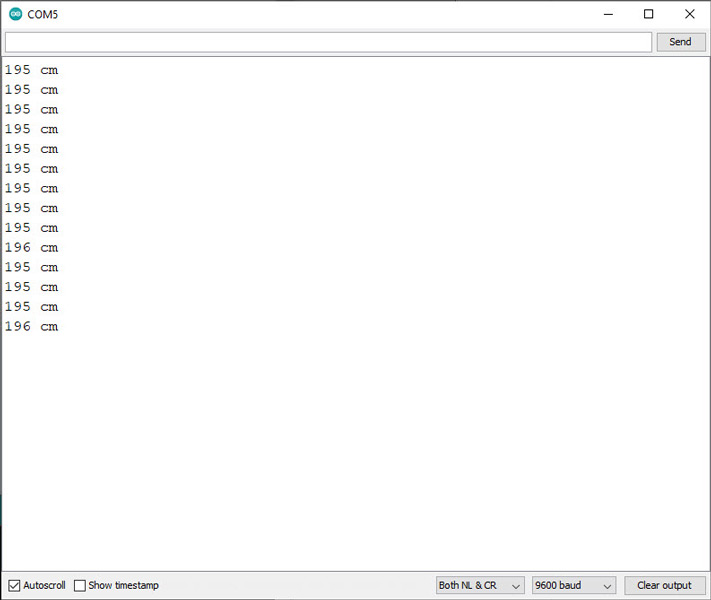
After running the code, you will see the following image in the serial monitor.
