Step By Step Guide to Install Raspbian on Raspberry Pi [w/ Images]
Written by
Mohammadreza Akbari
Overview
In order to begin with Raspberry Pi boards, you’ll need to install an operating system on them, depending on your needs. Raspberry Pi boards support a variety of operating systems. One of the most applicable operating systems for Raspberry Pi is Raspbian. In this tutorial, you’ll learn how to install Raspbian on your Raspberry Pi board in two different methods.
What You Will Learn
What the Raspbian operating system is.
How to install Raspbian operating system.
What is Raspbian?
Raspbian is a free operating system based on Debian, optimized for use in Raspberry Pi boards. There are currently two versions of this operating system: Desktop version and Lite version.
The desktop version, with a compressed size of 1GB, has a graphical interface.
Lite version is about 350MB and lacks a graphical environment. You can only write and execute commands and programs in the terminal environment.
Raspbian is the recommended operating system for working with Raspberry Pi boards by the Raspberry Pi foundation.
Method 1: Installing Raspbian Using NOOBS
NOOBS is a piece of software for installing different operating systems on Raspberry Pi. In order to install an operating system using NOOBS you need:
Hardware Components
Raspberry Pi 3 B+
×
1
Micro SD card (minimum 8GB)
×
1
5V adapter (with a recommended current rating of 2.5A or more)
×
1
Ethernet cable
×
1
HDMI Cable
×
1
PC or laptop
×
1
LCD with HDMI port
×
1
USB Mouse
×
1
Software Apps
SD Formatter
How to Install the Raspbian?
Follow these steps to install the operating system:
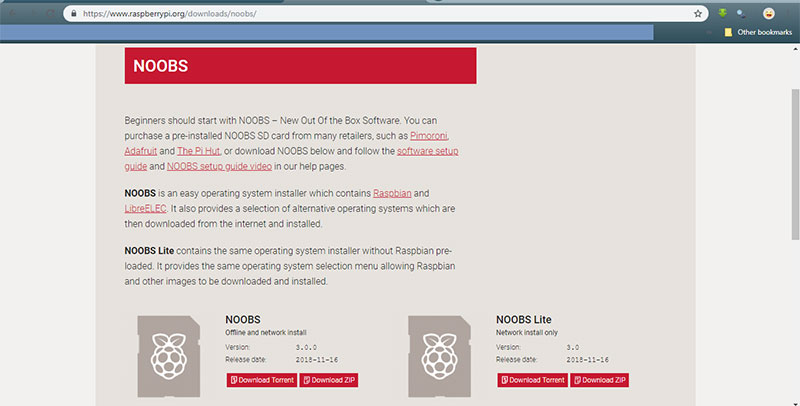
Step 1: Download the latest version of NOOBS from this link.
Note
NOOBS version (The first version you can see in the picture above) has the Raspbian operating system included by default, so you don’t need to download it separately. The Lite version only includes the NOOBS and no operating systems.
In this tutorial, we have used the Lite version so that you can see the complete process.
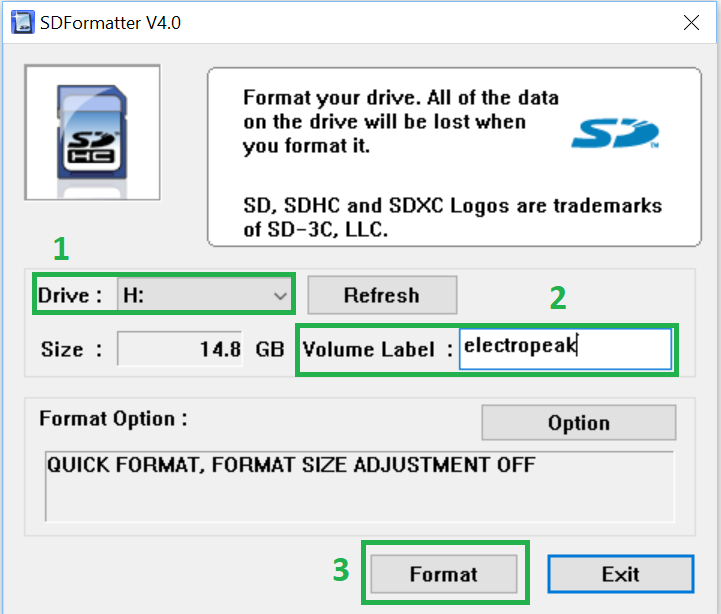
Step 2: Connect micro SD card to your PC and format it. (we recommend you to use SD Formatter)
Select the Drive and enter your desired Label and press Format.
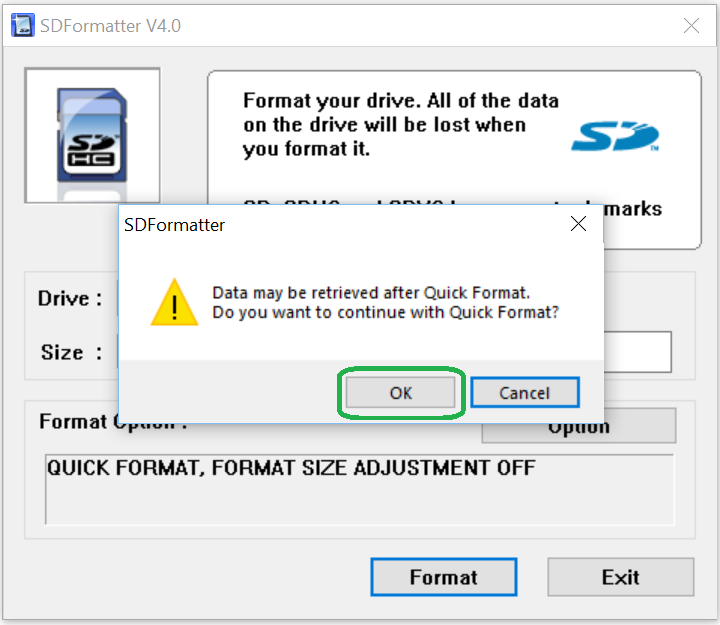
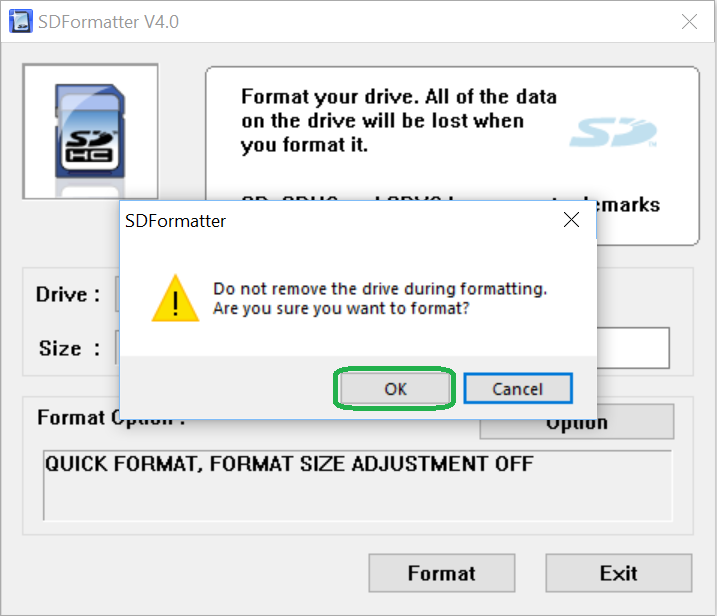
The following two messages will be displayed to you. Press OK.
If everything is set and formatting succeeds, the following message will be displayed:
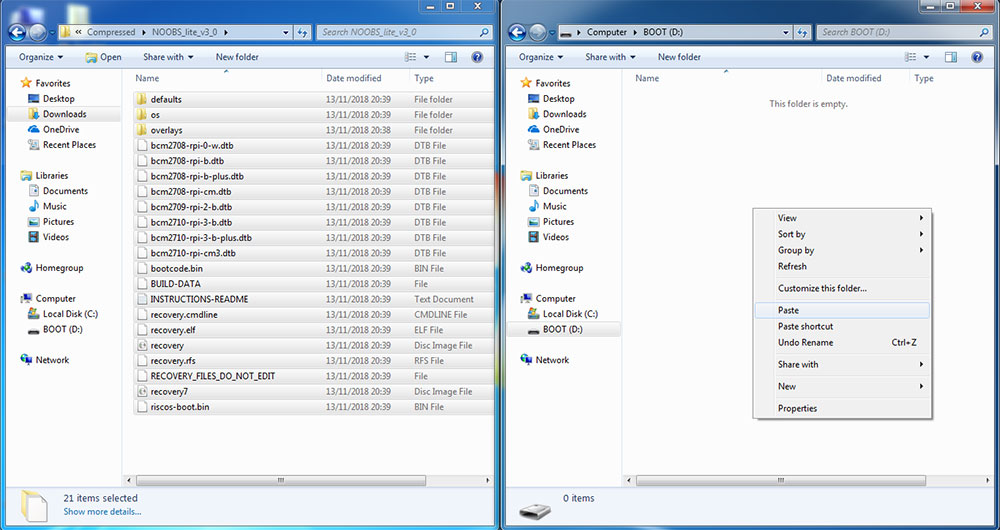
Step 3: Extract the downloaded NOOBS file and copy the contents to the micro SD card.
Step 4: Put SD card in Raspberry Pi.
Step 5: Connect Raspberry Pi to your router using a network cable.
Note
If the router is not accessible or you cannot connect a network cable to it, connect the network cable to your computer that is connected to the internet(over WiFi or …).
Step 6: Connect your Raspberry Pi to a monitor using HDMI cable
Step 7: Connect the mouse to your Raspberry Pi.
Step 8: Connect your Raspberry Pi’s power adapter.
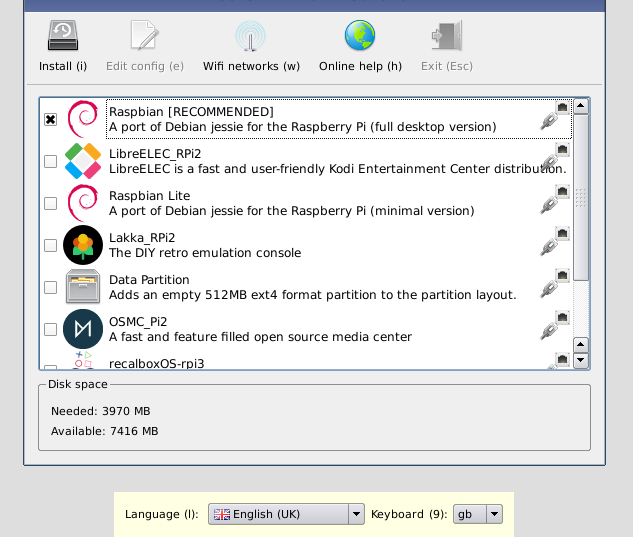
Step 9: Wait for the window below to appear.
Step 10: Choose Raspbian operating system (or whatever operating system you desire) and press install.
Step 11: Wait for the operating system installation to complete.
Method 2: Installing Raspbian Manually
You need to download the OS first. Then install it on the SD card.
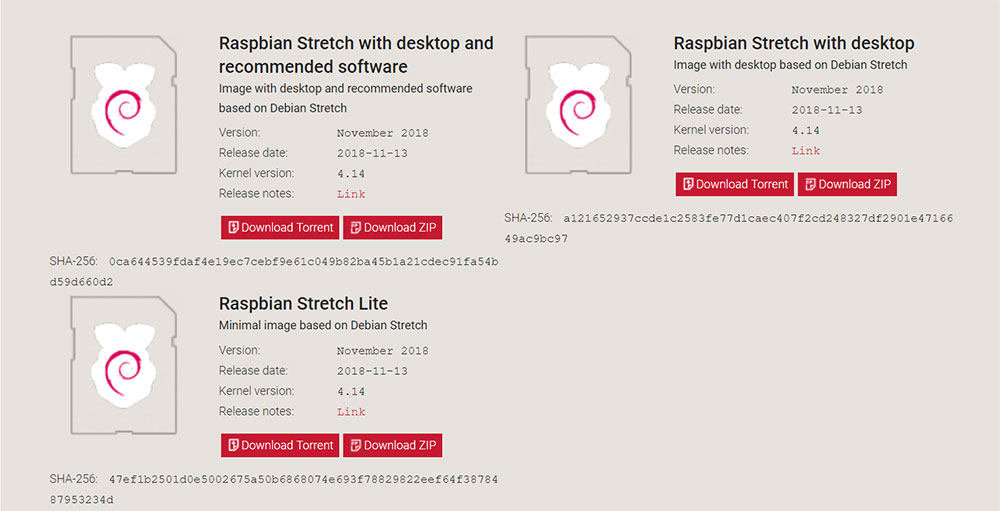
Step 2: Choose the Raspbian version you are looking for and download it.
Step 3: Connect micro SD card to your PC and format it. (refer to the previous method for details)
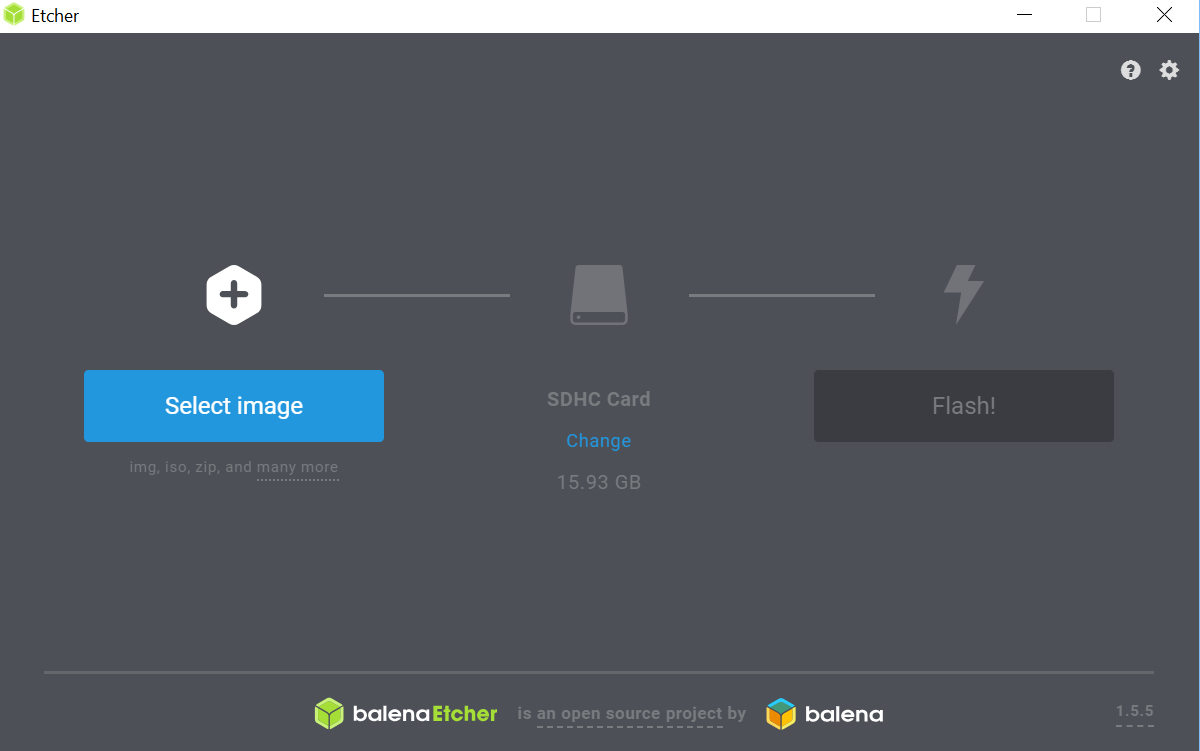
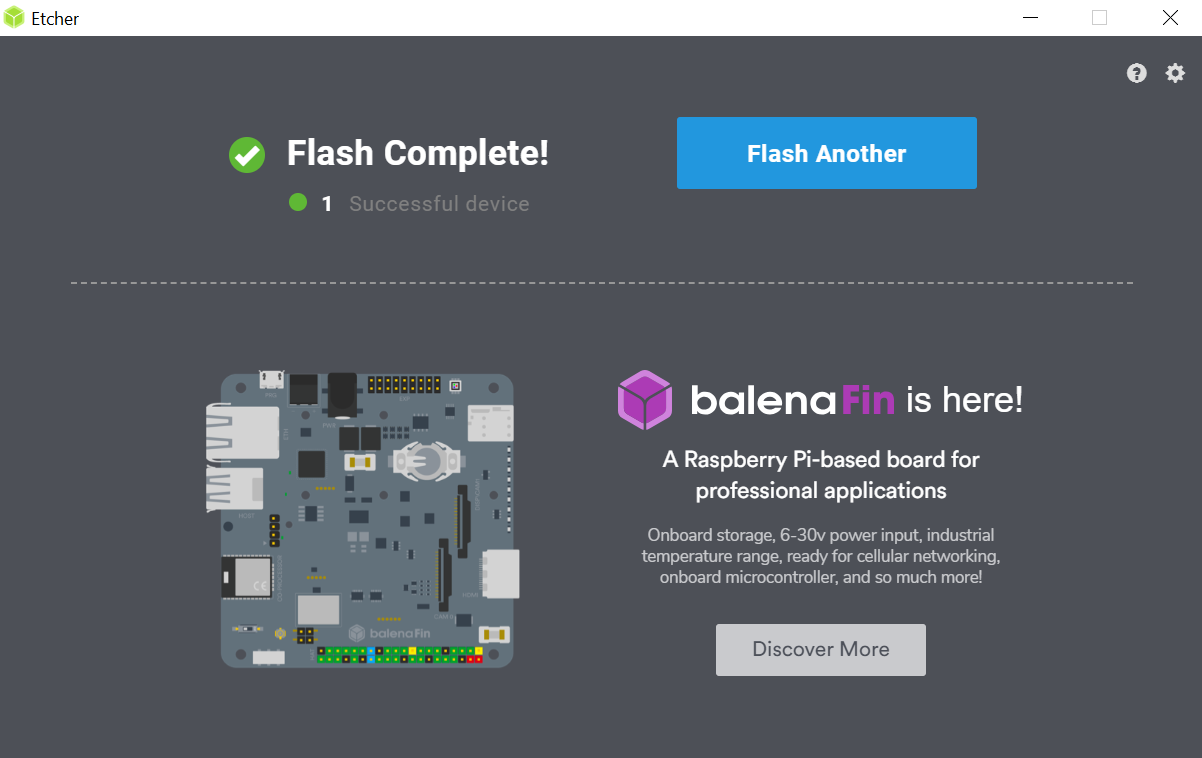
Step 4: Copy the OS you have just downloaded to your SD card using the Etcher software.
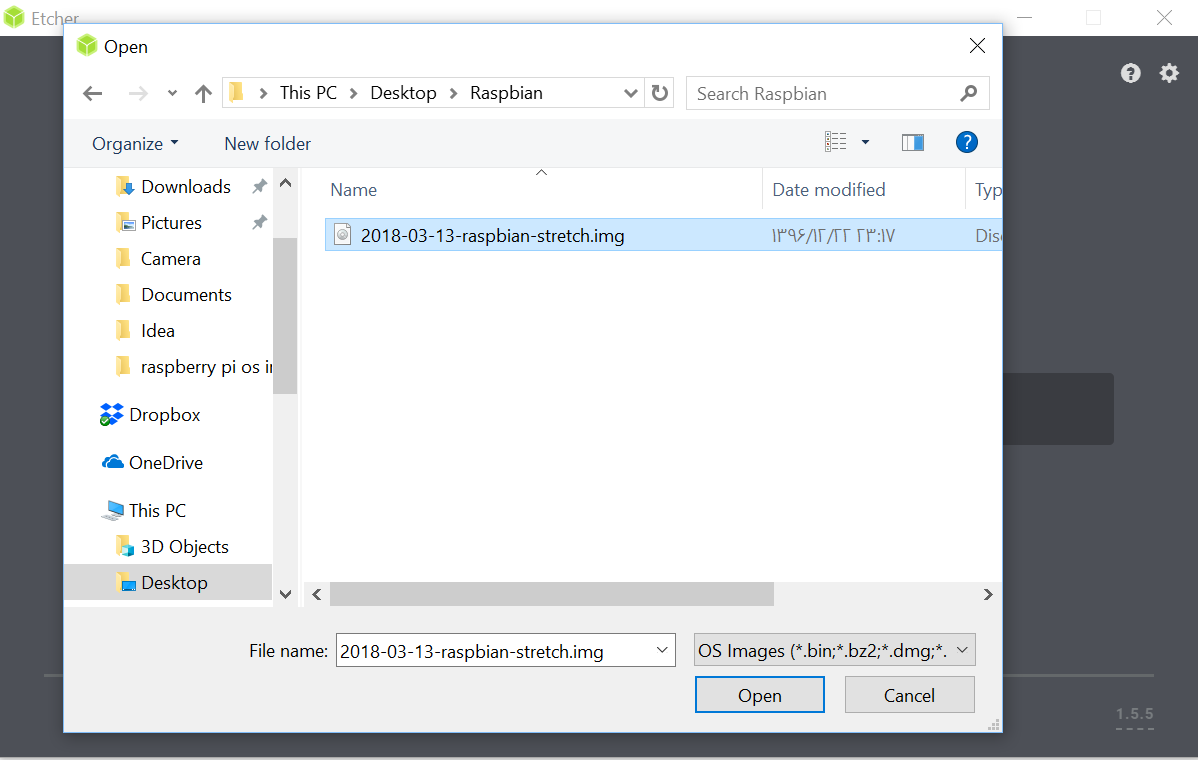
Choose the OS file.
Note
You can also unzip the file. This software accepts both .zip and .img formats.
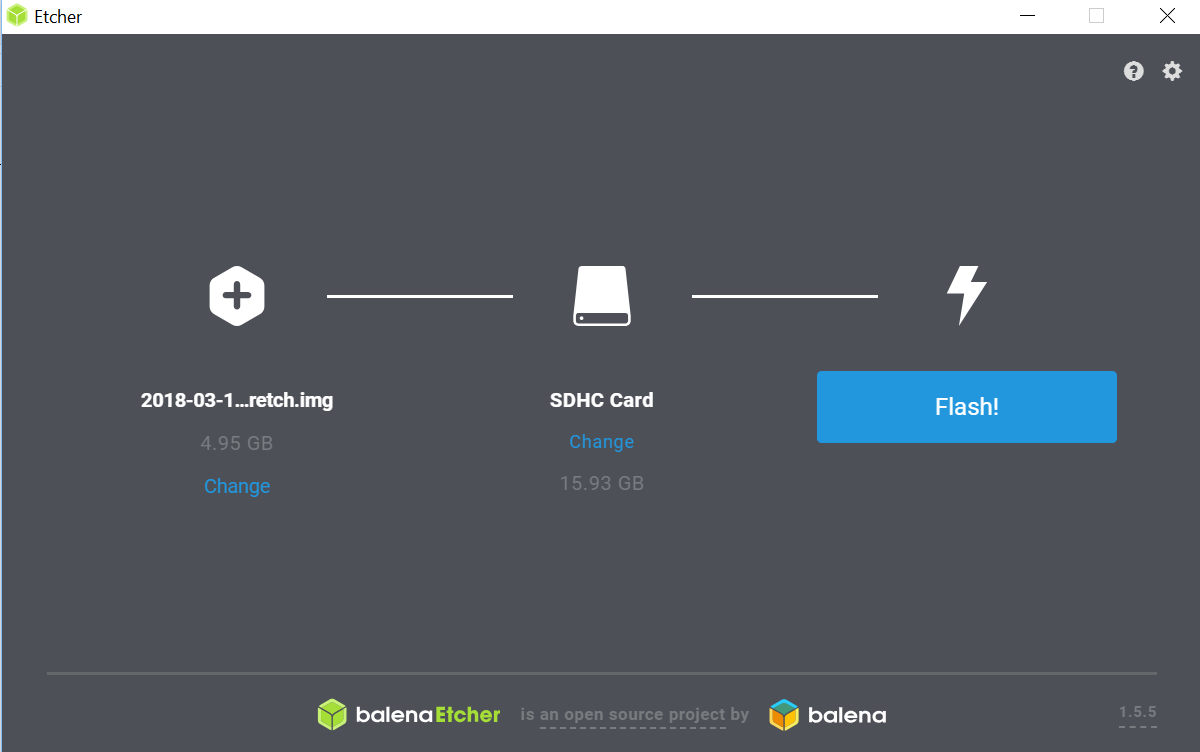
Choose your SD card.
Click Flash.
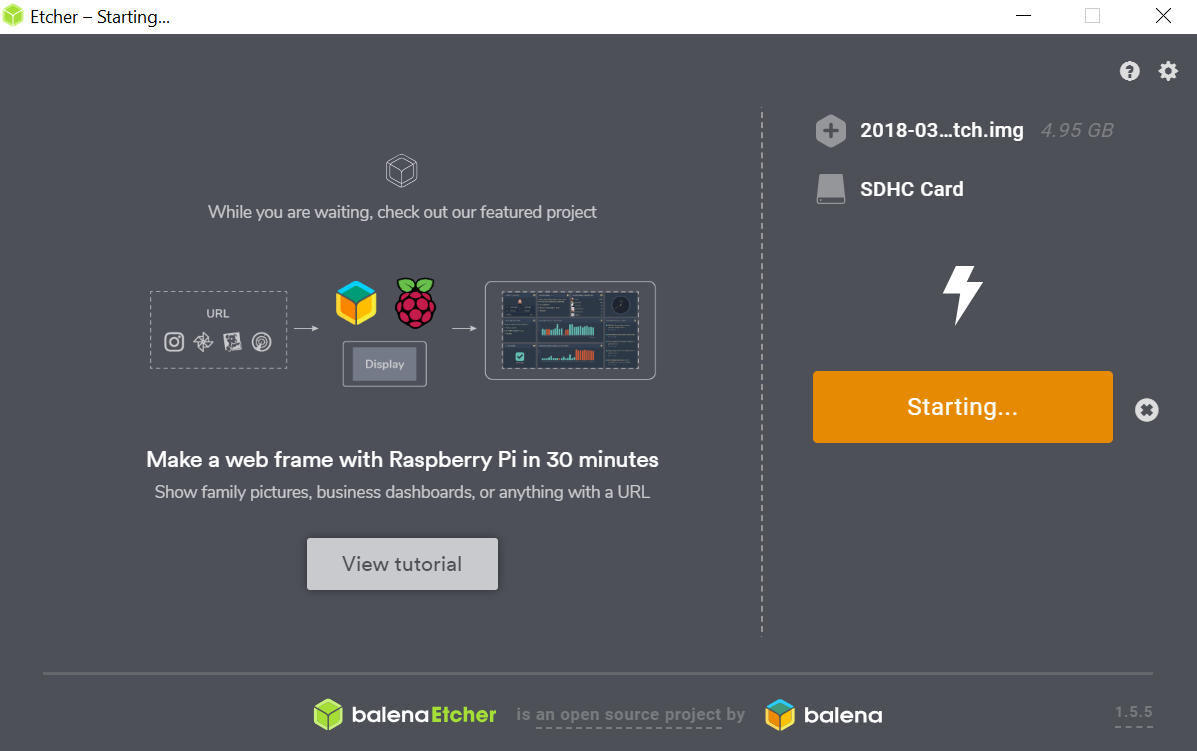
Wait until the following message is displayed.
Basic Operating System Test
To ensure successful installation of the operating system, you can follow the steps below:
Put your SD card into the Raspberry Pi
Connect your Raspberry Pi to the monitor using HDMI cable.
Connect your Raspberry Pi’s power supply.
After the operating system boots, you should see something similar to the following on your screen.
Note
Before removing the power adapter from the Raspberry Pi, turn off the operating system and wait a few seconds for the Raspberry Pi to completely shut down, then you can remove the adapter.
To turn off the operating system, enter this command in the Raspberry Pi terminal: