
Overview
In this article, We will explain meaning of digital Image Processing (DIP) and the reasons of using hardwares like Pixy and other tools to make a process on pictures or videos.
What You Will Learn
- How a digital image form.
- What digital image processing is.
- Tools for image processing.
- What Pixy is and how to use it.
What is image processing?
Photos, videos, and generally pictures in addition to saving a moment of our memories, have other applications too. Maybe you see security cameras in public places or you see robots tracking a line, object or more advanced realizing the situation, separating impurities from products on the production line and lots of similar or even not similar applications are doing with some calculations on pictures and These calculations are named image processing.
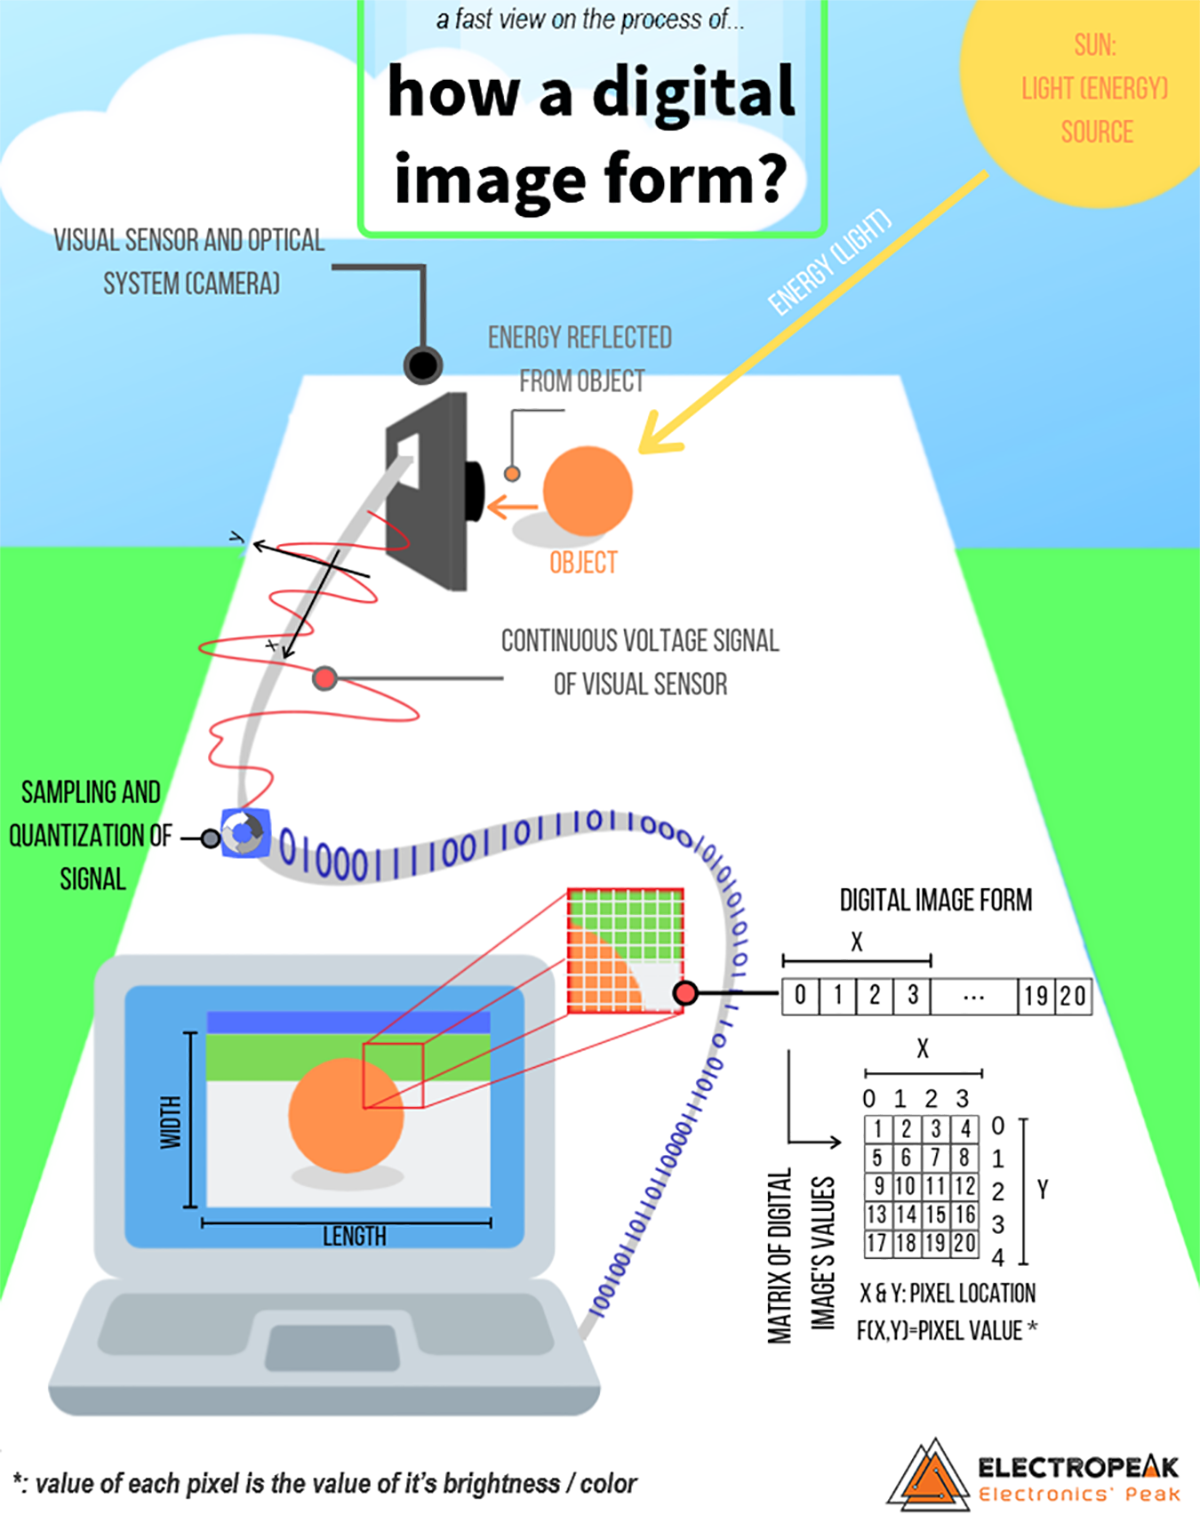
For best understanding, it’s helpful to know image structure. Every image is a signal with the pixel values at any point of that. (pixel is the basic unit of a digital image that can have different values for its brightness and/or color, these values are called “intensity”) The signal is the continuous voltage signal given by visual sensor, this signal will be converted to digital form with some processes like sampling. The digital form of these data is like a two-dimensional array or matrix make a digital image so their form is f (X, Y) for the location and value. Don’t forget every video is a set of images playing with a specific rate of play in a second.

How to do image processing?
If we are thinking about a robotic application for image processing, there are two ways:
- choosing a usual camera module (providing the image without any processing on it) and then using programming and calculations by the user.
- Using hard wares that do this process for faster and easier use; Like pixy camera…
first solution: For the first way, there are different soft wares like MATLAB or libraries like OpenCV for coding. There are other names in processing tools, too; but the popular names searching for this processing is OpenCV and MATLAB. Let’s see a fast comparison between them:

Using this way is more common between programmers and can provide what we need to know about our image.
Second solution: using a special hardware! like cameras with the ability of image processing. They usually have a user interface and doesn’t need coding. That seems easier but somehow makes limitations and they can do what they are specified for that; for example, a face detection camera can’t do color recognition normally (maybe with some changes in firmware can change the recognition algorithm but that’s hard and not common way!)
Two ways, but which is better?
Getting Started by Pixy
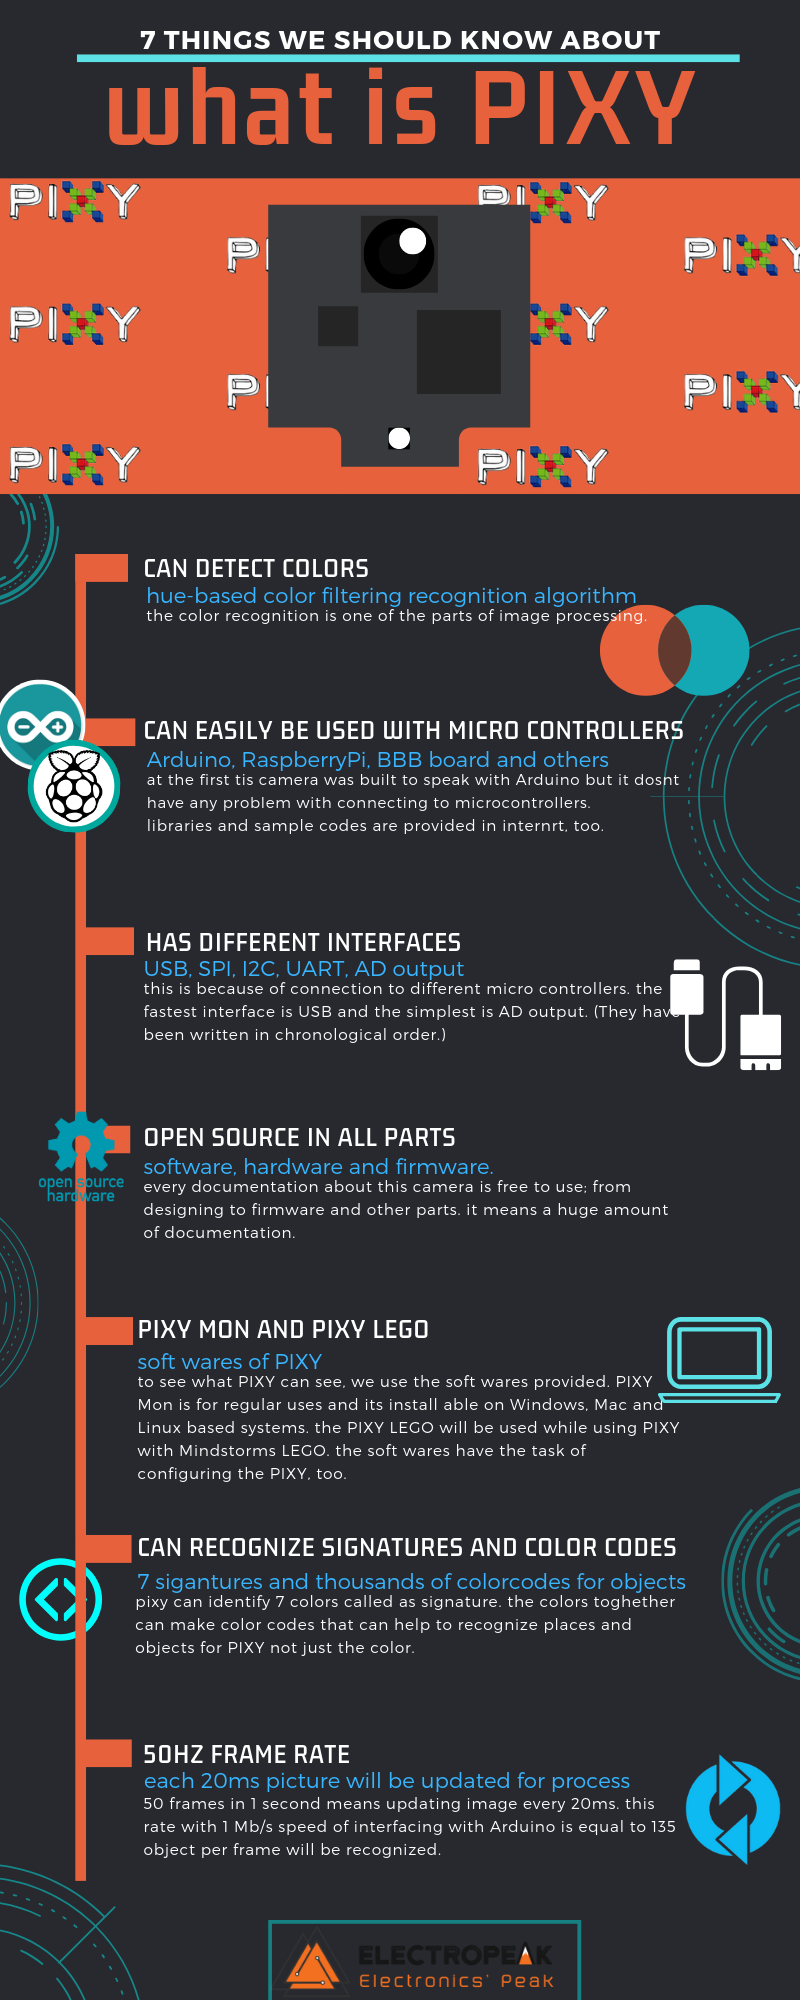
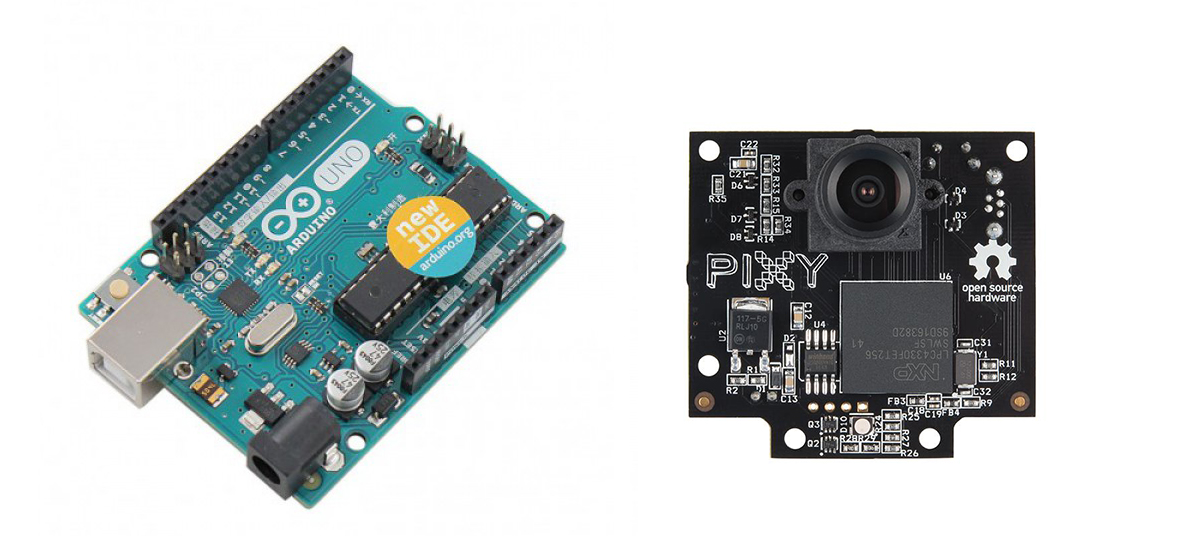
PIXY is one of the camera modules specified for image processing, the recognition algorithm is color-based filtering. The main purpose of this camera is recognition colors and name them as a familiar object. This camera can “learn” what colors you “thought” it at first.
Getting Started by Pixy
Now, come with us step by step until the end :
First step:
Buying a pixy! Regular PIXY and PIXY2 are two versions of pixy cameras. click the link above for buying the regular type, which we continue steps of using this board.
Second:
Power it up. The board has a USB port for power. It will be powered by connecting to computer USB port.it can be powered via two pins behind the board with battery (6-10v).
Third:
Connect it to the computer via USB cable. One end to the computer and other to the micro USB port of PIXY.
Forth:
Download the software of your cam here. PIXY Mon is the application of PIXY for Linux, Mac and Windows platform. What this app can do is the configuration and show what PIXY can see.
Fifth:
Up to this point, the camera doesn’t need to be connected necessarily to a microcontroller or board if you need to see and recognize without anything else; recognition is not depending on micro connection. Anyway, for teach, select an object with distinct and good hue. Because of the hue-based color filtering recognition algorithm, the hue and light of the environment can affect the result. So, don’t choose white, black or gray objects because these colors are not hue!
Sixth:
Push the button on top of PIXY to start teaching. First, the LED will blink and after that, an RGB LED will get the color of the central part of the sight area. Pick the object in front of the camera, if the LED showed the right color it shows right locking. the distance between the lenses and the object should be 6-20 inches. The second way is using PIXY MON; chose a big area of the object in PIXY MON and then it selects the object.
Seventh:
The grid of the object will be shown in pixy mon. see if the grid is the right area of the object not including the background. Sliders in configuration can help to have a better area.
Eighth:
Now for each “color”, the camera will set a number. 7 signatures mean 7 colors to recognize. With using colors close to each other, for example, a label with the colors of red-pink-blue you can define an object or place for camera, for example, that label show the door place. This can help to recognize thousands of objects with this camera! This set of colors is called “color code” or CC. for setting CC you should use PIXY mon and then it can be used like any signature.
Ninth:
After a successful teaching, if a microcontroller or board is connected to the camera, can give the object detected by pixy. If you are using an Arduino, use this pinout for connection. (click here for more info) , then download the PIXY library here, add to the libraries of Arduino in the direction of Sketch>Include library>Add ZIP library. Now select the zip file of the library. That’s done! Now with the default sketch of PIXY, it will give the X and Y (location) and width and length (size) of the object. Other sketches can be used too; like pan and tilt. For other boards connection, you can see here.
NOTE: Teaching has two methods as we explained: 1. Using PIXY without PIXY MON, like what robots do and they are not connected to a PC. The method will be but how to set the signature number? The led if the PIXY will change the color at the first moments of teaching, the click you do on which color will set the number; from red meaning 1 to violet meaning 7. In method 2, the number setting will be done with application only.
Very near to THE END
We explained about what made the need to use pictures, what is digital image processing and how it can be done. Which ways we have and from hardware’s that currently can help us, we chose PIXY for the explanation. we explained How it works and what to do if you are a beginner of pixy cameras! Now you can start the image processing for your small robot and enjoy having a third eye with your computer.

Comments (2)
I have an application where I need to scan, in real time, trains passing a noise monitor and identify the number on the side of the train. Is it possible with PixY?
Unfortunately we cannot help you with that since we only tested Pixy for color detection.